Advertisement
Quick Links
Advertisement

Related Manuals for FMT Wireless SmartDip

Summary of Contents for FMT Wireless SmartDip
- Page 1 Installation and Operation Guide WIRELESS TANK LEVEL MONITORING | FREE ACCESS TO YOUR ONLINE PORTAL...
- Page 2 Wireless SmartDip. In this manual, you will find detailed instructions on in- stalling Wireless SmartDip, configuring the system using the web portal, and utilizing its features for real-time data access. Additionally, you will gain insights into the technical specifications, such as accuracy, battery life, and operating temperature ranges.
-
Page 3: General Information
Access to your tank data is via cloud-based web portal, FMTData.com This platform can be accessed by using a web browser and no special software is needed. Wireless SmartDip is subject to FMT’s standard 2 year war- ranty period. For further information and exclusions, visit: https:/ /fmtweb.com/terms-and-conditions/... - Page 4 Installing the Wireless SmartDip Lower the probe into the tank. Ensure the probe does not rest in sludge or grime in the bottom of the tank. This will cause major faults.
- Page 5 Installing the Wireless SmartDip Secure the Wireless SmartDip unit to the tank by rotating the unit clockwise until the thread is tight. Open the Wireless SmartDip lid by removing 2 screws using a phillips head screwdriver.
- Page 6 Installing the Wireless SmartDip Slide the battery connector on to the pins, being careful not to bend any pins.
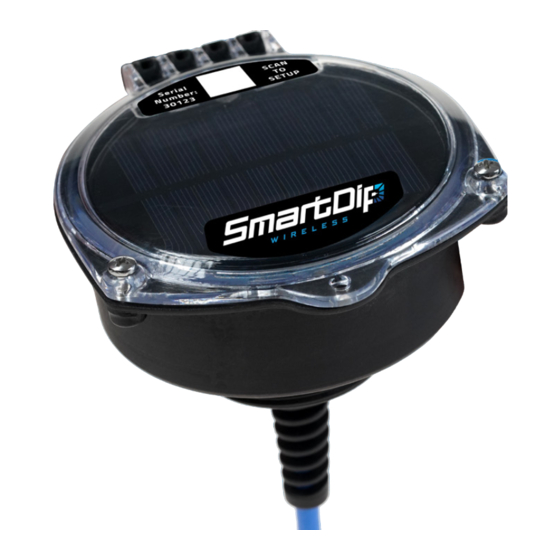
- Page 7 Installing the Wireless SmartDip Scan the QR code on the top of the Wireless SmartDip unit to begin setting up.
- Page 8 When the QR code is scanned, you will be taken to an au- tomated setup wizard. This wizard is designed to help you make sure the Wireless SmartDip is configured correctly and working as intended. The first page of the wizard is a welcome page.
- Page 9 Setting the Tank Dimensions The second page is a security check to ensure you are authorised to setup the Wireless SmartDip. The default PIN is 6789...
- Page 10 Setting the Tank Dimensions The third page is the tank information page. This page is where you will enter the dimensions or 20-point dip for the tank.
- Page 11 Setting the Tank Dimensions The next page will prompt for additional information needed such as the type of fluid in the tank, and the local time of the Wireless SmartDip unit.
- Page 12 Setting the Tank Dimensions When prompted, press the WakeUp button on the Wireless SmartDip. Once pressed, tick the box then click Next.
- Page 13 Setting the Tank Dimensions While the Wireless SmartDip syncs to the cloud and down- loads the configuration from previous step, you will see this animation. The sync process can take up to 1 minute.
- Page 14 Setting the Tank Dimensions Once connected, you will need to input a manual dip of the tank level. This is a check to ensure the Wireless SmartDip is operating and configured correctly.
- Page 15 Setting the Tank Dimensions Once the Wireless SmartDip confirms it’s functioning cor- rectly, you will see a congratulations screen with your tank levels displayed.
- Page 16 Setting the Tank Dimensions You’ve finished setting up your Wireless SmartDip!
- Page 17 Installing the Wireless SmartDip Seal the Wireless SmartDip lid and re-fasten the screws to secure it.
- Page 18 Adding the Tank to your Portal Navigate to www.fmtdata.com/new If you currently have an account, click “Yes” then login to add your new Wireless SmartDip. If this is your first time using FMTData, click “No” and follow the steps to create your account.
- Page 19 Accessing your Tank Data Open your web browser and navigate to www.fmtdata.com then log into your account. Click the Tanks button along the left-hand side of the screen.
- Page 20 Accessing your Tank Data On this page, you can see the most recent tank level readings. To view previous readings, click the Dips tab and select the date range you’d like to see the readings for.
- Page 21 Accessing your Tank Data To export your dip history, check the date range, then click Export To set up alerts, click Configure Tanks then Email Alerts...
- Page 22 Accessing your Tank Data On this page, you can click Add Alert to create an alert. Your existing alerts will also be shown on this page. To set up a scheduled daily email of tank reading, click Configure Tanks then Email Schedule. Here you can set up daily emails.
- Page 23 Scheduling Dips On the Tanks page, click Config to manage the scheduled wakeup and dip frequency. The scheduled wakeup time will be the starting point from which a dip will be taken every X hours as specified in the Interval dropdown box.
- Page 24 Wireless SmartDip Hardware Specifications Table Long Term Stability: ± Tank Height: 0 - 10m 0.2% FS/Year Fuel Types: Suitable for Operating Temp Range: use with diesel, AdBlue, DEF and other non- -25 °C to 70 °C hazardous liquids Accuracy: 0.25% FS Cable: Polyethylene (Max) 0.5% FS (Typical)
- Page 25 Wireless SmartDip Hardware...
- Page 26 Wireless SmartDip Networking Information Wireless SmartDip uses the LTE-M network. This enables Wireless SmartDip to utilise a dedicated M2M network for the best quality connection. You must ensure 4G LTE-M is available in your installation location.
- Page 27 To force a dip to be uploaded to the website, open the Wire- less SmartDip and press WAKEUP. To restore factory settings on a Wireless SmartDip, hold the RESET button while clicking the WAKEUP button once, and continue hold- ing the RESET button for 10 seconds until all three LED indicators are simultaneously illuminated.
-
Page 28: Troubleshooting
Check you’re logged in to the same account that was used when installing Wireless SmartDip. Go to the Tanks page and check if the serial number on the Wireless SmartDip unit matches any unit listed on the page. If not listed, contact support. - Page 29 No dip online when i press button OR missed a scheduled dip Confirm that your subscription is valid Open the Wireless SmartDip lid Check the Power LED is on Press the WAKEUP button Watch the Comms LED to ensure it flashes If the Comms LED turns off, contact support.
-
Page 30: Safety Warnings
Safety Warnings IMPORTANT It is essential that you read the instructions in this manual before operating and maintaining the product. When the battery pack is not installed, keep it away from other metal objects, like paper clips, coins, keys, nails, screws or other small metal objects that can make a connection from one terminal to another. - Page 31 Safety Warnings • Do not place the product or battery packs near fire or heat. • Do not crush, drop or damage the battery pack. Do not use a battery pack that has been dropped or has received a sharp blow. Properly dispose of a dropped or damaged battery immediately.
- Page 32 Fluid Management Technology Pty Ltd 169 Grange Road, Beverley SA 5009 PO Box 1224 Flinders Park SA 5025 Office: (08) 8240 5585 Email: sales@fmtweb.com...