Table of Contents
Advertisement
Available languages
Available languages
Quick Links
WARRANTY
2
Year
Limited Warranty
FOR TWO YEARS from the date of sale this product is warranted against defects in material or workmanship.
WITH PROOF OF SALE a defective product will be repaired or replaced free of charge.
The Kenmore brand is used under license. Direct all claims for warranty service to Koolatron Customer
Assistance, call 1-800-265-8456 or email service@koolatron.com
This warranty covers manufacturer's defects including electrical and mechanical defects provided the
appliance is correctly assembled, operated and maintained according to the supplied instructions. It does not
cover damage caused by accident, misuse or abuse including overheating, unauthorized repairs or
alterations, or use with a voltage converter or aftermarket accessories, and it does not apply to scratches,
stains, discoloration or other surface damage that does not impair the product function. This warranty is void
if the appliance is ever used for purposes other than private household use.
Koolatron Corporation
4320 Federal Drive, Batavia, NY 14021 U.S.A.
139 Copernicus Blvd., Brantford, ON N3P1N4 Canada
Kenmore and the Kenmore logo are registered trademarks to Transform SR Brands Management LLC
and are used under license by Koolatron Corporation
9/2023-v1
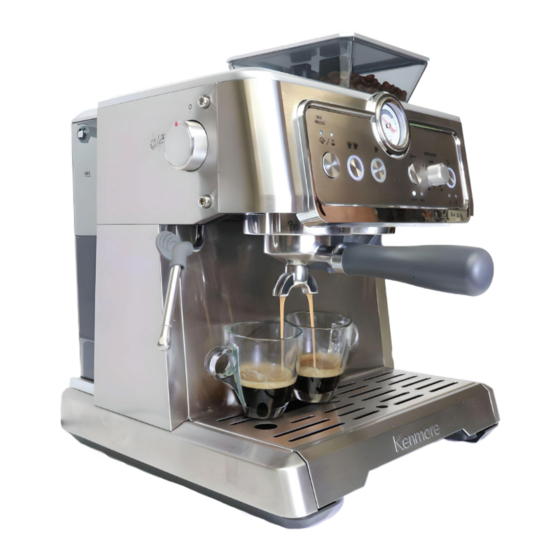
Semi-Automatic Espresso Machine
with Grinder
Customer Assistance
1-800-265-8456
www. koolatron.com
H1S391
KKEMCMT
KKCMEMT
Use & Care Guide
Advertisement
Chapters
Table of Contents

Related Manuals for Kenmore KKCMEMT


Summary of Contents for Kenmore KKCMEMT
- Page 1 FOR TWO YEARS from the date of sale this product is warranted against defects in material or workmanship. WITH PROOF OF SALE a defective product will be repaired or replaced free of charge. The Kenmore brand is used under license. Direct all claims for warranty service to Koolatron Customer Assistance, call 1-800-265-8456 or email service@koolatron.com This warranty covers manufacturer’s defects including electrical and mechanical defects provided the...
-
Page 2: Table Of Contents
TABLE OF CONTENTS IMPORTANT SAFEGUARDS KNOW YOUR MACHINE Parts Controls Accessories SETTING UP Before First Use Assembling Your Machine Preheating & Standby Flushing the System Dispensing Hot Water OPERATING YOUR MACHINE Making Espresso Texturing Milk Espresso drinks to try CARE & MAINTENANCE Cleaning Descaling Getting the Most Out of Your Machine... -
Page 3: Important Safeguards
The use of aftermarket attachments or accessories not recommended by Kenmore will void your warranty and may cause re, electrical shock, or injury. a. Do not use near the edge of a counter or table or on a wet or uneven surface;... -
Page 4: Know Your Machine
KNOW YOUR MACHINE KNOW YOUR CONTROLS A. Steam/hot water selector B. 2-cup/double shot selector C. 1-cup/single shot selector D. Pressure gauge E. Basket size selector F. Grind amount selector G. Power switch H. Water re ll indicator I. Descaling reminder 1. -
Page 5: Accessories
SETTING UP YOUR ESPRESSO MAKER BEFORE FIRST USE 1. Carefully unpack your Kenmore Espresso Machine and check that all parts are present. Remove any promotional labels or stickers and safely dispose of plastic bags or small pieces that could present a su ocation or choking hazard. -
Page 6: Preheating & Standby
SETTING UP YOUR ESPRESSO MAKER SETTING UP YOUR ESPRESSO MAKER PREHEATING & STANDBY 5. Press the steam/hot water button to run hot water through the hot water outlet for about 10 seconds. The hot water indicator will slowly ash white while the hot water is Once the water tank and bean hopper are correctly installed, plug the power cord into the power running. -
Page 7: Operating Your Machine
OPERATING YOUR MACHINE OPERATING YOUR MACHINE CHOOSING A FILTER BASKET Fig. 6 BREWING ESPRESSO Your machine includes two pressurized (double- wall) lter baskets. Pressurized lter baskets are THE PERFECT EXTRACTION designed to minimize the impact of grind, dose, tamp, or freshness on the quality of the nished The word espresso refers to a method of brewing co ee in which hot water is forced under shot. - Page 8 OPERATING YOUR MACHINE OPERATING YOUR MACHINE 3. Use the grind amount dial to increase or 3. To remove, rotate and lift the lter basket while lightly pressing it into the wall of the porta lter. Fig. 12 When the dot reaches the vertical groove, the basket will easily lift out. decrease the automatic dose as needed to achieve a balanced extraction and to suit your personal taste.
- Page 9 "ristretto," while a longer pull results in a larger volume shot with a milder avor called a "lungo." To make a ristretto or lungo with your Kenmore espresso machine, dose and tamp your grounds as before and load the porta lter into the group head. Press and hold the...
-
Page 10: Texturing Milk
OPERATING YOUR MACHINE OPERATING YOUR MACHINE TEXTURING MILK 3. When your milk is heated through to approximately 140-160°F (60-70°C), turn the steam knob back to the position and remove the pitcher. Immediately wipe the wand with a clean, damp cloth to prevent the milk from drying on it and purge it with a 1-2 second burst of steam. Now that you have perfected your espresso, it's time to turn that shot into a delicious cappuccino or latte! Although cappuccinos and lattes have exactly the same ingredients - espresso and milk - 4. -
Page 11: Espresso Drinks To Try
OPERATING YOUR MACHINE ESPRESSO DRINKS TO TRY COOLING DOWN When you are nished using the steam wand, press the button to exit steam mode. The machine will beep 3 times and the , and lights will ash red to indicate that the water temperature is still too high for making espresso. -
Page 12: Care & Maintenance
CARE & MAINTENANCE CARE & MAINTENANCE A clean, well-maintained machine is essential to making delicious espresso. As you use your DESCALING REMINDER machine, co ee residue and mineral deposits from your water naturally build up on the inner Your machine's descaling reminder will light up red after about 300 uses (including pumping hot components. -
Page 13: Getting The Most Out Of Your Machine
GETTING THE MOST OUT OF YOUR MACHINE TROUBLESHOOTING CHOOSING YOUR BEANS PROBLEM POSSIBLE CAUSE POSSIBLE SOLUTION • Look at and smell your beans: The ideal espresso beans will have an intense, almost nutty or Grind size too coarse Empty lter and retry with a ner chocolatey scent and will look shiny but not overly oily or greasy. -
Page 14: Troubleshooting
TROUBLESHOOTING TROUBLESHOOTING PROBLEM POSSIBLE CAUSE POSSIBLE SOLUTION PROBLEM POSSIBLE CAUSE POSSIBLE SOLUTION Co ee grounds around lter Always wipe away excess grinds Grouphead or lter clogged Purge grouphead basket rim before inserting porta lter with co ee residue Clean shower screen and lter Filter basket over lled Empty lter and retry with less holes with a brush or pin... - Page 15 Machine à espresso semi-automatique Garantie limitée avec moulin PENDANT DEUX ANS à compter de la date d’achat d’origine ce produit Kenmore sera exempt de défauts de matériaux ou de fabrication. Un produit défectueux sera réparé ou remplacé gratuitement, AVEC PREUVE DE VENTE.
- Page 16 TABLE DES MATIÈRES MESURES DE PROTECTION IMPORTANTES CONNAÎTRE VOTRE MACHINE Pièces Commandes Accessoires MISE EN PLACE Avant la première utilisation Assemblage de votre machine Préchau age et veille Rinçage du système Distribution d’eau chaude UTILISATION DE VOTRE MACHINE Faire du espresso Lait texturant Cafés espressos à...
- Page 17 L’utilisation d’accessoires de rechange non suivantes : recommandés par Kenmore entraînera la nullité de votre garantie et pourrait provoquer a. Ne l’utilisez pas près du bord d’un comptoir ou d’une table ou sur une surface humide un incendie, un choc électrique ou des blessures.
-
Page 18: Connaître Votre Machine
CONNAÎTRE VOTRE MACHINE CONNAÎTRE LES COMMANDES A. Sélecteur vapeur/eau chaude B. Sélecteur 2 tasses/double dose C. Sélecteur 1 tasse/dose simple D. Manomètre E. Sélecteur de taille de panier F. Sélecteur de quantité de mouture G. Interrupteur H. Indicateur de remplissage d’eau I. -
Page 19: Accessoires
MISE EN PLACE DE VOTRE MACHINE AVANT LA PREMIÈRE UTILISATION 1. Déballez soigneusement votre machine à espresso Kenmore et véri ez que toutes les pièces sont présentes. Retirez toutes les étiquettes ou autocollants promotionnels et jetez en toute sécurité les sacs en plastique ou les petits morceaux qui pourraient présenter un risque de su ocation ou d’étou ement. -
Page 20: Préchau Age Et Veille
MISE EN PLACE DE VOTRE MACHINE MISE EN PLACE DE VOTRE MACHINE PRÉCHAUFFAGE ET VEILLE 5. Appuyez sur le bouton vapeur/eau chaude pour faire couler de l’eau chaude par la sortie d’eau chaude pendant environ 10 secondes. Le voyant d’eau chaude clignote lentement en Une fois le réservoir d’eau et la trémie à... -
Page 21: Utilisation De Votre Machine
UTILISATION DE VOTRE MACHINE UTILISATION DE VOTRE MACHINE CHOISIR UN PANIER-FILTRE Fig. 6 INFUSION D’ESPRESSO Votre machine comprend deux paniers- ltres pressurisés (à double paroi). Les paniers ltrants EXTRACTION PARFAITE sous pression sont conçus pour minimiser Le mot Espresso fait référence à une méthode de préparation du café dans laquelle de l’eau l’impact de la mouture, du dosage, du tassement chaude est forcée sous pression à... - Page 22 UTILISATION DE VOTRE MACHINE UTILISATION DE VOTRE MACHINE 3. Utilisez le sélecteur de quantité de mouture 3. Pour le retirer, faites pivoter et soulevez le panier- ltre tout en appuyant légèrement dessus Fig. 12 contre la paroi du porte- ltre. Lorsque l’onglet atteint la rainure verticale, le panier se soulève pour augmenter ou diminuer la dose automa- tique selon les besoins pour obtenir une facilement.
- Page 23 « lungo ». Pour faire un ristretto ou un lungo avec votre machine espresso Kenmore, dosez et tassez votre mouture comme avant et chargez le porte- ltre dans la tête de groupe. Appuyez et maintenez enfoncé...
-
Page 24: Lait Texturant
UTILISATION DE VOTRE MACHINE UTILISATION DE VOTRE MACHINE LAIT TEXTURANT 3. Lorsque votre lait est chau é à environ 140-160 °F (60-70 °C), remettez le bouton vapeur rotatif en position et retirer le pichet. Essuyez immédiatement la buse à vapeur avec un chi on propre Maintenant que vous avez perfectionné... -
Page 25: Cafés Espressos À Essayer
UTILISATION DE VOTRE MACHINE CAFÉS ESPRESSO À ESSAYER REFROIDISSEMENT Lorsque vous avez ni d’utiliser la buse à vapeur, appuyez sur le bouton pour quitter le mode vapeur. La machine émettra 3 bips et les voyants , et clignoteront en rouge pour indiquer que la température de l’eau est encore trop élevée pour faire un espresso. -
Page 26: Nettoyage
NETTOYAGE ET ENTRETIEN NETTOYAGE ET ENTRETIEN Une machine propre et bien entretenue est essentielle pour préparer un délicieux espresso. RAPPEL DE DÉTARTRAGE Lorsque vous utilisez votre machine, les résidus de café et les dépôts minéraux de votre eau Le rappel de détartrage de votre machine s’allume en rouge après environ 300 utilisations (y s’accumulent naturellement sur les composants internes. -
Page 27: Tirer Le Meilleur Parti De Votre Machine
TIRER LE MEILLEUR PARTI DE VOTRE MACHINE DÉPANNAGE CHOISIR VOS GRAINS DE CAFÉ PROBLÈME CAUSE POSSIBLE SOLUTION POSSIBLE • Regardez et sentez les grains : Les grains d’espresso idéaux auront un parfum intense, presque Particules de mouture trop Videz le ltre et réessayez avec des de noisette ou de chocolat et auront l’air brillants mais pas trop huileux. - Page 28 DÉPANNAGE DÉPANNAGE PROBLÈME CAUSE POSSIBLE SOLUTION POSSIBLE PROBLÈME CAUSE POSSIBLE SOLUTION POSSIBLE Mouture de café autour du Essuyez toujours l’excès de mouture avant Tête de groupe ou ltre Purgez la tête de groupe bord du panier- ltre d’insérer le porte- ltre obstrué...
Need help?
Do you have a question about the KKCMEMT and is the answer not in the manual?
Questions and answers