Table of Contents
Advertisement
Quick Links
B
™
FocalPoint
GS Imaging
l
Instrument User's Manua
Becton, Dickinson and Company
7 Loveton Circle
Sparks, MD 21152 USA
Benex Limited
Pottery Road, Dun Laoghaire
Co. Dublin, Ireland
Australian Sponsor:
Becton Dickinson Pty Ltd.
4 Research Park Drive
Macquarie University Research Park
North Ryde, NSW 2113 Australia
Document Number: 500011292
2016-03(01)
4 43875, 490189, 491085, 491086, 491087, 491089,491090, 491091
English
Advertisement
Table of Contents
Troubleshooting

Related Manuals for Becton Dickinson BD FocalPoint GS Imaging


Summary of Contents for Becton Dickinson BD FocalPoint GS Imaging
- Page 1 7 Loveton Circle Sparks, MD 21152 USA Benex Limited Pottery Road, Dun Laoghaire Co. Dublin, Ireland Australian Sponsor: Becton Dickinson Pty Ltd. 4 Research Park Drive Macquarie University Research Park North Ryde, NSW 2113 Australia Document Number: 500011292 2016-03(01) ...
- Page 2 Change History Revision Pages Reason Initial release for Sparks, MD Manufacturing Hewlett Packard is a trademark of the Hewlett Packard Development Company, LP. © 2016 BD. BD, BD Logo and all other trademarks are property of Becton, Dickinson and Company. U.S.
-
Page 3: Table Of Contents
BD FocalPoint GS Imaging System ................. 2-1 BD FocalPoint GS Review Station................... 2-2 BD FocalPoint Slide Profiler Slide Information .............. 2-3 BD FocalPoint GS Imaging System Workflow ..............2-4 BD FocalPoint Slide Profiler ..................2-4 BD FocalPoint GS Review Station ................2-5 Chapter 3: Guided Screening Starting the Application .................... - Page 4 Table of Contents Screening FOVs....................... 3-7 BD FocalPoint GS Review Mode Basics ..............3-8 Verifying the Stage Position/Using the OffSet Function ..........3-9 Navigating Through FOVs ..................... 3-10 Using the Mouse to Navigate ..................3-10 Using the Foot Pedal to Navigate ................3-10 Using the VCR Buttons to Navigate ................
- Page 5 Table of Contents Chapter 6: BD FocalPoint GS Review Station MD and QC Modes Enhanced QC Review option................... 6-1 Enabling Enhanced QC ....................6-2 Chapter 7: Managing the BD FocalPoint GS Review Station Server Copy Service Basics ......................7-1 Operating Modes ......................7-1 Transferring Data ......................
- Page 6 Table of Contents Slides Not Successfully Processed ................10-6 Slide Result Report Options................... 10-7 Ranking Information ....................10-7 Specimen Adequacy Information ................10-8 Processing Status Information ..................10-8 Chapter 11: The BD FocalPoint Slide Profiler Main Window Main Window ........................ 11-2 Help Icon ........................
- Page 7 Table of Contents Chapter 13: Slides, Coverslips, and Slide Preparations Types of Slide Preparations Allowed ................13-1 BD SurePath Slides ....................13-1 Slide and Coverslip Standards..................13-2 Slide and Coverslip Dimensions ................. 13-2 Slide Optical Properties ....................13-3 Coverslip Requirements ....................13-3 Adhesive and Mounting Requirements ...............
- Page 8 Table of Contents Type of USB Flash Drive to Use (for USB backup systems) ........15-22 Backup Media Archive Reminder ................15-22 Alternate Backup Media Daily ................... 15-23 Manual Daily Backup ....................15-23 Shutting Down the System................... 15-24 Restarting the System....................15-26 Chapter 16: BD FocalPoint Slide Profiler Maintenance Maintenance Schedule ....................
- Page 9 Table of Contents Sorting Slides by Action Categories................18-8 When to Manually Screen Slides ................... 18-9 Selecting Slides for QC Rescreening................18-9 Monitoring the Slide Rejection Rate................18-11 Mean Stain Score ..................... 18-11 Report Options......................18-13 Report Types ......................18-13 Report Sorting Options .....................
- Page 10 Table of Contents Appendix C: Warnings and Cautions Appendix D: BD FocalPoint Slide Profiler System Integrity Appendix E: BD FocalPoint Slide Profiler Maintenance Schedule Appendix F: System Integrity (SI) Results Log Appendix G: BD FocalPoint Slide Profiler Slide Rejection Rate Log Appendix H: BD FocalPoint GS Review Station Custom Settings BD FocalPoint GS Settings....................
- Page 11 Table of Contents Appendix L: International Contacts BD FocalPoint Slide Profiler Quick Reference Guide Instrument/Device Status Alerts .................QR-1 Beginning Processing ....................QR-1 Manual Backup Procedure ..................QR-1 Shut Down Procedure ....................QR-1 Start-up Procedure .....................QR-3 Symbol Glossary Index Operator’s Manual—BD FocalPoint GS Imaging System...
- Page 12 Table of Contents Operator’s Manual—BD FocalPoint GS Imaging System...
-
Page 13: List Of Figures
BD FocalPoint GS Imaging System ............ 2-2 Figure 2-2 Slide Information area................. 2-3 Figure 2-3 BD FocalPoint GS Imaging System workflow ........2-5 Figure 2-4 BD FocalPoint GS Review Station workflow........2-6 Figure 3-1 Start, Program, and BD FocalPoint GS menus........3-2 Figure 3-2 Calibrate top edge................ - Page 14 List of Figures Figure 5-4 History dialog box ................5-3 Figure 5-5 Toolbar Offset button ................5-3 Figure 5-6 Toolbar Track button................5-3 Figure 5-7 Tracking function................. 5-4 Figure 5-8 Toolbar HotDot button................. 5-4 Figure 5-9 HotDot not close to target (left) and centered on target (right) ... 5-4 Figure 5-10 Toolbar Help button ................
- Page 15 List of Figures Figure 7-17 My Computer menu (archived slide folders) ........7-13 Figure 7-18 My Computer menu (archived slide data) ......... 7-13 Figure 7-19 My Network Places menu ..............7-14 Figure 7-20 Map Network Drive menu ..............7-14 Figure 7-21 BD FocalPoint GS - Archive icon ............7-14 Figure 7-22 BD FocalPoint GS - Archive (Select archive directory).....
- Page 16 List of Figures Figure 11-15 Shutdown window ................11-14 Figure 12-1 Print Summary Statistics..............12-3 Figure 12-2 Slide result report, tray layout ............12-7 Figure 12-3 Slide Result Report (slide layout, sorted by date)......12-9 Figure 12-4 Example of a Slide Result Report ........... 12-11 Figure 12-5 Example of a Review Report (Sorted by Rank) ......
- Page 17 List of Figures Figure 18-5 Print Summary Statistics..............18-7 Figure 18-6 Usage Statistics options..............18-11 Figure 18-7 Usage statistics................18-12 Figure 18-8 Slide result report, tray layout ............18-16 Figure 18-9 Slide Result Report (slide layout, sorted by barcode)..... 18-18 Figure 19-1 BD FocalPoint Slide Profiler QA program .........
- Page 18 List of Figures Operator’s Manual—BD FocalPoint GS Imaging System...
-
Page 19: Chapter 1: Introduction
Purpose Statement The purpose of this manual is to describe the operations and functions of the BD FocalPoint GS Imaging System as a complete cervical cancer screening system. There are references in this manual to individual components of the system such as the BD FocalPoint Slide Profiler that, when used without the BD FocalPoint GS (Guided Screener) enhancement, will have different limitations. -
Page 20: Bd Focalpoint Gs Review Station
15 fields of view (FOVs) most likely to contain abnormal cells. The BD FocalPoint GS Imaging System identifies up to 25% of successfully processed slides as requiring no further review. -
Page 21: Using This Manual
Chapter 1, Introduction, (this chapter) contains introductory information. Chapter 2, BD FocalPoint GS Imaging System Introduction, describes the BD FocalPoint GS Review Station, an automated microscope accessory that enhances the scanning and annotation steps of screening a microscope slide. - Page 22 Lists functions. Chapter 10, The BD FocalPoint Slide Profiler, presents an overview of the BD FocalPoint GS Imaging System technology as well as a description of the system components and specifications. Chapter 11, The BD FocalPoint Slide Profiler Main Window, describes the workstation software.
- Page 23 Appendix I, System Requirements, details the electrical and mechanical specifications for the BD FocalPoint GS Imaging System. Appendix J, BD FocalPoint GS Review Station Abbreviations, provides definitions for some of the common abbreviations used in this manual.
-
Page 24: Document Conventions
: Indicates the possibility of severe equipment damage or invalid AUTION results if instructions are not followed. Note: Gives helpful information about the BD FocalPoint GS Imaging System. Diagnostic The diagnostic terminology used in this manual for use in the... -
Page 25: How To Contact Bd Diagnostics
Chapter 1: Introduction How to Contact BD Diagnostics How to Contact BD Diagnostics In the United Technical Service and Support 800-638-8663 States Outside of the Contact your local BD representative. United States Operator’s Manual—BD FocalPoint GS Imaging System... - Page 26 How to Contact BD Diagnostics Chapter 1: Introduction Operator’s Manual—BD FocalPoint GS Imaging System...
-
Page 27: Chapter 2: Bd Focalpoint Gs Imaging System Introduction
System Introduction This chapter provides overview information on the basic operation of the BD FocalPoint GS Imaging System and a brief review of the workflow process for orientation. Specific details on how to operate the BD FocalPoint Slide Profiler and BD FocalPoint GS Review Station are discussed in subsequent chapters. -
Page 28: Bd Focalpoint Gs Review Station
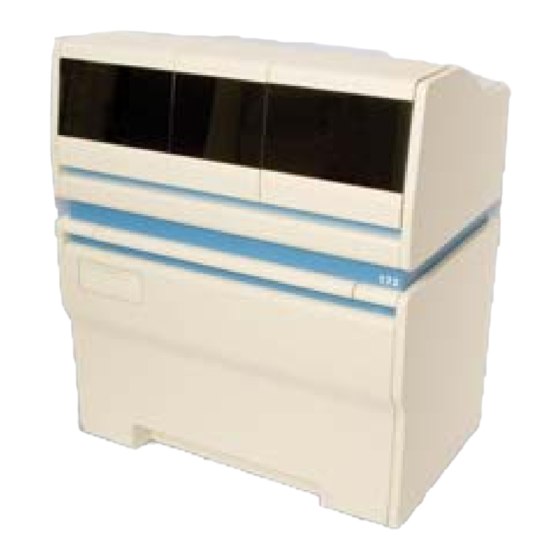
BD FocalPoint GS Review Station Chapter 2: BD FocalPoint GS Imaging System Introduction Profiler with the precision field relocation capability of the BD FocalPoint GS Review Station. Figure 2-1 BD FocalPoint GS Imaging System BD FocalPoint GS Review Station The BD FocalPoint GS Review Station is designed for the desktop and allows the user to perform a computer assisted slide review. -
Page 29: Bd Focalpoint Slide Profiler Slide Information
Chapter 2: BD FocalPoint GS Imaging System Introduction BD FocalPoint GS Review Station the automated re-location capability of the BD FocalPoint GS Review Station to evaluate the pre-selected FOVs. Note: The digital images that the Slide Profiler provides are BD FocalPoint intended for relocation/calibration purposes only and are not intended for the purpose of interpretation. -
Page 30: Bd Focalpoint Gs Imaging System Workflow
Table 2-1 Slide Information data BD FocalPoint GS Imaging System Workflow There are two phases to the BD FocalPoint GS Imaging System workflow: Phase 1 is performed on the BD FocalPoint Slide Profiler and Phase 2 is performed on the BD FocalPoint GS Review Station. -
Page 31: Bd Focalpoint Gs Review Station
Chapter 2: BD FocalPoint GS Imaging System Introduction BD FocalPoint GS Imaging System Workflow BD SurePath Slides Process Review, BD FocalPoint No FOVs, Slide Profiler or Rerun (see Note 1) Manual primary screening Slides classified as Review Slides classified as... -
Page 32: Figure 2-4 Bd Focalpoint Gs Review Station Workflow
BD FocalPoint GS Imaging System Workflow Chapter 2: BD FocalPoint GS Imaging System Introduction Note: In the US, Conventional Pap smears are not eligible for Field of View (FOV) screening. Refer to Chapter 18 for a discussion of conventional slide processing. -
Page 33: Chapter 3: Guided Screening
Chapter 3: Guided Screening Starting the Application Chapter 3 Guided Screening This chapter reviews the process of reviewing FOVs on the BD FocalPoint GS Review Station. This process is used to evaluate a slide using guided screening. As previously discussed in Chapter 2, all BD SurePath™ Liquid-based Pap Test slides are initially processed on the BD FocalPoint™... -
Page 34: Calibrating The Stage
Calibrating the Stage Chapter 3: Guided Screening Figure 3-1 Start, Program, and BD FocalPoint GS menus PTION ASKS ERFORMED ™ BD FocalPoint GS - T Access the report utility and other administrative tasks. These tasks are discussed in OOLS Chapters 8 and 9 as well as in Appendix H. ™... -
Page 35: Figure 3-2 Calibrate Top Edge
Chapter 3: Guided Screening Calibrating the Stage Figure 3-2 Calibrate top edge Use the following steps to calibrate the stage. Note: Perform the calibration process with the same magnification (for example 10X) that is used for screening slides. Put the slide securely on the stage with the label on the left. Warning Make sure that the clip grips the slide edge securely. -
Page 36: Figure 3-4 Calibrate Right Edge
Calibrating the Stage Chapter 3: Guided Screening Focus the image again, and then recheck the alignment. When the stage location is correct, click to continue. The following dialog box opens. Figure 3-4 Calibrate right edge Move the stage to position the right edge of the slide as demonstrated in and center the slide edge in the center of the field of view. -
Page 37: Selecting A Slide
Chapter 3: Guided Screening Selecting a Slide Selecting a Slide After calibrating the stage, select the slide to be reviewed. Once the slide selection window is displayed, select the accession number of the slide. Figure 3-6 Slide Selection window There are three ways to identify the slide: Scan in the accession number directly from the slide using the ... -
Page 38: Mouse Click From The Slide List
Selecting a Slide Chapter 3: Guided Screening Remove the slide from the slide tray and read the number on the label. Note: Take care to pick up the slide by the edges, so that fingerprints do not get on top of the coverslip. Position the cursor in the Enter Slide ID box, and delete any numbers already displayed. -
Page 39: Screening Fovs
Chapter 3: Guided Screening Screening FOVs Warning Make sure that the clip grips the slide edge securely. An unsecured slide could fall into a slotted stage opening and be damaged. Damaged or broken slides can cause injuries. Be careful not to allow the clip to snap against the glass. -
Page 40: Bd Focalpoint Gs Review Mode Basics
Screening FOVs Chapter 3: Guided Screening BD FocalPoint GS Review Mode Basics Toolbar Primary Control Image area Panel Slide map Figure 3-8 BD FocalPoint GS review mode main display Primary image area The primary image area is used to display the FOV images captured from the BD FocalPoint Slide Profiler. -
Page 41: Verifying The Stage Position/Using The Offset Function
Chapter 3: Guided Screening Screening FOVs Control Panel The control panel is similar to the toolbar in that it controls various functions during the review process. Each function will be described as it occurs in the workflow. See for a description of each of the available functions and a suggested workflow. -
Page 42: Navigating Through Fovs
Navigating Through FOVs Chapter 3: Guided Screening If the image does not match the view, do the following: Use the manual stage controls to re-align the object so it matches the image in the primary display. Click the button located in the toolbar. The stage will move Offset and adjust to the new offset position. -
Page 43: Screening And Triaging Slides
Chapter 3: Guided Screening Screening and Triaging Slides First FOV Back Last FOV Forward VCR Buttons Figure 3-10 VCR Buttons When advancing from FOV to FOV the color of the dot changes from black to pink indicating the FOV has been reviewed. Refer to Chapter 5 for detailed information regarding slide map color. -
Page 44: Full Slide Manual Review
(Refer to the BD FocalPoint GS Imaging System product insert.) Full Slide Manual To perform a full slide review, use the manual stage controls on the Review microscope and perform a full slide manual review. -
Page 45: Finishing A Slide
Chapter 3: Guided Screening Finishing a Slide Note: Manual dotting of cells of interest is performed according to your laboratory's current procedure. GS Review software allows for electronic dotting and screening. Refer to Screening Slides Chapter 4. Finishing a Slide Finishing a slide is a two step process: Select the Eval or No Eval function. -
Page 46: Figure 3-14 Evaluation Dialog Box
Finishing a Slide Chapter 3: Guided Screening Figure 3-14 Evaluation dialog box From the box, select the primary Interpretation/Result evaluation. To add adequacy or other non-neoplastic descriptive findings, select one or more of each from their respective list boxes. Both the and the Adequacy of specimen Organisms and Other... -
Page 47: Using The No Evaluation Function
Chapter 3: Guided Screening Finishing a Slide Figure 3-15 List of evaluation statements To add additional notes or comments, type them in the Notes box. If your protocol calls for a user name or ID other than the currently logged in user ID, type it in the box. - Page 48 Finishing a Slide Chapter 3: Guided Screening (AFR) is selected when the slide Awaiting further review requires further review by a second individual such as a pathologist. Slides queued up as Awaiting further review be retrieved using the BD FocalPoint GS Review Station in either GS review mode or by the second reviewer.
-
Page 49: Chapter 4: Screening Slides Manual Screening
Chapter 4: Screening Slides Manual Screening Chapter 4 Screening Slides This chapter reviews the process of manually screening a slide at the BD FocalPoint GS Review Station. There are two modes available for examining a cytologic slide Review slide using FOVs Manual full slide review (FSR) Manual Screening A full slide, manual review is performed at the BD FocalPoint GS... -
Page 50: Figure 4-1 Main Display
Screen Mode Basics Chapter 4: Screening Slides Figure 4-1 Main Display Toolbar Buttons The toolbar buttons are used to turn BD FocalPoint GS Review Station features on and off. Information on how and when to use these features is described as it occurs in the workflow (refer to Chapter 5 for additional information). -
Page 51: Screening Slides
Chapter 4: Screening Slides Screening Slides Figure 4-2 Slide map detail Electronic Dotting Electronic Dotting captures and stores x/y coordinates for additional areas of interest. To add a dot for a location of interest, position the stage over the location, and then either: click the middle mouse button ... -
Page 52: Other Types Of Slides
Screening Slides Chapter 4: Screening Slides Tool Bar Control Panel Primary image area Slide map Secondary image area Figure 4-4 Main screening display Use the microscope stage controls to screen the slide. FOVs marked by the Profiler display as black dots on the slide map. If additional areas of interest need to be dotted, use the electronic dotting function as described in Chapter 4. -
Page 53: Figure 4-5 Slide Selection Window
Chapter 4: Screening Slides Screening Slides Accession Number New Slide Button Figure 4-5 Slide Selection window Click the New Slide button on the far left of the Slide Selection window (shown in Figure 4-5) or press the key on the Enter keyboard. - Page 54 Screening Slides Chapter 4: Screening Slides Operator’s Manual—BD FocalPoint GS Imaging System...
-
Page 55: Chapter 5: Bd Focalpoint Gs Review Station User Interface Understanding The Toolbar Buttons
Chapter 5: BD FocalPoint GS Review Station User Interface Understanding the Toolbar Buttons Chapter 5 BD FocalPoint GS Review Station User Interface This section provides reference information on the user interface and optional features that are not discussed in Chapters 3 and 4. Topics discussed in this chapter include: Understanding the Toolbar Buttons ... -
Page 56: Figure 5-3 History Dialog Box
Understanding the Toolbar Buttons Chapter 5: BD FocalPoint GS Review Station User Interface button displays one of two dialog boxes that show slide History information or cytologic interpretations made by previous reviewers using the BD FocalPoint GS Review Station. At any time during the review or screening process, prior slide information can be accessed. -
Page 57: Offset Button
Chapter 5: BD FocalPoint GS Review Station User Interface Understanding the Toolbar Buttons Tabs Figure 5-4 History dialog box Note: This feature provides the history of interpretations entered using the Eval function. Offset Button Offset Figure 5-5 Toolbar Offset button button will re-align the x y coordinates of the stage position Offset as needed after calibrating the stage. -
Page 58: Hotdot Button
Understanding the Toolbar Buttons Chapter 5: BD FocalPoint GS Review Station User Interface Figure 5-7 Tracking function HotDot Button HotDot Figure 5-8 Toolbar HotDot button button provides a visual display of how close the stage HotDot position is to a particular FOV. For the BD FocalPoint GS application this function is not required. -
Page 59: Understanding The Control Panel
Chapter 5: BD FocalPoint GS Review Station User Interface Understanding the Control Panel Understanding the Control Panel Figure 5-11 shows the Control Panel buttons that can be used while reviewing a slide. Most Significant Dot - makes locations more prominent on the display Removes a location recently added by the current user Stops review of this slide, and brings up... -
Page 60: Control Buttons
Understanding the Control Panel Chapter 5: BD FocalPoint GS Review Station User Interface Control Buttons Figure 5-12 illustrates the use of the MSD function. The currently viewed MSD is surrounded by a square and has a red border. Selected dot Figure 5-12 Selected MSD Click MSD to mark the dot as a most significant dot. -
Page 61: Using The Slide Map
Chapter 5: BD FocalPoint GS Review Station User Interface Using the slide map The VCR buttons are: Beginning (back to the first dot), Rewind (back one dot), Forward (ahead one dot), and End (ahead to the last marked dot). LOIs marked by the BD FocalPoint Slide Profiler appear as black dots in the slide map area. -
Page 62: Slide Status Information
Using the slide map Chapter 5: BD FocalPoint GS Review Station User Interface PPEARANCE OF NDICATES LOI added in QC mode LOI added in MD mode REEN Table 5-2 Dot Color Cues Slide Status Slides are assigned different icons with associated colors based on Information their processing and interpretation status. -
Page 63: Multiple Slides Found Window
Rerun and yellow indicates Process Review . Slide Results The background color in the slide results data window indicates Data Color Codes BD FocalPoint GS Imaging System action. Green indicates that the slide was successfully processed on the BD FocalPoint Slide Profiler. -
Page 64: Annotating An Fov
Using the slide map Chapter 5: BD FocalPoint GS Review Station User Interface Annotating an Annotation Process There are two types of FOVs that can be annotated: FOVs selected by the BD FocalPoint Slide Profiler User added electronic FOV (dot) ... -
Page 65: Chapter 6: Bd Focalpoint Gs Review Station Md And Qc Modes
Chapter 6: BD FocalPoint GS Review Station MD and QC Modes Enhanced QC Review option Chapter 6 BD FocalPoint GS Review Station MD and QC Modes In general, the operating modes function identically to mode. However, there are several important FocalPoint GS Review differences: button is only available in... -
Page 66: Enabling Enhanced Qc
Enhanced QC Review option Chapter 6: BD FocalPoint GS Review Station MD and QC Modes Figure 6-1 QC Review message Note: If the function is not enabled this message will not appear. All slides (with status of RFS and QC Review) will be in the QC Mode slide list. If Enhanced QC is disabled, all slides will have a green status icon (see Table 5-3). -
Page 67: Figure 6-3 Enabling Enhanced Qc Review
Chapter 6: BD FocalPoint GS Review Station MD and QC Modes Enhanced QC Review option Figure 6-3 Enabling Enhanced QC review From the Slide Sign Out screen, check the Enable Enhanced QC box. review Enable/ disable Enhanced QC Figure 6-4 Enabling Enhanced QC review Click to exit the BD FocalPoint GS Administration tool. - Page 68 Enhanced QC Review option Chapter 6: BD FocalPoint GS Review Station MD and QC Modes The QC application is the only means available for reviewing these slides on the BD FocalPoint GS Review Station. Slides not selected for QC review will remain on the list.
-
Page 69: Chapter 7: Managing The Bd Focalpoint Gs Review Station Server
Chapter 7: Managing the BD FocalPoint GS Review Station Server Copy Service Basics Chapter 7 Managing the BD FocalPoint GS Review Station Server This chapter discusses the flow of data into and out of the BD FocalPoint GS Server. Two utilities manage this process: Copy Service and Archive. -
Page 70: Transferring Data
Copy Service Basics Chapter 7: Managing the BD FocalPoint GS Review Station Server Transferring Data When the BD FocalPoint Slide Profiler completes its slide processing, slides are designated either , or . For Review Process Review Rerun slides in the review category, the BD FocalPoint GS Review Station is used to evaluate the slide data. -
Page 71: Figure 7-1 My Computer Menu
Chapter 7: Managing the BD FocalPoint GS Review Station Server Copy Service Basics To restart the copy service application: Go to the BD FocalPoint GS Server and right click the My Computer icon. Select Manage Figure 7-1 My Computer menu Select . -
Page 72: Archive Utility Basics
Archive Utility Basics Chapter 7: Managing the BD FocalPoint GS Review Station Server The APSW61 Properties menu opens. Note: If automatic copy service has already been set, but has stopped, the Service Status will read Stopped . Figure 7-4 APSW61 Properties menu Use the drop down menu to select Automatic Click the... -
Page 73: Sign Out
Chapter 7: Managing the BD FocalPoint GS Review Station Server Sign Out There are two processes that need to occur for periodic archiving to be complete. First, the batches must be "signed out." Second, the signed out batches must then be archived. Note: Prior to starting this process, all the cytotechnologists must have logged off of their systems. -
Page 74: Figure 7-8 Bd Focalpoint Gs - Administration Tool
Sign Out Chapter 7: Managing the BD FocalPoint GS Review Station Server Click in the FocalPoint GS - Administration Tool window. Sign Out Figure 7-8 BD FocalPoint GS - Administration Tool button turns green and the Slide Sign Out window Sign Out appears. - Page 75 : These slides might be triaged this way from No Further Review the BD FocalPoint Slide Profiler In the US, the BD FocalPoint GS Imaging System will not designate BD SurePath slides as Slides No Further Review.
-
Page 76: Figure 7-10 Bd Focalpoint Gs - Administration Tool (Slide Sign Out Details)
Enable Copy Service sign out of NFR slides For BD SurePath slides in the US, this selection should be unchecked. The BD FocalPoint GS Imaging System combined with No Further Review is not available in the US. Enable Enhanced QC Review... -
Page 77: Archive
Chapter 7: Managing the BD FocalPoint GS Review Station Server Archive Archive After clicking on the Slide Sign Out window, the Sign Out Archive button turns green and the Archive Signed Out Slides window appears for archiving previously signed out slides. Figure 7-11 BD FocalPoint GS - Administration Tool (Archive Signed Out Slides) Features of this window: : The source path field shows the source of the... -
Page 78: Figure 7-12 Bd Focalpoint Gs - Administration Tool (Archive Results)
Archive Chapter 7: Managing the BD FocalPoint GS Review Station Server During archiving, the list of slides being archived and the status appears on the display. Once archiving is complete, the message Archive Results window appears. This window displays the archiving results information. -
Page 79: Figure 7-14 Bd Focalpoint Gs - Administration Tool (Close Archive Signed Out Slides)
Chapter 7: Managing the BD FocalPoint GS Review Station Server Archive When finished archiving slides and viewing reports, close the Archive Signed Out Slides window using the X at the upper right hand corner. A window appears to confirm closing the application. Click continue. -
Page 80: Figure 7-15 Bd Focalpoint Gs - Reports
Archive Chapter 7: Managing the BD FocalPoint GS Review Station Server Figure 7-15 BD FocalPoint GS - Reports To locate archived files From the Windows desktop, right-click the My Computer icon. Select Explore Click the + to expand My Computer. If slides have been archived to the C:\Archives destination, click the + to expand that folder. -
Page 81: Viewing Archived Slide Data
Chapter 7: Managing the BD FocalPoint GS Review Station Server Archive Click on the + for the desired archive folder. The slide folders for that archive appear. Figure 7-17 My Computer menu (archived slide folders) Click on the desired slide folder. The data for that slide appear on the right side of the window. -
Page 82: Figure 7-19 My Network Places Menu
Archive Chapter 7: Managing the BD FocalPoint GS Review Station Server Select Explore Select Tools Select Map Network Drive Figure 7-19 My Network Places menu In the Map Network Drive window click on the arrow for the dropdown menu. Drive: Figure 7-20 Map Network Drive menu In the figure above, the archive folder is not mapped. -
Page 83: Figure 7-22 Bd Focalpoint Gs - Archive (Select Archive Directory)
Chapter 7: Managing the BD FocalPoint GS Review Station Server Archive In the BD FocalPoint GS - Archive menu click Browse Select archive directory Figure 7-22 BD FocalPoint GS - Archive (Select archive directory) In the window that appears, select the folder located in Archives drive. -
Page 84: Figure 7-24 Bd Focalpoint Gs - Archive (Select Archived Slides To View)
Archive Chapter 7: Managing the BD FocalPoint GS Review Station Server Figure 7-24 BD FocalPoint GS - Archive (Select archived slides to view) The FOVs that were archived can now be viewed. Use the same mechanisms to move from one FOV to another as in the BD FocalPoint GS review application. -
Page 85: Moving Data To An External Media
Chapter 7: Managing the BD FocalPoint GS Review Station Server Archive Moving Data to After archiving data, back up the data by moving the folders that were an External created on the C: drive to an external hard drive. Media An alternative method to backing up files is to archive directly to an external hard drive. -
Page 86: Figure 7-27 Search Menu
Archive Chapter 7: Managing the BD FocalPoint GS Review Station Server Figure 7-27 Search menu Fill in the desired slide number in the All or part of the file field and the location of the archived data in the name: Look in: field. -
Page 87: Figure 7-29 Search Menu (Located File)
Chapter 7: Managing the BD FocalPoint GS Review Station Server Archive Figure 7-29 Search menu (located file) Note: If the search is performed at a BD FocalPoint GS Review Station, click over the located slide and click Send to My Documents on the Review Station. - Page 88 Archive Chapter 7: Managing the BD FocalPoint GS Review Station Server 7-20 Operator’s Manual—BD FocalPoint GS Imaging System...
-
Page 89: Chapter 8: Generating Bd Focalpoint Gs Review Station Reports
Chapter 8: Generating BD FocalPoint GS Review Station Reports Generating Reports Chapter 8 Generating BD FocalPoint GS Review Station Reports This chapter discusses the reports available from the BD FocalPoint GS Review Station. To view, customize, or print slide data reports, use the BD FocalPoint GS Review Station Report utility. -
Page 90: Selecting The Report Type
Generating Reports Chapter 8: Generating BD FocalPoint GS Review Station Reports Use the work flow buttons to navigate the report process generation On-screen instructions appear here until a report is generated Report Setup button Figure 8-1 BD FocalPoint GS Report utility Selecting the Select the type of report to be created. -
Page 91: Previewing And Printing The Report
Chapter 8: Generating BD FocalPoint GS Review Station Reports Generating Reports Previewing and Select the report style to be created, and then from the report utility printing the work flow panel, click on Generate Report. report A preview of the selected report (QC Report, sorted by Rank) is displayed on screen. -
Page 92: Overview Of Bd Focalpoint Gs Review Station Reports
Overview of BD FocalPoint GS Review Station Reports Chapter 8: Generating BD FocalPoint GS Review Station Overview of BD FocalPoint GS Review Station Reports There are three types of reports that can be generated: summary, custom, and QC. Summary Summary reports can either display a summary of BD FocalPoint GS Reports Review Station processing activity for the selected time period (month, week, or day), or all of the slides currently stored in the database. - Page 93 This column displays the number of slides in this archive that were designated as NFR (No Further Review) by a FocalPoint GS Review Station user. Note: This column displays 0 for BD SurePath slides in the US because the BD FocalPoint GS Imaging System combined with is not available. Further Review...
- Page 94 Overview of BD FocalPoint GS Review Station Reports Chapter 8: Generating BD FocalPoint GS Review Station message will appear at the bottom of the report and there will be no breakdown of archived slides by category. Discrepant Evaluations Summary Report The purpose of the Discrepant Evaluations report is to display slides for which the Interpretation/Result changed from one evaluation to another on the BD FocalPoint GS Review Station.
-
Page 95: Qc Reports
Chapter 8: Generating BD FocalPoint GS Review Station Reports Overview of BD FocalPoint GS Review Station QC Reports The QC report details the progress of BD FocalPoint GS Review Station processing for each slide in the print set. Generating interim versions of this report and analyzing this progress determines when it is appropriate to generate the Final QC Report that details which slides are the most appropriate candidates for QC rescreening. -
Page 96: Figure 8-4 Final Qc Report Detail
Overview of BD FocalPoint GS Review Station Reports Chapter 8: Generating BD FocalPoint GS Review Station The final QC report provides a convenient list of the slides most appropriate for QC rescreening. The following criteria are used to create this list: To be considered for QC review, a slide must be evaluated as “Ready for signout”... -
Page 97: Chapter 9: Customizing Bd Focalpoint Gs Review Station Lists
Chapter 9: Customizing BD FocalPoint GS Review Station Lists Editing BD FocalPoint GS Review Station Lists Chapter 9 Customizing BD FocalPoint GS Review Station Lists The BD FocalPoint GS Administration Tool allows the customization of the appearance and performance of the Archive and Lists functions. Managing the BD FocalPoint GS Review Station Server details how to use the archive portion of this utility. - Page 98 Editing BD FocalPoint GS Review Station Lists Chapter 9: Customizing BD FocalPoint GS Review Station Lists Figure 9-1 BD FocalPoint GS Administration Tool (instructions) On the BD FocalPoint GS Administration Tool control panel, click button. Lists The utility displays the controls used to update the lists. When this portion of the utility is first opened, the Annotations button is initially selected.
-
Page 99: Revising The Lists
Chapter 9: Customizing BD FocalPoint GS Review Station Lists Editing BD FocalPoint GS Review Station Lists List controls The following table details the functions of the controls available on the BD FocalPoint GS Administration Tool when working with lists. ROUP ONTROL ASSOCIATED FUNCTION Click to display summary instructions for use. -
Page 100: Figure 9-3 Adding A Row To A List
Editing BD FocalPoint GS Review Station Lists Chapter 9: Customizing BD FocalPoint GS Review Station Lists Position the cursor over the row that needs to be deleted, and click the left mouse button. Click the button. Delete The type will be removed from the list. To close the window, either click on the control panel, or Finish... -
Page 101: Chapter 10: The Bd Focalpoint Slide Profiler Slide Profiler Overview
Chapter 10: The BD FocalPoint Slide Profiler Slide Profiler Overview Chapter 10 The BD FocalPoint Slide Profiler This chapter provides an overview of the BD FocalPoint Slide Profiler that includes: a description of the system components, a discussion of how slide results are classified and interpreted, and information about how slides are ranked. - Page 102 Slide Profiler Overview Chapter 10: The BD FocalPoint Slide Profiler Instrument Workst Figure 10-1 The BD FocalPoint Slide Profiler Workstation Components The following paragraphs provide a detailed description of the workstation components. The number following each item corresponds to the numbered component locations illustrated in Figure 10-1. ...
- Page 103 Chapter 10: The BD FocalPoint Slide Profiler Slide Profiler Overview Instrument Components The following paragraphs describe each component in the instrument. The instrument contains the optical and imaging systems and the mechanical tray and slide handling devices. Input and Output hopper doors Trays to be processed are placed in ...
-
Page 104: Slide Processing
Slide Processing Chapter 10: The BD FocalPoint Slide Profiler measure image resolution. measure the performance of the microscope system. identify any dust contamination in the optical system and on the calibration plate. When required, the calibration plate is automatically rotated in and out of the calibration position. -
Page 105: Slide Processing Results
Chapter 10: The BD FocalPoint Slide Profiler Slide Processing Results Before the first tray and after each succeeding tray, a comprehensive system integrity (SI) assessment of the instrument is automatically performed to ensure that all data collection and image analysis mechanisms are operating within specified limits. -
Page 106: Slides Not Successfully Processed
Slide Processing Results Chapter 10: The BD FocalPoint Slide Profiler All qualified Pap smear slides receive an action of No Further Review Additionally, designated slides receive an action of or Review. . Each of these actions is described in the following paragraphs. Review No Further Review Slides slides have the highest likelihood of being... -
Page 107: Slide Result Report Options
Chapter 10: The BD FocalPoint Slide Profiler Slide Result Report Options out as NILM, 10% must be randomly selected for QC review. Each of the process failure actions is described in the following paragraphs. Process Review Slides Slides receiving an action of could not be analyzed Process Review because of slide physical characteristics or specimen limitations. -
Page 108: Specimen Adequacy Information
Slide Result Report Options Chapter 10: The BD FocalPoint Slide Profiler ranking information. The reason for the scant cellularity classification is that there are not an adequate number of reference cells on the slide to successfully qualify and rank the slide. Reference cells are used to identify the slide as a Pap test and assess cellularity. - Page 109 Chapter 10: The BD FocalPoint Slide Profiler Slide Result Report Options Squamous Endocervical Inflammation/ Action Scanning Result Adequacy* Component Component Obscuration Review—Instrument detected potential Scan completed SBLB, Detected Detected/ <50% cellular abnormalities. Slide must be Satisfactory Insufficient 50-75% reviewed by a Cytotechnologist. Review—The instrument did not detect Scan completed Unsatisfactory...
- Page 110 Slide Result Report Options Chapter 10: The BD FocalPoint Slide Profiler 10-10 Operator’s Manual—BD FocalPoint GS Imaging System...
-
Page 111: Chapter 11: The Bd Focalpoint Slide Profiler Main Window
Chapter 11: The BD FocalPoint Slide Profiler Main Window Chapter 11 The BD FocalPoint Slide Profiler Main Window The BD FocalPoint Slide Profiler consists of an instrument and a computer workstation. The instrument processes the slides and calculates the slide results. The workstation, consisting of a computer and a color monitor, runs the workstation software that displays the windows-based, graphical Main Window. -
Page 112: Figure 11-1 Bd Focalpoint™ Profiler Main Window
Main Window Chapter 11: The BD FocalPoint Slide Profiler Main Window Main Window The BD FocalPoint Slide Profiler main window is the highest level window. That is, it appears when the workstation software is started and it remains visible while performing various screening tasks. Figure 11-1 illustrates a typical BD FocalPoint Slide Profiler Main Window. -
Page 113: Help Icon
Chapter 11: The BD FocalPoint Slide Profiler Main Window Main Window Help Icon Click the icon (see Figure 11-2) featured in the top right corner of the Main Window (see Figure 11-1) to display the online files. Each Help major window or menu contains a icon. -
Page 114: Instrument Status
Main Window Chapter 11: The BD FocalPoint Slide Profiler Main Window Instrument The section below the button lists the following information (See Home Status Figure 11-4): Instrument Name: prior to installation, the instrument is assigned a unique name. Intended Use: identifies the method of instrument operation. ... -
Page 115: Task Buttons
Chapter 11: The BD FocalPoint Slide Profiler Main Window Main Window See Monitoring the Instrument During Processing in Chapter 15 for detailed information on how to monitor the progress of slide processing. Figure 11-5 Main Window Processed Slides field Task Buttons There are three task buttons located in the lower portion of the BD FocalPoint Slide Profiler Main Window: ,and... -
Page 116: Utilities Button
Utilities Button Chapter 11: The BD FocalPoint Slide Profiler Main Window Reprint Button Choose the button to reprint previously printed reports, or to Reprint print additional reports that were not automatically printed. See Reprinting in Chapter 12 and Reprinting Reports in Chapter 15 for instructions on how to use this feature. -
Page 117: Figure 11-7 Utilities Window
Chapter 11: The BD FocalPoint Slide Profiler Main Window Utilities Button Figure 11-7 Utilities window Each of the Utilities commands is described below. Select the button to access the following types of reports Statistics (see Figure 11-8): Each window function is described below. Usage Statistics ... -
Page 118: Usage Statistics
Utilities Button Chapter 11: The BD FocalPoint Slide Profiler Main Window Figure 11-8 Statistics Window Usage Statistics The Usage Statistics command opens a window (see Figure 11-9) which is used to create a report containing totals and some percentage calculations for: empty Tray positions ... -
Page 119: Figure 11-9 Usage Statistics Report Window
Chapter 11: The BD FocalPoint Slide Profiler Main Window Utilities Button Figure 11-9 Usage Statistics Report window Select the appropriate button for the desired time period. Time period choices are: —The default range is for the current date. No action Date Range is required to view the current day’s statistics. -
Page 120: System Integrity
Utilities Button Chapter 11: The BD FocalPoint Slide Profiler Main Window Click to display the statistics on the screen. Print Preview Figure 11-9 shows an example of usage statistics for the month of August. There is additional information at the bottom of the preview (including throughput or slides per day) screen for this report. -
Page 121: Figure 11-11 View Si Statistics Window
Chapter 11: The BD FocalPoint Slide Profiler Main Window Utilities Button To display the system integrity statistics: Choose to display the window shown Statistics System Integrity in Figure 11-11. Figure 11-11 View SI Statistics window Click the appropriate button for the desired time period. Time period choices are: —... -
Page 122: System Messages
Utilities Button Chapter 11: The BD FocalPoint Slide Profiler Main Window To print the report, choose the command; to return to the Print Statistic Integrity Reports window, choose Back Choose again to return to the Statistic Reports window; click Back on the question mark to view the Help screen. -
Page 123: Automatic Printing
Chapter 11: The BD FocalPoint Slide Profiler Main Window Automatic Printing System Message menu Figure 11-13 System Messsages menu Automatic To change the automatic printing capability: Printing Choose (see Figure 11-7). Utilities Automatic Printing Select a trigger to generate an automatic report printing (see Figure 11-14: •... -
Page 124: Backup
Backup Chapter 11: The BD FocalPoint Slide Profiler Main Window Figure 11-14 Automatic Printing window Backup (see Figure 11-7). Use the command to Choose Utilities Backup Backup perform a manual backup in case the automatic backup failed for some reason or as requested by BD service personnel. -
Page 125: Service Mode Disabled
Chapter 11: The BD FocalPoint Slide Profiler Main Window Service Mode Disabled be requested by BD Diagnostics Technical Support for troubleshooting purposes. This may also be done if the BD FocalPoint Slide Profiler has to be powered off or shut down for an extended period. For complete instructions on how to shutdown the system, see Shutting Down the System in Chapter 15. - Page 126 Service Mode Disabled Chapter 11: The BD FocalPoint Slide Profiler Main Window 11-16 Operator’s Manual—BD FocalPoint GS Imaging System...
-
Page 127: Chapter 12: Using Bd Focalpoint Slide Profiler Reports
Chapter 12: Using BD FocalPoint Slide Profiler Reports Understanding Report Printing Operations Chapter 12 Using BD FocalPoint Slide Profiler Reports This chapter describes printing operations, provides examples of each type of slide result report, and suggestions for choosing the most suitable options for each report. -
Page 128: Printing
Understanding Report Printing Operations Chapter 12: Using BD FocalPoint Slide Profiler Reports reprint. Refer to Reprinting in Chapter 12 for details on printing an existing print set. The creation of a print set occurs in the following manner: As slides are processed by the system, slide results are posted in the slide results area of the Main Window. -
Page 129: Print Summary Statistics
Chapter 12: Using BD FocalPoint Slide Profiler Reports Report Options When reprinting reports, entire print sets can be reprinted (sorted by rank, barcode, or date) or a barcode range or a date/time range can be reprinted. Reports reprinted using either the barcode range or date/ time range do not contain any ranking information because these options print results data that may span multiple print sets. -
Page 130: Report Types
Report Options Chapter 12: Using BD FocalPoint Slide Profiler Reports that allow the user to print slide result reports that best suit the workflow in your laboratory. Report Types There are six types of report available: Slide Results: Lists results for all slides by Rank, Bar code or Date. ... -
Page 131: Report Layout Options
Chapter 12: Using BD FocalPoint Slide Profiler Reports Report Options For best results, refer to the discussions on each report type and select options in accordance with the suggestions provided in the tables following each sample report. Report Layout The term layout refers to how the slide results are presented on a Options report. - Page 132 Report Options Chapter 12: Using BD FocalPoint Slide Profiler Reports Tray Layout Tray layouts are always sorted by date. This is true when printing or reprinting results. When sorted by date, they are printed in the order of processing allowing the slide results to match the order of the slides as they appear in the tray.
- Page 133 Chapter 12: Using BD FocalPoint Slide Profiler Reports Report Options • Each slide receives an individual rank from 1 to n, where a rank of 1 indicates a slide most likely to contain abnormality and n is the slide least likely to contain abnormality (n is the number of slides in a print set, minus the scant celluarity slides).
-
Page 134: Figure 12-2 Slide Result Report, Tray Layout
Report Options Chapter 12: Using BD FocalPoint Slide Profiler Reports Figure 12-2 Slide result report, tray layout 12-8 Operator’s Manual—BD FocalPoint GS Imaging System... - Page 135 Chapter 12: Using BD FocalPoint Slide Profiler Reports Report Options Slide Layout A report using the slide layout option lists the slide results in a tabular format sorted by rank, barcode number, or date. Figure 12-3 shows an example of a report using the slide layout option sorted by date. The sorting and layout selections chosen depends on how the reports in your laboratory are used.
-
Page 136: Figure 12-3 Slide Result Report (Slide Layout, Sorted By Date)
Report Options Chapter 12: Using BD FocalPoint Slide Profiler Reports Figure 12-3 Slide Result Report (slide layout, sorted by date) Ranking information: All successfully processed slides having an action of receive a group (or quintile) Review QC Review ranking, an individual ranking based on their scoring position within the print set, and their individual rank expressed as a percentage. -
Page 137: Sample Reports
Chapter 12: Using BD FocalPoint Slide Profiler Reports Sample Reports Chapter 10. The percentage value is the individual rank expressed as a percentage of n. Action required: Review/Process Review/QC Review/Rerun/ . (See Analyzing Slide Result Reports in Chapter 15). Empty The specimen results for each slide: •... -
Page 138: Slide Result Report
Sample Reports Chapter 12: Using BD FocalPoint Slide Profiler Reports Slide Result The Slide Result report in the Report Options and Reprint Options Report windows lists the slide results in a tabular format sorted by rank, barcode number, and date (see Figure 12-4). This report is useful for sorting slides by result category. -
Page 139: Review Report
Chapter 12: Using BD FocalPoint Slide Profiler Reports Sample Reports For additional information, refer to: Chapter 14, Setting BD FocalPoint Slide Profiler Report Options Chapter 15, Operating the BD FocalPoint Slide Profiler Review Report The Review report contains a listing of all slides that were designated for a selected print set (see Figure 12-5). -
Page 140: Qc Review Report
Sample Reports Chapter 12: Using BD FocalPoint Slide Profiler Reports Suggested Report Options This report can be sorted by Rank, Barcode or Date. This Review report contains ranking information for each successfully processed slide within the print set. As an aid for manual review, the slides are ranked for probable abnormality. -
Page 141: Figure 12-6 Example Of A Qc Review Report (Sorted By Rank)
Chapter 12: Using BD FocalPoint Slide Profiler Reports Sample Reports Figure 12-6 Example of a QC Review Report (Sorted By Rank) Suggested Report Options This report can be sorted by Rank, Barcode or Date. If the QC Review report is for previously unprinted results, it contains results for all QC review slides processed since the last print set was created. -
Page 142: Archive Report
Sample Reports Chapter 12: Using BD FocalPoint Slide Profiler Reports Use the QC Review report as a worksheet when doing QC rescreening of slides called within normal limits (WNL) by a cytotechnologist during manual screening. Refer to Chapter 19 for recommendations about performing QC rescreening. -
Page 143: Rerun Report
Chapter 12: Using BD FocalPoint Slide Profiler Reports Sample Reports Figure 12-8 Example of a Process Review Report Suggested Report Options This report can be sorted by Barcode or Date. If the Process Review report is for previously unprinted results, it will contain results for all slides processed since the last print set was created. -
Page 144: Figure 12-9 Example Of A Rerun Report
Sample Reports Chapter 12: Using BD FocalPoint Slide Profiler Reports The system experienced a power failure. Figure 12-9 Example of a Rerun Report Suggested Report Options This report can be sorted by Barcode or Date. These slides must be rerun when the instrument is functioning properly. -
Page 145: Chapter 13: Slides, Coverslips, And Slide Preparations
Chapter 13: Slides, Coverslips, and Slide Preparations Types of Slide Preparations Allowed Chapter 13 Slides, Coverslips, and Slide Prepara- tions For a Pap smear slide to be successfully processed on the BD FocalPoint Slide Profiler, it must meet certain physical requirements and standards. -
Page 146: Slide And Coverslip Standards
Slide and Coverslip Standards Chapter 13: Slides, Coverslips, and Slide Preparations 37.5 - 39.5 mm 11.0 - 13.0 Figure 13-1 Example of a BD SurePath slide Complete specifications for BD SurePath slides are detailed in the Slide Requirements Specification, P/N 803-00367-00. Slide and Coverslip Standards The following subsections present various standards and specifications for slide and coverslip optical properties, slide and... -
Page 147: Slide Optical Properties
Chapter 13: Slides, Coverslips, and Slide Preparations Slide and Coverslip Standards Label area >12.8 Microscope Slide 21.5 - 26.5 mm 28.7 - 61.3 mm (SurePath) 38.7 - 61.3 mm (Conventional) (BD SurePath) 74.7 - 76.5 mm (Conventional) Figure 13-2 Slide and coverslip dimensions Slide Optical The optical properties for slides processed on the BD FocalPoint Slide Properties... -
Page 148: Adhesive And Mounting Requirements
Slide and Coverslip Standards Chapter 13: Slides, Coverslips, and Slide Preparations Adhesive and Consider the following requirements when selecting an adhesive and Mounting mounting coverslips: Requirements The combined thickness of the slide, coverslip, and adhesives must be between 0.98 and 1.90 mm in the scanning area. The combined thickness of adhesive plus glass coverslip must be ... - Page 149 Chapter 13: Slides, Coverslips, and Slide Preparations Slide and Coverslip Standards Barcode labels must be durable so that they remain both human and machine readable under normal laboratory handling and application to microscope slides. Slides may be exposed to and immersed in the following solvents: Water ...
- Page 150 Slide and Coverslip Standards Chapter 13: Slides, Coverslips, and Slide Preparations 13-6 Operator’s Manual—BD FocalPoint GS Imaging System...
-
Page 151: Chapter 14: Setting Bd Focalpoint Slide Profiler Report Options Slide Report Types
Chapter 14: Setting BD FocalPoint Slide Profiler Report Options Slide Report Types Chapter 14 Setting BD FocalPoint Slide Profiler Report Options This chapter provides detailed instructions on how to select and define various slide result reports, which are automatically printed when the button is selected in the Instrument window. -
Page 152: Figure 14-1 Example Of Report Type Drop Down Menu
Slide Report Types Chapter 14: Setting BD FocalPoint Slide Profiler Report Options Figure 14-1 Example of Report Type drop down menu Six reports are available: — For a given print set, lists results for all slides. Slide Results (See Report Types in Chapter 12 for examples of these reports). —... -
Page 153: Sort Order And Layout Options
Chapter 14: Setting BD FocalPoint Slide Profiler Report Options Slide Report Types — For a given print set, lists all slides that Process Review Report were designated . (See Process Review Report Process Review in Chapter 12 for an example of this report.) —... -
Page 154: Defining A Report
Slide Report Types Chapter 14: Setting BD FocalPoint Slide Profiler Report Options Defining a Report Use the following procedure to define a report. Although most labs determine which reports best suit their needs and set their report types only once, Report Types can be changed any time a different report is required. -
Page 155: Selecting Qc Review Report Options
Chapter 14: Setting BD FocalPoint Slide Profiler Report Options Selecting QC Review Report Options automatically print when is selected from the Report Print window. To discard clicking , select the button—this returns Remove Cancel to the Reports window. Click on the button to view online Help help information. -
Page 156: Figure 14-2 Defining A Qc Report
Selecting QC Review Report Options Chapter 14: Setting BD FocalPoint Slide Profiler Report Options Figure 14-2 Defining a QC Report 14-6 Operator’s Manual—BD FocalPoint GS Imaging System... -
Page 157: Chapter 15: Operating The Bd Focalpoint Slide Profiler
Chapter 15: Operating the BD FocalPoint Slide Profiler Chapter 15 Operating the BD FocalPoint Slide Pro- filer This chapter provides detailed instructions on how to operate the BD FocalPoint Slide Profiler. In general, the material in this chapter is organized in the order of use. A typical daily operation includes the following tasks Figure 15-1 illustrates a typical laboratory workflow. -
Page 158: Figure 15-1 Typical Laboratory Workflow Using The Bd Focalpoint Slide Profiler
Chapter 15: Operating the BD FocalPoint Slide Profiler BD SurePath Slides Process Review, BD FocalPoint No FOVs, Slide Profiler or Rerun (see Note 1) Manual primary screening Slides classified as Review Slides classified as Review using Process Review or BD FocalPoint GS (see Note 1) Rerun Review Station... -
Page 159: General Warnings And Cautions
Chapter 15: Operating the BD FocalPoint Slide Profiler General Warnings and Cautions General Warnings and Cautions Observe the following general warnings and cautions while operating the BD FocalPoint Slide Profiler. Other, more specific warnings and cautions appear throughout this chapter and elsewhere in the manual. Warning Shock and fire potential from spilled liquids. -
Page 160: Cleaning Slides
Preparing Slides for Processing Chapter 15: Operating the BD FocalPoint Slide Profiler To apply a barcode label to a slide: If an underlying label, such as the accession or specimen number, needs to be preserved start with Step 1; otherwise, start with Step 2. -
Page 161: Loading Trays
Chapter 15: Operating the BD FocalPoint Slide Profiler Loading Trays Loading Trays This section describes how to insert slides into trays, how to use switch slides to indicate a change in the type of slide preparation, and how to remove the slides from a tray when processing is finished. Pay particular attention to these instructions because improperly loaded slides may crack or break during processing. -
Page 162: Changing Preparation Types With Switch Slides
Loading Trays Chapter 15: Operating the BD FocalPoint Slide Profiler if any of the slides are not seated properly. Reseat slides as necessary. Changing If processing more than one type of slide preparation on a single Preparation BD FocalPoint Slide Profiler, a special slide must be inserted in the tray to Types with separate each type of preparation. -
Page 163: Removing Slides From Trays
Chapter 15: Operating the BD FocalPoint Slide Profiler Handling Slide Trays Removing Slides To remove slides from a tray: from Trays Remove slides from trays by grasping the edges of the slide and gently pulling the slide from under the metal clips. Handling Slide Trays This section describes the procedures for loading, unloading, and ejecting trays. -
Page 164: Unloading Trays
Handling Slide Trays Chapter 15: Operating the BD FocalPoint Slide Profiler Close the hopper door securely to begin processing. Note that the instrument will not start processing until the hopper door is properly closed. To load trays while the instrument is processing: Additional trays may be added once processing has begun. -
Page 165: Monitoring The Instrument During Processing
Chapter 15: Operating the BD FocalPoint Slide Profiler Monitoring the Instrument During Processing The system displays a message asking to continue with this request. Click on the button. After several seconds the tray is ejected into the output hopper. Slides in a tray that complete processing prior to the manual eject are reported as qualified if SI passes after the tray is ejected. -
Page 166: Instrument Status Indicator
Monitoring the Instrument During Processing Chapter 15: Operating the BD FocalPoint Slide Profiler The Main Window also displays a scrollable list of slide processing information (see Figure 15-3). The slides on this list have been processed, but have not yet had results printed. The list displays the following information about each processed slide: Barcode number of the tray (Tray ID) ... -
Page 167: Printing Reports
Chapter 15: Operating the BD FocalPoint Slide Profiler Printing Reports Table 15-1 lists the basic status messages. Keep in mind that more than one of these messages may appear at one time in the status area. TATUS LERT CTION Hopper Empty (yellow) The input hopper is empty and the system is ready to process or is calibrating. -
Page 168: Creating A Print Set (Establishing Rank)
Printing Reports Chapter 15: Operating the BD FocalPoint Slide Profiler Creating a Print Each time reports are printed, a print set is created that groups all Set (Establishing slides processed since the last print set was created. It is important to Rank) remember that once reports are printed for a set of slides, the slide results for that print set are archived in the BD FocalPoint Slide Profiler... -
Page 169: Analyzing Slide Result Reports
Chapter 15: Operating the BD FocalPoint Slide Profiler Analyzing Slide Result Reports Operating Mode Processing Mode Report title Print set number (assigned at time of printing) Number of qualified slides and a summary of the results for the Figure 15-4 Print Summary Statistics Review the contents of this report as it summarizes the data for the print set. -
Page 170: Sorting Slides By Action Categories
Sorting Slides by Action Categories Chapter 15: Operating the BD FocalPoint Slide Profiler be corrected and the slide may be rerun. When a problem cannot be corrected, or if a slide cannot be successfully reprocessed by the system, the slide must be manually screened by a cytotechnologist. -
Page 171: When To Manually Screen Slides
Chapter 15: Operating the BD FocalPoint Slide Profiler When to Manually Screen Slides When to Manually Screen Slides All slides categorized as , must be reviewed at the Review BD FocalPoint GS workstation. The remaining slides must be manually screened by a cytotechnologist. Exceptions to this are any Process slides that were successfully reprocessed on the Review... -
Page 172: Figure 15-6 Slide Selection Options
Reprinting Reports Chapter 15: Operating the BD FocalPoint Slide Profiler Select the button in the Slide Selection field to view options Edit as shown in Figure 15-6. Figure 15-6 Slide Selection Options Select the appropriate button to choose a reprint option. Choices are: •... -
Page 173: Figure 15-7 Reprint Reports - By Barcode Range
Chapter 15: Operating the BD FocalPoint Slide Profiler Reprinting Reports Figure 15-7 Reprint Reports - by Barcode Range — Click the button in the field Edit Slide Barcode Range From: and type the first barcode number in the range. Tab to the field and type the optional last barcode number in the range to access available slide barcodes (Figure 15-8). -
Page 174: Figure 15-8 Reprint By Barcode Screen
Reprinting Reports Chapter 15: Operating the BD FocalPoint Slide Profiler Figure 15-8 Reprint by Barcode Screen 15-18 Operator’s Manual—BD FocalPoint GS Imaging System... -
Page 175: Figure 15-9 Reprint Reports - By Date/Time Range
Chapter 15: Operating the BD FocalPoint Slide Profiler Reprinting Reports Figure 15-9 Reprint Reports - by Date/Time Range — The system defaults to the current date. No Date/Time Range action is required to reprint the current day’s reports. To change the dates, click in the month field and either type the desired month manually or click on the arrow buttons to scroll to the month to reprint results. -
Page 176: Figure 15-10 Reprint Reports-By Print Set
Reprinting Reports Chapter 15: Operating the BD FocalPoint Slide Profiler Figure 15-10 Reprint Reports—by Print Set — Select the print set option to reprint results. Only Print Set one print set can be selected at a time. Click on a print set to select or deselect it. -
Page 177: Backing Up Your Data
Chapter 15: Operating the BD FocalPoint Slide Profiler Backing Up Your Data Slide information summary Figure 15-11 Print Summary for reprinted report Review the contents of this report as it summarizes the results data for the reprinted reports. Backing Up Your Data To protect your data, BD recommends establishing a routine backup procedure. -
Page 178: Type Of Usb Flash Drive To Use (For Usb Backup Systems)
Backing Up Your Data Chapter 15: Operating the BD FocalPoint Slide Profiler When the backup procedure is complete, the system displays a message in the information field of the Main Window indicating the success or failure of the backup. (See Figure 15-12.) If the backup was unsuccessful, perform the manual backup procedure described in Manual Daily Backup in Chapter 15. -
Page 179: Alternate Backup Media Daily
Chapter 15: Operating the BD FocalPoint Slide Profiler Backing Up Your Data place. If the backup media is missing, there will be a prompt to insert backup media, so that the aged data can be archived. If data is not backed up, the workstation will not remove old data. Failure to back up data over a period of time eventually exhausts the workstation's storage space. -
Page 180: Shutting Down The System
Shutting Down the System Chapter 15: Operating the BD FocalPoint Slide Profiler To perform a manual backup on a USB flash drive (for USB backup systems): Plug a USB flash drive into a USB port on the system console. Choose ... -
Page 181: Figure 15-14 Password Window
Chapter 15: Operating the BD FocalPoint Slide Profiler Shutting Down the System From the BD FocalPoint Slide Profiler Main Window, choose . A window similar to the one shown in Utilities Shutdown Figure 15-14 appears asking for a password. Type your password and click on Figure 15-14 Password window To cancel the shutdown request and return to the Main window,... -
Page 182: Restarting The System
Restarting the System Chapter 15: Operating the BD FocalPoint Slide Profiler Restarting the System Normally, the system is on all the time. Use this restart procedure after an unusual event, such as a power failure. If a power failure occurs, turn off the instrument and the workstation components as described in Shutting Down the System before performing this procedure. -
Page 183: Chapter 16: Bd Focalpoint Slide Profiler Maintenance
Chapter 16 BD FocalPoint Slide Profiler Mainte- nance The BD FocalPoint GS Imaging System requires occasional maintenance to ensure that all components remain in good working order. This chapter describes the required procedures and is organized in the following manner: Maintenance Schedule ... -
Page 184: Checking The Isolation Table
Checking the Isolation Table Chapter 16: BD FocalPoint Slide Profiler Maintenance NTERVAL OMPONENT ROCEDURE Isolation Table See Checking the Isolation AILY Table Slide Trays See Cleaning the Trays EEKLY Air Filter See Inspecting the Air Filter Backup Media See Changing the Backup ONTHLY Media ONTHLY... -
Page 185: Cleaning The Trays
Chapter 16: BD FocalPoint Slide Profiler Maintenance Cleaning the Trays Cleaning the Trays When not in use, store the slide trays in a covered bin to keep them clean and to reduce dust accumulation. To prevent the trays from jamming and to prevent the internal calibration plate from becoming excessively dirty, clean all trays weekly. - Page 186 Cleaning the Calibration Plate Chapter 16: BD FocalPoint Slide Profiler Maintenance Do not perform the following steps unless trained to clean the calibration plate. The cleaning procedure should take about 15 minutes. Use the materials supplied in the calibration plate cleaning kit, which was provided with calibration plate cleaning training.
-
Page 187: Inspecting The Air Filter
Chapter 16: BD FocalPoint Slide Profiler Maintenance Inspecting the Air Filter Note on the Maintenance Schedule (see Appendix E) that the calibration plate was cleaned. Inspecting the Air Filter Inspect the air filter assembly weekly to ensure that the instrument is protected from excessive dust. -
Page 188: Cleaning The Monitor
Cleaning the Monitor Chapter 16: BD FocalPoint Slide Profiler Maintenance Cleaning the Monitor Clean the monitor as necessary to remove fingerprints, dust, or any other debris. The following materials are required: Lint-free cloth Glass cleaning solution (DO NOT use an alcohol based cleaner) ... -
Page 189: Printer Maintenance
Chapter 16: BD FocalPoint Slide Profiler Maintenance Printer Maintenance Warning Shock and fire potential when improperly grounded. Never use a two-prong plug adapter to connect primary power to the system. Use of a two-prong adapter disconnects the utility ground, creating a potential shock hazard. Always connect the system power cord directly to an appropriate receptacle with a functional ground. -
Page 190: Changing The Backup Media
Changing the Backup Media Chapter 16: BD FocalPoint Slide Profiler Maintenance To clean an optical mouse: If using an optical mouse, it is only necessary to periodically clean the reflective mouse pad. Changing the Backup Media The following materials are required for USB backup systems: USB flash drive USB 2.0 4 GB capacity (or greater) -
Page 191: Chapter 17: Bd Focalpoint Slide Profiler Troubleshooting
Chapter 17: BD FocalPoint Slide Profiler Troubleshooting Chapter 17 BD FocalPoint Slide Profiler Troubleshooting This chapter contains a troubleshooting guide and procedures that may help solve problems if difficulties are encountered while operating the BD FocalPoint Slide Profiler. Refer to the following sections: ... -
Page 192: Troubleshooting Guide
Troubleshooting Guide Chapter 17: BD FocalPoint Slide Profiler Troubleshooting Troubleshooting Guide YMPTOM OSSIBLE AUSE OLUTION The BD FocalPoint Slide Software error. Contact BD Diagnostics Technical Support. Profiler Main window does not appear after a restart. Clicking the mouse has no The workstation software is frozen. -
Page 193: Introduction
Chapter 18: Processing Conventional Slides on the BD FocalPoint Slide Profiler Introduction Chapter 18 Processing Conventional Slides on the BD FocalPoint Slide Profiler Introduction This chapter details the specifics for processing and reporting conventional slides on the BD FocalPoint Slide Profiler. This chapter also provides information on slide and coverslip specifications and adhesive specifications for conventionally prepared Pap smear slides that can be processed on the BD FocalPoint Slide... -
Page 194: Slide And Coverslip Standards
Types of Slide Preparations Allowed Chapter 18: Processing Conventional Slides on the BD FocalPoint Slide Profiler Label area >12.8 Microscope Slide 21.5 - 26.5 mm 38.7 - 61.3 mm (Conventional) 74.7 - 76.5 mm Figure 18-1 Slide and coverslip dimensions Slide and The following subsections present various standards and Coverslip... -
Page 195: Staining And Fixative Requirements
Chapter 18: Processing Conventional Slides on the BD FocalPoint Slide Profiler Operating the BD FocalPoint Slide Staining and The slides must be stained with the Papanicoloau method. Before Fixative staining conventional Pap Smears, all fixatives (a combination of Requirements alcohol with or without a wax-like substance called CarboWax) must be removed by immersing in 95% ethanol for a minimum of 10 minutes. -
Page 196: Changing Preparation Types With Switch Slides
Operating the BD FocalPoint Slide Profiler Chapter 18: Processing Conventional Slides on the BD FocalPoint Slide Changing If processing more than one type of slide preparation on a single Preparation BD FocalPoint Slide Profiler, a special slide must be inserted in the Types with tray to separate each type of preparation. -
Page 197: Processed Slides Field In Main Window
Chapter 18: Processing Conventional Slides on the BD FocalPoint Slide Profiler Operating the BD FocalPoint Slide Processed Slides The Processed Slides field in the BD FocalPoint Slide Profiler main Field in Main window is similar to the one shown in Figure 18-4. Window Instrument name Number of... -
Page 198: Printing Reports
Operating the BD FocalPoint Slide Profiler Chapter 18: Processing Conventional Slides on the BD FocalPoint Slide • Empty Printing Reports Use the printed slide reports to sort slides by results category. Slides that receive a result of must be reviewed at the BD FocalPoint Review GS Review Station by a cytotechnologist. -
Page 199: Analyzing Slide Result Reports
Chapter 18: Processing Conventional Slides on the BD FocalPoint Slide Profiler Analyzing Slide Result Reports types are listed and the number of unreported qualified slides for each are shown. When the reports from the printer are collected, a Print Summary Statistics sheet accompanies each set of reports. -
Page 200: Sorting Slides By Action Categories
Sorting Slides by Action Categories Chapter 18: Processing Conventional Slides on the BD FocalPoint Slide Profiler instrument analysis. These slides must be reviewed by a cytotechnologist. — These slides have the highest likelihood of No Further Review being normal and can be archived by the laboratory as being NILM. —... -
Page 201: When To Manually Screen Slides
Chapter 18: Processing Conventional Slides on the BD FocalPoint Slide Profiler When to Manually Screen Slides and groups them by tray. See Slide Result Report in Chapter 12 for an example of this report. For details on using both types of reports, see Sample Reports in Chapter 12. - Page 202 Selecting Slides for QC Rescreening Chapter 18: Processing Conventional Slides on the BD FocalPoint Slide Profiler Review report (sorted by rank) can be reprinted for the desired print set. Follow the instructions in Selecting QC Review Report Options in Chapter 14 and in Chapter 12. The QC Review report contains a ranked list of all slides selected by the System, followed by a set of the next QC Review...
-
Page 203: Monitoring The Slide Rejection Rate
Chapter 18: Processing Conventional Slides on the BD FocalPoint Slide Profiler Monitoring the Slide Rejection Rate by a cytotechnologist before being included in a QC review population. From the Process Review report, following normal laboratory practices, randomly select a percentage of the slides for QC review. -
Page 204: Figure 18-6 Usage Statistics Options
Monitoring the Slide Rejection Rate Chapter 18: Processing Conventional Slides on the BD FocalPoint Slide Profiler Figure 18-6 Usage Statistics options Click on the button. Click on the buttons and select the Month Edit appropriate month and year. Click to display the statistics on the screen. Figure 18-7 Preview shows an example of usage statistics for the month of January. -
Page 205: Report Options
Chapter 18: Processing Conventional Slides on the BD FocalPoint Slide Profiler Report Options Note: Slide data is available to be displayed after the slides are printed and assigned to a print set, not when they complete processing on the instrument. Additionally, the data is presented on a 24 hour basis, not per print set. -
Page 206: Report Sorting Options
Report Options Chapter 18: Processing Conventional Slides on the BD FocalPoint Slide Profiler Archive Report: Lists all slides that were designated to No Further (See Archive Report in Chapter 12 for an example of this Review report). Process Review Report: Lists all slides that were designated ... - Page 207 Chapter 18: Processing Conventional Slides on the BD FocalPoint Slide Profiler Report Options Each layout option is described in the following subsections. Keep in mind that not all of the layout options are suitable for each type of report. Tray Layout Tray layouts are always sorted by date.
- Page 208 Report Options Chapter 18: Processing Conventional Slides on the BD FocalPoint Slide Profiler contain abnormalities, and so on, with the 5th quintile containing the 20% of the slides least likely to contain abnormalities. • Each slide receives an individual rank from 1 to n, where a rank of 1 indicates a slide most likely to contain abnormality and n is the slide least likely to contain abnormality (n is the number of slides in a print set, minus the scant cellularity slides).
-
Page 209: Figure 18-8 Slide Result Report, Tray Layout
Chapter 18: Processing Conventional Slides on the BD FocalPoint Slide Profiler Report Options Figure 18-8 Slide result report, tray layout Slide Layout A report using the slide layout option lists the slide results in a tabular format sorted by rank, barcode number, or date. Figure 18-9 shows an example of a report using the slide layout option sorted by date. - Page 210 Report Options Chapter 18: Processing Conventional Slides on the BD FocalPoint Slide Profiler If printing reports for the first time Reports that use a slide layout can be sorted by barcode, rank, or date (except for certain types of reports that do not contain ranking information).
-
Page 211: Figure 18-9 Slide Result Report (Slide Layout, Sorted By Barcode)
Chapter 18: Processing Conventional Slides on the BD FocalPoint Slide Profiler Report Options Figure 18-9 Slide Result Report (slide layout, sorted by barcode) Ranking information: All successfully processed slides having an action of receive a group (or quintile) Review QC Review ranking, an individual ranking based on their scoring position within the print set, and their individual rank expressed as a percentage. - Page 212 Report Options Chapter 18: Processing Conventional Slides on the BD FocalPoint Slide Profiler The percentage value is the individual rank expressed as a percentage of n. Action required: Review/Process Review/QC Review/Rerun/ . (See Analyzing Slide Result Reports in Chapter 15). Empty The specimen results for each slide: Specimen adequacy...
-
Page 213: Chapter 19: Quality Assurance On The Bd Focalpoint Slide Profiler
Chapter 19: Quality Assurance on the BD FocalPoint Slide Profiler Chapter 19 Quality Assurance on the BD FocalPoint Slide Profiler U. S. Clinical laboratories that report cytology test results must comply with all quality control (QC) requirements of the Clinical Laboratory Improvement Amendments of 1988 (CLIA ‘88). -
Page 214: The Quality Assurance Program
The Quality Assurance Program Chapter 19: Quality Assurance on the BD FocalPoint Slide Profiler automated System Integrity tests and reports that document any system failures. The Quality Assurance Program The Quality Assurance Program ensures continuous optimum performance of the BD FocalPoint Slide Profiler in your laboratory, and aids compliance with the applicable quality control requirements of CLIA ‘88. -
Page 215: Installation
Chapter 19: Quality Assurance on the BD FocalPoint Slide Profiler The Quality Assurance Program Pre-Installation Check power, phone lines, and other Inspection of Facility physical requirements Modify Facility, If Required Figure 19-2 Pre-installation phase activities Installation When the pre-installation phase is completed, BD Diagnostics ships your BD FocalPoint Slide Profiler. - Page 216 The Quality Assurance Program Chapter 19: Quality Assurance on the BD FocalPoint Slide Profiler example, BD SurePath w/plastic coverslip) that your laboratory processes. If it is determined that elements of your slide preparation process are not compatible with the BD FocalPoint Slide Profiler, the BD Diagnostics service representative will recommend changes to your process to ensure full compatibility.
-
Page 217: Figure 19-4 Laboratory Process Compatibility Assessment Procedures
Chapter 19: Quality Assurance on the BD FocalPoint Slide Profiler The Quality Assurance Program Select and Process Pap Smears from Laboratory Specimen and FocalPoint Slide Slide Staining Algorithm Process Adjustment Preparation Quality Test Compatibility Recommendation Quality Tests Test Test Results Integration Process Acceptable (Set Operating Threshold Values) Figure 19-4 Laboratory Process Compatibility Assessment procedures... -
Page 218: Post Installation Phase
Selecting Slides for QC Rescreening Chapter 19: Quality Assurance on the BD FocalPoint Slide Profiler Post Installation Once your laboratory begins routine use of the BD FocalPoint Slide Phase Profiler, you enter the post-installation phase. During this phase you must periodically monitor the performance of the System and the slide preparation processes that can affect its performance. - Page 219 Chapter 19: Quality Assurance on the BD FocalPoint Slide Profiler Selecting Slides for QC Rescreening The following procedure describes how to select slides for a 15% QC rescreening. 1. Obtain the QC Review report (sorted by rank) and Print — This report should have been printed at the same Summary time the other slide result reports were printed.
-
Page 220: Monitoring The Slide Rejection Rate
Monitoring the Slide Rejection Rate Chapter 19: Quality Assurance on the BD FocalPoint Slide Profiler 5. Determine the number of slides that need QC rescreening — If you have not from the Process Review population already done so, print a Process Review report for the selected print set. -
Page 221: Figure 19-5 Usage Statistics Options
Chapter 19: Quality Assurance on the BD FocalPoint Slide Profiler Monitoring the Slide Rejection Rate To check your slide reject rate: Choose to display the Utilities Statistics Usage Statistics Statistics Reports window as shown in Figure 19-5. Figure 19-5 Usage Statistics options Click on the button. -
Page 222: Figure 19-6 Usage Statistics
Monitoring the Slide Rejection Rate Chapter 19: Quality Assurance on the BD FocalPoint Slide Profiler Figure 19-6 Usage Statistics Use the scroll bar, to scroll down and view that statistics for each operating mode. Note: Slide data is available to be displayed after the slides are printed and assigned to a print set, not when they complete processing on the instrument. -
Page 223: Training Records
Chapter 19: Quality Assurance on the BD FocalPoint Slide Profiler Training Records Training Records Training will be conducted by BD Diagnostics. Copies of training documentation for all staff will be made available to the laboratory for their files. System Performance Verification This section describes the BD FocalPoint Slide Profiler automated quality control monitoring system, System Integrity (SI), and the procedures necessary to print reports containing the results of the SI... -
Page 224: Tracking Si Results
System Performance Verification Chapter 19: Quality Assurance on the BD FocalPoint Slide Profiler failures are always recorded in the system log. Use the System Message command to print a list of any failures recorded in the system log. The procedure for printing the system messages is described under the heading System Messages in Chapter 19. -
Page 225: System Messages
Chapter 19: Quality Assurance on the BD FocalPoint Slide Profiler System Performance Verification Figure 19-8 System Integrity Statistics To print the report, choose the command; to return to the Print Statistic Reports window, choose Close Choose to close the Statistic Reports window; choose Close Help to view the Help screen. -
Page 226: Figure 19-9 Statistics Window
System Performance Verification Chapter 19: Quality Assurance on the BD FocalPoint Slide Profiler Figure 19-9 Statistics window Choose . A list of system messages similar to System Messages the one shown in Figure 19-10 appears. The system automatically scrolls to the most recent messages, at the bottom of the message list. -
Page 227: Figure 19-10 System Messages
Chapter 19: Quality Assurance on the BD FocalPoint Slide Profiler System Performance Verification Figure 19-10 System Messages Operator’s Manual—BD FocalPoint GS Imaging System 19-15... - Page 228 System Performance Verification Chapter 19: Quality Assurance on the BD FocalPoint Slide Profiler 19-16 Operator’s Manual—BD FocalPoint GS Imaging System...
-
Page 229: Appendix A: Bd Focalpoint Slide Profiler Installation Checklist
Appendix A BD FocalPoint Slide Profiler Installation Checklist When the BD FocalPoint Slide Profiler is installed in your laboratory, ensure that all the necessary components are present. The BD FocalPoint system consists of the following components: BD FocalPoint Instrument Instrument or Slide trays ... -
Page 230: Additional Items Supplied At Startup
Appendix A Installation Checklist Additional Items Printer paper (starter package) Supplied at Head cleaning tape (1) Startup One roll of slide barcode labels provided per site Line protector and/or power supply (optional, at additional cost) Switch Slides (as appropriate for laboratory) ... -
Page 231: Appendix B: Bd Focalpoint Slide Profiler Processing Messages
Appendix B BD FocalPoint Slide Profiler Processing Messages When slides are rejected because the scanning process did not complete, or because the slide or specimen was unsuitable, a reason is printed on the report. Refer to this appendix for a description of these reasons. - Page 232 Slide Not Scanned Appendix B Error Messages skewed, or not properly applied, or for some other reason the corners are not machine detectable. Check the coverslip placement and ensure that the coverslip is clean and within limits. Repair and rerun. If the slide cannot be successfully rerun, it must be screened by a cytotechnologist.
- Page 233 Appendix B Error Messages Slide Not Scanned The high-power scan did not complete properly. If the slide cannot be successfully rerun, it must be screened by a cytotechnologist. Slide preparation type mismatch The slide type (conventional or BD SurePath) for the current slide does not match the expected slide preparation type.
-
Page 234: Scant Cellularity
Scant Cellularity Appendix B Error Messages rerun. If the slide cannot be successfully rerun, it must be screened by a cytotechnologist. Unable to focus, coverslip tilted The detected coverslip was rotated more than the amount permitted. Check the coverslip placement and ensure that the coverslip is clean and within limits. -
Page 235: Staining Not Within Limits
Appendix B Error Messages Staining Not Within Limits Scant specimen or upside down An insufficient amount of cellular material was found for focusing on the center of the slide, or the slide has been placed upside down in the tray, with the specimen on the side facing the floor and the barcode label on the top. -
Page 236: Image Quality Not Within Limits
Image Quality Not Within Limits Appendix B Error Messages Nuc. Stain - too light or dark The average stain intensity for the nuclei on this slide is either too light or too dark for reliable BD FocalPoint analysis. Review this slide manually. -
Page 237: Other Errors
Appendix B Error Messages Other Errors Other Errors The following additional process status messages may be reported: Slide not detected The system did not locate a slide in this position on the tray. Inspect the tray position and rerun the slide if necessary. If the slide cannot be successfully rerun, it must be screened by a cytotechnologist. - Page 238 Other Errors Appendix B Error Messages Appendix B-8 Operator’s Manual—BD FocalPoint GS Imaging System...
-
Page 239: Appendix C Warnings And Cautions
Warnings and Cautions The following table lists the warning and caution labels that appear on the BD FocalPoint GS Imaging System. The table includes the text of each label, the general location of the label on the instrument, and a description of the effect if the warning or caution is not adhered to. - Page 240 Appendix C Warnings and Cautions The following table lists the Cautions and Warnings found in this manual. OTICE OCATED ON OUND ON OTICE Warning Page 3-3 BD FocalPoint GS Make sure that the clip grips the slide edge securely. An unsecured Review Station slide could fall into a slotted stage opening and be damaged.
- Page 241 Slide Profiler order shown below: Caution Page 16-4 BD FocalPoint The BD FocalPoint GS Imaging System contains no user-replaceable Slide Profiler or serviceable parts. When cleaning the calibration plate, be careful not to disturb any internal components. Warning Page 16-4 BD FocalPoint Shock potential when cleaning with power applied.
- Page 242 Appendix C Warnings and Cautions Appendix C-4 Operator’s Manual—BD FocalPoint GS Imaging System...
-
Page 243: Appendix D: Bd Focalpoint Slide Profiler System Integrity
Appendix D BD FocalPoint Slide Profiler System Integrity BD Diagnostics has built into its BD FocalPoint GS Imaging System a comprehensive, fully automated quality assurance technology called System Integrity (SI). SI validates slide results produced by the BD FocalPoint GS Imaging System by regular monitoring of the system operating parameters. - Page 244 Appendix D System Integrity Pass-recalibrate SI tests passed; a calibration was run to avoid future test failures. Reject previous tray A test failed that requires the previous tray’s results to be rejected. However, calibration successfully brought the system back within specifications. Error An error occurred that requires the previous tray’s results to be invalidated.
-
Page 245: Appendix E: Bd Focalpoint Slide Profiler Maintenance Schedule
Appendix E BD FocalPoint Slide Profiler Maintenance Schedule The following maintenance schedule is provided for your convenience. Make a photocopy of the schedule for each month and use it to keep a record of your scheduled maintenance tasks. Initial each task as it is completed. - Page 246 Appendix E-2 Operator’s Manual—BD FocalPoint GS Imaging System...
-
Page 247: Appendix F: System Integrity (Si) Results Log
Appendix F System Integrity (SI) Results Log Record SI results data on a daily basis. Refer to System Performance Verification in Chapter 19 for instructions on how to use this log. SI R OTAL ECALIBRATE EJECT RROR NITIALS Operator’s Manual—BD FocalPoint GS Imaging System Appendix F-1... - Page 248 Appendix F SI Results Log Appendix F-2 Operator’s Manual—BD FocalPoint GS Imaging System...
-
Page 249: Appendix G: Bd Focalpoint Slide Profiler Slide Rejection Rate Log
Appendix G BD FocalPoint Slide Profiler Slide Rejection Rate Log Monitor the Slide Rejection Rate on a monthly basis. Access the View Usage Statistics utility from the Utility Menu. Display the appropriate monthly statistics report. Refer to Selecting Slides for QC Rescreening in Chapter 19 for instructions on using this log. - Page 250 Appendix G Slide Rejection Rate Log Appendix G-2 Operator’s Manual—BD FocalPoint GS Imaging System...
-
Page 251: Appendix H: Bd Focalpoint Gs Review Station Custom Settings
Appendix H BD FocalPoint GS Review Station Custom Settings The BD FocalPoint GS Review Station settings should not need to be changed from the configuration set during installation. However, if these settings do need to be changed, this chapter details how to access the options that can be controlled. -
Page 252: Bd Focalpoint Gs Settings
BD FocalPoint GS Settings Appendix H Custom Settings BD FocalPoint GS Settings The BD FocalPoint GS Settings dialog box has four tabs, General, Microscope, Barcode and Screening. Each tab is discussed separately. To access From the Start menu, select Programs FocalPoint ™... -
Page 253: Using The Microscope Tab
Appendix H Custom Settings BD FocalPoint GS Settings Specify the database connection Under , use the button to specify the Browse Database Connection location of your slide data database source. Your network administrator should be able to provide this information. Specify camera type Under , select... -
Page 254: Figure H-2 Settings, Microscope Tab
BD FocalPoint GS Settings Appendix H Custom Settings Figure H-2 Settings, Microscope tab Specify eyepiece settings Under , specify the magnification and diameter of your Eyepieces microscope eyepieces. These settings enable the BD FocalPoint GS Review Station to correctly represent the field of view for features such as Tracking and HotDot. -
Page 255: Using The Barcode Tab
Appendix H Custom Settings BD FocalPoint GS Settings Figure H-3 Configure Objective dialog box In the box type in the power of the objective. Magnification By default, the displays the magnification Objective Name number that is typed-in, appended with the letter x. This description can be changed as needed. -
Page 256: Using The Screening Tab
BD FocalPoint GS Settings Appendix H Custom Settings Figure H-4 Settings, Barcode tab Specify barcode reader format Under , specify the format of the barcode reader signal to be Format used. Choose to use the Interleaved, 2-of-5 (8- Slide Profiler Reserved ... -
Page 257: Figure H-5 Settings, Screening Tab
Appendix H Custom Settings BD FocalPoint GS Settings Figure H-5 Settings, Screening tab Specifying the slide type The option selected here determines the appearance of the slide map on the main BD FocalPoint GS Review Station display. Four types of slides can be selected. -
Page 258: Reports Settings
Reports settings Appendix H Custom Settings Figure H-7 Left- and right-handed Main Window Reports settings In addition to the BD FocalPoint GS Review Station custom settings already discussed, there is one more control that governs the performance of the BD FocalPoint GS Review Station.This control is accessed via the FocalPoint GS - Reports utility. -
Page 259: Figure H-9 Report Setup Dialog Box
Appendix H Custom Settings Reports settings Click the Report Setup button. The Report Setup dialog box is displayed. Figure H-9 Report Setup dialog box Click the Institution Name tab. Figure H-10 Institution Name tab In the field provided, enter the name of your hospital or lab. This name will then be displayed in the upper-left corner on all BD FocalPoint GS Review Station reports. - Page 260 Reports settings Appendix H Custom Settings Appendix H-10 Operator’s Manual—BD FocalPoint GS Imaging System...
-
Page 261: Appendix I System Requirements
Appendix I System Requirements BD FocalPoint The BD FocalPoint GS Review Station hardware requires a minimum GS Review 15 Amp, 50/60 Hz circuit with proper grounding, and must meet local Station requirements. Electrical Specifications PERATING OLTAGE VOLTS VOLTS 50/60 Hz 50/60 Hz PERATING REQUENCY... -
Page 262: Bd Focalpoint Slide Profiler Specifications
BD FocalPoint Slide Profiler Specifications Appendix I System Requirements BD FocalPoint Slide Profiler Specifications L × W × H IMENSIONS 44 in. × 28.5 in. × 51.25 in. (112 cm × 72 cm ×130 cm) (height is with hood closed) 44 in. -
Page 263: Bd Focalpoint Slide Profiler Workstation
Appendix I System Requirements BD FocalPoint Slide Profiler Specifications BD FocalPoint Slide Profiler Workstation 17 inch LCD color display ONITOR Processor W × H × D IMENSIONS 5.27 in. × 1.70" in. × 3.71" in. (133.8 mm x 43.1 mm x 94.2 mm) Monitor (w/stand) W x H x D 14.92"... - Page 264 BD FocalPoint Slide Profiler Specifications Appendix I System Requirements Appendix I-4 Operator’s Manual—BD FocalPoint GS Imaging System...
-
Page 265: Appendix J: Bd Focalpoint Gs Review Station Abbreviations
Appendix J BD FocalPoint GS Review Station Abbreviations BBREVIATION EFINITION Awaiting Further Review Atypical squamous cells, cannot exclude HSIL ASC-H Atypical squamous cells, undetermined ASC-US significance Cancer, Not Otherwise Specified Cancer NOS Field of View Guided Screening High grade squamous intraepithelial lesion HSIL encompassing moderate and severe dysplasia/CI5/CIN2/CIN3... - Page 266 Appendix J Abbreviations-2 Operator’s Manual—BD FocalPoint GS Imaging System...
-
Page 267: Maintenance & Troubleshooting
Appendix K BD FocalPoint GS Review Station Maintenance & Troubleshooting Maintenance procedures Controller/Stage Clean the stage and controller with a clean, dry cloth. Microscope Refer to the manufacturer’s manual for cleaning instructions. Note: Disassembling some components of the microscope during routine microscope maintenance can necessitate a service call. -
Page 268: Figure K-1 Slide Holder Alignment, Upper-Right Slide Corner
Maintenance procedures Appendix K Maintenance and Troubleshooting Figure K-1 Slide holder alignment, upper-right slide corner Manually adjust the slide holder until the upper right corner of the slide is centered when looking through the microscope oculars. If your slide holder retaining screws are thumbscrews, skip to the next step. -
Page 269: Monitor
Appendix K Maintenance and Troubleshooting Troubleshooting Guide Repeat steps 4 through 11 until the slide holder edges remain centered beneath the oculars as the stage is moved back and forth along the slide edges. Bulb replacement Refer to the microscope manufacturer’s manual for bulb replacement instructions. - Page 270 Troubleshooting Guide Appendix K Maintenance and Troubleshooting YMPTOM OSSIBLE AUSE OLUTION If none of the above apply and "no image available" appears instead of the image then remap the network drive. Also ensure the user ID and password for the RS are on the server Slide cannot be found in the Has the review station been mapped to the Contact BD Diagnostics Technical Support for...
-
Page 271: Appendix L International Contacts
Voice: (81) 3 54138181 • Fax (81) 3 54138144 Rua Alexandre Dumas 1976 Australian Sponsor: 04717-004 Sao Paulo, S.P. Brazil Becton Dickinson Pty Ltd. Voice: (55) 11 5459833 • Fax: (55) 11 2478644 4 Research Park Drive Macquarie University Research Park North Ryde, NSW 2113 Australia Operator’s Manual—BD FocalPoint... - Page 272 Appendix L International Contacts Appendix D-2 Operator’s Manual—BD FocalPoint GS Imaging System...
-
Page 273: Bd Focalpoint Slide Profiler Quick Reference Guide
If necessary, insert a USB drive . Choose . The File Backup Procedure BD FocalPoint GS Imaging System begins the backup. When complete, a message window appears indicating success or failure of the backup. Shut Down Remove all trays from the input hopper. Procedure If the system is currently idle, go to Step 6. -
Page 274: Start-Up Procedure
BD FocalPoint GS Imaging System Quick Reference Guide Click on the button to continue with the shutdown process. To cancel the shutdown request and return to the Main Window, click on the button. After a slight pause, the following prompt is displayed: At this point the system components can be powered down as described in the following steps. -
Page 275: Symbol Glossary
Symbol Glossary BD FocalPoint GS Imaging System Symbol Glossary Manufacturer / Производител / Výrobce / Fabrikant / Hersteller / Positive control / Положителен контрол / Pozitivní kontrola / Positiv Κατασκευαστής / Fabricante /Tootja / Fabricant / Proizvođać / Gyártó / kontrol / Positive Kontrolle / Θετικός... - Page 276 BD FocalPoint GS Imaging System Symbol Glossary In Vitro Diagnostic Medical Device / Медицински уред за диагностика Lower limit of temperature / Долен лимит на температурата / Dolní ин витро / Lékařské zařízení určené pro diagnostiku in vitro / In vitro hranice teploty / Nedre temperaturgrænse / Temperaturuntergrenze / diagnostisk medicinsk anordning/Medizinisches In-vitro-Diagnostikum / Κατώτερο...
- Page 277 Symbol Glossary BD FocalPoint GS Imaging System Keep dry / Пазете сухо / Skladujte v suchém prostředí / Opbevares Patient ID number / ИД номер на пациента / ID pacienta / Patientens tørt / Trocklagern / Φυλάξτε το στεγνό / Mantener seco / Hoida ID-nummer / Patienten-ID / Αριθμός...
- Page 278 BD FocalPoint GS Imaging System Symbol Glossary Symbol Glossary-4 Operator’s Manual—BD FocalPoint GS Imaging System...
-
Page 279: Index
H-5 barcode labels database connection H-2 applying 15-3 default requirements 15-3 screening objective H-4 BD FocalPoint GS Imaging System defining options for a slide results report component maintenance 16-1 14-3 BD FocalPoint Slide Profiler delete computer illustrated 10-2... - Page 280 BD FocalPoint GS Imaging System Index electromagnetic fields 15-3, C-2 slide processing information 11-4 Empty position slide result uses 11-5 rerunning slides for 15-14, 18-8 instrument status Enhanced QC Review 6-1 messages, list of 15-11 eyepieces H-4 viewing 15-10 Interleaved, 2-of-5 H-5 isolation system File menu maintenance (gas system only) 16-2...
- Page 281 Index BD FocalPoint GS Imaging System most significant dot 5-6 sorting by category 15-14, 18-8 mouse processing status messages, list of 15-11 cleaning 16-7 operations 11-2 QA Program pointers 11-2 facilities requirements 19-2 MSD 5-6 installation phase 19-3 post-installation phase 19-6 new slide 4-5 pre-installation phase 19-2 Nikon E400 microscope I-1...
- Page 282 Index BD FocalPoint GS Imaging System defining 14-3 select examples of 12-10 archive criteria 7-9 layout options 12-4, 14-3, 18-13 archive directory 7-15 printing 15-11, 15-12 multiple slides 5-9 new slide 4-5 errors 15-13 printing for the first time 12-8, 18-17 report type 8-2 reprinting 15-15 slide 3-5...
- Page 283 Index BD FocalPoint GS Imaging System slide specifications 13-2 system log 19-11 slide status 3-15, 5-8 system messages, viewing 19-13 slide trays cleaning 16-3 tapes ejecting 15-8 data backup 15-21 ejecting during a power outage 15-9 task icons loading and unloading 15-7 types 11-5 loading when instrument is idle 15-7 toolbar...
- Page 284 Index BD FocalPoint GS Imaging System Index - vi Operator’s Manual—BD FocalPoint GS Imaging System...
Need help?
Do you have a question about the BD FocalPoint GS Imaging and is the answer not in the manual?
Questions and answers