Advertisement
Quick Links
Read all instructions before
assembling and using product.
IMPORTANT - Keep instructions
for future use.
Lisez toutes les instructions avant avant
d'assembler et d'utiliser le produit.
IMPORTANT - Conservez les instructions pour
pour une utilisation ultérieure.
by
Rose
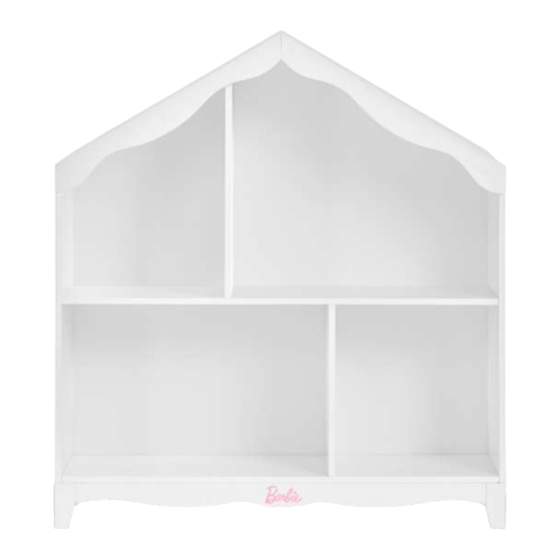
HUTCH / Bookcase
OWNER'S MANUAL
MANUEL DU PROPRIÉTAIRE
Lea todas las instrucciones antes de
montar y utilizar el producto.
IMPORTANTE - Guarde las instrucciones
para uso futuro.
MANUAL DEL USUARIO
by
Scan the QR code to
register your product
Scannez le code QR pour
enregistrer votre produit
Escanee el código QR para
registrar su producto
0623R1-SKU B2004
Advertisement

Subscribe to Our Youtube Channel
Related Manuals for Evolur Barbie Rose HUTCH / Bookcase


Summary of Contents for Evolur Barbie Rose HUTCH / Bookcase
- Page 1 Rose HUTCH / Bookcase OWNER’S MANUAL MANUEL DU PROPRIÉTAIRE MANUAL DEL USUARIO Read all instructions before assembling and using product. IMPORTANT - Keep instructions for future use. Scan the QR code to register your product Lisez toutes les instructions avant avant Lea todas las instrucciones antes de Scannez le code QR pour d'assembler et d'utiliser le produit.
- Page 2 Evolur Collection brings the world of dreams & fantasies alive. The Barbie by Evolur collection is crafted to offer the urban, millennial parent the ultimate growing nursery furniture range for their toddlers! A playful and feminine range, each piece is unique & luxurious, offering a...
- Page 3 Barbie by Evolur Collection donne vie au monde des rêves et des fantasmes. La collection Barbie by Evolur est conçue pour offrir aux parents urbains et millénaires la gamme de meubles de pépinière ultime pour leurs tout-petits ! Une gamme ludique et féminine, chaque pièce est unique et...
- Page 4 Evolur Collection da vida al mundo de los sueños y fantasías. ¡La colección Barbie by Evolur está diseñada para ofrecer a los padres milenarios urbanos la mejor gama de muebles de guardería en crecimiento para sus niños pequeños! Una gama divertida y femenina, cada pieza es...
- Page 5 SAFE SLEEP TIPS Small parts may present choking hazard prior to Adult Assembly Required. assembly. DO NOT use the product Please read the instructions if it is damaged, broken, thoroughly. Identify all parts and/or components are & hardware. missing or broken. To protect your parts during Do Not Use Power assembly, please place them...
- Page 6 CONSEILS POUR UN SOMMEIL SÛR Les petites pièces peuvent présenter un Un assemblage par un risque d'étouffement adulte est requis. avant l'assemblage. NE PAS utiliser le produit s'il Veuillez lire attentivement les est endommagé, cassé, et/ou instructions. Identifiez toutes si des composants sont les pièces et le matériel.
- Page 7 CONSEJOS PARA DORMIR CON SEGURIDAD Las piezas pequeñas Se requiere el montaje pueden presentar peligro por parte de un adulto. de asfixia antes del montaje. Lea detenidamente las NO utilice el producto si está instrucciones. Identifique dañado, roto y/o faltan todas las piezas y herrajes.
- Page 8 INSTRUCTIONS FOR FUTURE USE. • SMALL PARTS MAY PRESENT CHOKING HAZARDS PRIOR TO ASSEMBLY. • USE ONLY EVOLUR SUPPLIED HARDWARE TO ASSEMBLE. USING UNAUTHORIZED HARDWARE COULD JEOPARDIZE THE STRUCTURAL INTEGRITY OF THE PRODUCT. • REMOVE ALL PARTS AND HARDWARE FROM THE BOX AND LAYOUT ON A CLEAR SOFT SURFACE, AS THIS WILL AVOID DAMAGING PARTS DURING ASSEMBLY.
- Page 9 ULTÉRIEURE. • LES PETITES PIÈCES PEUVENT PRÉSENTER DES RISQUES D'ÉTOUFFEMENT AVANT L'ASSEMBLAGE. • N'UTILISER QUE LE MATERIEL FOURNI PAR EVOLUR POUR L'ASSEMBLAGE. L'UTILISATION DE MATERIEL NON AUTORISE POURRAIT COMPROMETTRE L'INTEGRITE STRUCTURELLE DU PRODUIT. • RETIREZ TOUTES LES PIÈCES ET LE MATÉRIEL DE LA BOÎTE ET DISPOSEZ-LES SUR UNE SURFACE CLAIRE ET SOUPLE, AFIN D'ÉVITER D'ENDOMMAGER LES PIÈCES LORS DE...
- Page 10 MONTAJE. CONSERVE LAS INSTRUCCIONES PARA USO FUTURO. • LAS PIEZAS PEQUEÑAS PUEDEN PRESENTAR PELIGRO DE ASFIXIA ANTES DEL MONTAJE. • UTILICE ÚNICAMENTE HERRAJES SUMINISTRADOS POR EVOLUR PARA EL MONTAJE. EL USO DE HERRAJES NO AUTORIZADOS PUEDE PONER EN PELIGRO LA INTEGRIDAD ESTRUCTURAL DEL PRODUCTO.
- Page 11 If there are any missing parts, please contact Evolur before using the product. S'il y a des pièces manquantes, veuillez contacter Evolur avant d'utiliser le produit. Si falta alguna pieza, póngase en contacto con Evolur antes de utilizar el producto. Left Side Panel...
- Page 12 If there are any missing parts, please contact Evolur before using the product. S'il y a des pièces manquantes, veuillez contacter Evolur avant d'utiliser le produit. Si falta alguna pieza, póngase en contacto con Evolur antes de utilizar el producto. Right Top Rail...
- Page 13 If there are any missing parts, please contact Evolur before using the product. S'il y a des pièces manquantes, veuillez contacter Evolur avant d'utiliser le produit. Si falta alguna pieza, póngase en contacto con Evolur antes de utilizar el producto. Bolt M6 x 40mm (×6) Bolt M6 x 25mm (×12)
- Page 14 HUTCH ASSEMBLY - CAM BOLT ASSEMBLY ASSEMBLAGE DE LA HUCHE - ASSEMBLAGE DU BOULON DE CAME MONTAJE DE LA CONEJERA - CONJUNTO PERNO LEVA 1a. Place the parts on a soft, level surface prior to assembly. 1b. Lay the Left Side Panel (1) and the Right Side Panel (2) flat on a level surface.
- Page 15 HUTCH ASSEMBLY - CAM BOLT ASSEMBLY (Contd.) ASSEMBLAGE DU BOUCHON - ASSEMBLAGE DU BOULON DE LA CAM (suite) CONJUNTO HUTCH - CONJUNTO CAM BOLT (Contd.) 1e. Position the Cam Bolts (D) in the insertions provided on the Fixed Shelf (5) and Bottom Panel (6). 1f.
- Page 16 HUTCH ASSEMBLY - LEGS ASSEMBLY ASSEMBLAGE DE LA HUCHE - ASSEMBLAGE DES PIEDS MONTAJE DE LA CONEJERA - MONTAJE DE LAS PATAS 2a. Align the cam bolts on the Left Front And Right Rear Legs (13) and the Right Front And Left Rear Legs (14) to the insertions on the Side Rail (15) as shown in the illustration.
- Page 17 HUTCH ASSEMBLY - BOTTOM FRAME ASSEMBLY ASSEMBLAGE DE LA HUCHE - ASSEMBLAGE DU CADRE INFÉRIEUR MONTAJE DE LA CONEJERA - MONTAJE DEL MARCO INFERIOR 3a. Align the cam bolts on the assembled legs to the Bottom Rails (16) as shown in the illustration. 3b.
- Page 18 HUTCH ASSEMBLY - SHELF ASSEMBLY ASSEMBLAGE DE LA HUCHE - ASSEMBLAGE DE L'ÉTAGÈRE MONTAJE DE LA CONEJERA - MONTAJE DEL ESTANTE 4a. Position the cam bolts on the Fixed Shelf (5) to the insertions provided on the Top Divider (7) and the Bottom Divider (8) as shown in the illustration.
- Page 19 HUTCH ASSEMBLY - BOTTOM PANEL ASSEMBLY ASSEMBLAGE DE LA HUCHE - ASSEMBLAGE DU PANNEAU INFÉRIEUR MONTAJE DE LA CONEJERA - MONTAJE DEL PANEL INFERIOR 5a. Position the cam bolts on the Bottom Panel (6) to the insertions provided on the Bottom Divider (8) as shown in the illustration.
- Page 20 HUTCH ASSEMBLY - SIDE PANEL ASSEMBLY ASSEMBLAGE DE LA HUCHE - ASSEMBLAGE DES PANNEAUX LATÉRAUX MONTAJE DE LA CONEJERA - MONTAJE DEL PANEL LATERAL 6a. Align the Left Side Panel (1) and the Right Side Panel (2) to the half-assembled hutch as shown in the illustration.
- Page 21 HUTCH ASSEMBLY - TOP PANEL ASSEMBLY ASSEMBLAGE DE LA HUCHE - ASSEMBLAGE DU PANNEAU SUPÉRIEUR MONTAJE DE LA CONEJERA - MONTAJE DEL PANEL SUPERIOR 7a. Align the Left Top Panel (3) over the shorter length of the top shelf and the Right top Panel (4) over the longer length of the top shelf as shown in the illustration.
- Page 22 HUTCH ASSEMBLY - TOP RAIL ASSEMBLY ASSEMBLAGE DE LA HUCHE - ASSEMBLAGE DU RAIL SUPÉRIEUR MONTAJE DE LA CONEJERA - MONTAJE DEL RIEL SUPERIOR 8a. Align the Left Top Rail (9) and the Right Top Rail (10) as shown in the illustration.
- Page 23 HUTCH ASSEMBLY - TOP RAIL ASSEMBLY (Contd.) ASSEMBLAGE DU CHARIOT - ASSEMBLAGE DU RAIL SUPÉRIEUR (suite) MONTAJE DE LA CAJA - MONTAJE DEL CARRIL SUPERIOR (Cont.) 8c. Position the cam bolts on the top rails to the insertions of the top panels as shown in the illustration.
- Page 24 HUTCH ASSEMBLY - SUPPORT RAIL ASSEMBLY ASSEMBLAGE DE L'HUCHE - ASSEMBLAGE DU RAIL DE SUPPORT ENSAMBLAJE DE LA CONEJERA - ENSAMBLAJE DEL RIEL DE SOPORTE 9a. Position the Top Support Rail (11) at the joint of the top panel as shown in the illustration. Similarly, position the Side Support Rails (12) at the joint of the top and side panels.
- Page 25 HUTCH ASSEMBLY - BOTTOM FRAME ASSEMBLY ASSEMBLAGE DE LA HUCHE - ASSEMBLAGE DU CADRE INFÉRIEUR ENSAMBLAJE DE LA CONEJERA - ENSAMBLAJE DEL MARCO INFERIOR 10a. Align the assembled bottom frame to the bottom of the half-assembled hutch as shown in the illustration. 10b.
- Page 26 HUTCH ASSEMBLY - BACK PANEL ASSEMBLY ASSEMBLAGE DE LA HUCHE - ASSEMBLAGE DU PANNEAU ARRIÈRE MONTAJE DE LA CONEJERA - MONTAJE DEL PANEL TRASERO 11a. Place the half-assembled hutch on its front on a soft, level surface. Position the Top Back Panel (17) and the Bottom Back Panel (18) to the back of the hutch as shown in the illustration.
- Page 27 ANTI-TIP SAFETY HARDWARE INSTALLATION WARNING • Serious or fatal crushing injuries can occur from furniture tip-over. To help prevent tip-over: Place the heaviest items on the lower shelves. • Do not set TVs or other heavy objects on top of this product unless the product is specifically designed to accommodate them.
- Page 28 INSTALLATION DU MATERIEL DE SECURITE ANTI-BASCULE AVERTISSEMENT • Le basculement d'un meuble peut entraîner des blessures graves, voire mortelles, par écrasement. Pour éviter le basculement : Placez les articles les plus lourds sur les étagères inférieures. • Ne placez pas de téléviseurs ou d'autres objets lourds sur ce produit, à moins qu'il ne soit spécifiquement conçu pour les accueillir.
- Page 29 INSTALACIÓN DE LOS HERRAJES DE SEGURIDAD ANTIVUELCO ADVERTENCIA • El vuelco de un mueble puede provocar lesiones graves o mortales por aplastamiento. Para evitar el vuelco Coloque los objetos más pesados en los estantes inferiores. • No coloque televisores u otros objetos pesados encima de este producto a menos que el producto esté...
- Page 30 FIXING THE HUTCH ONTO A DRESSER FIXATION DE LA HUCHE SUR UNE COMMODE FIJACIÓN DE LA CONEJERA A UNA CÓMODA 1) Disassemble the bottom frame from the hutch by unscrewing the screws as shown in the illustration. 2) Position the hutch onto the dresser (NOT INCLUDED).
-
Page 31: Proper Storage
FURNITURE CARE INSTRUCTIONS ROOM CLIMATE CONTROL: • Wood, when first cut contains more than 50 percent water. When it is prepared for furniture construction it is placed in a Kiln and the moisture content is brought down to 8 to 10 percent. Wood is porous and responds to its environment. If the room has high humidity it will absorb it and expand and if the humidity is low it will lose moisture and shrink. - Page 32 • Keep the furniture level so doors and drawers open and close freely. • Clean with a damp, not wet, cloth. Use only a mild soap. Do not use the abrasive cleaners. • Do not scratch or chip the finish. Evolur • Inspect the product periodically, contact for replacement parts or questions.
- Page 33 INSTRUCTIONS D'ENTRETIEN DES MEUBLES CLIMATISATION DE LA PIÈCE : • Le bois, lorsqu'il est coupé pour la première fois, contient plus de 50 % d'eau. Lorsqu'il est préparé pour la construction de meubles, il est placé dans un four et la teneur en humidité est ramenée à...
- Page 34 • Ne pas rayer ou ébrécher la finition. • Inspectez périodiquement le produit, contactez Evolur pour des pièces de rechange ou des questions. • Ne stockez pas le produit ou toute pièce à des températures et conditions extrêmes telles qu'un grenier chaud ou un sous-sol humide et froid.
- Page 35 INSTRUCCIONES PARA EL CUIDADO DE LOS MUEBLES CLIMATIZACIÓN DE HABITACIONES: • La madera, cuando se corta por primera vez, contiene más del 50 por ciento de agua. Cuando se prepara para la construcción de muebles, se coloca en un horno y el contenido de humedad se reduce al 8 o 10 por ciento.
- Page 36 • No raye ni astille el acabado. • Inspeccione el producto periódicamente, póngase en contacto con Evolur para obtener piezas de repuesto o hacer preguntas. • No almacene el producto ni ninguna de sus partes en temperaturas y condiciones extremas como un ático caliente o un sótano húmedo y frío.
- Page 37 45 VERONICA AVENUE 5375 BOULEVARD DES GRANDES SOMERSET NEW JERSEY 08873 PRAIRIES ST LEONARD, QUÉBEC H1R 1B1 www.evolur.com BARBIE™ and associated trademarks are owned by and used under license from Mattel. ©2023 Mattel. BARBIE™ ainsi que les marques et les logos afférents appartiennent à...
Need help?
Do you have a question about the Barbie Rose HUTCH / Bookcase and is the answer not in the manual?
Questions and answers