Table of Contents
Troubleshooting

Subscribe to Our Youtube Channel
Related Manuals for KPI-JCI FT300DF


Summary of Contents for KPI-JCI FT300DF
- Page 1 FT300DF Plant Operation and Service Manual and Parts Book JCI Track Mounted Crushing Plant XML Revision 0 86470 Franklin Blvd, Eugene, OR 97405 • 800-314-4656 • 541-736-1400 • Fax 541-988-9401 24/7 Parts Number 888-474-0115...
-
Page 3: Table Of Contents
Table of Contents Introduction....................1 Operation and Service Manual ..................1 Address For Notices ..................... 1 Track Plant Components ....................2 Crusher Components ....................3 Kodiak+ Series Crusher Theory of Operation ............5 Crushing Parameters ................... 7 Safety......................9 Safety Overview ......................9 Hazard and Advisory Statements ................. - Page 4 Table of Contents Wire Rope .........................35 Connecting Or Clamping Wire Ropes ...............35 Chains ........................36 Fiber Or Synthetic Slings ..................36 Machinery Installation Safety ..................36 Foundations ......................36 Guarding ........................37 Customer Modifications ....................37 Electrical Connections ....................37 Site Selection ........................38 Plant Leveling ......................38 Track Plant Control Locations ..................39 Initial Startup Inspections ....................40 Hopper and Crushing Chamber Inspection ...............40 Hydraulic System Inspection ..................40...
- Page 5 Table of Contents Moving Plant Using Omnex Remote ................ 81 Operation....................... 89 Crusher Safety ......................89 Pre-Start Checks ......................91 Plant Pre-Start Checks ..................... 91 Conveyor Pre-Start Checks ..................91 Crusher Pre-Start Checks ..................92 Plant Startup, Operation, and Shutdown ..............93 Plant Startup ......................
- Page 6 Table of Contents Crusher Diagnostics ....................158 System Diagnostics ....................158 Automatic Crusher Shutdown ..................160 Circuit Breakers ......................161 Crusher Operational Troubleshooting ................162 Maintenance ....................165 Maintenance and Repair Safety ..................165 General Precautions ....................165 Electrical Systems .....................165 Pressurized Systems ....................166 Welding On Machinery ....................166 Clearing Jammed Material ..................167 Hazardous Materials ....................168 Disposal Of Excess Fuels, Lubricants And Liquids ...........168...
- Page 7 Table of Contents Plant Grease Points ..................... 212 Radiator and Cooler Care ..................213 Track Checks ....................... 213 Track Drive Gearbox Oil ..................213 Lube Oil Sample Procedure ................. 214 Lube and Hydraulic Reservoir Air Breather Change Procedure ......216 Oil Filter Restriction Indicator ................
- Page 8 Table of Contents Individual TIR Cylinder Relief Valve Testing and Setting Procedure ......308 Bowl Thread Lubrication Procedure ................313 Mantle Bolt Thread Maintenance ................316 Service ......................319 Track Plant Service .......................319 Remote Control System ID Code Procedure ............319 Crusher Service ......................323 Offset Cone Lifting Eye Safety ..................323 Cone Lifting Eye and Cone Lifting Eye Assembly .............324 Cone Lifting Eye (one-piece) ................324...
- Page 9 Table of Contents Lube Cooler Bypass Valve Removal Procedure ............413 Lube Cooler Bypass Valve Install Procedure ............416 Lube Flow Encoder Removal Procedure ..............418 Lube Flow Encoder Installation Procedure ............... 421 Reference Information ................. 423 Plant Information ......................423 Specifications ......................
- Page 10 Table of Contents Hydraulic Pressures ......................455 Conveyor and Track Pressure ..................455 Crusher System Pressure ..................457 Feeder Lift Pressure ....................457 Lube Flow Pressure ....................458 Crusher Hydraulic Manifold Assembly ................459 Crusher System Relief Pressure ................460 Bowl Clamp ........................461 Bowl Clamp Circuit ....................463 Bowl Rotation Motor ......................464 Bowl Rotation Circuit ....................465 Tramp Iron Relief (TIR) System ..................466...
-
Page 11: Introduction
NTRODUCTION PERATION AND ERVICE ANUAL Introduction Operation and Service Manual This manual provides the information for an experienced operator to successfully and safely operate your equipment. Please review this manual carefully to ensure you receive the most benefit from your machine. Make sure that all personnel are aware of, and use, proper safety precautions when working with and/or around the plant and related equipment. -
Page 12: Track Plant Components
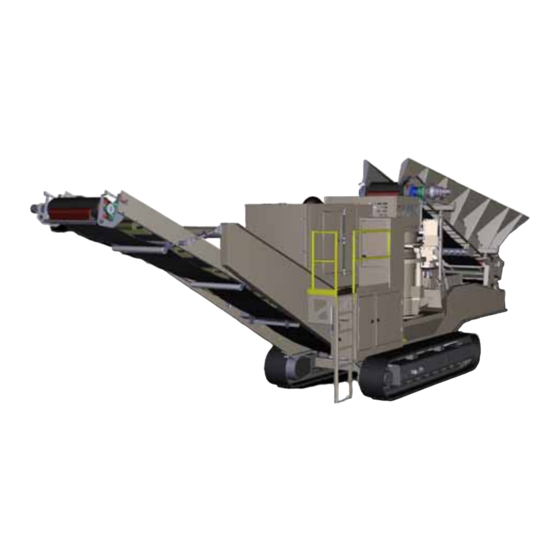
NTRODUCTION RACK LANT OMPONENTS Track Plant Components The FT Direct Feed plant is a remote-controlled, track-mounted crushing plant system. The plant consists of a feed conveyor, a discharge conveyor, and a Kodiak+ series crusher. The conveyors and tracks are hydrau- lically driven and are operated by a bank of control valves mounted in an enclosure on the left-hand side of the plant. -
Page 13: Crusher Components
NTRODUCTION RACK LANT OMPONENTS Crusher Components... - Page 14 NTRODUCTION RACK LANT OMPONENTS Tramp Iron Relief (TIR) Cylinder Hydraulic Bowl Clamp Bowl Assembly Hopper Bowl Liner Retention System Drive Ring Hydraulic Bowl Rotation Motor Bowl Support Crusher Base Frame Assembly Wedgeplate Pin Clutch Assembly Cone Assembly Pinion Assembly Driven Sheave Mantle...
-
Page 15: Kodiak+ Series Crusher Theory Of Operation
NTRODUCTION RACK LANT OMPONENTS Kodiak+ Series Crusher Theory of Operation The Kodiak+ remote adjust crusher crushes rock by feeding it through the hopper and bowl opening into the crushing chamber. As the cone gyrates inside the chamber, the crushing action is achieved when rock falls into the open side and is crushed as the gap between the mantle and liner closes up. - Page 16 NTRODUCTION RACK LANT OMPONENTS Crusher Upper Assembly Bowl Rotation Assembly Bowl Position Proximity Sensor Driven Gear Drive Ring Upper Dust Seal Assembly Bowl Clamp Bowl Liner Retention Components Manganese Bowl Liner Lower Dust Seal Assembly Bowl Support Bowl Clamp Hydraulic Oil Supply Hose...
-
Page 17: Crushing Parameters
NTRODUCTION RACK LANT OMPONENTS The upper assembly includes the bowl and liner and is threaded into the bowl support. The upper assembly is held into place by the bowl clamp, which is a hydraulically controlled lock nut. As hydraulic pressure is increased, the bowl clamp piston removes all end play in the threads, which in turn secures the bowl assembly. - Page 18 NTRODUCTION RACK LANT OMPONENTS Application • Reduction ratio limited to 6 to 1 below 1" closed side setting and 8 to 1 above 1" closed side setting, provided no bowl float occurs. • Manganese chamber configuration conforms to the factory recommended application guidelines. •...
-
Page 19: Safety
AFETY AFETY VERVIEW Safety Safety Overview It is the responsibility of the quarry management team to develop a comprehensive safety awareness program, and to ensure that all quarry workers and support personnel receive appropriate safety training as approved by federal, state, and local regulations. Safety is basically common sense. There are standard safety rules, but each situation has its own peculiarities, which can not always be covered by rules. -
Page 20: Hazard Statements
AFETY LASH AFETY Hazard Statements The Caution, Warning and Danger statements are hazard statements used to alert workers of unsafe prac- tices and potentially harmful or life-threatening situations. Each of these statements is preceded by the Safety Alert Symbol. • CAUTION indicates a potentially hazardous condition that, if not avoided, MAY result in minor personal injury. -
Page 21: Lockout/Tagout
AFETY OCKOUT AGOUT JCI Electrical systems and switch panels pose an Arc Flash and electrical shock hazard. Refer to NFPA 70 for information about working with high voltage electrical systems. Lockout/Tagout Who Must Use Lockout/Tagout? Quarry owners, managers, and safety officers must be aware of OSHA’s “lockout/tagout” standard: CRF Section 29 1910.147, The Control of Hazardous Energy. -
Page 22: When Can Lockout/Tagout Devices Be Removed
AFETY OCKOUT AGOUT When Can Lockout/Tagout Devices be Removed? Lockout/tagout devices can only be removed after the following conditions are met: • All guards and protective devices are properly reinstalled. • All tools and repair equipment are removed from the equipment and the immediate area. •... -
Page 23: Lockout/Tagout Devices
AFETY OCKOUT AGOUT • Always be sure that all peripheral equipment, such as feed conveyors, grizzly feeders and discharge conveyors, is also tagged and locked out. Serious personal injury or death can result if any of these items starts unexpectedly while the crusher is being serviced. •... -
Page 24: Lockout/Tagout Kit
AFETY OCKOUT AGOUT A lock must be sufficiently durable, so it can withstand the environmental conditions (heat, cold, moisture, etc.) around it. A lock must also be strong enough so that it cannot be easily removed or forced open. A tag or label must be affixed to each lock to alert others that service work is in progress. -
Page 25: Lockout/Tagout Procedure
AFETY OCKOUT AGOUT Lockout/Tagout Procedure WARNING: Stored Energy Hazard. The feed conveyor and under crusher discharge conveyor use hydraulic cylinders to lift them into position. Make sure that the feed conveyor is fully resting on its stops and the under crusher discharge conveyor end is folded into its shipping position and the shipping brackets are installed (if equipped with a folding discharge conveyor). - Page 26 AFETY OCKOUT AGOUT Turn the battery isolation switch to the OFF position. Locate the battery isolation switch lockout hasp in the electrical control panel. Insert the open side of the hasp into the hole on the top of the switch and fold the hasp sides together.
- Page 27 AFETY OCKOUT AGOUT Place a lockout device through the hasp sides. Install the lock and tag. Write your appropriate information on the tag. See your local lockout/tagout regulations for what needs to be written on the tag. Turn the engine start key to make sure that the power is disconnected from the system. The Digsy display panel should not come on.
-
Page 28: Miscellaneous Safety Tips
AFETY ISCELLANEOUS AFETY Miscellaneous Safety Tips Know Your Machinery • Read the manufacturer’s operation and maintenance manuals for all machinery and equipment that you operate. Be sure that all hazard statements contained within the manuals are completely understood. • Become familiar with the controls, functions and settings of each machine. Fully understand all phases of each machine’s operation. -
Page 29: Observe Personal Safety Precautions
AFETY ISCELLANEOUS AFETY Observe Personal Safety Precautions • Never wear loose or ragged clothing when working on or around rotating power equipment. Avoid wearing necklaces, rings or other jewelry. These items can become caught or tangled in the machinery, resulting in severe personal injury or death. •... -
Page 30: Avoid Alcohol And Other Drugs
AFETY ISCELLANEOUS AFETY Avoid Alcohol and Other Drugs • Do not operate or work near quarry machinery when under the influence of alcohol or other drugs. These substances can result in reduced alertness and impaired judgment. Serious personal injury or death could result. -
Page 31: Safety Decals
AFETY AFETY ECALS • Maintenance inspection procedures are included throughout this manual. Although maintenance is not typically a safety concern, machinery that is regularly maintained and in proper working condition will minimize the occurrence of safety hazards and emergency situations. Safety Decals Decal Meaning... - Page 32 AFETY AFETY ECALS Decal Meaning WARNING: PINCH POINT — This equipment poses a pinch hazard. You must keep feet and hands clear of the this equipment while it is operating. CAUTION: SLIP HAZARD — The walkways around this equipment pose a slip hazard due to debris on the walkways. Take care when working around this equipment and watch your step.
- Page 33 AFETY AFETY ECALS Decal Meaning CAUTION: USE RESPIRATORY PROTECTION — Operation causes dust and debris to become airborne and pose risk of respiratory injury. You must wear approved respiratory protection while it is operating. WARNING: AVOID INJURY — Operating this equipment with the guards removed poses risk of severe injury.
- Page 34 AFETY AFETY ECALS Decal Meaning CAUTION: EQUIPMENT DAMAGE — Do not run the screen with the shipping brackets installed. Severe equipment damage could occur if you attempt to operate the screen with the shipping brackets installed. Read the Operation Manual before running the screen.
- Page 35 AFETY AFETY ECALS Decal Meaning WARNING: HAND PINCH POINT HAZARD — Conveyor folding points pose a pinch hazard that could cause serious injury or death. Keep your hands clear while folding conveyors. WARNING: CRUSHING FORCE FROM ABOVE — Unsupported conveyors pose a crushing hazard. You must support the conveyor with an appropriately rated stand before servicing the conveyor.
- Page 36 AFETY AFETY ECALS Decal Meaning WARNING: HIGH VOLTAGE HAZARD — This equipment’s electrical system poses a risk of serious burn or electric shock. You must take care when servicing the electrical system. Follow all lockout/tagout procedures before servicing. WARNING: HIGH VOLTAGE HAZARD SHUT...
- Page 37 AFETY AFETY ECALS Decal Meaning DANGER: HAZARDOUS VOLTAGE. 380 VOLTS — The electrical components in the control panel pose a risk of serious burns or shock. You must make sure that all components are shut off and this equipment is properly locked and tagged out before servicing the electrical components.
- Page 38 AFETY AFETY ECALS Decal Meaning DANGER: HAZARDOUS VOLTAGE. Do not operate switch under load. You must not move the switch to any position while the plant is powered up. Severe injury or death could occur due to high voltage electrical shock. DANGER: HIGH PRESSURE HAZARD.
-
Page 39: Track Plant Safety Decal Locations
AFETY AFETY ECALS Track Plant Safety Decal Locations... - Page 40 AFETY AFETY ECALS...
-
Page 41: Crusher Safety Decal Locations
AFETY AFETY ECALS Crusher Safety Decal Locations... - Page 42 AFETY AFETY ECALS...
-
Page 43: Emergency Stop (E-Stop) Locations
AFETY (E-STOP) L MERGENCY OCATIONS Emergency Stop (E-STOP) Locations The Emergency Stop (E-STOP) switches are mounted in three locations: the left-hand side, the right-hand side, and the hand held remote control. To actuate the E-STOP push in on the switch, which will shut down the entire plant operation. To reset the switch, twist the button clockwise until it automatically pops out. -
Page 44: Omnex Screen (Optional)
AFETY (E-STOP) L MERGENCY OCATIONS A screen on the Digsy will signal when any of the E-STOPS is activated. You must make sure that all E-STOP switches are reset in order to start the plant. Omnex Screen (optional) Standard Screen... -
Page 45: Setup
ETUP OISTING AND ANDLING AFETY Setup Hoisting and Handling Safety General Precautions • Do not allow personnel to work or walk under loads supported by a crane or hoist. • Use appropriate lifting devices to secure the load to the crane. See the following paragraphs of this section for additional information. -
Page 46: Chains
ETUP ACHINERY NSTALLATION AFETY Chains Chains require careful use, handling and maintenance to ensure long life and safe operation. • Ensure that the correct size chain is being used for the application. • Ensure that the chain is inspected regularly following the manufacturer’s guidelines. •... -
Page 47: Guarding
ETUP ACHINERY NSTALLATION AFETY • Crushing and screening machinery needs a firm foundation on which to operate. This does not need to be a poured pad, but it must not be unstable ground. When selecting the location, be sure that the entire area is as level as possible. -
Page 48: Site Selection
ETUP ELECTION • Do not place power lines in an area where they will be driven over by transport vehicles or other quarry equipment. If it is absolutely necessary to extend a power line across a traffic area, protect the cable with properly rated bridging. -
Page 49: Track Plant Control Locations
ETUP RACK LANT ONTROL OCATIONS Track Plant Control Locations It is very important to fully understand the controls and indicators in order to safely and efficiently operate your plant. The plant control system can be broken down into electronic controls and hydraulic controls. Engine Compartment Hydraulic Compartment Crusher Lube Compartment... -
Page 50: Initial Startup Inspections
ETUP NITIAL TARTUP NSPECTIONS Initial Startup Inspections Hopper and Crushing Chamber Inspection Item Description The cone head blocks have been removed and chamber is completely empty. The bowl liner is not in contact with the mantle anywhere (CSS>0) Hopper is free of overhead obstructions that could prevent rotation of bowl or cause interference during tramp iron events or chamber clearing. -
Page 51: Lube Assembly Inspection
ETUP NITIAL TARTUP NSPECTIONS Lube Assembly Inspection Item Description Oil level is at the FULL mark on the sight gauge (top off if required). Oil fill cap is in place. Breather is unobstructed. Oil return line is connected and routing appears to be as per recommended practice. -
Page 52: Under Crusher Inspection
ETUP NITIAL TARTUP NSPECTIONS Under Crusher Inspection Item Description The crusher is mounted level in all directions. All crusher supports and/or foundations are on solid ground and/or supported on cribbing that is in solid condition. All mounting bolts are tight. Crusher discharge area is free of debris all the way from the CSS to the conveyor belt. -
Page 53: Conveyor Preparation
ETUP ONVEYOR REPARATION Conveyor Preparation Conveyor Safety • Do not allow anyone to operate the conveyor until he or she has read the owner’s manual and is completely familiar with all safety precautions. • Do not allow the following people to operate or maintain the conveyor: Children Persons unfamiliar with the equipment, or unfamiliar with safe operating and maintenance procedures for the equipment. -
Page 54: General Conveyor Information
ETUP ONVEYOR REPARATION • Before starting engines within enclosed areas, be certain ventilation is sufficient to avoid buildup of exhaust fumes. • Relieve any and all pressure before opening, repairing, or removing any air pressure lines, hydraulic lines, valves, fittings or seals. In the event of an hydraulic line rupture, stay clear of the area until pres- sure has been relieved. -
Page 55: Conveyor Belt Training
ETUP ONVEYOR REPARATION Conveyor Belt Training Conveyor belt training is the process of adjusting idlers and load conditions to achieve conveyor belt travel over the center area of the troughing idlers, pulleys, and return idlers. A true conveyor belt path means that the belt is tracking without run-off. - Page 56 ETUP ONVEYOR REPARATION opposite conveyor frame, Z, and place a mark on the frame. This line, YZ, is at a 90° angle to the mid point line on the conveyor that runs through X. Clamp a straight edge along the YZ line and use this as your reference to check all idlers for square.
-
Page 57: Adjusting Belt Side Creep
ETUP ONVEYOR REPARATION Adjusting Belt Side Creep If after running the conveyor you have noticed that the belt tends to creep to one side as it travels along the conveyor you will need to make corrections to its path. The following steps will help you make the appropriate corrections: : Try never to adjust pulleys for belt training. - Page 58 ETUP ONVEYOR REPARATION (shown below) where the center of the idler is fixed, you can make adjustments by rotating the idler ends around the circle. Make sure you run the conveyor between each adjustment until the belt creep stops.
-
Page 59: Conveyor Loading
ETUP ONVEYOR REPARATION Conveyor Loading Properly loading the conveyor will prolong the life of the belt. The ideal condition is to have the material pass from the chute to the belt at almost the same speed and direction of travel as the belt with a minimal amount of impact. -
Page 60: Baghouse Operation
ETUP AGHOUSE PERATION Baghouse Operation Bag House Assembly Bag House Indicator Light The baghouse is an air filtration system that removes fine dust particles prior to engine air intake. In order for the filtration system to operate effectively, the filter elements must be cleaned periodically. Cleaning of the Bag House is achieved by applying short duration reverse air pressure to the filter elements. -
Page 61: Baghouse Programming Logo
ETUP AGHOUSE PERATION Baghouse Programming LOGO! The Baghouse Controller, based upon the Siemens “LOGO! PLC (Programmable Logic Controller) is designed to control the operation of two (2) banks of pneumatic solenoid valves used in engine air intake filter self-cleaning. The Pulse Period is one (1) hour, Pulse On is one (1) second. : If the power is removed while the program is running, the program will start automatically when power NOTE is restored. - Page 62 ETUP AGHOUSE PERATION Press “ESC” key. You should see a menu showing “STOP”, “Set Param” “SET”, and “Prg Name”. Make sure “STOP” is selected and press “OK” key. Select “YES” to confirm then press “OK”.
- Page 63 ETUP AGHOUSE PERATION This will bring up a new menu; “Program”, “Card”, “Setup”, and “Start”. Select “Card” and the press “OK”. Select the second option on the next menu; “Card -> LOGO symbol” then press “OK”. Select “Yes” to confirm then press “OK”. Wait a few seconds for the program to transfer.
- Page 64 ETUP AGHOUSE PERATION When transfer is done the scree will return to Menu; “Program”, “Card”, Setup, and “Start”. Select “Start” and press “OK”. The LOGO display will show “Engine Shutdown or E-stop”. Remove memory module, and replace cap cover.
-
Page 65: Remote Operation
ETUP EMOTE PERATION Remote Operation Remote Operation Safety WARNING: Only authorized personnel are permitted to operate the track mounted plant remote control system. Personnel must be specifically trained in the safe use of the remote control system. Failure to adhere to these rules and those of your operation site can result in death, serious injury, and damage to equipment. -
Page 66: Tethered Remote
ETUP EMOTE PERATION Tethered Remote The track plant comes standard with a tethered remote, which allows you to move the plant, sound the horn, and press emergency stop. This hand-held device plugs into the electrical system by way of a cable, so it does not require batteries. -
Page 67: Kar-Tech Controller
ETUP EMOTE PERATION Kar-Tech Controller The track plant also comes standard with a Kar-Tech radio remote, which is a wireless hand-held device that allows you to move the plant, stop the engine and sound the horn. Hand-Held Remote Transmitter The remote is powered by 2 AAA alkaline batteries and has a battery life of 30 continuous hours. The batteries can be replaced by removing the screws and battery cover from the back of the remote. -
Page 68: Remote Receiver
ETUP EMOTE PERATION Remote Receiver ELATED LINKS Kar-Tech Controller Troubleshooting... -
Page 69: Omnex Radio Remote Control (Optional)
ETUP EMOTE PERATION Omnex Radio Remote Control (optional) The plant offers an optional radio remote control system that has a hand-held remote control transmitter and a receiver module that is mounted in the plant lube panel. Since they are manufactured as a matched set, the loss of either device requires that the replacement be programmed to match the original component. -
Page 70: Transporting Machinery
ETUP RANSPORTING ACHINERY The remote control system has safety features built in, which automatically shut down the plant under the following conditions: • Remote control out of range. • Transmitter damage. • Power loss to the hand-held remote. Activating any switch turns the remote on, however, if the emergency stop switch is activated, plant shutdown is immediate. -
Page 71: Moving The Plant
ETUP RANSPORTING ACHINERY Moving the Plant The track-mounted crushing plant is designed to be moved around a site under its own power. To move the plant you will need to read and understand the safety precautions explained in this manual as well as all site safety regulations applicable to operating a crushing plant. -
Page 72: Transporting The Crusher
ETUP RANSPORTING ACHINERY Transporting the Crusher When the Kodiak+ crusher is to be moved to a new crushing site, the cone head must be blocked to prevent damage to the crusher bearings. The roller bearings are designed to handle heavy crushing loads but not the sharp impact load caused from the cone head bouncing during transportation. -
Page 73: Conveyor Shipping Bracket
ETUP RANSPORTING ACHINERY Conveyor Shipping Bracket Plants with a folding conveyor are shipped with a shipping bracket that must be removed before unfolding the conveyor. Remove the hardware securing the shipping bracket to the top half of the conveyor. Swivel the bracket up towards the base of the conveyor. Align the bracket hole with the drilled hole in the conveyor. -
Page 74: Raising/Lowering The Feed Conveyor
ETUP RANSPORTING ACHINERY Raising/Lowering the Feed Conveyor Raise the feed conveyor by pushing the feed conveyor lever up. Feed Conveyor Lever To lower feed conveyor back into travel mode, push the lever down. -
Page 75: Baghouse Shipping Cover
ETUP RANSPORTING ACHINERY Baghouse Shipping Cover The baghouse is shipped with the shipping cover to protect the filters. This MUST be removed before you start the engine as the air flow will be too low. Shipping Cover Locate the shipping cover on the bottom of the baghouse. Remove the bolts (four in most cases) holding the shipping cover in place. - Page 76 ETUP RANSPORTING ACHINERY Unlatch and remove the pin holding the step upright. Carefully lower the step for use. Return step to upright position, insert pin, and latch when traveling to maintain track width requirements.
-
Page 77: Plant Travel Position
ETUP RANSPORTING ACHINERY Plant Travel Position Track Idler End Track Sprocket End When traveling up a grade, make sure that the track is driven idlers first. You should drive the track drive sprocket first while traveling down a gradient. -
Page 78: Moving Plant Using Tethered Remote
ETUP RANSPORTING ACHINERY Moving Plant Using Tethered Remote NOTICE: You must install the cone travel blocks before moving the plant. Failure to install the travel blocks in the crushing chamber will cause severe damage to the bearings and will void the crusher warranty. Walk around the plant to visually make sure all personnel are clear and understand that you will be moving the plant. - Page 79 ETUP RANSPORTING ACHINERY Make sure that all emergency stop (ESTOP) switches are in the operating position.
- Page 80 ETUP RANSPORTING ACHINERY Turn battery isolation switch to the “on” position. Turn key on the Digsy display to the on position and wait ten (10) seconds for system to initialize. Sound warning horn for 30 seconds.
- Page 81 ETUP RANSPORTING ACHINERY Start the engine by turning the key in a clockwise direction to the start position and hold. Release the key when the engine starts. If engine fails to start, turn key counterclockwise to the off position and repeat steps 1-6.
- Page 82 ETUP RANSPORTING ACHINERY The travel warning horn will automatically sound, alerting those around the plant will be moving. Travel Horn : The travel warning horn will continue to sound until you change press the track drive engage button NOTE to disengage the tracks. To move the plant forward, in the direction of the feed end, press and hold both the left and right toggle switches upward to “Left FWD”...
- Page 83 ETUP RANSPORTING ACHINERY : When traveling downhill on a steep grade, position the track unit so that the crusher pinion shaft faces NOTE uphill. This will prevent lube oil from leaking out of the pinion shaft. To turn the plant while it is already moving, just let off the switch for the direction you wish to turn. Once you have moved the plant into the desired position, turn the track switch from “enable”...
-
Page 84: Moving Plant Using Kar-Tech Remote
ETUP RANSPORTING ACHINERY Moving Plant Using Kar-Tech Remote NOTICE: You must install the cone travel blocks before moving the plant. Failure to install the travel blocks in the crushing chamber will cause severe damage to the bearings and will void the crusher warranty. Walk around the plant to visually make sure all personnel are clear and understand that you will be moving the plant. - Page 85 ETUP RANSPORTING ACHINERY Make sure that all emergency stop (ESTOP) switches are in the operating position. Turn battery isolation switch to the “on” position.
- Page 86 ETUP RANSPORTING ACHINERY Turn key on the Digsy display to “on” position and wait ten (10) seconds for system to initialize. Power up the Kar-Tech remote by pressing and holding the power button for at least two (2) seconds.
- Page 87 ETUP RANSPORTING ACHINERY Power Button Left Track Forward Left Track Reverse Engine Stop Switch (ESTOP) Track Drive Engage Battery Level Light Signal Strength Light Right Track Forward Right Track Reverse Horn : The transmitter is designed with a power saving feature, which will turn off the transmitter after 15 NOTE minutes if no buttons are pressed.
- Page 88 ETUP RANSPORTING ACHINERY Start the engine by turning the key in a clockwise direction to the start position and hold. Release the key when the engine starts. If engine fails to start, turn key counterclockwise to the off position and repeat steps 1-7.
- Page 89 ETUP RANSPORTING ACHINERY The travel warning horn will automatically sound, alerting those around the plant will be moving. Travel Horn : The travel warning horn will continue to sound until you change press the track drive engage button NOTE to disengage the tracks. To move the plant forward, in the direction of the feed end, press and hold both “LH Track Forward”...
- Page 90 ETUP RANSPORTING ACHINERY Once you have moved the plant into the desired position, press the “Track Drive Engage” button to disengage the tracks. Press ESTOP. Turn the key to the off position. Turn the battery isolation switch to the off position.
-
Page 91: Moving Plant Using Omnex Remote
ETUP RANSPORTING ACHINERY Moving Plant Using Omnex Remote Walk around the plant to visually make sure all personnel are clear and understand that you will be moving the plant. Verify that the Omnex receiver is connected to the 12 pin Deutsch connector. Omnex Receiver Deutsch Connector... - Page 92 ETUP RANSPORTING ACHINERY Make sure that all emergency stop (ESTOP) switches are in the operating position. Make sure that all switches on the Omnex remote are in the neutral position or in the “off” position.
- Page 93 ETUP RANSPORTING ACHINERY Turn battery isolation switch to the “on” position. Turn key on the Digsy display to “on” position and wait ten (10) seconds for system to initialize.
- Page 94 ETUP RANSPORTING ACHINERY Active LED Indicator Emergency Stop Switch (ESTOP) Horn Switch Tracks Switch Push in transmitter ESTOP.
- Page 95 ETUP RANSPORTING ACHINERY Toggle horn switch to activate transmitter. Turn clockwise and release transmitter ESTOP. The active LED will flash two (2) times per second. Sound the warning horn for 30 seconds. Start the engine by turning the key in a clockwise direction to the start position and hold. Release the key when the engine starts.
- Page 96 ETUP RANSPORTING ACHINERY Conduct the following checks: • Check the hydraulic oil filter restriction indicator. • Check the plant for excess vibration. • Check for unusual noises. • Inspect the hydraulic hoses and connections for leaks. Once the engine is warmed up and you are ready to move the plant, toggle the track button up to track mode on the remote control.
- Page 97 ETUP RANSPORTING ACHINERY Travel Horn : The travel warning horn will continue to sound until you change the selector to neutral mode. NOTE To move the plant forward, in the direction of the feed end, press and hold both “LH Track” and “RH Track”...
- Page 98 ETUP RANSPORTING ACHINERY Press ESTOP. Turn the key to the off position. Turn the battery isolation switch to the “off” position.
-
Page 99: Operation
PERATION RUSHER AFETY Operation Crusher Safety WARNING: Do not allow personnel to be on or near the crusher during operation. The crusher will shake violently should tramp iron be fed into the machine. Stay clear of feed and discharge areas to prevent being injured or killed by fling or falling rock. WARNING: Never attempt to clear jammed material from the crushing chamber while the crusher is operating. - Page 100 PERATION RUSHER AFETY • Never place hands on cylinder rods. Stay clear of pinch-point area between the upper and main frames. • Never stand on hydraulic hoses or use them as steps. If hoses rupture, serious injury or death could result.
-
Page 101: Pre-Start Checks
PERATION TART HECKS Pre-Start Checks Plant Pre-Start Checks Read and understand the operation and service manual. Inspect the engine air cleaner and clean intake evacuator valve. Examine the engine radiator and hydraulic cooler fins for material buildup. Check the engine fuel level. Check the hydraulic oil level. -
Page 102: Crusher Pre-Start Checks
PERATION TART HECKS Crusher Pre-Start Checks For optimum performance and maximum life as well as safety of personnel working around the crusher, certain items must be checked on a daily basis. In the Maintenance section of this manual there is a checklist and instructions on how to conduct the checks. -
Page 103: Plant Startup, Operation, And Shutdown
PERATION LANT TARTUP PERATION HUTDOWN • Accumulation of black powder under the rotation stops indicating that bowl float has occurred. Verify that the bottom of the bowl drive ring is in the “Crushing Zone” defined by the decals on the gear supports. - Page 104 PERATION LANT TARTUP PERATION HUTDOWN : The Digsy system functions differently depending on which remote is connected to the plant, so a NOTE remote must be connected in order to operate the controls. Tethered Remote Deutsch Connector...
- Page 105 PERATION LANT TARTUP PERATION HUTDOWN Make sure that all emergency stop (ESTOP) switches are in the operating position. Turn battery isolation switch to the “on” position.
- Page 106 PERATION LANT TARTUP PERATION HUTDOWN Turn key on the Digsy display to the “on” position and wait ten (10) seconds for system to initialize. From the Main screen press F2 to sound warning horn for 30 seconds. Start the engine by turning the key in a clockwise direction to the start position and hold. Release the key when the engine starts.
-
Page 107: Plant Operation
PERATION LANT TARTUP PERATION HUTDOWN Conduct the following checks: Check the hydraulic oil filter restriction indicator. Check the plant for excess vibration. Check for unusual noises. Inspect the hydraulic hoses and connections for leaks. Raise all conveyors to their operating positions. ELATED LINKS Raising/Lowering the Feed Conveyor Plant Operation... - Page 108 PERATION LANT TARTUP PERATION HUTDOWN : The Local Mode screen should have each of the components configured for your particular plant NOTE model. If the box above or below a component is green, it is turned off. If it is red, the component is running. Press F1 to start the crusher.
-
Page 109: Plant Shutdown
PERATION LANT TARTUP PERATION HUTDOWN Plant Shutdown Stop feeding material and allow time for material to be completely processed and discharged from the plant. From the Local Mode screen, press F2 to turn off the feeder. : The Local Mode screen should have each of the components configured for your particular plant NOTE model. - Page 110 PERATION LANT TARTUP PERATION HUTDOWN Let the engine run at low idle for 15 minutes, then stop the engine by turning the key counterclockwise to the “off” position. Turn the battery isolation switch to the “off” position.
-
Page 111: Plant Startup Using Omnex Remote
PERATION LANT TARTUP PERATION HUTDOWN Plant Startup Using Omnex Remote Walk around the plant to visually make sure all personnel are clear and understand that you will be oper- ating the plant. WARNING: Verify that no one is under the crusher or near any moving machinery prior to starting any crusher-related equipment. - Page 112 PERATION LANT TARTUP PERATION HUTDOWN Make sure that all emergency stop (ESTOP) switches are in the operating position. Make sure that all switches on the Omnex remote are in the neutral position or in the “off” position.
- Page 113 PERATION LANT TARTUP PERATION HUTDOWN Turn battery isolation switch to the “on” position. Turn key on the Digsy display to “on” position and wait ten (10) seconds for system to initialize.
- Page 114 PERATION LANT TARTUP PERATION HUTDOWN Active LED Indicator Emergency Stop Switch (ESTOP) Horn Switch Tracks Switch Push in transmitter ESTOP.
- Page 115 PERATION LANT TARTUP PERATION HUTDOWN Toggle horn switch to activate transmitter. Turn clockwise and release transmitter ESTOP. The active LED will flash two (2) times per second. Sound the warning horn for 30 seconds. Start the engine by turning the key in a clockwise direction to the start position and hold. Release the key when the engine starts.
-
Page 116: Plant Operation Using Omnex Remote
PERATION LANT TARTUP PERATION HUTDOWN Allow the engine to idle for a warm up period of fifteen (15) minutes at low idle. Conduct the following checks: Check the hydraulic oil filter restriction indicator. Check the plant for excess vibration. Check for unusual noises. Inspect the hydraulic hoses and connections for leaks. - Page 117 PERATION LANT TARTUP PERATION HUTDOWN Track Switch Toggle the feeder switch to the “on” position to start the feed conveyor. Feeder Switch : The feed conveyor will not operate if the crusher is off. NOTE Start the feed material.
-
Page 118: Plant Shutdown Using Omnex Remote
PERATION LANT TARTUP PERATION HUTDOWN Plant Shutdown Using Omnex Remote Stop feeding material and allow time for material to be completely processed and discharged from the plant. Toggle the feeder switch to the “off” position to stop the feed conveyor. Feeder Switch Toggle the crusher switch to the “off”... - Page 119 PERATION LANT TARTUP PERATION HUTDOWN Toggle the tracks switch to the neutral position to stop the under crusher conveyor. Track Switch Allow crusher to complete shutdown sequence.
-
Page 120: Emergency Stop (Estop) Re-Start Procedure
PERATION LANT TARTUP PERATION HUTDOWN Let the engine run at low idle for 15 minutes, then stop the engine by turning the key counterclockwise to the “off” position. Turn the battery isolation switch to the “off” position. Emergency Stop (ESTOP) Re-Start Procedure Ensure the reason for the emergency stop has been resolved. -
Page 121: Digsy Screen Navigation
PERATION IGSY CREEN AVIGATION Digsy Screen Navigation Digsy Display Panel Engine Ignition Switch Surrounding the screen are a series of pushbuttons labeled “F1” through “F18.” If an icon is next to, above, or below the function button, pressing the corresponding button will take you to another screen in the Digsy system. - Page 122 PERATION IGSY CREEN AVIGATION To scroll or tab between items on a page, use the corresponding buttons underneath the up/down buttons. To increase/decrease quantities for various settings, use the pushbuttons under the plus and minus signs. If a screen is part of a task, i.e. the Bowl Removal screen, there will be a return icon at the bottom. Pushing this button signifies “ok”...
-
Page 123: Digsy Icons
PERATION IGSY CREEN AVIGATION Digsy Icons... - Page 124 PERATION IGSY CREEN AVIGATION...
-
Page 125: Main Screen
PERATION CREEN Main Screen When you turn the ignition key to the “run” position, a “splash” screen will appear on the Digsy display. The splash screen shows the version of the control software and the machine type that has been selected on the OEM setup screen. - Page 126 PERATION CREEN • Engine: Press F6 to access general engine information. • Local: Press F7 to gain manual control of the plant and components. • Crusher: Press F8 to access general crusher information and to reset the CSS. • Performance: Press F10 to access machine performance information.
- Page 127 PERATION CREEN...
-
Page 128: Setup Configuration
PERATION ETUP ONFIGURATION Setup Configuration The setup screen allows you to adjust some control settings, including baghouse operations and conveyor overload conditions, as well as basic parameters, such as language, display brightness, and units of measurement. The icons along the top and bottom rows are controlled by the pushbuttons above or below them. The eight (8) options in the middle can be altered from this screen by using the F1/F2 buttons to toggle between them, and the F3/F4 buttons to decrease/increase the values that are set. - Page 129 PERATION ETUP ONFIGURATION ICON DESCRIPTION Conveyor Overload. Press F10 to go to configuration screen. Digsy Display Brightness. Use the F3/F4 buttons to adjust the brightness of the Digsy screen. Digsy Display Contrast. Use the F3/F4 buttons to adjust the contrast of the Digsy screen.
-
Page 130: Password Entry
PERATION ETUP ONFIGURATION ICON DESCRIPTION Crusher Control. Use the F3/F4 buttons to disable/enable the crusher. Disabling the crusher puts it into “Travel Mode” and must be done before transporting the plant. (A red X through the crusher logo signals that it is disabled). The crusher must be taken out of Travel Mode before it can be operated. - Page 131 PERATION ETUP ONFIGURATION You will be asked to provide a password. Use the appropriate F keys to type in the password. For example, the above password would be F6, F6, F7, F7, F8, F8. : If you make a mistake, press F4 to start over. NOTE When the correct password is entered, a screen will appear telling you it was successful.
-
Page 132: Hopper Level Sensor
PERATION ETUP ONFIGURATION Hopper Level Sensor The Kodiak+ crusher is shipped with a hopper level sensor and a mounting bracket, which provides consid- erable adjustability, mounts on any shape hopper, and can be easily repositioned when moving a portable plant. The photo below shows the sensor installed on a JCI crushing plant. Hopper Level Sensor Sensor Bracket The pivoting sensor bracket provides protection against falling rocks and pivots in two directions to accom-... - Page 133 PERATION ETUP ONFIGURATION Hopper Level Sensor Cable Input The hopper level sensor may be enabled or disabled as required. If enabled, the sensor is used by the Digsy system to determine if the feed conveyor should be stopped or started. The control setup consists of configuring a sensor on delay period and a conveyor off period.
-
Page 134: Hopper Level Sensor Initial Configuration
PERATION ETUP ONFIGURATION Hopper Level Sensor Initial Configuration Choose a location with a clear unimpeded view of the feed hopper that is as high above the full level as practical while still providing a solid platform. Provide some means for protecting the sensor from physical damage by flying feed material. Mount the sensor. - Page 135 PERATION ETUP ONFIGURATION In the Setup screen, press F6 to enter the Hopper Level Sensor screen. Disable the hopper level sensor by pressing F12. The purpose of this step is to allow the operator to establish flow of rock through the crusher using manual controls until it is determined that the sensor’s “full level is appropriate.
- Page 136 PERATION ETUP ONFIGURATION Sensor On Delay (in seconds) Feed Conveyor Off Period (in seconds) When the feed reaches the full level and the LEDs come on for an uninterrupted time period equal to the configured on delay, the feed conveyor should be disabled. If the conveyor stops but the hopper overflows, the on delay period needs to be reduced and/or the full level needs to be lowered.
-
Page 137: Hopper Sensor Calibration Procedure
PERATION ETUP ONFIGURATION Hopper Sensor Calibration Procedure Program the sensor to detect a window with a “near” and “far” limit. The far target detects the desired hopper full level. Any time an object is within this window the output LEDs on the sensor will light up and a signal will be sent to the control system. - Page 138 PERATION ETUP ONFIGURATION Green Power ON/OFF LED Yellow Analog Output LED Analog Output Programming Pushbutton (Not Used) Red Signal Strength LED Yellow Discrete Output LED Discrete (Switched) Output Programming Pushbutton Choose the output for the first set of window limits (discrete) and push and hold the corresponding button until the green Power LED goes OFF and the appropriate yellow Output LED turns ON (solid).
-
Page 139: Local Mode Screen
PERATION OCAL CREEN Position the target for the second limit and “click” the button again. This will teach the sensor the second limit. The yellow Output LED turns off and the green Power LED comes on; the sensor is now in normal RUN mode. -
Page 140: Engine Screen
PERATION NGINE CREEN Engine Screen The Engine screen provides engine speed, fuel status, engine hours, engine temperature and pressure. If a problem exists, the message center will be yellow and you can go to the diagnostics screen for engine codes. Also, the engine screen allows you to adjust the engine RPM. -
Page 141: Engine Rpm Adjustment
PERATION NGINE CREEN Engine RPM Adjustment From the Main screen press F6 to access the Engine screen. View the current engine RPM setting in the center. Press F12 to raise or F13 to lower the RPMs to the desired level. Press F5 to exit to previous screen. -
Page 142: Performance Screen
PERATION ERFORMANCE CREEN Performance Screen The performance screen shows the percent load and engine RPM. You can also adjust the crusher CSS. ELATED LINKS Bowl Rotation and CSS Adjustment... -
Page 143: Crusher Screen
PERATION RUSHER CREEN Crusher Screen The Crusher screen displays important operating conditions to ensure the crusher is within tolerances. Operating Conditions: • Lube Flow • Lube Oil Temperature • Bowl Clamp Pressure • TIR Pressure • Hydraulic System Pressure • Hydraulic Oil Temperature •... -
Page 144: The Crushing Zone
PERATION RUSHER CREEN The Crushing Zone The JCI Kodiak+ crusher comes equipped with a decal applied to all the drive gear support posts that defines the “Crushing Zone.” This crushing zone is the region where the bottom of the bowl drive ring can be posi- tioned. -
Page 145: Maximum Bowl Position
PERATION RUSHER CREEN Maximum Bowl Position It is important to prevent the bottom edge of the bowl drive ring from rotating above the top of the orange decal that defines the specified “Crushing Zone” unless the bowl clamp has been depressurized and disabled. If the bowl rotates too far beyond this point, the amount of thread engagement between the bowl and bowl support will eventually be inadequate to resist the substantial upward thrust of the bowl clamp and the bowl threads and/or the bowl clamp could be damaged. -
Page 146: Bowl Float
PERATION RUSHER CREEN Bowl Float Bowl float occurs when material in the crushing chamber is able to overcome the Tramp Iron Relief (TIR) hold down force and the upper assembly lifts off the baseframe repeatedly. Bowl float indicates that the crusher is overloaded. -
Page 147: Bowl Rotation And Css Adjustment
PERATION RUSHER CREEN Bowl Rotation and CSS Adjustment The Crusher screen displays the closed side setting relative to a “zero” location that is set by the user. Once the counter “zero” point is set, the bowl can be rotated up and the counter will display the closed side setting of the chamber. -
Page 148: Zeroing Out Bowl Position Counter
PERATION RUSHER CREEN Zeroing Out Bowl Position Counter There are two ways to zero out the bowl position counter: with the crusher stopped or with the crusher empty and running. The problem with resetting while the crusher is stopped is that rocks in the feed hopper can occasionally roll down into the chamber before the liner contacts the mantle. - Page 149 PERATION RUSHER CREEN The observer alerts you to immediately release the bowl down button as soon as contact is detected. Stop as soon as the sound of contact is heard or clockwise cone rotation is observed. NOTICE: It is essential to stop bowl rotation as soon as the bowl contacts the cone in order to avoid damage to the cone brake components.
-
Page 150: Crusher Clear Procedure
PERATION RUSHER CREEN : If you reach the maximum crushing zone limit while adjusting the bowl up, a warning screen will NOTE appear. Do not raise the bowl farther unless you intend to remove the bowl. Always follow the instructions outlined in this manual to remove the bowl. - Page 151 PERATION RUSHER CREEN WARNING: Never reach into the gap or insert tools into the gap between the upper assembly and baseframe when the upper assembly is elevated. After clearing, lockout/tagout the plant and conduct a visual inspection of the crusher prior to restarting. •...
-
Page 152: Adjusting Conveyor Speed
PERATION DJUSTING ONVEYOR PEED Adjusting Conveyor Speed You can increase/decrease the speed of the conveyors using flow control valves located in the hydraulic panel. Each valve is labeled with the conveyor number, which corresponds to the plant decal located on the panel door. -
Page 153: Operating The Plant In Extreme Weather Conditions
PERATION PERATING THE LANT IN XTREME EATHER ONDITIONS Operating the Plant in Extreme Weather Conditions Crusher Lubrication Heater Lube Heater Valve The lubrication system tank has an internal heat exchanger that uses engine coolant as a means of heating the lube oil. In cold weather conditions, turn the lube heater valve to the open position, start the engine, and allow the lube oil temperature to raise to 80°F (24°C) before starting the crusher. -
Page 154: Automatic Error Guiding
PERATION UTOMATIC RROR UIDING Automatic Error Guiding Many of the operator accessible screens will play a warning triangle in the bottom left corner just above the F1 key when an error is present. By pressing F1 when this occurs, you will automatically be guided to the diagnostic screen where the error is active. -
Page 155: Warning Screens
PERATION ARNING CREENS Warning Screens The table below details each Digsy warning screen and its meaning: SCREEN DESCRIPTION Baghouse Error. Maximum bowl height for crushing. To remove bowl, go to the bowl removal in the maintenance screen. - Page 156 PERATION ARNING CREENS SCREEN DESCRIPTION CAN BUS failure. This screen will be shown when the Digsy display and the control unit stop communicating. Check connections for both units. press F5 to reset. Clutch error. Crusher overload.
- Page 157 PERATION ARNING CREENS SCREEN DESCRIPTION Engine error. Feeder stopped. Clutch low pressure.
- Page 158 PERATION ARNING CREENS SCREEN DESCRIPTION Low bowl clamp pressure. This screen is displayed when the bowl clamp pressure drops below 1500 psi (10341 kPa). Begin shutdown procedures and correct the problem. Press F5 to reset. Low TIR pressure. This screen is displayed if the TIR pressure drops below 1500psi (10341 kPa).
- Page 159 PERATION ARNING CREENS SCREEN DESCRIPTION J1939 failure. This screen is displayed when communication between the engine, clutch, Digsy, or the remote control has failed. The engine will stop. Correct the problem before resuming operation. Press F5 to reset. High crusher lube oil temperature. This screen is displayed if the lube oil reaches 190°F / 88°C.
- Page 160 PERATION ARNING CREENS SCREEN DESCRIPTION High hydraulic temperature. This screen is displayed if the hydraulic oil reaches 190°F / 88°C. You should begin shutdown procedures and find the cause of the overheating. Press F5 to reset. Hydraulic temperature transducer not detected.
- Page 161 PERATION ARNING CREENS SCREEN DESCRIPTION System pressure transducer not detected (PT3). This screen will be displayed if the sensor stops sending a signal to the Digsy control unit. Check the installation. Press F5 to reset. TIR transducer not detected (PT2). This screen will be displayed if the sensor stops sending a signal to the Digsy control unit.
- Page 162 PERATION ARNING CREENS SCREEN DESCRIPTION Low lube flow. This screen will be displayed if the crusher lube flow falls below 4 gpm. Begin shutdown procedures and correct the problem. Press F5 to reset. Low voltage. This screen will be shown when the electrical system voltage drops below 21V.
- Page 163 PERATION ARNING CREENS SCREEN DESCRIPTION Radio ESTOP Pressed. This screen is shown when the remote ESTOP is activated. Press F5 to reset. Radio not linked. When the remote either loses battery power or is moved beyond the range of the transmitter, this screen will be displayed after the plant has automatically shut down.
-
Page 164: Diagnostics
PERATION IAGNOSTICS Diagnostics The Diagnostics screen allows you to access various statistics and information regarding how your machine is performing. You have access to any engine error codes, clutch system issues, sensor inputs and outputs. These screens are generally used for troubleshooting. : If you do not have the (optional) Omnex remote connected, the Radio icon will not appear. - Page 165 PERATION IAGNOSTICS...
-
Page 166: Fault Condition Warning
PERATION IAGNOSTICS Fault Condition Warning When a fault condition is detected by the Digsy control system, the display panel will show a screen associ- ated with the fault. If the fault has not been cleared and corrected, the Diagnostic screen notifies and guides you to the portion of the crusher that is experiencing an error. -
Page 167: Clutch Diagnostics
PERATION IAGNOSTICS You are able to view the engine error code history page by pressing F1. The engine error code history is able to store up to 20 past error codes. These codes are sorted by the order in which they occurred. Also, stored error code information includes: SPN number, FMI number, engine hours at the time of the error, and a description of the error. -
Page 168: Crusher Diagnostics
PERATION IAGNOSTICS Crusher Diagnostics System Diagnostics The system diagnostics screen displays the status of the analog sensors, CAN open status, and J1939 status. These statuses are shown by a green indicator, meaning present, or gray indicator, meaning not present. System voltage is also given. Press F1 to go to the inputs (I/O) screen. - Page 169 PERATION IAGNOSTICS Push F3 (OUTPUTS) to go to the outputs screen. All input and output statuses can be tested for troubleshooting purposes. From the Crusher Outputs screen you can raise and lower the bowl using F12/F13 and you can also clear the crusher using F2.
-
Page 170: Automatic Crusher Shutdown
PERATION UTOMATIC RUSHER HUTDOWN System diagnostics are the only screens in which you can change between languages without going through the setup screen. This is primarily for service personnel who might need to switch languages while trouble- shoot problems. Press F4 under the language to switch. You can choose between English, Spanish, or Portu- guese. -
Page 171: Circuit Breakers
PERATION IRCUIT REAKERS Circuit Breakers The circuit breakers protect the plant electrical system from over voltage. When one is tripped, you can reset the switch, either by pressing the pushbutton or pulling the lever down to the on position, depending on the type. -
Page 172: Crusher Operational Troubleshooting
PERATION RUSHER PERATIONAL ROUBLESHOOTING Crusher Operational Troubleshooting For the most part you can avoid many of the problems below by maintaining a choke feed, preventing bowl float, and using the proper liner, closed side setting, and reduction ratio for the material you are crushing and producing. - Page 173 PERATION RUSHER PERATIONAL ROUBLESHOOTING SYMPTOM PROBABLE CAUSE Pinion bearing failing. Excessive heat buildup at pinion housing. Lack of lubrication. Rumbling noise emitted from crusher. Bearing failing. Hammering noise when crushing rock. Crusher not choke fed. Hydraulic fluid leaking down side of bowl support. Damaged bowl clamp seal;...
- Page 174 PERATION RUSHER PERATIONAL ROUBLESHOOTING...
-
Page 175: Maintenance
AINTENANCE AINTENANCE AND EPAIR AFETY Maintenance Maintenance and Repair Safety WARNING: Always lockout/tagout power to machinery and conveying equipment before performing any maintenance or repairs. Warn all personnel that the machinery is being serviced. General Precautions • To help ensure safe machine operation, use only genuine Original equipment manufacturer (OEM) replacement parts that are sold or approved by the machine’s manufacturer. -
Page 176: Pressurized Systems
AINTENANCE AINTENANCE AND EPAIR AFETY Pressurized Systems • Adjust, maintain and repair all pressurized systems only in accordance with the instructions contained in the manufacturer’s manuals provided with the machinery. • Never attempt to work on a pressurized system while it is pressurized or in operation. •... -
Page 177: Clearing Jammed Material
AINTENANCE AINTENANCE AND EPAIR AFETY • Relieve all hydraulic pressure before welding near hydraulic components and lines. Cover hydraulic components to protect them from weld spatter and sparks. • Do not weld near flammable liquids or hydraulic oils. • Welding lifting eyes or hooks to manganese steel castings is strongly discouraged, and should be done only if absolutely necessary. -
Page 178: Hazardous Materials
AINTENANCE AINTENANCE AND EPAIR AFETY Hazardous Materials • Be aware potentially hazardous chemicals or materials. Such items can be harmful if they are improp- erly used, stored, mixed transported, if they are inhaled, swallowed or allowed to contact the skin. •... -
Page 179: System Controls
AINTENANCE YSTEM ONTROLS System Controls The system controls screen is designed to allow you to run a component independently for maintenance purposes. Pressing the corresponding function key will turn on the component. The green light indicates that the chosen item is running. Press the same button to turn the item off. The green light will go out. Maintenance Screen The maintenance screen is a portal to several maintenance procedures including bowl removal and pressure valve adjustments. -
Page 180: Disconnecting Digsy Control Components
AINTENANCE ISCONNECTING IGSY ONTROL OMPONENTS Disconnecting Digsy Control Components You must disconnect the following items before any welding may occur on the plant. Set the battery switch to the OFF position. - Page 181 AINTENANCE ISCONNECTING IGSY ONTROL OMPONENTS Remove both cable connectors from the Digsy control unit, located in the electrical cabinet. Remove the two cables from the Digsy display unit, located in the electrical cabinet.
- Page 182 AINTENANCE ISCONNECTING IGSY ONTROL OMPONENTS Remove the cable connected to the Omnix control unit located in the lube cabinet. Or, if you have either the Kar-Tech controller plugged in, unplug that cable.
- Page 183 AINTENANCE ISCONNECTING IGSY ONTROL OMPONENTS Remove the cable from the SKIM module, located in the lube panel. Remove the two cables connected to the PT Tech clutch control unit, located in the hydraulic cabinet.
-
Page 184: Depressurize Plant Hydraulic System Procedure
AINTENANCE EPRESSURIZE LANT YDRAULIC YSTEM ROCEDURE Depressurize Plant Hydraulic System Procedure Support all folding conveyors, with appropriately rate blocking and position stabilizers so there is “no load” on them. (This means that they are in a position where they are not working. This could be at one end or the other of the piston position.) WARNING: When the hydraulic pressure is relieved the folding conveyors are not properly supported. - Page 185 AINTENANCE EPRESSURIZE RUSHER YDRAULIC YSTEM ROCEDURE NV1 Needle Valve (TIR Pressure) NV2 Needle Valve (Bowl Clamp Pressure) To relieve the bowl clamp pressure, open needle valve NV2, located on the lower right-hand corner of the manifold. You will have to first loosen the jam nut behind the valve before turning the knob. : To prevent hydraulic pressure from building up, leave NV1 and NV2 needle valves open while working NOTE on the hydraulic system.
-
Page 186: Track Plant Maintenance Procedures
AINTENANCE RACK LANT AINTENANCE ROCEDURES TIR Pressure Transducer (PT2) Bowl Clamp Transducer (PT1) Verify that the pressure reads zero on the pressure transducers at the top of the manifold. Track Plant Maintenance Procedures Track Plant Daily Inspection Checklists Use the following checklists to help guide you through daily inspections. Before Plant Startup WARNING: Always lockout/tagout the equipment and depressurize the hydraulic system prior to conducting these inspections. -
Page 187: After Plant Startup
AINTENANCE RACK LANT AINTENANCE ROCEDURES OPERATOR’S SERVICE INITIALS INSPECTION ITEM OKAY REQUIRED Inspect all conveyor guards are installed and functioning properly. Remove all tools and any foreign objects from the conveyor belts. Inspect the track undercarriage. Check for leakage on all track idlers. Inspect the track drive motor seal and all hydraulic connections. -
Page 188: Restriction Indicator
AINTENANCE RACK LANT AINTENANCE ROCEDURES Restriction Indicator Periodically during your shift, check the air intake restriction indicator, which is located in the engine compart- ment. A clear area, or service indicator window, around the middle of the indicator will fill with a yellow plug that rises to the red area on the indicator. -
Page 189: Engine Coolant Level
AINTENANCE RACK LANT AINTENANCE ROCEDURES NOTICE: Always service the air filter system with the engine stopped. You can damage the engine severely with dust and debris. : An adequate supply of clean, filtered air is necessary to maintain correct fuel/air ratios, resulting in a NOTE cleaner burning engine. -
Page 190: Engine Drive Belts
AINTENANCE RACK LANT AINTENANCE ROCEDURES Check engine coolant level. Add coolant if necessary. NOTICE: See the engine manual for the proper coolant specifications. Do NOT use any sealants that are not recommended by your engine manufacturer. Install coolant cap. ELATED LINKS Lockout/Tagout Procedure Engine Drive Belts Lockout/tagout the plant, following all local rules and regulations. -
Page 191: Engine Fuel Level
AINTENANCE RACK LANT AINTENANCE ROCEDURES Engine Fuel Level Check the fuel level daily as part of the pre-start checks. Fill the fuel tank as necessary. Make sure the engine is off. Lockout/tagout the equipment following all local rules and regulations. Check the fuel level on the fuel tank sight gauge, located next to the fuel filler on the tank. -
Page 192: Engine Oil Level
AINTENANCE RACK LANT AINTENANCE ROCEDURES Reach down into the hole in the engine fuel guard and remove the engine fuel filler cap. NOTICE: Since the fuel tank is pressurized during normal plant operation, the air pressure will be released when you remove the cap. - Page 193 AINTENANCE RACK LANT AINTENANCE ROCEDURES Engine Oil Dipstick Push the dipstick completely down and pull out. The oil level must be between the ADD and FULL marks on the dipstick. If the oil level is below the ADD mark, add oil to raise the oil level up to the FULL mark on the dipstick. ADD Mark FULL Mark : Do not add engine oil until level is below the ADD mark on the dipstick.
-
Page 194: Fuel Water Separator
AINTENANCE RACK LANT AINTENANCE ROCEDURES Follow the instructions in the engine manual to add oil. Replace dipstick. ELATED LINKS Lockout/Tagout Procedure Fuel Water Separator On your plant, the primary fuel filter also acts a fuel/water separator. It should be checked before starting the engine prior to each shift. -
Page 195: Hydraulic Cooler
AINTENANCE RACK LANT AINTENANCE ROCEDURES Hydraulic Cooler Inspect the hydraulic cooler for damage or leaks. Keep the cooler clean from excess dirt buildup. When the plant is operating, periodically check to make sure the fan is operating. The thermostat for the cooler is set at 115°F so if the hydraulic tank or the hoses are hot to the touch, make sure the fan is functioning properly. -
Page 196: Hydraulic Oil Level
AINTENANCE RACK LANT AINTENANCE ROCEDURES Check all plumbing lines and piping connections for leakage and/or breaks and replace as necessary. Check all hydraulic hoses for tears, bucking, and leaks and replace as necessary. ELATED LINKS Lockout/Tagout Procedure Depressurize Plant Hydraulic System Procedure Hydraulic Oil Level Depressurize the hydraulic system. -
Page 197: Hydraulic Restriction Indicator
AINTENANCE RACK LANT AINTENANCE ROCEDURES Hydraulic Restriction Indicator Once the engine is started, check the hydraulic filter restriction indicator. The hydraulic filter is mounted on the hydraulic tank under the tank cover. Check the indicator as part of your post start checks. Drive Cog Sheave Alignment and Belt Tension Verify Drive Cog Sheave Alignment Procedure The best tool to measure any misalignment is a laser alignment device. - Page 198 AINTENANCE RACK LANT AINTENANCE ROCEDURES Angular Misalignment Parallel Misalignment Verify that the sheaves are aligned.
- Page 199 AINTENANCE RACK LANT AINTENANCE ROCEDURES Angular Misalignment Adjustment Procedure Determine the angular alignment with a straightedge. Locate and loosen the four engine sled jam nuts. Right Side Left Side Rear...
- Page 200 AINTENANCE RACK LANT AINTENANCE ROCEDURES Left Side Front (located in the engine compartment) Locate the four (4) jack screws in the corners under the engine sled. Turn the four (4) jack screws to raise the engine sled to relieve the weight of the engine sled from the hard shims.
- Page 201 AINTENANCE RACK LANT AINTENANCE ROCEDURES If the cog sheave is pitched up, as shown below, turn both jack screws in the back of the engine sled up an equal number of turns (or turn both jack screws in the front down an equal number of turns) to bring the engine sled down to align the cog sheaves.
- Page 202 AINTENANCE RACK LANT AINTENANCE ROCEDURES If the cog sheave is pitched down, as shown below, turn both jack screws in the front of the engine sled up an equal number of turns (or turn both jack screws in the back and equal number of turns) to align the cog sheaves.
- Page 203 AINTENANCE RACK LANT AINTENANCE ROCEDURES Left Engine Sled Adjustment Bolt...
- Page 204 AINTENANCE RACK LANT AINTENANCE ROCEDURES Right Engine Sled Adjustment Bolt...
- Page 205 AINTENANCE RACK LANT AINTENANCE ROCEDURES If the cog sheave is pitched to the left, loosen the right side engine sled adjustment bolt and tighten the left side engine sled adjustment bolt until the cog sheaves are aligned. If the cog sheave is pitched to the right, loosen the left side engine sled adjustment bolt and tighten the...
- Page 206 AINTENANCE RACK LANT AINTENANCE ROCEDURES right side engine sled adjustment bolt until the cog sheaves are aligned.
- Page 207 AINTENANCE RACK LANT AINTENANCE ROCEDURES Parallel Misalignment Adjustment Procedure Make sure the cog sheaves are aligned correctly. To adjust parallel misalignment, loosen the bolts on the engine cog sheave bushing and push or pull the cog sheave/bushing until it is aligned with the crusher cog sheave. When the cog sheaves are aligned, torque the bolts to 141 ft-lb (192 Nm).
- Page 208 AINTENANCE RACK LANT AINTENANCE ROCEDURES Use a hammer and a drift to set the bushing and the cog sheave by hitting the bushing on the large side opposite the split in the bushing. Hit bushing on both sides of the screw. Do not hit close to the outside of the bushing to avoid damage.
- Page 209 AINTENANCE RACK LANT AINTENANCE ROCEDURES Setting the Cog Belt Tension Meter Press the POWER key. If this is the first time you have used your meter, the screen will appear as below. If this is not the first time, the last settings used will appear. Press the “MASS”...
- Page 210 AINTENANCE RACK LANT AINTENANCE ROCEDURES The “MASS” window will be shown. NOTICE: After ten (10) hours of operation, use the “USED BELT SETTING.” DEFLECTION NEW BELT USED BELT MASS WIDTH SPAN 74-81 LBS SETTING SETTING (34-37 KG) 48-51 HZ 41-43 HZ .56 IN.
- Page 211 AINTENANCE RACK LANT AINTENANCE ROCEDURES The “SPAN” screen will be shown. Enter the “SPAN” value from the above chart on the keypad. This entry will be in grams per meter. If your entry is incorrect press “SPAN” again and the cursor will return to the starting position. Using the Cog Belt Tension Meter Relieve all hydraulic pressure.
- Page 212 AINTENANCE RACK LANT AINTENANCE ROCEDURES Hold the sensor 0.4 inch (1cm) or closer to the belt. : Do not touch the belt with the sensor. NOTE Strike the belt with a large wrench. The meter will display a measurement in Hz. Repeat the above step three (3) times to ensure accuracy.
-
Page 213: Baghouse Filter Change
AINTENANCE RACK LANT AINTENANCE ROCEDURES NOTICE: If the belt does not track correctly, immediately shut down to prevent damage to the belt. Run the plant to verify belt tension and proper belt alignment. Shut down the plant. Remove the drive guard. Verify the belt tension and visually inspect the belt for proper alignment. - Page 214 AINTENANCE RACK LANT AINTENANCE ROCEDURES Use the following procedures change the filters: Remove the top section of the baghouse. Remove the old bags and cages from the collector. The air plenum should be thoroughly cleaned after removing the used bags and cages. Clean the top surface and inside surface of the tube sheet hole so the urethane top will seal on a clean smooth metal surface.
- Page 215 AINTENANCE RACK LANT AINTENANCE ROCEDURES Inspect each filter element for damage from shipping, storage or handling. Do not use damaged elements; they may leak or fail prematurely. Slowly lower the filter element through the tube sheet hole without touching the sides of the hole as much as possible.
- Page 216 AINTENANCE RACK LANT AINTENANCE ROCEDURES Push the opposite side of the top of the element until it is securely snapped into the tube sheet hole. Ground Wire Option: Pull the ground wire out of the inside of the element and fold over the flange top on either end of the element top.
- Page 217 AINTENANCE RACK LANT AINTENANCE ROCEDURES : A snap band retainer has been shipped with every top load filter element. NOTE Pinch the snap band retainer in the center to form a figure “8”. Bend the loop slightly and place the retainer under the molded lip of the top flange of the filter element. This shallow lip prevents upward movement of the snap band retainer after proper installation.
-
Page 218: Track Plant Maintenance Schedules
AINTENANCE RACK LANT AINTENANCE ROCEDURES With the snap band retainer held against one side of the filter element top interior, slowly allow the retainer to expand into the recessed area between the lip rim and the three interior post stops. The snap band retainer should fit snugly between the lip rim and the vertical post stops. -
Page 219: Monthly Or Every 200 Hours Of Operation
AINTENANCE RACK LANT AINTENANCE ROCEDURES Monthly or Every 200 Hours of Operation ITEM INSTRUCTIONS Hydraulic Tank Breather Replace breather filter. Hydraulic Oil Test oil sample. Track Drive Gearbox Oil Check level. Every 500 Hours of Operation ITEM INSTRUCTIONS Track Gearbox Oil Change oil. -
Page 220: Batteries
AINTENANCE RACK LANT AINTENANCE ROCEDURES Batteries Each week the batteries should be checked and cleaned. WARNING: When working around batteries, avoid any sparks and/or flame. Hydrogen gas given off by batteries is explosive. • Ensure that the battery tops are kept clean and free of dirt and electrolyte. •... -
Page 221: Feed Conveyor Gear Reducer
AINTENANCE RACK LANT AINTENANCE ROCEDURES • Check and record battery voltage level. • Check battery hold-downs for tightness, and clean if needed with solution used on battery. Ensure integ- rity of hold-downs, and replace if in doubt. : Frequency of battery maintenance dependent on type of battery (i.e. conventional, low-maintenance, NOTE or maintenance-free). -
Page 222: Plant Grease Points
AINTENANCE RACK LANT AINTENANCE ROCEDURES Plant Grease Points Conveyor Head Pillow Block Conveyor Support Pivot Points... -
Page 223: Radiator And Cooler Care
AINTENANCE RACK LANT AINTENANCE ROCEDURES Radiator and Cooler Care • Check the engine radiator and hydraulic oil cooler for damage, wear, and dirt buildup. • Clean the radiators periodically to keep dirt buildup from closing off the fins. • Check the hoses and tubing that attach to the radiators for damage, leaks, or excessive wear. Track Checks Track Undercarriage Inspect the track mounting hardware for damage and cracking. -
Page 224: Lube Oil Sample Procedure
AINTENANCE RACK LANT AINTENANCE ROCEDURES Oil Fill Level Plug Oil Drain Plug Remove the “Oil Fill Level” plug and look inside the gearbox. The oil level should be at the bottom of the plug threads. Add oil if necessary. Replace the plug and use a new washer. ELATED LINKS Lockout/Tagout Procedure Lube Oil Sample Procedure... - Page 225 AINTENANCE RACK LANT AINTENANCE ROCEDURES • Look at particle count. If changes are detected, take a second look at silica, iron, and copper to see if the particle count change corresponds with a change in one of these contaminant/wear elements. •...
-
Page 226: Lube And Hydraulic Reservoir Air Breather Change Procedure
AINTENANCE RACK LANT AINTENANCE ROCEDURES Attach the sampling tube to the oil sampling port. Prior to collecting the sample, allow a small amount of oil to flow into a spare container to flush away any contamination. Open the clean sample container and fill with lubricant. Install the protective cap on the oil sampling port. - Page 227 AINTENANCE RACK LANT AINTENANCE ROCEDURES The hydraulic breather is located on top of the hydraulic tank, behind the hydraulic filter. Relieve all hydraulic pressure. Lockout/tagout the plant, following all local rules and regulations. Inspect the area around the breather frequently to verify that the bottom surface is free to draw in clean air.
-
Page 228: Oil Filter Restriction Indicator
AINTENANCE RACK LANT AINTENANCE ROCEDURES Oil Filter Restriction Indicator The lube oil filter and the hydraulic oil filter each have a filter restriction indicator mounted on the filter head. When the filter becomes restricted, the plug inside the glass tube will be pushed into the red zone, indicating it is time to change the filter. - Page 229 AINTENANCE RACK LANT AINTENANCE ROCEDURES Lockout/tagout the crusher and power supply. Locate the lube oil filter. Unscrew the filter. Inspect filter for any contamination and dispose properly. Remove new filter from packaging. Apply a light coat of oil to the o-ring. Remove the protective paper.
-
Page 230: Lube Oil Reservoir Fill Procedure
AINTENANCE RACK LANT AINTENANCE ROCEDURES Install onto the filter head. Clean up any spilled lube oil. After re-pressurizing the hydraulic system, check for leaks around the oil filter. ELATED LINKS Lockout/Tagout Procedure Depressurize Plant Hydraulic System Procedure Lube Oil Reservoir Fill Procedure Check and/or add oil when the crusher has been stopped long enough that any oil remaining in the crusher is able to return to the reservoir. -
Page 231: Lube Oil Change Procedure
AINTENANCE RACK LANT AINTENANCE ROCEDURES Clean the area around the fill opening thoroughly before removing the fill cap to avoid introducing dirt directly into the reservoir. Verify that dirt will not be knocked into the opening once the cap is removed. Verify that the spout on oil dispensing equipment and/or buckets, funnels, etc. -
Page 232: Hydraulic Filter Change Procedure
AINTENANCE RACK LANT AINTENANCE ROCEDURES Relieve all hydraulic pressure. Lockout/tagout the plant, following all local rules and regulations. Locate the drain plug, underneath the lube reservoir. Place a container under the reservoir drain. Remove the drain plug from the reservoir and drain the oil. Install the reservoir drain plug. - Page 233 AINTENANCE RACK LANT AINTENANCE ROCEDURES Locate the hydraulic oil filter, which is mounted on the hydraulic tank under the access cover. Remove the tank cover, which is bolted on the sides. Remove the breather to relieve any presser built up in the tank. Clean the area around the filter.
- Page 234 AINTENANCE RACK LANT AINTENANCE ROCEDURES Remove filter cover and hardware. Remove the filter element inside the filter. Insert new filter element. Install the filter cover and secure with hardware. Install the breather. Install the tank cover and secure with hardware. ELATED LINKS Lockout/Tagout Procedure Depressurize Plant Hydraulic System Procedure...
-
Page 235: Hydraulic Oil Change Procedure
AINTENANCE RACK LANT AINTENANCE ROCEDURES Hydraulic Oil Change Procedure WARNING: The hydraulic system operates at high pressures. Do not attempt to perform any service without depressurizing the system. Serious injury could result from high pressure oil. Relieve all hydraulic pressure. Lockout/tagout the plant, following all local rules and regulations. - Page 236 AINTENANCE RACK LANT AINTENANCE ROCEDURES • Clean rags Relieve all hydraulic pressure. Lockout/tagout the plant, following all local rules and regulations. : The following steps can be done for either accumulator or both. NOTE Locate the hydraulic accumulators inside the engine compartment. Disconnect hydraulic fittings from the accumulator.
-
Page 237: Hydraulic Accumulator Refill Procedure
AINTENANCE RACK LANT AINTENANCE ROCEDURES Support the accumulator as you loosen the clamp. Remove the accumulator. Place accumulator on work surface and stabilize to prevent from falling off. Clean up any spilled hydraulic fluid. ELATED LINKS Lockout/Tagout Procedure Depressurize Plant Hydraulic System Procedure Hydraulic Accumulator Refill Procedure Tools and supplies needed: •... - Page 238 AINTENANCE RACK LANT AINTENANCE ROCEDURES Check the nitrogen pressure in the accumulator by attaching valve and gauge. Pressure should be 1900 +/- 50 psi. Attach the nitrogen bottle high pressure hose to the accumulator with a gauge. WARNING: Do not overfill the hydraulic accumulator. Filling above 1900+/- 50psi can damage the accumulator or cause it to rupture, which can cause serious injury or death.
- Page 239 AINTENANCE RACK LANT AINTENANCE ROCEDURES Slowly open the valve to the nitrogen bottle watching the gauge pressure. Once the nitrogen pressure is 1900 +/- 50psi close the valve on the accumulator. Close the valve on the nitrogen bottle. Remove the valve from the accumulator and install the cap to protect the fitting. Remove the hose and secure the nitrogen bottle.
-
Page 240: Hydraulic Accumulator Installation Procedure
AINTENANCE RACK LANT AINTENANCE ROCEDURES Hydraulic Accumulator Installation Procedure Tools and supplies needed: • Wrench set • Socket set • Clean rags Make sure accumulator is serviced with nitrogen prior to installation. : The accumulator weighs about 30 pounds (14kg) and can be slippery; use care when installing. NOTE : The following steps can be done for either accumulator or both. - Page 241 AINTENANCE RACK LANT AINTENANCE ROCEDURES Hydraulic line from NV1 goes to accumulator on right Hydraulic line from NV2 goes to accumulator on left Clean up any spilled hydraulic fluid.
-
Page 242: Conveyor Maintenance
AINTENANCE ONVEYOR AINTENANCE Conveyor Maintenance Conveyor Daily Inspection Checklist OPERATOR’S SERVICE INITIALS INSPECTION ITEM OKAY REQUIRED Check the gear reducer oil levels. Make sure all guards are in place and are working properly. Inspect all conveyor belts for damage and excess wear. - Page 243 AINTENANCE ONVEYOR AINTENANCE ITEM INSTRUCTIONS Check and adjust to prevent side spillage, and to Skirt Boards prevent material from falling between the tail pulley and the belt. Keep clean to ensure safe viewing distance legibility. Safety Labels Contact JCI for replacement decals if needed. Ensure they contact the belt and run free under load.
-
Page 244: Repairing A Broken Conveyor Belt
AINTENANCE ONVEYOR AINTENANCE Repairing a Broken Conveyor Belt This will guide you through the proper method of repairing a broken conveyor belt. Refer to the below sections to correctly repair a broken conveyor belt. • How to Measure for Proper Conveyor Belt Length •... -
Page 245: Squaring The Ends Of The Conveyor Belt
AINTENANCE ONVEYOR AINTENANCE Squaring the Ends of the Conveyor Belt You can maximize the belt splicing life when both ends of the belt are properly squared prior to fastener instal- lation: • Fasteners will last longer when the belt is aligned correctly. •... - Page 246 AINTENANCE ONVEYOR AINTENANCE Mark the center with either a straight edge or chalk line using the marks from the above step. Using a square, draw a line perpendicular to your average center line across the belt width.
- Page 247 AINTENANCE ONVEYOR AINTENANCE For even greater accuracy in preparing your squaring line (on belts with worn edges) after completion of step 3, mark two lines (B & C) equal distance from the center line in the area where the splice will be installed.
-
Page 248: How To Drill And Skive The Conveyor Belt
AINTENANCE ONVEYOR AINTENANCE Where this arc intersects the two smaller lines (B &C) marked parallel to the belt center line, align a steel straight edge through these points and trace the line across the width of the belt. The resulting line is the true square. - Page 249 AINTENANCE ONVEYOR AINTENANCE : Ensure the belt is “rubber” side up. NOTE Place the bolt template with the lugs tight against the end of the belt.
- Page 250 AINTENANCE ONVEYOR AINTENANCE Nail the bolt template in position through the belt to the board. Use the Flexco drill bit (p/n HP1) to bore the holes through both ends of the template.
- Page 251 AINTENANCE ONVEYOR AINTENANCE Take the drilling template off and pull one end of the belt out of the way. Place the skiving template (p/n 990941) on the belt by inserting the aligning pins in the holes you drilled. Use a router with a 1-2” X 1” straight flute carbide tipped bit to create the skives.
-
Page 252: Attaching The Belt Ends
AINTENANCE ONVEYOR AINTENANCE Repeat moving the template and router skives until both end are complete. Attaching the Belt Ends Once the belt ends are squared, drilled and skived the belt ends are ready to be joined together. Cut a chamfer at the edge of each belt end. This will help prevent the edge of the splice from catching on any part of the conveyor structure or rollers. - Page 253 AINTENANCE ONVEYOR AINTENANCE If needed, assemble bottom plate. Insert two (2) bolts and attach clip. You may insert all the bolts in the holes of one side of the belt or you may start at once end or middle of the belt and insert one bolt in each end of the belt. Place top plates over bolts.
- Page 254 AINTENANCE ONVEYOR AINTENANCE Cut Flexco-lok Tape 3 1/2 times the width of the belt and feed the tape under the top plates and under the bottom plates then back under the top plates.
- Page 255 AINTENANCE ONVEYOR AINTENANCE Pull the tape tight and hold in position by tightening a fastener at each end with Flexco part number HW1. Then tighten all other plates. Make sure the points on the plates do not puncture the tape. Tighten all nuts uniformly.
- Page 256 AINTENANCE ONVEYOR AINTENANCE Break off excess bolt ends using a bolt breaker. Grind the bolts smooth to finish.
-
Page 257: Using The Flexco 840 Belt Cutter
AINTENANCE ONVEYOR AINTENANCE Using the Flexco 840 Belt Cutter The Flexco 840 belt cutter is a single operator self contained belt cutting device. Base Locking Pins Clamp Bar Handles Clamp Bar Wrench Blade troth... - Page 258 AINTENANCE ONVEYOR AINTENANCE Ensure the blade in the belt cutter is at one end. Roll the belt back a few feet from the cut mark and place the belt cutter. Roll the belt back and position the belt over the belt cutter base.
- Page 259 AINTENANCE ONVEYOR AINTENANCE Place the clamp bar on the belt cutter. Place the locking pin in the belt cutter, and then push down the clamp bar handles to secure the belt. Turn the wrench to move the blade through the blade troth and cut the belt. Remove the belt from the belt cutter.
-
Page 260: Crusher Maintenance
AINTENANCE RUSHER AINTENANCE Crusher Maintenance Crusher Hydraulic Safety Precautions CAUTION: The Kodiak+ crusher hydraulic system uses high pressure fluid. Exposure to high pressure oil could cause severe injury or death. Always depressurize the hydraulic system before conducting maintenance or service. CAUTION: Some diagnostic and/or adjustment procedures described in this manual require working on electrically and/or hydraulically energized equipment. -
Page 261: Crusher Daily Inspection Checklist
AINTENANCE RUSHER AINTENANCE • Repair any leaks immediately. Always relieve system pressure and lockout/tagout power before tight- ening fittings or making repairs. • Never attempt to adjust pressure relief valves higher than the specified settings. Serious personal injury and/or equipment damage could result. Do not operate the hydraulic system with worn, damaged, or leaking components. -
Page 262: Crusher Maintenance Schedules
AINTENANCE RUSHER AINTENANCE OPERATOR’S SERVICE INITIALS INSPECTION ITEM OKAY REQUIRED Verify that belt guards are in place and in serviceable condition. Check for oil leaks anywhere in the lubrication or hydraulic systems and hoses. Check for physical damage to seal between the bowl drive ring and bowl support. -
Page 263: Every 500 Hours Of Operation
AINTENANCE RUSHER AINTENANCE Every 500 Hours of Operation ITEM INSTRUCTIONS Lube Oil and Filter Change. Lube Oil Breather Inspect. Bowl Rotation Gearbox Lube Oil Check and top off, if required. Bowl Rotation Gearbox Output Shaft Grease Replenish, if required. Be sure to remove vent plug. Annually or 4,000 Hours ITEM INSTRUCTIONS... -
Page 264: Before Recommissioning The Crusher
AINTENANCE RUSHER AINTENANCE Before Recommissioning the Crusher If the crusher has been out of commission for a prolonged, unknown period, a complete tear down and inspec- tion may be required. If a complete tear down is considered unnecessary: ITEM INSTRUCTIONS Lube Oil and Filter Change. -
Page 265: Under Crusher Access Door
AINTENANCE RUSHER AINTENANCE Under Crusher Access Door Under the feed side of the plant is an access door you will use to check under the crusher each day. Depressurize the hydraulic system. Lockout/tagout the battery isolation switch, observing all local rules and regulations. Locate the access door. -
Page 266: Bowl Rotation Gear Box Lubrication Procedure
AINTENANCE RUSHER AINTENANCE Bowl Rotation Gear Box Lubrication Procedure Tools and supplies needed: • Crusher lube oil • Grease • Set of Allen wrenches • Clean rags The gear box used to rotate the bowl has oil in the lower portion to lubricate the gears and grease in the upper portion to lubricate the shaft bearings. - Page 267 AINTENANCE RUSHER AINTENANCE Grease Zerk Vent Hole/Grease Pan Head Screw Remove the vent hole pan head screw next to the grease zerk fitting on the upper portion of the gearbox. Add grease through the grease zerk. : One or two pumps of grease per year should be adequate. Do not over grease. Grease is for the output NOTE shaft bearings only.
-
Page 268: Bowl Rotation Gear Box Oil Change Procedure
AINTENANCE RUSHER AINTENANCE Bowl Rotation Gear Box Oil Change Procedure Tools and supplies needed: • Crusher lube oil • Empty container • Set of Allen wrenches • Clean rags Change the gear oil and add grease to the shaft bearings once per year or after 4,000 hours (whichever comes first), or before recommissioning the crusher after it has been out of service for a prolonged, unknown period. -
Page 269: Removing The Hopper Extension
AINTENANCE RUSHER AINTENANCE Removing the Hopper Extension Tools and supplies needed: • Socket set • Wrench set • Properly rated hoist WARNING: The hopper extension is extremely heavy. Use appropriately rated lifting device. Serious injury or death could result if the hopper extension were to fall. Remove the bolts that hold the hoper extension in place. -
Page 270: Installing The Hopper Extension
AINTENANCE RUSHER AINTENANCE Remove the hopper extension from the hopper. Installing the Hopper Extension Tools and supplies needed: • Socket set • Wrench set • Properly rated hoist WARNING: The hopper extension is extremely heavy. Use appropriately rated lifting device. Serious injury or death could result if the hopper extension were to fall. - Page 271 AINTENANCE RUSHER AINTENANCE Attach the hoist to the three lifting eyes on the hopper extension. Align the extension with the hopper on the crusher. Install the bolts that hold the hopper extension in place and remove the hoist.
-
Page 272: Hopper Assembly Removal Procedure
AINTENANCE RUSHER AINTENANCE Hopper Assembly Removal Procedure Tools and supplies needed: • Socket set • Wrench set • Properly rated hoist WARNING: The hopper assembly is extremely heavy. Use a lifting device and rigging rated for the weight of the hopper. Do not reach under the hopper as it is being raised from the crusher. -
Page 273: Hopper Assembly Installation Procedure
AINTENANCE RUSHER AINTENANCE Attach hoist to the hopper. Remove the hopper. ELATED LINKS Depressurize Crusher Hydraulic System Procedure Lockout/Tagout Procedure Hopper Assembly Installation Procedure Tools and Supplies • Socket set • Wrench set • Properly rated hoist WARNING: The hopper assembly is extremely heavy. Use a lifting device and rigging rated for the weight of the hopper. - Page 274 AINTENANCE RUSHER AINTENANCE Lift the hopper over the upper assembly. Align the hopper with the orientation marks that were done during the removal and install the hopper onto the crusher. Install the bolts that attach the hopper to the upper assembly. Remove the hoist.
-
Page 275: Upper Assembly Removal Procedure
AINTENANCE RUSHER AINTENANCE Upper Assembly Removal Procedure Tools and supplies needed: • Leather gloves • Clean rags • Properly rated hoist • Pry bar • Hammer • Silicone Prior to removing the upper assembly it may be advantageous (but not required) to rotate the bowl to a higher position. - Page 276 AINTENANCE RUSHER AINTENANCE Disconnect the bowl clamp hose at the quick disconnect. Disconnect the bowl position proximity sensor cable. Disconnect the bowl float indicator cable, if equipped. WARNING: Be careful when removing the upper assembly as the possibility of pinching yourself exists. Remove the keepers from each of the TIR cylinder rod ends.
- Page 277 AINTENANCE RUSHER AINTENANCE Remove the two-piece split collars from each of the TIR cylinder rod ends. It may be necessary to use a small pry bar to extend the TIR cylinder rod far enough to remove the split collars, but if the TIR hydraulic circuit was de-energized as described earlier, the cylinder should extend easily.
- Page 278 AINTENANCE RUSHER AINTENANCE Attach appropriately rated rigging to the three lifting eyes on the inside of the bowl. : Raise the upper assembly no higher than required. Do not leave the load suspended unattended. NOTE Remove the upper assembly. Place the upper assembly in a way that will not damage the fitting on the bottom edge of the upper assembly.
-
Page 279: Upper Assembly Installation Procedure
AINTENANCE RUSHER AINTENANCE Upper Assembly Installation Procedure Tools and supplies needed: • Leather gloves • Clean rags • Properly rated hoist • Pry bar • Hammer • Silicone WARNING: The upper assembly is extremely heavy. Use a lifting device and rigging rated for the weight of the assembly. - Page 280 AINTENANCE RUSHER AINTENANCE Hoist the upper assembly over the lower assembly and align the anti-rotation blocks. : Get help to align the cylinders to make sure all the cylinders pass through the upper assembly. NOTE As you slowly the upper assembly, position each TIR cylinder to pass through the holes in the upper assembly.
- Page 281 AINTENANCE RUSHER AINTENANCE Make sure the anti-rotation blocks are against the pads. Use a pry bar if needed. Install spherical washer.
- Page 282 AINTENANCE RUSHER AINTENANCE WARNING: Be careful when installing the split collar as the possibility of pinching yourself exists. Install the split collar.
- Page 283 AINTENANCE RUSHER AINTENANCE Install the keepers. Install bowl clamp hydraulic line.
- Page 284 AINTENANCE RUSHER AINTENANCE Install hydraulic lines to the bowl rotation motor. Install the proximity sensor cable if installed. Install the bowl float indicator cable if installed. Energize the hydraulic system and engage the TIR cylinders to secure the upper assembly to the lower assembly.
-
Page 285: Bowl Removal Procedure
AINTENANCE RUSHER AINTENANCE Bowl Removal Procedure Tools and supplies needed: • Leather gloves • Clean rags • Allen wrench set • Lifting device rated for the upper assembly WARNING: The crusher bowl assembly is extremely heavy, use a lifting device and rigging rated for the weight of the bowl assembly. - Page 286 AINTENANCE RUSHER AINTENANCE Press F3 to stop the engine. Open needle valve NV2 to depressurize the bowl clamp, which is located on the lower right hand corner of the hydraulic manifold. Observe the bowl clamp pressure on the gauge located on the upper right hand corner of the manifold. Verify the pressure has dropped to zero.
- Page 287 AINTENANCE RUSHER AINTENANCE Attach a lifting device rated for the weight of the bowl assembly (see Specification section for specific model weights). The rigging needs to be able to rotate with the bowl. Follow all local safety precautions pertaining to rigging, cranes etc. Turn on the hydraulic system.
-
Page 288: Bowl Installation Procedure
AINTENANCE RUSHER AINTENANCE Shut down the HPU. Pressing F5 on bowl removal screen will navigate to the bowl install screen. ELATED LINKS Hopper Assembly Removal Procedure Bowl Installation Procedure Tools and supplies needed: • Leather gloves • Clean rags • Allen wrench set •... - Page 289 AINTENANCE RUSHER AINTENANCE WARNING: All personnel should stay clear of the suspended load until it is partially engaged in the bowl support. Line up the threads on the bowl assembly with the start of the threads in the bowl support. As the threads are just about to come into contact, rotate the bowl by hand as it is lowered until the threads come into engagement.
- Page 290 AINTENANCE RUSHER AINTENANCE NOTICE: As in the case of bowl removal, verify that the hose connecting the bow clamp to the HPU is disconnected. Failure to do this will cause a massive oil leak and potentially damage the seal and/or piston. Once the drive ring is engaged with the drive gear extensions, start up the hydraulic system by pulling up on the ESTOP button.
-
Page 291: Manganese Liner Changes
AINTENANCE RUSHER AINTENANCE Manganese Liner Changes The steps outlined in the following pages will guide you through the disassembly and re-assembly of the crusher so that the manganese liners can be changed. WARNING: The manganese liners are extremely heavy and will cause serious injury or death if they are not handled properly. - Page 292 AINTENANCE RUSHER AINTENANCE Retaining Ring Keepers with Bolts Locking Ring Retaining Ring Bolts and Lock Nuts Retaining Ring Foam Rubber Inserts Bowl Lock Nut Tools needed: • Crane, rigging, and shackles capable of lifting the crusher upper assembly (see weight chart in Speci- fications Section) •...
- Page 293 AINTENANCE RUSHER AINTENANCE Drive Ring Crushing Zone Indicator Relieve all hydraulic pressure. Lockout/tagout the crusher and any related components. Follow all local lockout/tagout procedures and regulations. Remove the bowl rotation hoses, bowl clamp hose, and position indicator cable. : Pressure will be trapped behind the ball checks if the pressure was not relieved prior to being discon- NOTE nected.
- Page 294 AINTENANCE RUSHER AINTENANCE Mark the upper assembly to the lower assembly to help with the orientation when reassembling. Follow the procedure to remove the hopper. Follow the procedure to remove the upper assembly. Set the upper assembly down on blocks with clearance under the liner. Clean away any mud and loose debris to expose the bowl liner retention hardware.
- Page 295 AINTENANCE RUSHER AINTENANCE Centering Bolt Retaining Ring : The retaining ring should drop, giving access to the split ring. If the retaining ring does not move down NOTE as the bolts are backed out, strike with a hammer, if necessary. : The rolled locking ring should now be loose.
- Page 296 AINTENANCE RUSHER AINTENANCE Insert the second pry bar and work the free end of the locking ring out from under the flange on the bowl liner. Continue working around the circumference of the locking ring, alternating between the two pry bars until the locking ring snaps off.
- Page 297 AINTENANCE RUSHER AINTENANCE Retaining Lip Manganese Seat Install the bowl over the new liner.
- Page 298 AINTENANCE RUSHER AINTENANCE Check to see that the liner is roughly centered in the bowl by measuring from the OD of the liner to the ID of the bowl in 3-4 places. The bowl can be adjusted side to side with a pry bar. The bowl need only be roughly centered at this point.
- Page 299 AINTENANCE RUSHER AINTENANCE Install the retaining ring with the 1” bolt holes lined up with the holes in the foam rubber inserts. Install the locking ring. Set the locking ring on top of the bowl liner. Press one end of the locking ring over the edge of the liner and install one of the retaining ring keeper bolts to hold it in place.
- Page 300 AINTENANCE RUSHER AINTENANCE Using two pry bars, work the locking ring over the flange onto the top of the liner in a manner similar to that used to remove it. : The ring will typically install with little difficulty using the pry bars. Avoid the temptation to help it along NOTE with your hands.
- Page 301 AINTENANCE RUSHER AINTENANCE Install the retaining ring keepers with bolts starting at a location next to the split in the locking ring and working sequentially around the locking ring until all the keepers are installed. : The locking ring keepers are beveled along the edge. They must be installed with the bevel against NOTE the locking ring.
- Page 302 AINTENANCE RUSHER AINTENANCE Re-check to make sure the liner is centered at both the top and bottom. : Do not tighten the radial centering bolts at this time.They should only be finger tight so they don’t NOTE prevent tensioning of the retainer bolts during the next step. Torque the retainer bolts uniformly to 450-475 ft lbs dry [350-375 lubed].
-
Page 303: Mantle Liner Change Procedure
AINTENANCE RUSHER AINTENANCE Install precut foam rubber dirt-excluding inserts, fiberglass insulation, or other material around the outside of the retainer ring. : These inserts are different from those used under the retainer ring. See parts book. NOTE The final step is to pour backing material, but as the mantle and bowl both require backing material, it is best to pour it at the same time. - Page 304 AINTENANCE RUSHER AINTENANCE Cut the mantle washer all the way through and around the at the angle shown with a cutting torch. This will relieve the tension on the threads of the mantle bolt. Mantle Washer Mantle Torch here NOTICE: Take care to note the correct angle and location of the cut shown in the illustration above. Failure to cut in the correct manner can result in damage to the cone stem.
- Page 305 AINTENANCE RUSHER AINTENANCE WARNING: Failure to burn the weld into the manganese could result in the weld breaking and causing personal injury. Lift the worn mantle from the cone head and set aside. WARNING: Stay well away from the mantle while it is being removed from the cone. Use a lifting device rated for the weight of the mantle.
- Page 306 AINTENANCE RUSHER AINTENANCE Coat the cone head with grease using a paintbrush. Do not apply grease to the seating surface. The grease will keep the backing material from adhering to the cone surface, allowing the mantle to self-tighten during crushing and make mantle removal that much easier next time. Lay the new mantle on its side and remove the paint and/or rust from the seating surface using a disc sander.
- Page 307 AINTENANCE RUSHER AINTENANCE Dowel Key Notch Pour Hole : It may be necessary to grind or cut the notch for the dowel key to allow the washer to sit flat. NOTE Lift the mantle into position on the cone head and center the part as close as possible.
- Page 308 AINTENANCE RUSHER AINTENANCE Place a foam rubber ring around the cone stem sitting on top of the cone head so that it will fit and seal underneath the liner and washer. This foam is installed to prevent backing material from flowing under the torch ring.
- Page 309 AINTENANCE RUSHER AINTENANCE Drill two 1/2” holes at the joint of the mantle bolt and mantle washer 180° apart for the 1/2” diameter pins that will key the two parts together. Start the drilling using a pilot drill bit. Follow the 45° slope of the parts.
- Page 310 AINTENANCE RUSHER AINTENANCE Install the mantle cap on the bolt with the Allen head capscrew. Apply Never Seize to the threads prior to installation. Weld the cap to the washer in three (3) places with a 3” long weld bead using stainless steel rod or equivalent.
- Page 311 AINTENANCE RUSHER AINTENANCE Fully close NV1 and NV2 on the hydraulic manifold. Remove locks and tags. Notify others in the area you will be starting the crusher and related equipment. Follow procedure on resetting the accumulated liner wear value to zero. ELATED LINKS Backing Material Procedure Upper Assembly Installation Procedure...
- Page 312 AINTENANCE RUSHER AINTENANCE Pour backing material through the holes in the flange at the top of the bowl liner. Pour backing until it overflows through the holes provided in the bore of the liner. When pouring is complete, plug the pour holes. Similarly, plug the overflow holes with silicone. : Although not absolutely necessary for the proper functioning of the bowl liner, plugging the pour holes NOTE is another way to prevent mud and debris from getting under the retaining ring and will make the next liner...
- Page 313 AINTENANCE RUSHER AINTENANCE fashioned. Alternatively, anything handy, such as rags, paper, insulation, etc., can be stuffed in the holes, leaving some space near the top to form a well. Fill the well with backing material or silicone. If backing material is used to plug the holes, be sure that the plug seals sufficiently to keep backing mate- rial from flowing into the space between the liner and the retention hardware.
-
Page 314: System Relief Valve Testing And Setting Procedure
AINTENANCE RUSHER AINTENANCE System Relief Valve Testing and Setting Procedure Tools and supplies needed: • Allen wrench set • End wrench 3/4” The instructions that follow assume that the system relief valve is installed already. The relief valve setting for normal operations is 3500 psi (241.3 bar) for all models. Consequently, the system relief valve will typically be set at 3500psi (241.3 bar) when starting this procedure. - Page 315 AINTENANCE RUSHER AINTENANCE From the maintenance screen, press F13 to enter the System Relief screen. : Upon entering the System Relief screen, the control system will disable all solenoids. At this point is it NOTE safe to relieve all hydraulic pressure. Depressurize the crusher hydraulic system by opening NV1 and NV2 on the hydraulic manifold.
- Page 316 AINTENANCE RUSHER AINTENANCE Clean the area around the quick disconnect before disconnecting the hoses going to the bowl rotation motor (M1/M2) Cap and plug to prevent contamination. : It is very important to prevent contamination of the hydraulic system. NOTE Close needle valves NV1 and NV2.
- Page 317 AINTENANCE RUSHER AINTENANCE Turn the adjustment screw in (clockwise) until the desired pressure is reached. Use the pressure gauge on the top of the manifold to monitor the pressure. When the pressure is set, press F5 to stop the test and go back to the main screen. Turn off the engine.
-
Page 318: Individual Tir Cylinder Relief Valve Testing And Setting Procedure
AINTENANCE RUSHER AINTENANCE Individual TIR Cylinder Relief Valve Testing and Setting Procedure Tools and supplies needed: • TIR Relief Valve Test Block • TIR Relief Valve • Allen wrench set • End wrenches 3/4” (mm) and 1-1/4” (mm) : In most cases, it will be necessary to temporarily increase the system relief valve pressure prior to NOTE adjusting the TIR relief valves. - Page 319 AINTENANCE RUSHER AINTENANCE From the Maintenance screen, press F15 to access the TIR adjust screen. : Upon entering the TIR RELIEF ADJUST screen, the control system will disable the TIR and bowl clamp NOTE systems temporarily. At this point is it safe to relieve all hydraulic pressure. Relieve all hydraulic pressure, and leave NV1 and NV2 open.
- Page 320 AINTENANCE RUSHER AINTENANCE Remove the hardware securing the door and open cabinet. Disconnect hoses C1 & C2. Close valves NV1 and NV2. Verify that the TIR Relief Valve Test Block is free of any dirt and debris and install. Port 1 of the test block connects to port C1.
- Page 321 AINTENANCE RUSHER AINTENANCE Visually inspect the relief valve high pressure seals closely for damage and install into the test block. Loosen the locknut on the relief valve adjusting screw. Turn the key to the “run” position to start the engine. Press F1 to test.
- Page 322 AINTENANCE RUSHER AINTENANCE pressure is reached. If the pressure comes up higher than the recommended pressure setting and no oil is heard, then the valve is set too high. Turn the adjustment screw out (counterclockwise) until the desired setting is reached. Bleed off pressure and retest.
-
Page 323: Bowl Thread Lubrication Procedure
AINTENANCE RUSHER AINTENANCE Close NV1 and NV2. Reset the system relief valve to the recommended setting for normal operation (typically 3500 psi). ELATED LINKS TIR Relief Valve Pressure Depressurize Crusher Hydraulic System Procedure Lockout/Tagout Procedure Bowl Thread Lubrication Procedure Thoroughly clean the threads and replace the grease at least once a year or at 4,000 hours (whichever comes first), or before recommissioning the crusher after it has been out of service for a prolonged unknown period. - Page 324 AINTENANCE RUSHER AINTENANCE Completely remove all grease from the threads on the bowl and bowl support. NOTICE: Use care when wiping the old grease away. Any damaged surfaces may have sharp edges that may not be visible through the grease. Inspect the threads for scrapes, nicks, tears, etc., and use a sander to refurbish any damaged surfaces.
- Page 325 AINTENANCE RUSHER AINTENANCE When all surfaces are clean and smooth, and the seals are in good working order, apply Mobilgrease XHP322 Mine (formerly Mobilgrease Moly52) grease to the threads of both the bowl and bowl support using a brush. Cover all surfaces completely, but the coating does not have to be thick. : If working from a reusable open container, take care to avoid allowing windblown dirt and debris from NOTE being deposited in the container and applied to the threads during subsequent service.
-
Page 326: Mantle Bolt Thread Maintenance
AINTENANCE RUSHER AINTENANCE Mantle Bolt Thread Maintenance Thoroughly clean the mantle bolt threads at every liner change. WARNING: Take care when wiping away existing lubricant. Damaged threads may have sharp edges. If the cone or cone stem were damaged during cutting torch removal of the mantle washer, evaluate the damage and repair if required. - Page 327 AINTENANCE RUSHER AINTENANCE When all threads and load-bearing surfaces are clean, inspected, and/or repaired, apply anti-seize compound generously to the threads, (and outside of the mantle nut in the case of K200+). Have lifting equipment available for prompt re-installation of the mantle to avoid contamination of the newly lubricated surfaces.
- Page 328 AINTENANCE RUSHER AINTENANCE...
-
Page 329: Service
ERVICE RACK LANT ERVICE Service Track Plant Service Remote Control System ID Code Procedure The transmitter and receiver units are matched at the factory with corresponding ID codes. The following procedure is only required if the remote has been lost or damaged and a new remote is to be used. Make sure fresh batteries are installed in the transmitter. - Page 330 ERVICE RACK LANT ERVICE Remove the receiver unit cover. Turn the plant battery disconnect switch to ON position.
- Page 331 ERVICE RACK LANT ERVICE Release the ESTOP on the hand-held remote. Activate the remote control system by actuating the horn switch. While holding the horn switch on, press to actuate and twist to release the ESTOP switch (this cycles the power on and off). This enables the “Download Password” mode. Release the horn switch.
- Page 332 ERVICE RACK LANT ERVICE is ready to receive “Configuration Data” from the hand-held unit. Once the STATUS LED is flashing rapidly, you can release the RESET switch. Reset Switch (SW1) Status LED Momentarily actuate the horn switch; this will enable the hand-held unit to send the “Configuration Data” to the receiver.
-
Page 333: Crusher Service
ERVICE RUSHER ERVICE Crusher Service Offset Cone Lifting Eye Safety One piece off set lifting eyes are available from JCI, part numbers 456531 for the K200+ and K300+, and 546849 for the K400+. These eyes are approved for lifting straight up/down only when installing/removing a cone assembly from the crusher without removing the mantle bolt cap. -
Page 334: Cone Lifting Eye And Cone Lifting Eye Assembly
ERVICE RUSHER ERVICE Cone Lifting Eye and Cone Lifting Eye Assembly This section provides instructions for using the two different cone lifting eyes. Each is used for a different lifting application. For quick identification, note that one of the lifting eyes is one piece and the other is a two-piece assembly.The cone lifting eyes are designed specifically for lifting certain cone assemblies made by JCI. - Page 335 ERVICE RUSHER ERVICE The part numbers for the cone lifting eye: CONE LIFTING EYE (ONE-PIECE) K200+/K300+ 456531 K400+ 546849...
-
Page 336: Cone Lifting Eye Assembly (Two-Piece)
ERVICE RUSHER ERVICE Cone Lifting Eye Assembly (two-piece) The two-piece cone lifting eye assembly is for lifting and turning the cone over when the mantle bolt cap has been removed. The part numbers for the cone lifting eye assembly: CONE LIFTING EYE ASSEMBLY (TWO-PIECE) K200+/K300+ 456532 K400+... - Page 337 ERVICE RUSHER ERVICE Remove the mantle bolt cap. Apply anti-seize and install the base of the cone lifting eye assembly and tighten to refusal. Apply anti-seize and install the lifting eye weldment and torque the four bolts to 80 ft/lbs (108 N-m).
-
Page 338: Cone Removal Procedure
ERVICE RUSHER ERVICE Cone Removal Procedure Tools and supplies needed: • Set of Allen wrenches • Cone lifting eye • Sila Tech Silicone Sealant • Torch • Lifting device rated for the cone assembly Relieve all hydraulic pressure. Lockout/tagout the crusher and power supply. Remove hopper assembly. - Page 339 ERVICE RUSHER ERVICE Install the lifting eye all the way into the cone. Verify the cone turns freely and rotate the cone so the lifting eyes on the cone are aligned with the “high side” of the wedgeplate. : If in doubt about the correct orientation, be sure to have someone familiar with this process verify that NOTE you have both the cone and the lifting eye properly oriented.
-
Page 340: Cone Installation Procedure
ERVICE RUSHER ERVICE CAUTION: Do not reach underneath the cone assembly to dislodge the floating plate if it is stuck. Do not attempt to remove but use caution when lifting and moving as it could drop off. Keep all personnel away from the cone assembly. Attach a guide line if needed to assist in moving the cone. - Page 341 ERVICE RUSHER ERVICE Align the floating plate so the slot is aligned with the lifting eye. WARNING: The cone is extremely heavy and will cause serious injury or death if not handled properly. Use appropriately rated lifting devices and tools when moving heavy items.
- Page 342 ERVICE RUSHER ERVICE As the cone nears the bottom (2 in/5 cm) make sure the torque bar will engage the slot of the floating plate. Lower the cone until it is in place. Verify the torque bar and floating plate are aligned by turning the cone clockwise slightly. If the cone is installed correctly it should turn easily.
-
Page 343: Tir Relief Cylinder Removal Procedure
ERVICE RUSHER ERVICE Fill in the recess of the mantle bolt cap with Sila Tech Silicone sealant (or equivalent). TIR Relief Cylinder Removal Procedure Tools and supplies needed: • Clean rags • Leather gloves • Wrench set • Lifting device rated for the TIR cylinder •... - Page 344 ERVICE RUSHER ERVICE Remove the keeper from the TIR cylinder rod that will be removed. Remove the two-piece split collar from the TIR cylinder rod end. It may be necessary to use a small pry bar to extend the TIR cylinder rod just enough to remove the split collar, but if the TIR hydraulic circuit was de-energized as described earlier, the cylinder should extend easily.
- Page 345 ERVICE RUSHER ERVICE Remove the bolt that holds the TIR clevis pin. Clean the area around the TIR cylinder where the hydraulic lines connect to the cylinder. : It is very important to prevent contamination of the hydraulic system. NOTE Remove the four hydraulic hoses from the TIR cylinder, two on each side.
-
Page 346: Tir Relief Cylinder Installation Procedure
ERVICE RUSHER ERVICE TIR Relief Cylinder Installation Procedure Tools and supplies needed: • Clean rags • Leather gloves • Wrench set • Lifting device rated for the TIR cylinder • Parker Super Lube (for o-ring lubrication) WARNING: The following instructions show how to replace components that require working around energized electrical and hydraulic circuits. - Page 347 ERVICE RUSHER ERVICE Install the clevis pin. Align the tab with the hole and install the bolt. Remove caps and apply o-ring lube to the fittings on the TIR cylinder.
- Page 348 ERVICE RUSHER ERVICE Remove the plugs from the hydraulic lines and install to the TIR cylinder. Energize the hydraulic system and press CLEAR until all the TIR cylinders are fully extended. Release the CLEAR button until the TIR system is pressurized again. Repeat this process three or four times. : This process will purge the air out of the hydraulic system and refill the installed cylinder with hydraulic NOTE fluid.
- Page 349 ERVICE RUSHER ERVICE Install the split collar. Install the keeper. Energize the hydraulic system and contract the TIR cylinder.
-
Page 350: Replacing V-Seat Liners
ERVICE RUSHER ERVICE Replacing V-Seat Liners Kodiak plus crushers are equipped with bronze V-seat liners that reduce the probability of damage to the baseframe and bowl support in the event of bowl float. The material used is UNS C61400 Aluminum Bronze x 0.250”... -
Page 351: V-Seat Liner Removal Procedure
ERVICE RUSHER ERVICE V-Seat Liner Removal Procedure Relieve all hydraulic pressure. Lockout/tagout the crusher and power supply. Remove the upper assembly. Prior to removing the old V-seat liners, mark the location of each liner on both ends. This can help locate the new liner. - Page 352 ERVICE RUSHER ERVICE : Depending on your model of crusher there may be more welds that need to be ground off to remove NOTE the V-seat. Once all welds are ground off, remove the V-seat liner. Throughly remove all traces of the previous liner and welds and clean to create a smooth bump-free surface.
-
Page 353: V-Seat Liner Installation Procedure
ERVICE RUSHER ERVICE V-Seat Liner Installation Procedure Make sure all traces of the previous liner and welds have been removed to create a smooth and bump-free surface. : The welding surfaces should be preheated to drive out any moisture. The exact temperature is not NOTE critical. -
Page 354: Pinion Assembly Removal Procedure
ERVICE RUSHER ERVICE 1” (2.5cm) 2” (5cm), 3 places 18” (46cm), 2 places 1” (2.5cm) Weld completely around hole, 3 places Do not weld bottom edge Weld the V-seat liner as shown in the diagram above. Pinion Assembly Removal Procedure Tools and supplies needed: •... - Page 355 ERVICE RUSHER ERVICE Drain crusher oil into a clean bucket. : Provide yourself 30 to 36 inches minimum to remove the pinion assembly. NOTE : If possible, leave sheave on pinion assembly. This will help balance the assembly. If sheave is NOTE removed from the pinion assembly, it will be extremely gear heavy.
- Page 356 ERVICE RUSHER ERVICE Remove the two set screws and install pusher bolts to the flange of the pinion assembly. Tighten the pusher bolts evenly to “push” the pinion assembly apart from the crusher body enough to remove the shims. : When removing the shims take not of the placement they must be replaced the way they were NOTE removed.
- Page 357 ERVICE RUSHER ERVICE : The sheave can be left installed to help balance the pinion assembly when being removed. If the NOTE sheave is removed install a section of pipe over the pinion shaft to help balance the assembly as it is being removed.
-
Page 358: Pinion Assembly Installation Procedure
ERVICE RUSHER ERVICE Pinion Assembly Installation Procedure Tools and supplies needed: • Leather gloves • Clean rags • Socket set • Lifting device rated for pinion assembly • Impact wrench • Air source : There are two holes on the pinion housing, the larger of the two is the oil inlet which should be put at NOTE the 12 o’clock position when installed. - Page 359 ERVICE RUSHER ERVICE Install the pinion assembly into the lower assembly. A long pipe can be used to balance the pinion when installing. Install the shims that were previously used. Once installed set the pinion measurement as defined in the table. The measurement is from the end of the pinion to the vertical edge of the dam truss on the lower assembly.
-
Page 360: Backlash Setting Procedure
ERVICE RUSHER ERVICE K200+ 7.7 / 19cm K300+ 7.7in / 19cm K400+ 9.2in / 23cm K500+ 11.in / 28cm Set backlash. Backlash Setting Procedure Tools and supplies needed: • Adjustable wrench • Two (2) dial calipers • Pinion shaft tool : The backlash is determined by the manufacturer when the gears are made. - Page 361 ERVICE RUSHER ERVICE Indicates travel of pinion assembly in or out. Pinion assembly adjustment bolt in. Indicates clearance between pinion and ring gear teeth. Pinion assembly adjustment bolt out. Install the dial caliper (3) X.XX inches from the edge of the shaft as shown above. See chart below. DISTANCE FROM OD SHAFT TO CRUSHER PITCH RADIUS...
- Page 362 ERVICE RUSHER ERVICE If measurement is greater, turn the adjustment bolt (2) clockwise; this will draw the pinion assembly in. Check the measurement and adjust until the desired measurement is met. If the reading is less than desired, turn the adjustment bolt (2) counterclockwise to loosen. Turn the adjustment bolt (4) clockwise;...
- Page 363 ERVICE RUSHER ERVICE Lift the wedgeplate and inspect the pinion gear teeth pattern on the ring gear. : The marks on the above photo indicate good alignment of the pinion gear and ring gear. NOTE Install wedgeplate. Apply anti-seize to thrust plate bolts and install thrust plate and torque to 520 ft lb./705 Nm. Measure gap between pinion assembly and crusher to determine correct shims.
- Page 364 ERVICE RUSHER ERVICE Install shims and bolts. Spray crusher oil on top of thrust plate and brake shaft. Install the cone brake plate bar.
- Page 365 ERVICE RUSHER ERVICE Apply crusher oil to the top of the cone brake plate. : For ease of installation of the cone note the orientation of the groove in the floating plate. This will aid NOTE in alignment of the torque bar on the cone. Install the floating plate and slide it back and forth to make sure there is no grinding or binding.
-
Page 366: Setting Gap Between Thrustplate And Wedgeplate Procedure
ERVICE RUSHER ERVICE Setting Gap Between Thrustplate and Wedgeplate Procedure : The purpose of the gap is to make sure the thrustplate does not contact the wedgeplate and it allows NOTE for the correct amount of oil for lubrication. Install magnetic dial indicator on the inside surface of the outer radial bearing race. Position dial indicator on thrust plate surface and set to zero. -
Page 367: Pin Clutch Removal Procedure
ERVICE RUSHER ERVICE If 0.025 to 0.035 thousandths measurement is not met the thrust plate needs to be machined. Thrustplate Wedgeplate To increase gap, machine here .025 to .035 To decrease gap, machine here Once the 0.025 to 0.035 thousandths is met, record measurement. Pin Clutch Removal Procedure Tools and supplies needed: •... - Page 368 ERVICE RUSHER ERVICE Place a bucket under the brake housing cover drain plug and remove the drain plug. Allow the oil to drain and remove some of the bolts to the brake housing cover. : When some of the bolts are removed it is a good idea to install a bolt that is longer than those being NOTE removed.
- Page 369 ERVICE RUSHER ERVICE Rotate the brake housing cover out of the way. WARNING: When removing the bolts to the guide ring it is possible for the guide ring, clutch and cone brake shaft to fall from the crusher, Support the guide ring as you remove the last bolt.
-
Page 370: Pin Clutch Installation Procedure
ERVICE RUSHER ERVICE Pin Clutch Installation Procedure Tools and supplies needed: • Clean rags • Socket set • Pry bar • Bucket • Allen wrench set • Sealant Make sure the area in the spindle where the clutch will be mounted is clean and free of debris. - Page 371 ERVICE RUSHER ERVICE Place the clutch onto guide ring. Install shear bolts to attach clutch assembly to guide ring. Install the cone brake shaft into the cone. Make sure the key aligns with the cone brake plate. : Depending on the work being performed, the cone brake shaft can be installed from the topside if the NOTE cone is removed.
- Page 372 ERVICE RUSHER ERVICE Tighten the four bolts. Guide Ring Shear Bolts Apply a bead of sealant to the bottom of the crusher before installing the brake housing cover.
- Page 373 ERVICE RUSHER ERVICE Install brake housing cover. Install drain plug to access panel. Install all bolts and tighten. Add lube oil.
-
Page 374: Drive Ring Seal Installation Procedure
ERVICE RUSHER ERVICE Drive Ring Seal Installation Procedure Tools and supplies needed: • Anti-seize • Socket set • Lifting device rated for the bowl clamp Apply anti-seize to the bolts and install the drive ring seal upper retainer. - Page 375 ERVICE RUSHER ERVICE Put the drive ring seal lower retainer in place around the bowl clamp assembly. Lay out the drive ring seal rubber in place around the bowl clamp with the lower retainer. : Make sure the rubber seals over lap. NOTE Apply anti-seize to the bolts and install the drive ring seal lower retainer with the seal rubber.
-
Page 376: Bowl Support Thread Removal Procedure
ERVICE RUSHER ERVICE Bowl Support Thread Removal Procedure Tools and supplies needed: • Feeler gauge • Hydraulic rams • Hammer • Straight edge • Pry bar • File • Torch • Grinder • Lifting device rated for the upper assembly Relieve all hydraulic pressure. - Page 377 ERVICE RUSHER ERVICE Use a grinder and remove the thread stop that is closest to the thread that needs to be changed. WARNING: The bowl support assembly is extremely heavy. Use a lifting device and rigging rated for the weight of the bowl support. Do not reach under the bowl support as it is being raised from the crusher.
-
Page 378: Bowl Support Thread Installation Procedure
ERVICE RUSHER ERVICE Remove the threads as needed. Bowl Support Thread Installation Procedure Tools and supplies needed: • Feeler gauge • Hydraulic rams • Hammer • Straight edge • Pry bar • File • Torch • Grinder • Lifting device rated for the upper assembly Clean and remove any burrs from the bowl support as needed. - Page 379 ERVICE RUSHER ERVICE If replacing one of the top or bottom threads, use a straight edge to locate the starting point of the thread. The starting point of the threads is where the top edge of the brass insert is slightly below that of the horizontal surface of the bowl support.
- Page 380 ERVICE RUSHER ERVICE Position the bowl support thread. WARNING: When removing the threads, watch your fingers. The threads, by design, are bigger than the bowl support. As you remove the thread it can spring back against you. Place thread in desired location. A pry bar may be used to assist the installation of the thread. Make sure the brass threads are pressed up next to each other.
- Page 381 ERVICE RUSHER ERVICE Weld in temporary bottom wedge stop. Install hydraulic ram. Weld in a temporary wedge stop on top and install hydraulic ram. Set pressure of hydraulic ram to 3000 psi this will help spread and seat the threads.
- Page 382 ERVICE RUSHER ERVICE Use a hammer to help seat the brass threads into the grooves of the bowl support. Once the threads are seated, check for gaps with a ten-thousandths feeler gage. If there are gaps, continue seating the threads and adjusting ram pressure to 3000 psi.
- Page 383 ERVICE RUSHER ERVICE When there are no gaps, weld in the top and bottom thread stops.
- Page 384 ERVICE RUSHER ERVICE Remove the wedge stops. Clean up the welds and threads.
-
Page 385: Bowl Clamp Thread Removal Procedure
ERVICE RUSHER ERVICE Bowl Clamp Thread Removal Procedure Tools and supplies needed: • Feeler gauge • Hydraulic rams • Hammer • Straight edge • File • Welder • Grinder • Lifting device rated for the bowl clamp assembly Relieve all hydraulic pressure. Lockout/tagout the crusher and power supply. - Page 386 ERVICE RUSHER ERVICE Use a grinder and remove the thread stop. WARNING: When removing the threads, watch your fingers. The threads, by design, are bigger than the bowl clamp. As you remove the thread it can spring back against you.
-
Page 387: Bowl Clamp Thread Installation Procedure
ERVICE RUSHER ERVICE Remove the threads as needed. Bowl Clamp Thread Installation Procedure Tools and supplies needed: • Feeler gauge • Hydraulic rams • Hammer • Straight edge • File • Welder • Grinder • Lifting device rated for the bowl clamp assembly Clean and remove any burrs from the bowl clamp. - Page 388 ERVICE RUSHER ERVICE Use a straight edge to locate the starting point of the thread. The starting point of the thread is where the top edge of the brass insert is slightly below that of the horizontal surface of the bowl clamp. Remove any burrs from the end of the brass threads.
- Page 389 ERVICE RUSHER ERVICE Position the bowl clamp thread. WARNING: When removing the threads, watch your fingers. The threads, by design, are bigger than the bowl clamp. As you remove the thread it can spring back against you. Use a pry bar to assist the installation of the thread.
- Page 390 ERVICE RUSHER ERVICE Make sure the brass threads are pressed up next to each other. Weld in the bottom thread stop if removed.
- Page 391 ERVICE RUSHER ERVICE Weld in a temporary wedge stop for hydraulic ram to push off. Install the hydraulic ram and set pressure to 3000 psi; this will seat the threads. Use a hammer to help seat the brass threads into the grooves of the bowl clamp.
- Page 392 ERVICE RUSHER ERVICE Once the threads are seated, check for gaps with a ten-thousandths feeler gage. If there are gaps, continue seating the threads and adjusting ram pressure to 3000 psi. When there are no gaps, weld in the top thread stop. Remove the wedge stop.
-
Page 393: Bowl Clamp Piston Seal Removal Procedure
ERVICE RUSHER ERVICE Clean up the welds and threads. Bowl Clamp Piston Seal Removal Procedure Tools and supplies needed: • Lifting eye (JCI p/n 090933) 1-8 UNC x 1x2 1/2 • Lifting device rated for the bowl clamp • Air nozzle •... - Page 394 ERVICE RUSHER ERVICE Remove the bowl clamp assembly. WARNING: The bowl clamp assembly is extremely heavy. Use a lifting device and rigging rated for the weight of the hopper. Do not reach under the hopper as it is being raised from the crusher. Do not allow anyone under or near the bowl clamp as it is being lifted.
- Page 395 ERVICE RUSHER ERVICE Remove the hydraulic fitting. Use air pressure and apply it to the bowl clamp; this will push out the white rod and piston seal. Once air pressure is applied the piston seal and the white rod will blow out in one place, from this point it can be pried out.
-
Page 396: Bowl Clamp Piston Seal Installation Procedure
ERVICE RUSHER ERVICE Bowl Clamp Piston Seal Installation Procedure Tools and supplies needed: • Lifting eye (JCI p/n 090933) 1-8 UNC x 1x2 1/2 • Lifting device rated for the bowl clamp • Air nozzle • Lubriplate No 105 grease •... - Page 397 ERVICE RUSHER ERVICE Position the piston seal on the bowl clamp with the o-ring down. Use a clamp to start the piston seal into the groove. : When installing the seal, it will want to twist; make sure the seal is vertical when installing it into the NOTE groove.
- Page 398 ERVICE RUSHER ERVICE Continue installing the piston seal in several places around the bowl clamp. Once the piston seal is started in several places, use a mallet to seat the seal all the way around in the groove.
- Page 399 ERVICE RUSHER ERVICE Use a non-metallic dowel to tap down and seat the seal in the bottom of the groove. : A small piece of the white rod is the ideal tool to install the seal. NOTE Install the plastic rods. Due to the curve of the bowl clamp, slight trimming of the plastic rods may be necessary to make sure there is no gap between the rod ends.
- Page 400 ERVICE RUSHER ERVICE Tap each piece to make sure there is no gap between the rods. When installing the last rod, cut it 1/8 inch (3 mm) too long.
- Page 401 ERVICE RUSHER ERVICE For the last rod, install both ends of the rod and then tap the middle of the rod down. This will make sure the rods are a tight fit. : Use only a blunt instrument to work the white rod and piston seal out of the bowl clamp. NOTE Make sure the plastic rods are tapped all the way down against the piston seal.
-
Page 402: Hydraulic Motor Removal Procedure
ERVICE RUSHER ERVICE Hydraulic Motor Removal Procedure Tools and supplies needed: • Set of Allen wrenches • Clean Rags • Lifting device rated for hydraulic motor and gearbox Relieve all hydraulic pressure. Lockout/tagout the crusher and power supply. Remove the quick disconnect hydraulic lines from hydraulic motor. Remove the two bolts. -
Page 403: Gear Box Removal Procedure
ERVICE RUSHER ERVICE Gear Box Removal Procedure Tools and supplies needed: • Set of Allen wrenches • Clean Rags • Lifting device rated for hydraulic motor and gearbox Relieve all hydraulic pressure. Lockout/tagout the crusher and power supply. Remove the hydraulic motor. Remove the gearbox guard. - Page 404 ERVICE RUSHER ERVICE Remove the proximity sensor element. Disconnect the electrical and remove the J-box if needed. Remove the drive gear and attach the lifting eye. Remove the bolts that hold the adjustment plates. Do not remove the square adjustment bolts. Remove the adjustment plate with the reduction gearbox from the motor base.
-
Page 405: Hydraulic Motor And Gear Box Installation Procedure
ERVICE RUSHER ERVICE Hydraulic Motor and Gear Box Installation Procedure Tools and supplies needed: • Feeler gauge • Thread tape • Pipe sealant • Anti-seize • Crusher Lube oil • Mobil grease CM-S • Set of allen wrenches • Clean Rags •... - Page 406 ERVICE RUSHER ERVICE Install adjustment bolts. Apply o-ring lube and install o-ring.
- Page 407 ERVICE RUSHER ERVICE Clean the gearbox and remove the plastic cap. Install the hydraulic pump onto the gear box.
- Page 408 ERVICE RUSHER ERVICE Install the bolts and tighten. Primer and paint the reduction gearbox and hydraulic motor if needed. Once paint is dry, turn over and apply anti-seize to gear reducer flange.
- Page 409 ERVICE RUSHER ERVICE Install motor mounting plate. Install the proximity sensor mount bracket. Install the bolts and tighten down.
- Page 410 ERVICE RUSHER ERVICE Remove the gearbox oil fill plug. Fill the gear box with 0.33 gallons of 629 lube oil or until it seeps out of the hole. Apply thread seal tape and/or pipe sealant to the plug and install.
- Page 411 ERVICE RUSHER ERVICE Remove the pan head screw next to the grease fitting on the reduction gearbox. Fill the grease box with Mobil Grease CM-S until grease begins to come out of the overflow hole. Install pan head screw and clean fitting from extra grease.
- Page 412 ERVICE RUSHER ERVICE Install the gearbox assembly into the motor base. Install the nuts and washers, two on each side. Do not tighten; this will be done after adjusting the distance between the drive gear and driven gear. Remove the plugs from the hydraulic motor.
- Page 413 ERVICE RUSHER ERVICE Install the fitting into M2. Install the fitting into M1. Install the hydraulic quick disconnect fittings.
- Page 414 ERVICE RUSHER ERVICE Install the drive gear. Install the close side setting sensor.
- Page 415 ERVICE RUSHER ERVICE Install the drive gear guard. Install the gearbox guard.
-
Page 416: Hydraulic Manifold Relief Valve Removal Procedure
ERVICE RUSHER ERVICE Hydraulic Manifold Relief Valve Removal Procedure Tools and supplies needed: • Clean rags • Wrench WARNING: The following instructions show how to replace components that require working around energized electrical and hydraulic circuits. Follow all local safety regulations with respect to working around electrical hydraulic equipment. -
Page 417: Hydraulic Manifold Relief Valve Installation Procedure
ERVICE RUSHER ERVICE With the relief valve removed, inspect the relief valve opening for contamination. Inspect the relief valve for contamination and general condition and wear of o-rings and washers. Replace as necessary. Hydraulic Manifold Relief Valve Installation Procedure Tools and supplies •... -
Page 418: Hydraulic Pressure Transducer Removal Procedure
ERVICE RUSHER ERVICE Energize hydraulic power and verify pressure. Check for leaks around the relief valve. Hydraulic Pressure Transducer Removal Procedure Relieve all hydraulic pressure. Lockout/tagout the crusher and power supply. Remove the electrical connector to the transducer. Remove transducer from the hydraulic manifold. -
Page 419: Hydraulic Pressure Transducer Installation Procedure
ERVICE RUSHER ERVICE Hydraulic Pressure Transducer Installation Procedure Loosen the locknut on the pressure transducer sensor to allow adjustment of the swivel base. : Do not separate the upper and lower sections of the pressure transducer. There is an o-ring between NOTE the upper and lower sections. -
Page 420: Low Lubrication Oil Level Shutoff Switch Removal Procedure
ERVICE RUSHER ERVICE Mode Button Enter Button Set Button : Typically the display will default to the BAR setting on a new transducer. To change the display to PSI: NOTE Press the “MODE” button until “UNI” is displayed. Press the “SET” button until “PSI” is displayed. Hold the “SET”... - Page 421 ERVICE RUSHER ERVICE Locate the low level shutoff switch. Disconnect the electrical connector. Remove the low level shutoff switch. Install the drain plug. Clean up any spilled oil.
-
Page 422: Low Lubrication Oil Level Shutoff Switch Installation Procedure
ERVICE RUSHER ERVICE Low Lubrication Oil Level Shutoff Switch Installation Procedure Tools and supplies needed: • Clean rags • Wrench set • Six (6) clean five-gallon buckets Make sure the drain plug is installed; if not, install it. : It is acceptable to use thread tape or thread sealant on the threads of the switch and drain plug. NOTE Install the new lube low level shutoff switch. -
Page 423: Lube Cooler Bypass Valve Removal Procedure
ERVICE RUSHER ERVICE Lube Cooler Bypass Valve Removal Procedure Tools and supplies needed: • Clean rags • Wrench set Relieve all hydraulic pressure. Lockout/tagout the crusher and power supply. : When removing the bypass valve, make a note of the directions of the fittings on the bypass valve if NOTE you are going to install the fittings on the new valve. - Page 424 ERVICE RUSHER ERVICE Disconnect the hose on the top right of the valve and install a cap and plug on the line and valve. Disconnect the two (2) hoses from the bottom right of the valve and install caps and plugs on the valve and lines.
- Page 425 ERVICE RUSHER ERVICE Remove the two (2) nuts and bolts securing the valve. Clean up any spilled lube oil. Take note of alignment of fittings if installing them on the new valve.
-
Page 426: Lube Cooler Bypass Valve Install Procedure
ERVICE RUSHER ERVICE Lube Cooler Bypass Valve Install Procedure Tools and supplies needed: • Clean rags • Wrench set Position lube cooler bypass valve in place and install two (2) bolts and nuts. - Page 427 ERVICE RUSHER ERVICE Remove the caps and plugs and connect the two (2) hoses to the bottom right of the valve. Remove the cap and plug and connect the hose to the top right of the valve. Remove the cap and plug and connect the oil inlet line to the valve. Clean up any spilled lube oil.
-
Page 428: Lube Flow Encoder Removal Procedure
ERVICE RUSHER ERVICE Lube Flow Encoder Removal Procedure Tools and supplies needed: • Clean rags • Wrench set Relieve all hydraulic pressure. Lockout/tagout the crusher and power supply. Locate the lube flow encoder near the filter element on the back side of the lube pump. - Page 429 ERVICE RUSHER ERVICE Remove the nut and plastic washer securing the flow encoder to the pump. Remove the tie wrap and disconnect the electrical connector to the flow encoder.
- Page 430 ERVICE RUSHER ERVICE Loosen the Allen screw on the collar of the flow encoder. Remove the flow encoder.
-
Page 431: Lube Flow Encoder Installation Procedure
ERVICE RUSHER ERVICE Lube Flow Encoder Installation Procedure Tools and supplies needed: • Clean rags • Wrench set Install the flow encoder. Install the plastic washer and nut to secure the flow encoder. - Page 432 ERVICE RUSHER ERVICE Tighten the Allen screw on the collar of the flow encoder. Connect the electrical connector and tie wrap in place.
-
Page 433: Reference Information
EFERENCE NFORMATION LANT NFORMATION Reference Information Plant Information Specifications Capacities COMPONENT CAPACITY GAL (LTR) Diesel Fuel Tank 200 (757) Hydraulic Tank 130 (492) Conveyor Widths COMPONENT WIDTH IN (MM) Feed Conveyor 36 (914) Under Crusher Conveyor 36 (914) Engine COMPONENT HORSEPOWER HP (KW) CAT C9 325 (242) -
Page 434: Track Plant Oil Recommendations
EFERENCE NFORMATION LANT NFORMATION Track Plant Oil Recommendations Grease Recommendations When lubricating with new grease, ensure the old and new greases are compatible. If there is uncertainty about compatibility, try removing all traces of the old lubricant from the bearing. This removal can be done effectively without resorting to cleaning solvents or other substances that may cause a fire hazard. -
Page 435: Track Oil Recommendations
EFERENCE NFORMATION LANT NFORMATION Track Oil Recommendations Refer to the track manufacturer’s manual for complete lubrication recommendations and requirements. Only the necessary viscosity ISO-VG 150 and ISO-VG 220 for normal operating conditions from 10° to 30° C is stated on the rating plate. Engine Oil Recommendations Refer to the engine manufacturer’s manual for the correct engine oil specifications. - Page 436 EFERENCE NFORMATION LANT NFORMATION ESTOP LEDs Indicates that the remote system is functioning and no ESTOPs are Green (RUN) activated. Indicates that an ESTOP has been activated. Check all ESTOP Red (ESTOP) switches. Flashing Red (ESTOP Fault) Indicates that a fuse has been blown or a relay fault exists. FUNCTION FAULT Green (No Fault) Indicates that the remote system is functioning.
-
Page 437: Kar-Tech Controller Troubleshooting
EFERENCE NFORMATION LANT NFORMATION The receiver unit is equipped with a 15A fuse that is located inside the cover. NOTICE: You must remove both connectors to the remote control receiver prior to welding on the plant. Failure to remove the connectors before welding will damage the receiver and it will have to be replaced. Kar-Tech Controller Troubleshooting To determine a fault code, count the number of blinks between the pause. - Page 438 EFERENCE NFORMATION LANT NFORMATION TRANSMITTER ERROR CODE CHART ERROR CODE PROBABLE CAUSE LOW BATTERY FAULTY CRICUIT TO OUTPUT 1 FAULTY CIRCUIT TO OUTPUT 2 FAULTY CIRCUIT TO OUTPUT 3 FAULTY CIRCUIT TO OUTPUT 4 FAULTY CIRCUIT TO OUTPUT 5 FAULTY CIRCUIT TO OUTPUT 6 FAULTY CIRCUIT TO OUTPUT 7...
-
Page 439: Crusher Information
EFERENCE NFORMATION RUSHER NFORMATION Crusher Information Available Liner Configurations K300+ Coarse Chamber Item Part Number Chamber Weight Mantle 456394SX 1600 lbs (726 kg) Liner 456262SX 1743 lbs (791 kg) Reduction Ratio: 4:1 to 8:1 max. (Based on no bowl float. If bowl float occurs, then you have gone beyond the allowable reduction ratio). -
Page 440: K300+ Medium Coarse Chamber
EFERENCE NFORMATION RUSHER NFORMATION K300+ Medium Coarse Chamber Item Part Number Chamber Weight Mantle 456262SX 1600 lbs (726 kg) Liner 456495SX 1868 lbs (847 kg) Reduction Ratio: 4:1 to 8:1 max. (Based on no bowl float. If bowl float occurs, then you have gone beyond the allowable reduction ratio). -
Page 441: K300+ Medium Chamber
EFERENCE NFORMATION RUSHER NFORMATION K300+ Medium Chamber Item Part Number Chamber Weight Mantle 456262SX 1600 lbs (726 kg) Liner 456395SX 1862 lbs (845 kg) Reduction Ratio: 3:1 to 6:1 max. (Based on no bowl float. If bowl float occurs, then you have gone beyond the allowable reduction ratio). -
Page 442: K300+ Medium Chamber With Feed Slots
EFERENCE NFORMATION RUSHER NFORMATION K300+ Medium Chamber with Feed Slots Item Part Number Chamber Weight Mantle 456262SX 1600 lbs (726 kg) Liner 456396SX 1871 lbs (849 kg) Reduction Ratio: 3:1 to 6:1 max. (Based on no bowl float. If bowl float occurs, then you have gone beyond the allowable reduction ratio). -
Page 443: K300+ Medium Fine Chamber
EFERENCE NFORMATION RUSHER NFORMATION K300+ Medium Fine Chamber Item Part Number Chamber Weight Mantle 456262SX 1843 lbs (836 kg) Liner 456397SX 1600 lbs (726 kg) Reduction Ratio: 3:1 to 6:1 max. (Based on no bowl float. If bowl float occurs, then you have gone beyond the allowable reduction ratio). -
Page 444: K300+ Fine Chamber
EFERENCE NFORMATION RUSHER NFORMATION K300+ Fine Chamber Item Part Number Chamber Weight Mantle 456322SX 1604 lbs (728 kg) Liner 456398SX 1657 lbs (752 kg) Reduction Ratio: 3:1 to 6:1 max. (Based on no bowl float. If bowl float occurs, then you have gone beyond the allowable reduction ratio). -
Page 445: K300+ Product Capacities
EFERENCE NFORMATION RUSHER NFORMATION K300+ Product Capacities Open circuit capacities in tons-per-hour OPEN CIRCUIT CAPACITIES IN TONS-PER-HOUR 1/2” 5/8” 3/4” 7/8” 1” 1-1/4” 1-1/2” 1-3/4” 2” (13mm) (16mm) (19mm) (22mm) (25mm) (32mm) (38mm) (44mm) (51mm) 170-210 190-240 215-270 240-300 270-330 310-385 330-415 350-440... -
Page 446: Kodiak Plus Gradation Chart
EFERENCE NFORMATION RUSHER NFORMATION Kodiak Plus Gradation Chart CRUSHER CLOSED SIDE SETTING PRODUCT SIZE 5/16” 3/8” 7/16” 1/2” 5/8” 3/4” 7/8” 1” 1-1/4” 1-1/2” 1-3/4” 2” 4” (101.6mm) 3-1/2” (88.9 mm) 3” (76.2mm) 2-3/4” (69.8mm) 2-1/2” (63.5mm) 2-1/4” (57.1mm) 2” (50.8mm) 1-3/4”... - Page 447 EFERENCE NFORMATION RUSHER NFORMATION CRUSHER CLOSED SIDE SETTING PRODUCT SIZE 5/16” 3/8” 7/16” 1/2” 5/8” 3/4” 7/8” 1” 1-1/4” 1-1/2” 1-3/4” 2” 5/16” (7.9mm) 1/4” (6.4mm) 5/32” (3.9mm) 100M 200M Estimated product gradation percentages at setting shown.
-
Page 448: K300+ Css Chart
EFERENCE NFORMATION RUSHER NFORMATION K300+ CSS Chart DESIRED CHANGE IN CSS INCHES INCHES 164/REV TEETH 1/32 0.03 4.71 1/16 0.06 9.42 0.13 18.84 0.38 56.52 0.50 12.7 75.36 0.63 15.9 94.20 0.75 19.1 113.04 0.88 22.2 131.89 1.00 25.4 159.73 1-1/8 1.13 28.6... -
Page 449: Crushing Application Guidelines
EFERENCE NFORMATION RUSHER NFORMATION Crushing Application Guidelines Some terms that will be used in this section: Closed Side Setting (CSS): The smallest distance between the bowl liner and cone mantle. The CSS is approximately similar to the largest desired particle size. Choke feed: The condition where the chamber is consistently filled with feed material to a level significantly above the top of the cone. - Page 450 EFERENCE NFORMATION RUSHER NFORMATION friable enough. A closed circuit crusher is more likely to see a reduction ratio of 4:1 to 6:1 and some fine appli- cations may go as low as 3:1. When choosing a chamber, consider the following guidelines. Assume the maximum feed size should be less than or equal to the average of the open and closed side feed opening.
- Page 451 EFERENCE NFORMATION RUSHER NFORMATION fed (aka trickle fed). Failure to choke feed increases sliding contact against the mantle and liner resulting in uneven and/or premature wear and more impact loading on the bearings. Choke feeding maintains downward pressure on the feed in the crushing chamber, which promotes rock on rock crushing and urges the feed downward and through the chamber.
- Page 452 EFERENCE NFORMATION RUSHER NFORMATION Feed Gradation Percent Passing Sieve Size in Inches (MM) Closed Side Feed Opening Midpoint Size The desired product size will typically dictate the CSS. Although there are exceptions to the rule, generally speaking, the CSS will be approximately equal to or slightly larger than the desired product size. Once the CSS and a general description of the feed is known, the liner selection is usually narrowed to only one or two choices in most cases.
-
Page 453: Pinion Speed
EFERENCE NFORMATION RUSHER NFORMATION When reducing CSS, the recommended procedure is to make the changes in small increments (smaller than .063” [1.6mm]), allowing the entire circuit to react to the change and stabilize. There is seldom, if ever, any reason to make sudden CSS reductions. The same can be said for increasing CSS to fine tune the circuit. Make small adjustments and wait. -
Page 454: Choke Feeding
EFERENCE NFORMATION RUSHER NFORMATION Choke Feeding Assuming that the bowl and liner have been properly selected for the feed material and desired product, the most important thing you can do to optimize the performance and life of the Kodiak+ crusher and wear parts is to keep the crusher choke fed. - Page 455 EFERENCE NFORMATION RUSHER NFORMATION Hardness Hardness is basically the amount of pressure needed to break a rock. Kodiak crushers are designed to crush rock with the compressive strength of 40,000psi or less. The following scale from ASTM C170 shows the corresponding pressure classification: PRESSURE STRENGTH...
-
Page 456: Fine Crushing
EFERENCE NFORMATION RUSHER NFORMATION Fine Crushing In some cases it is not practical or possible to continue to squeeze the CSS tighter and tighter to make smaller and smaller products. If attempts to do so result in persistent bowl float but it is important to make that partic- ular size product, it is sometimes possible to approach the problem entirely differently from that described so far. -
Page 457: Feed Related Problems
EFERENCE NFORMATION RUSHER NFORMATION Too Much Clay, Mud, or High Moisture Content Combinations of clay or mud, soft rock like soft limestone or shale, with more than 5% moisture content and sand will cause the material to compact into a composite solid form nicknamed “pancakes.” TIR Pressure Too Low If the TIR pressure is below the design setting, the feed material may overcome the TIR system and cause bowl float. - Page 458 EFERENCE NFORMATION RUSHER NFORMATION If the decision is made to make chamber changes based on unsatisfactory results and it has been decided that nothing can be done to improve the feed gradation, then use the guidelines above to evaluate the old chamber and the new candidate.
-
Page 459: Product Specification Troubleshooting
EFERENCE NFORMATION RUSHER NFORMATION Product Specification Troubleshooting SYMPTOM PROBABLE CAUSE Not choke fed. Hook in manganese. Loose liner or mantle. Segregated feed. Feed material not centered. CSS cchanges due to bowl clamp malfunction. Product won’t hold spec. Excessive fine material in feed. Excessive moisture in feed material. -
Page 460: Crusher Lubrication Oil Specifications
EFERENCE NFORMATION RUSHER NFORMATION Crusher Lubrication Oil Specifications Recommended Oil Type The oil installed at the factory is Mobilgear 600XP 150, a premium grade ISO 150 gear oil with extreme pres- sure additives specially formulated to minimize pitting. JCI requires use of Mobilgear 600XP or Mobilgear SHC150 synthetic oil throughout the warranty period. -
Page 461: Lubrication System Oil Flow
EFERENCE NFORMATION RUSHER NFORMATION Lubrication System Oil Flow The lube pump pulls oil from the reservoir and then pumps it through the oil filter and flow sensor. The oil is sent back to the crusher where it is pumped up the baseframe spindle to the bearings. The oil drains down through the bearings to the pinion tunnel, lubricating the gears and pinion bearings along the way. -
Page 462: Lube Oil Analysis
EFERENCE NFORMATION RUSHER NFORMATION Lube Oil Analysis JCI recommends sending samples in to be analyzed every 250 hours to monitor the condition of the lubricant and the effects of wear over time. The results of a single sample, although useful, are not nearly as valuable as the cumulative effect of several samples over time. - Page 463 EFERENCE NFORMATION RUSHER NFORMATION • Water. This will typically be reported as YES or NO. A YES reading on the report indicates that water (measured in percent of sample volume) exceeded a threshold limit. YES typically means great than 1%, but you should check with the lab performing the test to verify what their threshold value is. Anything other than NO is too much.
- Page 464 EFERENCE NFORMATION RUSHER NFORMATION Oil Filter Element Beta Ratings Filter elements are currently classified by a Beta rating system. A particular filter element may have several Beta ratings (typically 3 are listed), each corresponding to a specific particle size. Beta ratings are a measure of capture efficiency, and represent the ratio of the number of particles of a given size or greater upstream of the filter to the number of particles of the same size downstream.
-
Page 465: Hydraulic System
YDRAULIC YSTEM YDRAULIC RESSURES Hydraulic System Hydraulic Pressures There are gauges to monitor operating pressure at each of the hydraulic valves. Refer to your hydraulic sche- matic to determine the pressure relief setting for each valve. Conveyor and Track Pressure The hydraulic pressure valves and gauges for the conveyors and tracks are located in the hydraulic panel. - Page 466 YDRAULIC YSTEM YDRAULIC RESSURES...
-
Page 467: Crusher System Pressure
YDRAULIC YSTEM YDRAULIC RESSURES Crusher System Pressure The crusher system gauge is located on the crusher hydraulic manifold in the hydraulic panel. Feeder Lift Pressure The feed conveyor lift pressure gauge is located in the lube compartment. -
Page 468: Lube Flow Pressure
YDRAULIC YSTEM YDRAULIC RESSURES Lube Flow Pressure The lube flow pressure gauge is located in the lube compartment. -
Page 469: Crusher Hydraulic Manifold Assembly
YDRAULIC YSTEM RUSHER YDRAULIC ANIFOLD SSEMBLY Crusher Hydraulic Manifold Assembly Hydraulic pressure is provided by a gear pump connected to an open circuit hydraulic manifold in which hydraulic fluid is constantly flowing when the pump is running. The connection is made at the P port located on the left-hand end. -
Page 470: Crusher System Relief Pressure
YDRAULIC YSTEM RUSHER YDRAULIC ANIFOLD SSEMBLY Tramp Iron Relief System Needle Valve (NV1) Pump Discharge Pressure Gauge (GP3) Tramp Iron Pressure Transducer (PT2) TIR Circuit (S1) Rotate Bowl Down (S4) Bowl Clamp Pressure Transducer (PT1) Bowl Clamp Needle Valve (NV2) Rotate Bowl Up (S5) Bowl Clamp Circuit (S3) Hydraulic Clear Circuit (S2) -
Page 471: Bowl Clamp
YDRAULIC YSTEM LAMP Bowl Clamp The bowl clamp is a hydraulic piston that prevents the bowl from spinning when the crusher is operating. When the bowl clamp circuit is pressurized, the bowl clamp is forced upward. This action causes the threads in the bowl clamp to push against the bowl threads, thus keeping the bowl from turning. - Page 472 YDRAULIC YSTEM LAMP Anti-Rotation Pin...
-
Page 473: Bowl Clamp Circuit
YDRAULIC YSTEM LAMP Bowl Clamp Circuit The Kodiak+ hydraulic system automatically controls the bowl clamp pressure. The pressure is sensed by and displayed on pressure transducer PT1, mounted on the top right-hand side of the hydraulic manifold. If the pressure drops below the low set point, the pump starts and solenoid S3 is energized. When S3 is ener- gized, oil is sent to the bowl clamp and also the bowl clamp accumulator. -
Page 474: Bowl Rotation Motor
YDRAULIC YSTEM OTATION OTOR Bowl Rotation Motor Bowl Rotate Drive Gear Box Bowl Rotate Hydraulic Motor Drive Ring Gear The bowl rotation drive system is composed of a gear box and a hydraulic motor. A pinion gear on the gear box shaft meshes with the drive ring gear. -
Page 475: Bowl Rotation Circuit
YDRAULIC YSTEM OTATION OTOR Bowl Rotation Circuit Bowl rotation works in conjunction with the bowl clamp circuit. Solenoids S4 (down/M2) and S5 (up/M1) are energized by pressing BOWL DOWN or BOWL UP. Solenoids S4 and S5 direct oil to the hydraulic motor mounted on the crusher. -
Page 476: Tramp Iron Relief (Tir) System
YDRAULIC YSTEM (TIR) S RAMP ELIEF YSTEM Tramp Iron Relief (TIR) System The system is comprised of a series of TIR cylinders that hold the upper assembly down on the lower assembly of the crusher. The cylinders have an integral manifold that is equipped with four (4) ports and a relief valve that sends oil from the retract port to the extend port in the event of an overload condition. - Page 477 YDRAULIC YSTEM (TIR) S RAMP ELIEF YSTEM TIR Cylinder Manifold TIR Cylinder TIR (retract) Clear (extend) TIR Relief Valve...
-
Page 478: Tramp Iron Relief (Tir) Circuit
YDRAULIC YSTEM (TIR) S RAMP ELIEF YSTEM Tramp Iron Relief (TIR) Circuit The upper assembly is clamped to the baseframe by a group of hydraulic cylinders that are connected in parallel and spaced equally around the crusher. Every other cylinder is equipped with a relief valve that is situated in a cavity connected to the retract and extend ports of the cylinder. -
Page 479: Tir Relief Valve Pressure
YDRAULIC YSTEM (TIR) S RAMP ELIEF YSTEM It is necessary to bleed the pressure from the TIR circuit as a normal part of troubleshooting and adjusting the system pressures or any time any part of the hydraulic system is disconnected. CAUTION: Always bleed the pressure from the TIR and bowl clamp circuit prior to disconnecting or disassembling any part of the hydraulic system. -
Page 480: Clear Circuit
YDRAULIC YSTEM (TIR) S RAMP ELIEF YSTEM Clear Circuit In the event that the crushing chamber becomes plugged, the TIR cylinders may be extended to clear the chamber. When the CLEAR pushbutton is pressed, solenoids S2 and S6 are energized. Solenoid S2 directs oil to the extend port of the hydraulic cylinders.
Need help?
Do you have a question about the FT300DF and is the answer not in the manual?
Questions and answers