Table of Contents
Advertisement
Advertisement
Table of Contents

Related Manuals for Instant GOURMET


Summary of Contents for Instant GOURMET
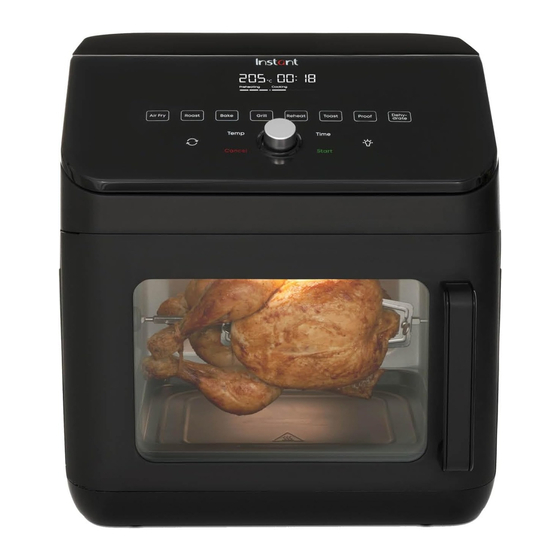
- Page 1 INSTANT GOURMET AIR FRYER OVEN...
- Page 2 ™ meals with less oil and more choice. We hope you fall in love with Instant air frying and enjoy it in your kitchen for years to come! Get started with your Gourmet Air Fryer Oven! Scan to Get Started!
-
Page 3: Table Of Contents
CONTENTS Important safeguards What’s in the box Using your Air Fryer Oven Initial set up Cooking Smart Programs Cleaning Troubleshooting Error codes Learn more Warranty... -
Page 4: Important Safeguards
Safety Instructions At Instant™, we want you to feel comfortable using our products. This Instant™ Air Fryer Oven was designed with you and your safety in mind. When using electrical appliances, basic safety precautions should always be followed to reduce the risk of fire, electric shock, and injury to persons. - Page 5 with the appliance. Cleaning and user maintenance shall not be made by children without supervision. • DO NOT use the appliance for anything other than household use. It is not intended for commercial use. • DO NOT leave the appliance unattended while in use. •...
- Page 6 • DO NOT use this appliance for deep frying foods. ACCESSORIES • DO use only accessories or attachments authorised by Instant Brands Inc. The use of parts, accessories or attachments not recommended by the manufacturer may cause a risk of electric shock or other personal injury, fire, and/or property damage.
- Page 7 • If the unit includes a detachable power cord: To connect, always attach the power cord to the appliance’s outlet firmly first, then plug the power cord into the wall outlet well. ELECTRICAL CAUTIONS • The appliance contains electrical components that are an electrical shock hazard.
-
Page 8: What's In The Box
WHAT’S IN THE BOX Air Fryer Oven Control panel Heating elements (inside) Lights (inside) Air fryer oven door with ClearCook Power cord (rear) Accessories Rotisserie Cooking Basket trays Rotisserie Drip pan Skewers Rotisserie Rotisserie spit holder and forks Remember to recycle! We designed this packaging with sustainability in mind. -
Page 9: Using Your Air Fryer Oven
USING YOUR AIR FRYER OVEN Control panel We’ve designed the control panel to be simple to use and easy to read. Status Display 4. Temperature Control • Cooking temperature 5. Time Control • Cooking time 6. Rotate • Progress bar indicator •... - Page 10 Turning the sound On/Off You can set notification sounds to ON or OFF. • While in Ready mode or while you’re setting up a cooking program (but before pressing Start), press and hold Time and Temp for 5 seconds until the display shows Sound On or Sound Off. Error alerts cannot be turned off.
-
Page 11: Initial Set Up
INITIAL SET UP Unpack Remove your new air fryer oven from the box. Remove all the packaging material from in and around the air fryer oven. Make sure to remove all the accessories from inside the air fryer oven. Don’t remove the safety warning stickers or the rating label from the air fryer oven. - Page 12 When the display shows Turn Food, wait 10 seconds for the program to resume. After the cooking session is done, let the unit cool. Now you’re ready to cook a meal in your Instant Air Fryer Oven! ™ User Manual...
-
Page 13: Cooking
COOKING The Instant GOURMET air fryer oven uses EvenCrisp rapid air ™ ™ circulation to crisp and cook food, from the top down giving your meals all the rich, crispy flavour of deep frying, with little to no oil. HOT SURFACES The air fryer oven will be hot during and after cooking. - Page 14 Cooking in your Air Fryer Oven These instructions explain how to cook food using one or more of the cooking trays. Prep Thaw, cut, season or batter your ingredients according to your recipe. Preheat Insert the tray(s) into the cooker and close the door. When the air fryer oven door is closed securely it will be flush with the front of the cooker.
- Page 15 Turn Part way through the cooking cycle the display shows Turn Food. If you do not open the door after Turn Food displays, cooking will proceed after 10 seconds. Open the door and carefully turn, flip, or rotate your food. Close the door again.
- Page 16 Slide the forks onto both ends of the spit, ensuring the prongs are inserted into the food item. Tighten the setting screws to secure the forks. Starting with the left side, slide the spit into the air fryer oven, until securely positioned into the black locator.
- Page 17 Using your Rotisserie Chip Basket Prep The rotisserie basket is perforated to allow maximum airflow for the perfect tumble-fried all-over crisp. Twist open the basket lid and add chips. To close, twist the lid to the locked position. Starting with the left side, slide the basket into the air fryer oven, until securely positioned into the black locator.
- Page 18 Rotisserie basket will be hot during and after cooking. Always use the rotisserie holder to remove rotisserie accessories, and exercise extreme caution when removing hot accessories from the cooking chamber. Always use proper heat protection. Using your Rotisserie Skewer Set Prep Prepare food onto the skewers, ensuring space is left at the end (2-3cm).
- Page 19 temperature and time as desired. Press rotate, the icon will light up.* Touch Start. *if you wish to stop rotation, press the rotate button again. Removing the Rotisserie Skewer Set Use caution when opening the oven door. The oven door and rotisserie will be hot.
- Page 20 Changing cooking time during cooking You can change the cooking time after you’ve started a Smart Program. Press Time and use the Control Dial to increase or decrease cooking temperature. Then press the Control Dial to confirm the change. Press Start to continue cooking. If you don’t press Start, cooking continues using the former settings.
-
Page 21: Smart Programs
SMART PROGRAMS Air Fry You can air fry foods like fries, cauliflower bites, wings, nuggets and more. Setting Default Minimum Maximum Temperature 205°C 82°C 205°C Cooking Time 18 minutes 1 minute 1 hour (00:18) (00:01) (01:00) To air fry • Follow the basic instructions for Cooking. - Page 22 To bake • Follow the basic instructions for Cooking. • Select “Bake” as the Smart Program. • There is no need to turn the food partway through cooking. Leave approximately 2.5 cm of space around all sides of the baking dish to allow heat to circulate evenly.
- Page 23 Reheat Bring the crisp and crunch back to leftover fries or pizza, in just a few minutes. Setting Default Minimum Maximum Temperature 138°C 49°C 182°C Cooking Time 10 minutes 1 minute 1 hour (00:10) (00:01) (01:00) To reheat • Follow the basic instructions for Cooking. •...
- Page 24 Toast Setting Default Default Default Toast Darkness Level 1 Level 2 Level 3 Cooking Time 2:50 minutes 3:10 minutes 3:30 minutes Toast settings are pre-defined and not adjustable To toast: • Select “Toast” as the Smart Program. • Select desired level by pressing time and using the control dial. User Manual...
-
Page 25: Cleaning
CLEANING Clean your Instant air fryer oven after each use. Always let all parts ™ cool to room temperature before cleaning. Before use or storing, make sure all surfaces are dry. To prevent electric shock, unplug before cleaning. DO NOT immerse power cord, plug or the appliance in water or other liquid, which may result in electric shock. -
Page 26: Troubleshooting
TROUBLESHOOTING Problem Cause Solution Air fryer oven will The appliance Make sure the power cord is plugged not turn on is not properly into the outlet firmly. plugged in. Outlet is not Plug another appliance into the same powered. outlet to test the circuit. The door is not Make sure the door is fully closed.. -
Page 27: Error Codes
ERROR CODES If the control panel displays an error code from this list, there is an issue with the air fryer oven. Here are the actions you should take to fix the problem. Problem Cause Solution Temperature sensor open circuit Contact Customer Care. -
Page 28: Learn More
LEARN MORE There’s a whole world of Instant information and help just waiting ™ for you. Here are some of the most helpful resources. Register your product instantbrands.com.au/pages/product-registration Contact Consumer Care instantbrands.com.au support.au@instantbrands.com 1800 251 643 or +61 2 9317 1000 Download the Instant Brands Connect App •... -
Page 29: Warranty
Provide a description of the appliance you believe has malfunctioned due to defective parts or workmanship. If it is necessary for the appliance to be sent to Instant Brands Australia for repair or replacement, Instant Brands Australia will send you a pre-paid shipping label and you must send the appliance and your dated sales receipt to Instant Brands Australia along with the appliance. - Page 30 WARRANTY Limitation and Exclusions To the maximum extent permitted by law, the maximum liability of Instant Brands Australia, if any, for any allegedly defective appliance or part shall in no circumstances exceed the purchase price of a comparable replacement appliance or part of the same age.
- Page 31 NOTES User Manual...
- Page 32 NOTES User Manual...
- Page 33 NOTES User Manual...
- Page 34 ©2024 Instant Brands (Australia) Pty Ltd. Sydney Corporate Park Level 1, 182-184 Bourke Road, Alexandria NSW 2015, Australia. instantbrands.com.au © 2024 Instant Brands LLC. INSTANT and INSTANT BRANDS are registered trademarks of Instant Brands Holdings Inc.
Need help?
Do you have a question about the GOURMET and is the answer not in the manual?
Questions and answers