Table of Contents
Advertisement
OMNI
PRO
TM
TOASTER OVEN AND AIR FRYER
User manual
Important safeguards
Products, parts and
accessories
Get started
Control panel
Cooking
Rotisserie cooking
Care, cleaning and storage
Troubleshooting
Warranty
Contact
Register your product today at instantappliances.com/support/register.
Download the Instant Pot App with 1000+ recipes at instantappliances.com/app.
Advertisement
Table of Contents

Related Manuals for Instant OMNI PRO


Summary of Contents for Instant OMNI PRO
- Page 1 TOASTER OVEN AND AIR FRYER User manual Important safeguards Products, parts and accessories Get started Control panel Cooking Rotisserie cooking Care, cleaning and storage Troubleshooting Warranty Contact Register your product today at instantappliances.com/support/register. Download the Instant Pot App with 1000+ recipes at instantappliances.com/app.
-
Page 2: Important Safeguards
IMPORTANT SAFEGUARDS At Instant Brands your safety always comes first. The Instant Omni ™ ™ ™ was designed with your safety in mind, and we mean business. Visit instantappliances.com to learn about this appliance’s safety mechanisms. When using electrical appliances, basic safety precautions should always... - Page 3 IMPORTANT SAFEGUARDS 08 DO NOT use accessories or attachments not authorized by Instant Brands Inc. The use of attachments not recommended by the manufacturer may cause a risk of injury, fire or electric shock. 09 Avoid contact with moving parts. Failure to do so may result in injury.
- Page 4 Use hand protection when handling hot items. 21 DO NOT store any materials other than authorized Instant Brands accessories in the appliance. 22 When cooking, DO NOT place the appliance against a wall or against other appliances.
- Page 5 IMPORTANT SAFEGUARDS 28 Should the appliance emit black smoke, touch Cancel and unplug immediately. Wait until smoking has stopped and the unit has cooled before removing accessories. 29 DO NOT rest cooking utensils or baking dishes on the appliance’s hot surfaces. 30 DO NOT use the accessories included with the oven in a microwave.
-
Page 6: Product Specifications
This appliance has a 3-prong grounding plug. To reduce the risk of electric shock, plug the power cord into a grounded (earthed) electrical outlet that is easily accessible. Product specifications Model: OMNI PRO 18 1800 W 120 V~ 60 Hz 19 Quarts / 18 Litres 26.05 lbs / 11.84 kg... -
Page 7: Table Of Contents
Table of Contents IMPORTANT SAFEGUARDS ..................2 Product specifications .....................6 Find your model name and serial number ............6 Product, parts and accessories .................. 8 Get started ........................9 Initial set up ......................9 Initial test run ......................10 Control panel ......................11 Settings ........................12 Status messages .....................14 Cooking ........................ -
Page 8: Product, Parts And Accessories
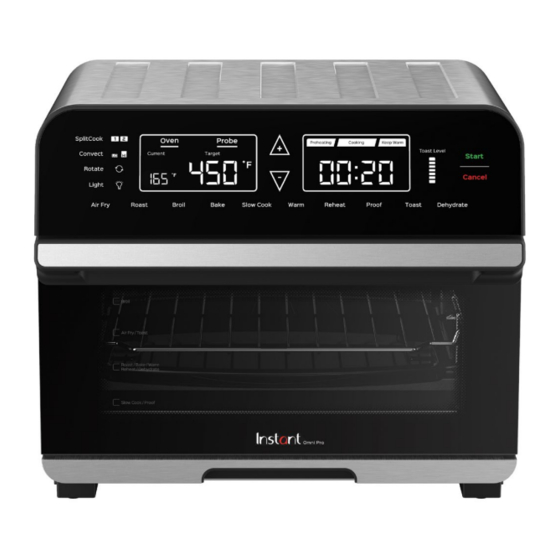
Product, parts and accessories Before using your fantastic new toaster oven, make sure that everything is present and accounted for. Toaster Oven Control panel Top heating elements Air vents and heating element coil Cooking chamber Probe socket Rotisserie catch Rack positions (4 levels) Cord wrap holder (rear) -
Page 9: Get Started
Don’t remove the safety warning stickers or the rating label from the oven. 03 You may be tempted to put the Omni Pro on your stovetop for quick use — but don’t do it! Place it on a stable, level surface, away from combustible material and external heat sources. -
Page 10: Initial Test Run
Do you have to do the test run? No — but getting to know the ins and outs of your Omni Pro prepares you for success in the kitchen! Take a few minutes to get to know how this hot number works. -
Page 11: Control Panel
Touch to view the target cooking temperature. Oven When cooking with the Omni Pro's probe, the current temperature rises in real time. See Cooking: Cooking with the probe for more information. When the probe is in place, touch Probe to view your meal's target and current internal Probe temperature in real time. -
Page 12: Settings
Settings To do this… Do this! The display shows OFF to let you know Wake the toaster oven. that the Omni is in standby mode, ready for action. Select any Smart Program. Touch Light to turn the oven light on and off at any time. - Page 13 Cooking is in progress. Cooking Cooking has finished and the oven enters into the Keep Warm state. Keep Warm Keep Warm does not turn on after cooking with the Omni Pro probe. See Cooking: Using the probe for more information. instantappliances.com | 13...
-
Page 14: Status Messages
Status messages The Omni Pro is in standby mode, ready to go! A smart program is in the preheating stage. Only applies to Air Fry, Roast and Bake. The oven door is open. If the oven door remains open for over 5 minutes during cooking and/or 30 seconds during program selection, the oven returns to standby mode. -
Page 15: Cooking
Cooking The Omni Pro is a compact powerhouse of an oven that you can trust to cook quickly, evenly, and deeply. What we love about it What you should know about it The Omni Pro has a bit of a learning curve. -
Page 16: Air Fry, Roast And Bake
180 to 450 °F Bake Light and fluffy cakes and pastries, scalloped potatoes and more. Stage 2: Cooking Stage 1: Setting up the Omni Pro for cooking 01 When the display switches to the 01 Connect the power cord to a 120 V cooking countdown, open the oven power source. -
Page 17: Cooking Tips
• Air frying can cause oil and fat to drip from foods. To prevent excess smoke, watch the oil levels and carefully remove and drain the cooking pan and/or crumb tray as needed. Check out the cooking timetables, download the free Instant Pot app, or, visit our recipe site for fun, easy-to-follow instructions. CAUTION The toaster oven and accessories will be hot during and after cooking. -
Page 18: Toast
Cooking Toast Toast up to 6 slices of bread or bagel halves at a time — no flipping required! Default Toast Smart Default toast number of Time range darkness program darkness level pieces range Adjusts by quantity 2 pieces Toasting of slices and toast Toast Level 4 (2PC) -
Page 19: Broil, Slow Cook, Warm, Reheat, Proof And Dehydrate
Cooking Broil, Slow Cook, Warm, Reheat, Proof and Dehydrate These cooking times and temperatures are recommendations only. Play with the presets to get the results you like best! Smart Default Temperature Default time Time range program temperature range 10 minutes 1 to 20 minutes 232 °C 176 to 232 °C... -
Page 20: Splitcook Tm
Cooking SplitCook The SplitCook setting lets you choose 2 smart programs to run automatically one after another, so if you want to sear your meal under the broiler then lower the heat, (or vice versa!) you can! What we love about it Things you should know You can use SplitCook with the Being able to program 2 back-to-back cooking... - Page 21 Cooking Stage 3: Cooking 03 When cooking is complete, carefully open the door, and using proper hand 01 Depending on the smart programs protection, remove your food from the you select, you can either wait for the cooking chamber. toaster oven to preheat, or place your dish into the cooking chamber right away.
-
Page 22: Cooking With The Probe
Cooking Cooking with the probe Whether you want to cook low and slow or ramp up the heat, the Omni Pro probe monitors the internal temperature of your dish so you don’t have to! What we love about it Things you should know The rotisserie setting cannot be used with the probe in place. - Page 23 Touch Oven to show the target cooking temperature. 09 The Omni Pro beeps and shows End when your food reaches the target internal temperature. 10 Using proper hand protection, unplug the probe from the oven, then remove your food from the cooking chamber.
-
Page 24: Probe Cooking Temperatures
Probe cooking temperatures Food Type Internal temperature Beef, pork, veal, lamb 71°C / 160°F Ground meat and meat mixtures Turkey, chicken 74°C / 165°F *Fresh beef, veal, lamb Steaks, roasts, chops 63°C / 145°F All poultry (breasts, whole bird, legs, thighs, wings, Poultry 74°C / 165°F ground poultry, giblets, and... -
Page 25: Rotisserie Cooking
Rotisserie cooking The rotisserie spit and forks are perfect for roasting whole chicken, tenderloin and much more. Follow the steps below to prepare your food, then turn on the rotisserie to get crispy, gorgeous, golden-all-over results! You can also view the "how to use the rotisserie"... -
Page 26: Removing Rotisserie Cooked Food
Rotisserie cooking 01 Select the Smart Program you want to 02 Lift the left side of the rotisserie spit use: Air Fry, Roast and Bake. slightly, then move the spit to the left to remove it from the catch on 02 Touch the temperature field to select the right. -
Page 27: Care, Cleaning And Storage
Care, cleaning and storage Clean your Instant Omni Pro and accessories after each use. Always unplug the toaster oven and let it cool to room temperature before cleaning. Never use harsh chemical detergents, scouring pads, or powders on any of the parts or components. -
Page 28: Troubleshooting
Troubleshooting Register your Instant Omni Pro today! If your issue persists or you have any additional questions, get in touch with a Customer Care Advisor through our chat widget at instantappliances.com/#chat, by email at support@instantpot.com or by phone at 1-800-828-7280. - Page 29 Troubleshooting Problem Possible reason Try this Avoid air frying foods with a high fat content. Cooking foods with a high fat content, such as bacon, Check the cooking pan and/or crumb tray for excess oil or fat, sausage, and hamburger. and carefully remove as needed after cooking.
-
Page 30: Warranty
If we are unable to resolve the problem, you may be asked to send your appliance to the Service Department for quality inspection. Instant Brands is not responsible for shipping costs related to warranty service, save and except for shipping costs associated with the return of your appliance from Canada or within the 48 contiguous states and the District of Columbia of the United States of America, as provided herein. - Page 31 Instant Brands representative. Limitation and Exclusions The liability of Instant Brands, if any, for any allegedly defective appliance or part shall in no circumstances exceed the purchase price of a comparable replacement appliance. This Limited Warranty does not cover:...
-
Page 32: Contact
Instant Brands Inc. 11—300 Earl Grey Dr., Suite 383 Ottawa, Ontario K2T 1C1 Canada Register your product today instantappliances.com/support/register Contact us 1-800-828-7280 support@instantappliances.com instantappliances.com/#chat instantbrands.com Copyright © 2021 Instant Brands Inc. ™ 650-0101-21...
Need help?
Do you have a question about the OMNI PRO and is the answer not in the manual?
Questions and answers
I cannot adjust the time or temperatures
To adjust the time and temperature on the Instant OMNI PRO, touch the time or temperature field, then use the + / – keys to make the necessary adjustments. If cooking is in progress, touch Start to resume cooking with the changes. Note that changes made during cooking are not saved to memory.
This answer is automatically generated