Table of Contents
Advertisement
Quick Links
Z-WAVE™ CONTROL + TEMPERATURE, HUMIDITY, AND MOTION INSERT INSTRUCTIONS
Model Number: ZW006UWA
Electrical Rating: 5VDC
The Swidget Z-Wave Control + Temperature, Humidity
and Motion Insert is a modular smart home solution
engineered for seamless integration with all Swidget
wiring devices. Swidget's Z-Wave Devices and Inserts
simplify the process of upgrading your home to a smart
living space. Swidget Devices are installed in your home
just like any other wiring devices, ensuring there is no
unnecessary complexity during installation. Once your
device is installed, simply select your desired sensor
capability, and snap your Swidget Z-Wave Insert into
the Swidget wiring device. The modularity of Swidget's
Inserts ensures that the solution is adaptable to your
needs as they change, and future-proofs your investment
by enabling you to adapt to new technologies, sensors,
and trends as they emerge.
Z-Wave Control Features
• Z-Wave Plus Certified with 800 series chipset
• Remote ON/OFF control via external Z-Wave
controller/hub.
• Manual ON/OFF control via front panel push button.
• User replaceable Insert – no electrician required
• Instantaneous W and kWh consumption for host
1
wiring device.
• Independent meter reports for each receptacle when
used with a Swidget 15A or 20A outlet.
• OTA upgradeable firmware
Temperature, Humidity, and Motion Sensor Features
• Temperature Sensor between –10°C to 40°C (14°F to
104°F)
• Multilevel sensor reports for temperature, humidity.
• 0 to 100% RH (relative humidity) operating range
• PIR Motion Sensor (Wireless Infrared Detection)
• Occupancy/Vacancy detection
What's Included
• Swidget Z-Wave™ Control + Temperature, Humidity,
and Motion Insert ZW006UWA x 1
1
Not applicable to Auxiliary and 20/40/60 Control Switch
1
©2023 SWIDGET CORP. ALL RIGHTS RESERVED.
IMPORTANT SAFETY INSTRUCTIONS
• Security Card x 1
• Packaging with QR on the outside to access the
instructions manual x 1
Swidget Wiring Devices
The Insert must be installed in a Swidget wiring device to
operate. The following wiring devices are available:
1. Auxiliary Control Switch - S16009WA
2. 20/40/60 Switch - S16008WA
3. Dimmer Switch - SD3001WA
4. 1P/3Way Switch - S16001WA
5. 15A Outlet - R1015SWA
6. 20A Outlet - R1020SWA
The final features and functionalities will depend on your
selection of Insert + wiring device combination.
IMPORTANT
This Insert must only be installed and used with an
approved/certified Swidget wiring device. Usage with any
other devices is not permitted and will result in the
Warranty becoming void.
WARNING
• While not required, it is recommended to avoid any risk
of shock or death, turn off power at the circuit breaker
or fuse and test that the power is off before installing or
removing any Insert.
• Not for use to control medical or life support equipment.
• For INDOOR use only: 0°C - 40°C (32°F - 104°F).
• Insert can only be installed in one orientation. Rear
alignment pins prevent incorrect installation. Do not
forcibly install an Insert.
• Do not use Swidget devices to control electric heaters
or any other appliances which may present a hazardous
condition due to unattended or unintentional or
automatic power on control.
• Requires a certified Z-Wave hub for operation.
• Double check any external Z-Wave settings for accuracy
before using them.
• This device complies with Z-Wave standard of open air,
line of sight transmission. Actual performance in a home
depends on the numbers of walls and obstacles between
the Insert and other Z-Wave devices / hubs.
• This device must be used in conjunction with an S2
Security Enabled Z-Wave Controller to fully utilize all
implemented security functions.
Installation
CAUTION
It is recommended to turn off power at the circuit breaker
or fuse and to test that the power is off before installing or
removing an Insert.
1. Orient the Insert to line up with the pins in the
wiring device cavity.
NOTE
Alignment pins will prevent incorrect installation.
2. Push Insert into the wiring device cavity until the
two side latches engage.
3. Re-enable power to the circuit breaker.
4. For a first time installation or after an Insert reset,
the Insert requires network ADD pairing / joining
(see below).
5. For Inserts being moved, the Insert will power up
with the previous location settings. For any required
adjustments, consult the manual of the connecting
Z-Wave controller / hub.
Insert Operation
Z-Wave SmartStart
SmartStart enabled products can be added into a
Z-Wave network by scanning the Z-Wave QR Code
present on the product with a controller providing
SmartStart inclusion. No further action is required and
the SmartStart product will be added automatically
within 10 minutes of being switched on in the network
vicinity.
1. Follow SmartStart device ADD steps for your Z-
Wave controller / hub.
2. Use the Z-Wave controller / hub app or interface
to scan the QR code located on the security card
or directly on the Insert, or manually enter the 5
digit PIN or Insert's full DSK (Device Specific Key) as
required.
Z-Wave™ Control + Temperature, Humidity, And Motion Insert Instructions - DDS50N0199
3. Once registered with your hub, the device will join
automatically within a minute of being placed in a
powered Swidget wiring device.
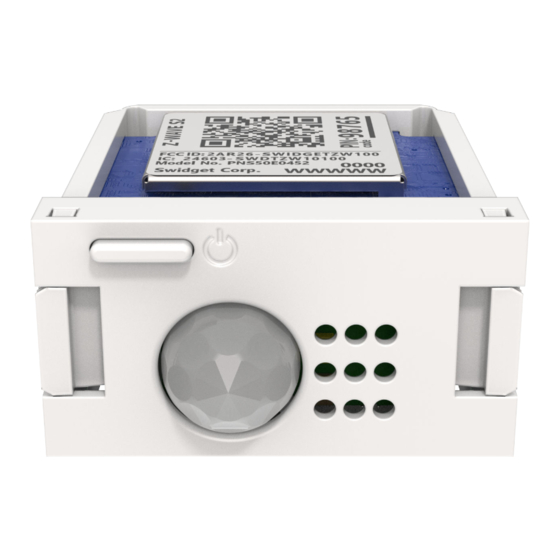
DSK located on the Insert
DSK located on the security
card
Manual Z-Wave Network Add - Classic Inclusion
1. Follow network ADD steps for your Z-Wave
controller / hub.
2. Lightly press Insert push button and hold for 5-10
seconds until the LED illuminates solid blue, then
release. LED will flash blue to indicate ADD mode is
enabled. No manual or external Z-Wave operations
are possible during this activity.
3. Insert will remain in ADD mode for up to 30 seconds.
If successful, LED will be solid blue for 5 seconds
then return to the normal operational state. IF
FAILED to connect after 30 seconds, the red LED
will flash for 3 seconds, indicating no or failed
network ADD. If necessary, consult your Z-Wave
controller/hub manual and retry.
Manual Z-Wave Network Remove - Classic Exclusion
1. Follow network REMOVE steps for your Z-Wave
controller / hub.
2. Lightly press Insert push button and hold for 5-10
seconds then release. LED will flash blue to indicate
REMOVE mode is enabled. No manual or external
Z-Wave operations are possible during this activity.
3. Insert will remain in REMOVE mode for up to 30
seconds. If successful, LED will be solid blue for 5
seconds then return to the normal operational state.
If FAILED to connect after 60 seconds, red LED
will flash indicating no or failed network REMOVE.
If necessary, consult your Z-Wave controller / hub
manual and retry.
Z-Wave Local Device Reset (Factory Reset)
NOTE
Should only be used when the original controller is
inoperable or has been replaced.
Advertisement
Table of Contents

Related Manuals for Swidget ZW006UWA


Summary of Contents for Swidget ZW006UWA
- Page 1 DSK located on the Insert DSK located on the security card The Insert must be installed in a Swidget wiring device to removing an Insert. operate. The following wiring devices are available: The Swidget Z-Wave Control + Temperature, Humidity 1.
- Page 2 Granted due to manufacturing defects for a period of 5 years for this equipment. Such modifications could void the user’s Security Swidget Host Devices and for a period of 2 years for Class authority to operate the equipment. Command Class...
- Page 3 IMPORTANT SAFETY INSTRUCTIONS This warranty applies only to Swidget products purchased from an authorized distributor or retailer, and as such, Swidget reserves the right to request proof of purchase, and reject claims for purchases made through unauthorized distributors or retailers.
Need help?
Do you have a question about the ZW006UWA and is the answer not in the manual?
Questions and answers