Subscribe to Our Youtube Channel
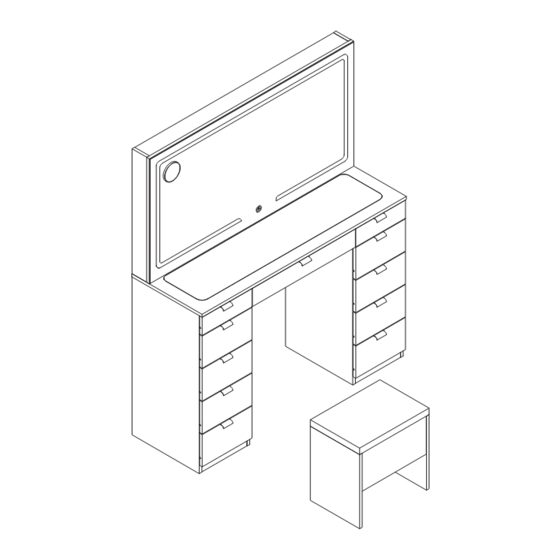
Summary of Contents for YitaHome FTBFVT-0017
- Page 2 FTBFVT-0017 SDJMY-V3 FTBFVT-0018 FTBFVT-0019 ASSEMBLY INSTRUCTIONS FTBFVT-0020 1. Two or more people are needed to complete the installation. Item Item 2.Professional installation is highly recommended. Reference Image Qty. Reference Image Qty. 3.Assemble on a flat,clean and soft surface. Item Item Reference Image Qty.
- Page 3 ASSEMBLY INSTRUCTIONS ASSEMBLY INSTRUCTIONS Item Item Reference Image Qty. Reference Image Qty. X106 8×40MM X126 3.5×14MM 6×35MM 3.5×35MM 3.5×14MM 7*40MM 3.5×35MM 250MM 250MM 3*12MM...
- Page 4 ASSEMBLY INSTRUCTIONS ASSEMBLY INSTRUCTIONS OUTER RUNNER INNER RUNNER OUTER RUNNER INNER RUNNER INNER RUNNER OUTER RUNNER INNER RUNNER OUTER RUNNER When installing the inner guide rail, please When installing the outer guide rail, please use the guide rail notch to assemble towards the use the guide rail notch to assemble towards the inner direction of the drawer.
- Page 8 ASSEMBLY INSTRUCTIONS ASSEMBLY INSTRUCTIONS 15pcs 9pcs 7pcs...
- Page 9 ASSEMBLY INSTRUCTIONS ASSEMBLY INSTRUCTIONS 11pcs 44pcs 44pcs 8pcs 1. Only fasten the top two right rails with part D (screw) in the holes shown on the first circled area. 2. Install other rails with part D (screw) in the holes as shown on second circled area.
- Page 11 ASSEMBLY INSTRUCTIONS ASSEMBLY INSTRUCTIONS 8pcs 8pcs 48pcs 32pcs 8pcs 8pcs 8pcs 8pcs 32pcs Magnifying lens Align the screws with the center of the mounting hole of the guide rail. Part I (Magnifying Mirror with Suction Cup) can be freely placed on the dresser table mirror to suit your personal needs.
- Page 12 ASSEMBLY INSTRUCTIONS ASSEMBLY INSTRUCTIONS 2pcs 4pcs 2pcs 4pcs 4pcs 12pcs 12pcs First connect the line interface, and then tear off the WALL tape behind the controller and paste it into the square groove on the back. wall space rear panel L4 L3 After the cabinet assembly, wall space...
- Page 13 ASSEMBLY INSTRUCTIONS ASSEMBLY INSTRUCTIONS 2pcs 4pcs 16pcs 2pcs wall space rear panel...
- Page 14 ASSEMBLY INSTRUCTIONS ASSEMBLY INSTRUCTIONS 12pcs 12pcs 2pcs Installation Completed...


Need help?
Do you have a question about the FTBFVT-0017 and is the answer not in the manual?
Questions and answers
Hi, I’m looking for instructions for sku # ftbfcb-6016. Today I received this item, and it didn’t come with instructions. It is a 7 drawer dresser.
The assembly instructions for the YitaHome 7 drawer dresser, part number FTBFVT-0017, include the following key steps:
1. General Guidelines:
- Two or more people are needed for assembly.
- Professional installation is recommended.
- Assemble on a flat, clean, and soft surface.
2. Drawer Installation:
- Fix screws on the inner side of the drawer.
- Align screws with the marked positions.
- If the installed position changes, adjust side-to-side or up and down at the marked positions.
3. Guide Rail Installation:
- Align the screws with the center of the mounting hole (M2) on the guide rail.
4. Wall Fixing for Safety:
- After assembly, install the wall fixing device on the back of the cabinet to prevent tipping.
- Place the wall fixing device based on your preferred location.
5. Mirror Attachment (if included):
- A magnifying mirror with suction cup (Part I) can be freely placed on the dresser mirror.
6. Parts:
- Multiple numbered parts and hardware components (e.g., screws, panels, support pieces) are used.
- Use the reference images and quantities listed in the manual to identify and assemble parts correctly.
7. Wiring (if applicable):
- Connect the line interface.
- Remove tape backing and attach the controller to the square groove on the back panel.
Follow the detailed diagrams and part labels in the manual to correctly complete each step.
This answer is automatically generated