Advertisement
Quick Links
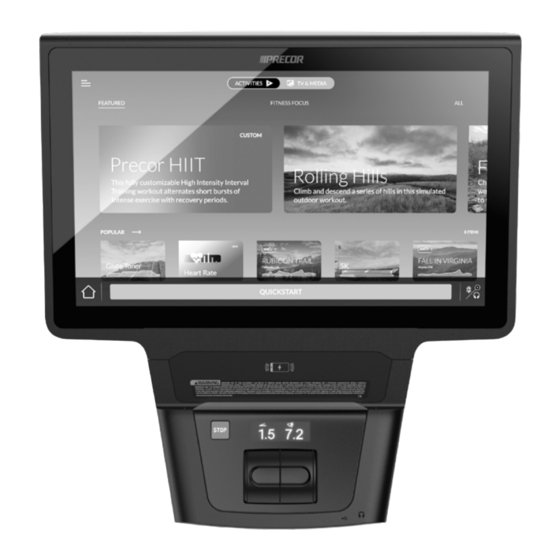
P94 (22") and P84 (16") Touchscreen Consoles
Installation Guide
WARNING Before you connect any cables to the console, make sure that
the equipment is not connected to any external power source.
Before you begin
The P94 22" console fits treadmills and StairClimbers only.
Match the correct number of paddles on the touchscreen to the appropriate lower equipment.
• Single paddle touchscreens = Upright Bike, Recumbent Bike, and StairClimber™ (SCL).
• Dual paddle touchscreens = Treadmill, Adaptive Motion Trainer™ (AMT), and Elliptical (EFX).
Install console cradle and display
1.
Ensure all cables feed up through the console mount on the lower equipment.
NOTE (JAPAN ONLY) If using a tuner, install the BCAS card into the lower brackets of the cradle
board before next step (see Figure 5).
2.
Place the cradle over and onto the console mount (Figure 1) and feed cables upward. Ensure cables
are not pinched. Cables pinched or damaged during install are not covered under warranty.
3.
Secure the console to the console mount on the lower equipment with the four fasteners included
with the lower equipment (Figure 2).
4.
Gently seat the display onto the cradle so it rests against the frame (Figure 3).
5.
Secure the display to the cradle frame with the four fasteners included with the console (Figure 4).
Figure 1. Cradle onto console mount
Connect cables
Connect the cables that are appropriate for the lower exercise equipment and media configuration (Figure 5). Not all connections are used in any configuration. Review your cable kit.
IMPORTANT A new power supply for the lower exercise equipment is provided in the cable kit and must be installed before connecting cables to the console. Not adding or
replacing the power supply will invalidate the warranty.
NOTE Before your begin, plug the CPA to MPA cable to the display
Make the connections as you need them in the order below to allow easy access to connection points. Once finished with other connections, plug it back into the cradle.
Connection Type
1
1
BCAS Card (Japan Only)
2
2
Power
3
3
Set top box/media (used with HDMI-2)
4
4
Safety key stop (Treadmill only)
5
5
Manual stop (Stairclimber only)
6
6
Tuner power
7
7
Heart rate sensor
8
8
Lower LPCA*
9
9
Handle controls (Stairclimber only)
10
10
MPA to CPA
11
11
TV, coaxial cable
12
12
Casting puck (optional) power
13
13
CPA to MPA
14
14
Ethernet/network
15
15
USB-C (from cradle)
16
16
Audio
17
17
HDMI-1 to tuner/lower cradle
18
18
HDMI-2 to set top box/media
19
19
HDMI-3 to casting puck (optional)
20
20
Casting puck holder 1
21
21
Casting puck holder 2
22
22
Headphone jack
23
23
USB-C port
24
24
Display reset button
25
25
Console reset button
©2023 Peloton Interactive | P94 P84 Touchscreen Console | Installation Guide
Figure 2. Secure
console to mount
Figure 3. Display onto cradle
13
13
and unplug it from the cradle
24
24
13
13
10
10
25
25
22
22
*For EFX, bikes, and AMT, clamp the ferrite on to the LPCA cable near end before connecting
(Figure 5A).
P94 22" Touchscreen
Figure 4. Secure display to cradle
10
10
. This will allow better access for the other connection points.
17
17
18
18
16
16
14
14
12
12
15
15
21
21
9
9
8
8
7
7
4
4
6
6
3
3
2
2
5
5
1
1
23
23
Figure 5
P84 16" Touchscreen
19
19
20
20
11
11
25 September 2023 | 306876-101B ENU | 1 of 2
Figure 5A
Advertisement

Related Manuals for Precor P94

Summary of Contents for Precor P94
- Page 1 *For EFX, bikes, and AMT, clamp the ferrite on to the LPCA cable near end before connecting Console reset button (Figure 5A). Figure 5A ©2023 Peloton Interactive | P94 P84 Touchscreen Console | Installation Guide 25 September 2023 | 306876-101B ENU | 1 of 2...
- Page 2 If using PrecorCast, verify casting by selecting option on screen and following prompts. Refer to the PrecorCast™ install guide and online configuration guide. ©2023 Peloton Interactive | P94 P84 Touchscreen Console | Installation Guide 25 September 2023 | 306876-101B ENU | 2 of 2...
Need help?
Do you have a question about the P94 and is the answer not in the manual?
Questions and answers