Kenmore RevitaLite KW4070 - Carpet Cleaner Manual
- Use & care manual (72 pages) ,
- Use & care manual (92 pages)
Advertisement
BEFORE USING YOUR NEW CARPET CLEANER
Read this Use & Care Guide. It will help you assemble and operate your new Kenmore carpet cleaner in the safest and most effective way.
For more information about carpet cleaner care and operation, call the Vacuum Cleaner Help Line at 1-877-531-7321 (US) / 1-844-608-3081 (CA). You will need the complete model and serial numbers when requesting information.
Your carpet cleaner's model and serial numbers are located on the Model and Serial Number Plate. Use the space below to record the model number and serial number of your new Kenmore carpet cleaner.
Keep this book and your sales check (receipt) in a safe place for future reference.
PACKING LIST
Your KENMORE CARPET CLEANER is packaged with the following parts and components included separately in the carton:
1 Carpet Cleaner
1 Tough Stain Tool
1 Wide Path Tool
1 8 oz. Carpet Cleaning Formula
1 Flexible Hose
1 Accessory Bag
1 Use & Care Guide
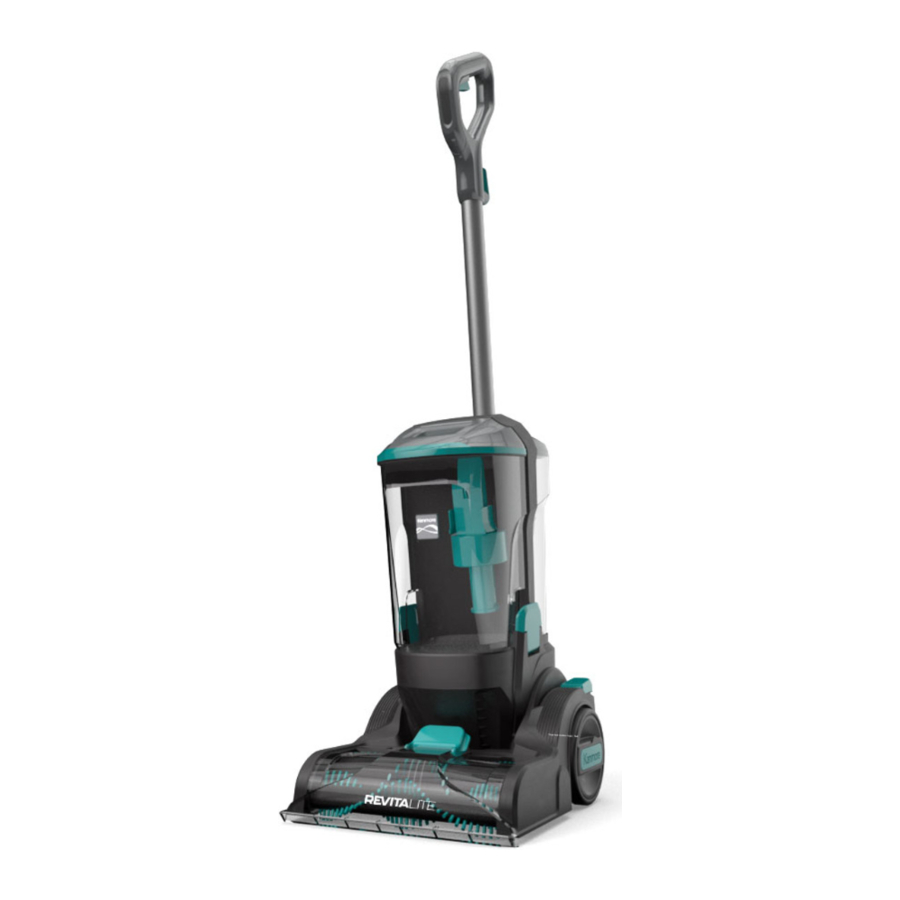
PARTS AND FEATURES
It is important to know your carpet cleaner's parts and features to assure its proper and safe use. Review these before using your carpet cleaner.
REPLACEMENT PARTS
| Item | Part No.(US) | Part No.(CA) |
| 3.5'' Tough Stain Tool | 591033101 | 591033101 |
| 6.5'' Wide Path Tool | 591033102 | 591033102 |
| Flexible Hose | 671004101 | 671004101 |
| Handle | 671004102 | 671004102 |
| Wand | 671004103 | 671004103 |
To order a replacement part, call 1-877-531-7321 (US) / 1-844-608-3081 (CA).

 Please pay special attention to these hazard alert boxes, and follow any instructions given.

statements alert you to such hazards as fire, electric shock, burns and personal injury.

statements alert you to such hazards as personal injury and/or property damage.
ASSEMBLY INSTRUCTIONS
Before assembling the carpet cleaner, check the PACKING LIST. Use this list to verify that you have received all the components of your new Kenmore Carpet Cleaner.
- Insert the handle into the wand until you hear a 'click'.

- Insert the wand into the main body until you hear a 'click'.

- Make sure the upper cord hook is in the proper position as shown. Wrap the power cord loosely around the upper and lower cord hooks.


NOTE: Make sure to wrap the power cord around the upper cord hook first, and then around the lower cord hook to avoid damaging the power cord.

- Lock power cord plug onto the power cord.
![]()

Electrical Shock and Personal Injury Hazard
Wrapping the cord too tightly with excessive stress on the cord may cause cord damage. A damaged cord is an electrical shock hazard and could cause personal injury or damage.
OPERATING INSTRUCTIONS
FILLING THE CLEAN WATER TANK
- Press the clean water tank release button with your thumb, and then lift up the clean water tank from the main body using the carrying handle.

- Open the clean water tank cap. Fill the tank with room temperature tap water and solution. Ensure the correct proportion of water and carpet cleaning solution is used by referring to the solution label. Do not exceed filling the clean water tank over the maximum fill line indicated on the clean water tank.

| Room Temperature Water | Cleaning Formula |
| Small area – bottom fill line (0.2 gal liquid) | 3 caps |
| Large area – top fill line (0.6 gal liquid) | 9 caps |
Do not fill with water above 104°F (40°C). Do not heat water or tank in microwave.

NOTE: An 8 oz. (236ml) bottle of cleaning formula is provided with this carpet cleaner. Ensure the cleaning formula and water are mixed correctly. Water must be at room temperature. Once depleted, the cleaning formula can be replaced by a high-quality liquid carpet cleaning solution that can be purchased from a local retailer.
NOTE: Using more than the recommended amount of cleaning formula may cause excessive foaming. KEEP OUT OF REACH OF CHILDREN. In case of eye contact, thoroughly flush with cold water. If irritation persists, consult a physician.
- Snap the clean water tank cap back into place.
![]()

- Align the clean water tank with the wand and slide the tank back into place, pressing down firmly until it feels secure.


USING THE CARPET CLEANER
NOTE: Before using the carpet cleaner, use a vacuum to remove loose dirt from area to be cleaned. Test a small hidden area for colorfastness. Gently rub surface with a dampened white cloth. Wait 10 minutes and check for color removal with a white paper towel. If color changes, do not use.
NOTE: To prevent staining, use plastic or aluminum foil to protect wood or metal surfaces from possible water spray.
To protect the wood floors underneath rugs or carpet, place waterproof material (e.g. plastic) underneath them before cleaning.
Moving parts! To reduce the risk of personal injury, DO NOT touch the brushrolls when the carpet cleaner is on. Contacting brushrolls while they are rotating can cut, bruise or cause other injuries. Disconnect electrical supply before servicing or cleaning the carpet cleaner. Use caution when operating near children or pets.

- Turn the upper cord hook to either side and down to release the power cord.
![]()
- Detach the power cord plug from the power cord.
- Be sure the power cord is locked into the upper locking notch as shown. This will help manage the power cord when operating the carpet cleaner.

- Plug the power cord into a properly grounded outlet located near the floor.


Personal Injury and Product Damage Hazard
- When any abnormality/failure occurs, stop using the product immediately and disconnect the power plug.
- DO NOT use outlets above counters. Damage from cord to items in surrounding area could occur.
- Turn on the carpet cleaner by pushing the power button with your foot.
![warning]() NOTE: The brushrolls do not rotate when the carpet cleaner is in the upright locked position.
NOTE: The brushrolls do not rotate when the carpet cleaner is in the upright locked position.
![]()
- Release the handle by placing a foot on the recline button and pulling back to change handle position.
![]()


- Tilt the wand back towards you and with the nozzle flush with the floor surface. Press the spray trigger to apply solution while making 2 slow wet passes: 1 forward and 1 back.

- Release the spray trigger. Make 2 slow dry passes: 1 forward and 1 back, to suck up the dirty solution.
![warning]() NOTE: DO NOT hold down the trigger for this step.
NOTE: DO NOT hold down the trigger for this step.


Do not allow the carpet cleaner to remain in one spot for any length of time when the brushrolls are turning.
Damage to carpet may occur.
NOTE: Do not over-saturate carpet. Be careful not to run over loose objects or edges of area rugs. Stalling the brushrolls may result in premature belt failure.
- Empty the dirty water tank when the dirty liquid reaches the "Max Fill" line and there is a loss in suction. See instructions in the EMPTYING DIRTY WATER TANK.
- Once you have completed cleaning, push the power button again to turn the carpet cleaner off; unplug the power cord from the power outlet.
USING THE CARPET CLEANER WITH HOSE & TOOL
- Place the carpet cleaner in the upright locked position.
- Open the flexible hose door. The door flips toward the nozzle cover to open.

- Insert the flexible hose as shown. Make sure the two hose release clips are locked into place. The cleaning solution delivery tube is suggested to face upwards.

- Connect the end of the cleaning solution delivery tube to the cleaning solution outlet on the nozzle and turn clockwise to secure as shown.

- Select the preferred tool and slide it onto the hose end until you hear a 'click'. To remove: Press the tool release button and pull out the tool.


3.5'' Tough Stain Tool: Use for carpet stains, furniture and other hard-to-reach surfaces.
6.5'' Wide Path Tool: Use for cleaning stairs and larger furniture areas.

- Turn on the carpet cleaner by pushing the power button with your foot.
![warning]() NOTE: The brushrolls do not rotate when the carpet cleaner is in the upright locked position.
NOTE: The brushrolls do not rotate when the carpet cleaner is in the upright locked position.
![]()
- Hold the tool about 1 inch over the stain to be cleaned. Squeeze the spray trigger to spray a generous amount of cleaning solution over the soiled area. Use the brush on the tool to agitate stains by scrubbing in a back and forth motion.
![]()
- To lift away the stain, apply downward pressure on the front of the cleaning tool and pull the tool backward slowly to vacuum up excess dirty liquids. Repeat as necessary.
![]()


- Empty the dirty water tank when the dirty liquid reaches the "Max Fill" line and there is a loss in suction. See instructions in the EMPTYING DIRTY WATER TANK.
- When finished cleaning with the hose and tool, it is suggested to rinse the inside of the hose and tool by turning the carpet cleaner on to suck up warm clean water.
- Once you have completed cleaning, push the power button again to turn the carpet cleaner off; unplug the power cord plug from the outlet.
- Detach the hose and the tool. Be sure the end of the cleaning solution delivery tube is removed from the cleaning solution outlet. Press both the hose release clips to remove the hose from the nozzle.
- Close the flexible hose door.
EMPTYING THE DIRTY WATER TANK
Always unplug power cord from electrical outlet before performing any service on carpet cleaner.
Empty the dirty water tank when the dirty liquid reaches the "Max Fill" line and there is a loss in suction. During normal use, debris may accumulate in the dirty water tank. In order to keep the carpet cleaner functioning properly, rinse out the dirty water tank with clean water after each use.
- Open both the dirty water tank locking latches. Hold the dirty water tank holder to lift up the dirty water tank from the main body as shown.


- Pull up the dirty water tank cover release and open the cover.

- Empty the tank. Drain liquids into a suitable receptacle or drain. Rinse the tank thoroughly with clean water when finished cleaning. Allow the tank to air dry before reinstalling.
DO NOT wash in the dishwasher.
DO NOT install tank while damp.

- Close the tank cover until you hear a 'click'.
- Before replacing the dirty water tank back into the unit, remove any debris from the air outlet area as shown.


- Replace the dirty water tank into the unit on the bottom of the main body, and then press the tank back into position.


- Close both the dirty water tank locking latches until you hear a 'click'.
![]()

MAINTENANCE AND CARE
Always follow all safety precautions when performing maintenance to the carpet cleaner.
Electrical Shock and Personal Injury Hazard
Disconnect electrical supply before servicing or cleaning the carpet cleaner. Failure to do so could result in electrical shock or personal injury from carpet cleaner suddenly starting.
CARPET CLEANER INTERIOR CLEANING

- Turn off and unplug carpet cleaner. Fill the clean water tank with warm tap water and then empty it all to rinse. Then fill again with warm tap water. Reinstall the clean water tank to the unit.
- To flush and rinse the carpet cleaner, turn on the unit and press the spray trigger for 15 seconds while making back and forth passes on a section of carpet.
- Release the spray trigger and vacuum up the water.
- Empty the dirty water tank.
CLEANING EXTERIOR AND ATTACHMENTS
- Turn off and unplug carpet cleaner. DO NOT drip water on carpet cleaner.
- To clean exterior, or to reduce static electricity and dust build-up, wipe outer surface with a clean, soft cloth that has been dipped in a solution of mild liquid detergent and water, then wrung dry. Wipe dry after cleaning.
NOTE: Wash attachments in warm soapy water, rinse and air dry. Do not clean in dishwasher.
CARPET CLEANER STORAGE
Electrical Shock and Personal Injury Hazard
Wrapping the cord too tightly puts stress on the cord and can cause cord damage. A damaged cord is an electrical shock hazard and could cause personal injury or damage.
- Clean the attachments thoroughly before storing. Place attachments in the accessory bag.
- Gather the cord and wrap it loosely around the cord hooks. Lock plug retainer onto the power cord.
- Empty the clean water tank. Rinse it out before placing back on the unit. Open the clean water tank cap to allow it to air dry.
- Empty the dirty water tank then rinse, clean and dry before placing back on the unit. The wide tank opening is designed to fit your hand inside to thoroughly clean, rinse and dry.
- Store the carpet cleaner in a dry, indoor area at room temperature.
CLEANING TOOLS
It is recommended to clean tools with water after each use.
NOTE: When the tools are worn or broken, replace the tools. To purchase tools, call 1-877-531-7321 (US) / 1-844608-3081 (CA).
- Press the tool release button to remove the tool from the hose.
![]()
- Press the cover release button on the tool and pull off tool cover. Remove the insert by pulling it off with force, if necessary.

- Rinse thoroughly with clean water. Allow the parts to dry before reinstalling.
DO NOT wash in the dishwasher.
DO NOT install while damp. - Reinstall the tool cover and the insert back into place until a click is heard.


CLEANING THE BRUSHROLLS
Always unplug power cord from electrical outlet before performing maintenance to the carpet cleaner.
To maintain efficient cleaning, the brushrolls must be kept free of carpet fiber, string, or hair build-up. If the brushrolls are wrapped with hair or debris, follow below steps to check and clean brushrolls. Cleaning the brushrolls periodically is recommended for best performance.
- Turn off and unplug carpet cleaner.
- Grip the two nozzle cover release tabs and pull up with force to remove the nozzle cover. Rinse the nozzle cover and allow it to dry before reinstallation.

- Use a proper tool (e.g. a comb) to brush out any build-up entangled around the brushrolls.
![]()
- When finished cleaning, reinstall the nozzle cover. First lock the two tabs on the nozzle cover into the slots on the front edge of the nozzle as shown. Then lock the nozzle cover into place by rotating it down until a click is heard.


NOTE: Make sure the nozzle cover is properly installed.
BELT CHANGING
Always unplug power cord from electrical outlet before performing maintenance to the carpet cleaner. Replace the belt whenever a burning rubber smell caused by excessive slippage occurs.
- Push the recline button; lay the carpet cleaner on floor with the bottom up and the floor nozzle flat.
- Use a Phillips head screwdriver to remove the three screws as indicated in the illustration from the lower plate.

- Remove the two small covers which are secured by the screws.

- The two brushrolls are connected together as an assembly. Lift the brushroll assembly up to the angle as shown.


- Carefully remove the belt end cover.

- Remove the worn or broken belt. Then the brushroll assembly can be lifted out from the nozzle cover. Note that two small washers at the belt ends of the brushrolls need to be properly conserved. Be careful to ensure that these do not get lost.

- Use scissors to remove any entangled hair around the brushrolls. Clean any debris from the brushrolls and the nozzle cover.
![]()


- Replace the brushroll assembly into the nozzle cover at the required angle as shown. Loop the new belt around the motor shaft and the belt path on the brushroll. The teeth of the belt and the belt path must align with each other. Make sure the washers are replaced

- Reinstall the belt end cover over the motor shaft and the belt ends of the two brushrolls. Make sure the belt ends are fully inserted into the belt end cover.


- Press the brushroll assembly down back into the nozzle cover. Rotate the brushrolls to make sure the belt is installed correctly.

- Reinstall the two small covers and secure with the three screws. Do not over-tighten the screws.


TROUBLESHOOTING
Review this table to find do-it-yourself solutions for minor performance problems. Any service needed, other than maintenance described in this Use & Care Guide, should be performed by a qualified service agent.
Disconnect electrical supply before performing maintenance to the carpet cleaner.
Failure to do so could result in electrical shock or personal injury.
| PROBLEM | POSSIBLE CAUSE | SOLUTION | ||
| The cleaner will not run. | Unplugged at wall outlet. | Plug in firmly. | ||
| Defective wall outlet. | Check with a good appliance or lamp. Be sure the power cord plug is fully plugged into a good wall outlet. | |||
| The motor is damaged. | Call 1-877-531-7321 (US) / 1-844-608-3081 (CA) for assistance. | |||
| Poor job of dirt pickup. | Dirty water tank is not installed correctly. | Check the dirty water tank for correct installation. Ensure it is installed in place. | ||
| Dirty water tank is full. | Empty the dirty water tank. | |||
| Flexible hose door may not be closed tightly in place. | Check the flexible hose door and make sure it is closed tightly. | |||
| Brushrolls may be wrapped with hair or debris. | Remove obstruction. Follow instructions. | |||
| Nozzle cover is not fully snapped into place. | Reinstall the nozzle cover. Follow instructions. | |||
| The flexible hose is clogged. | Clean the hose. Follow instructions. | |||
| Water escapes from the cleaner. | Dirty water tank is full. | Empty the dirty water tank. | ||
| Dirty water tank is not installed correctly. | Check the dirty water tank for correct installation. Ensure it is installed in place. | |||
| Clean water tank is not installed correctly. | Check the clean water tank for correct installation. Ensure it is installed in place. | |||
| Reduced or no spray through nozzle of the cleaner. | Clean water tank is empty. | Fill the clean water tank. | ||
| Clean water tank is not installed correctly. | Check the clean water tank for correct installation. Ensure it is installed in place. | |||
| No spray through the hose and the tool. | Air is trapped in the pump and hose. | With the clean tank full of water, turn on the cleaner. If hose does not spray, prime the pump by lowering the hose down to the floor and hold the trigger for up to 1 minute. | ||
| Clean water tank is empty. | Fill the clean water tank. | |||
| Clean water tank is not installed correctly. | Check the clean water tank for correct installation. Ensure it is installed in place. | |||
| Motor noise becomes high-pitched. | Dirty water tank is full. | Empty the dirty water tank. | ||
| The flexible hose is clogged. | Clean the hose. Follow instructions. | |||
| The float in the dirty water tank has been activated. | Empty and clean the dirty water tank. | |||
| Brushrolls will not turn during floor cleaning. | Brushrolls may be wrapped with hair or debris. | Remove obstruction. Follow instructions. | ||
| Brushrolls are not installed correctly. | Remove the brushrolls and reinstall. Follow instructions. | |||
| The belt is not routed correctly. | Check the belt routing. | |||
| The belt is worn or broken. | Replace the belt. Follow instructions. To purchase parts, call 1-877531-7321 (US) / 1-844-608-3081 (CA). | |||
CARPET CLEANER WARRANTY
Direct all claims for warranty service to: 1-877-531-7321 (US) / 1-844-608-3081 (CA).
Cleva North America, Inc., Greenville SC 29607
IMPORTANT SAFETY INSTRUCTIONS
Read all instructions in this guide before assembling or using your carpet cleaner.
Your safety is important to us. To reduce the risk of fire, electrical shock, injury to persons or damage when using your carpet cleaner, follow basic safety precautions including the following:
- Use your carpet cleaner only as described in this Use & Care Guide. Use only manufacturer's recommended attachments.
- Fully assemble before operating.
- Operate cleaner only at voltage specified on rating plate.
- Connect to a properly grounded outlet only. See GROUNDING INSTRUCTIONS. Do not modify the 3-prong grounded plug.
- Do not leave carpet cleaner when plugged in. Unplug from outlet when not in use and before performing maintenance.
- Do not expose to rain. Store indoors.
- Do not immerse. Use only on carpet moistened by cleaning process.
- Do not allow to be used as a toy. Close attention is necessary when used by or near children.
- Do not use with a damaged cord or plug. If carpet cleaner is not working as it should, has been dropped, damaged, left outdoors, or dropped in water, immediately discontinue use and call 1-877-531-7321 (US) / 1-844-608-3081 (CA) for assistance.
- Do not pull or carry by cord, use cord as a handle, close a door on cord, or pull cord around sharp edges or corners. Do not run carpet cleaner over cord. Keep cord away from heated surfaces.
- Do not unplug by pulling on cord. To unplug, grasp the plug, not the cord.
- Do not handle plug or carpet cleaner with wet hands.
- Do not put any objects into openings.
- Do not use with any opening blocked; keep free of dust, lint, hair, and anything that may reduce air flow.
- Keep hair, loose clothing, fingers, and all parts of body away from openings and moving parts.
- Turn off all controls before unplugging.
- Keep carpet cleaner on a level surface.
- Do not carry the carpet cleaner while in use.
- Use extra care when cleaning stairs. To avoid personal injury or damage, and to prevent the carpet cleaner from falling, always place carpet cleaner at bottom of stairs or on floor. Do not place carpet cleaner on stairs or furniture, as it may result in injury or damage.
- Do not put carpet cleaner on chairs, tables, etc. Keep unit on the floor.
- Do not use carpet cleaner to pick up flammable or combustible liquids (gasoline, cleaning fluid, perfumes, etc.), or use in areas where they may be present. The fumes from these substances can create a fire hazard or explosion.
- To reduce the risk of health hazards from vapors or dusts, do not vacuum toxic materials.
- Do not use or store near hazardous materials.
- Do not pick up anything that is burning or smoking, such as cigarettes, matches, or hot ashes.
- Do not use carpet cleaner without tanks in place. To reduce the risk of electric shock, always install float before any wet pick-up operation.
- Do not clean over floor electrical outlets.
- Do not use the carpet cleaner to pick up sharp hard objects, small toys, pins, paper clips, etc. They may damage the carpet cleaner or tanks.
- Do not use sharp objects to clean out hose as they can cause damage.
- To help prevent matting and resoiling, avoid contact with carpets until they are dry. Keep children and pets away from carpets until they are completely dry.
- Do not store the carpet cleaner with solution in tanks.
- You are responsible for making sure that your carpet cleaner is not used by anyone unable to operate it properly.
To reduce the risk of injury from moving parts - Unplug before servicing.

To reduce the risk of electric shock - Unplug before cleaning or servicing.
To reduce the risk of electric shock - Use indoors only.
SAVE THESE INSTRUCTIONS
Proper assembly and safe use of your carpet cleaner are your responsibilities. Your carpet cleaner is intended for Household Use. Read this Use & Care Guide carefully for important use and safety information. This guide contains safety statements under warning and caution symbols.
GROUNDING INSTRUCTIONS
This appliance must be grounded. If it should malfunction or breakdown, grounding provides a path of least resistance for electric current to reduce the risk of electric shock. This appliance is equipped with a cord having an equipment-grounding conductor and grounding plug. The plug must be inserted into an appropriate outlet that is properly installed and grounded in accordance with all local codes and ordinances.
Improper connection of the equipment grounding conductor can result in a risk of electric shock. Check with a qualified electrician or service person if you are in doubt as to whether the outlet is properly grounded. Do not modify the plug provided with the appliance. If it will not fit the outlet, have a proper outlet installed by a qualified electrician.
This appliance is for use on a nominal 120V circuit and has a grounding attachment plug that looks like the plug shown in the illustration. Make sure that the appliance is connected to an outlet having the same configuration as the plug. No adapter should be used with this appliance.

Vacuum Cleaner Help Line:
1-877-531-7321 (US) / 1-844-608-3081 (CA)
8:00am-5:00pm EST, M-F
www.kenmorefloorcare.com

Documents / Resources
References
Download manual
Here you can download full pdf version of manual, it may contain additional safety instructions, warranty information, FCC rules, etc.
Advertisement


Need help?
Do you have a question about the RevitaLite KW4070 and is the answer not in the manual?
Questions and answers