Advertisement
Quick Links
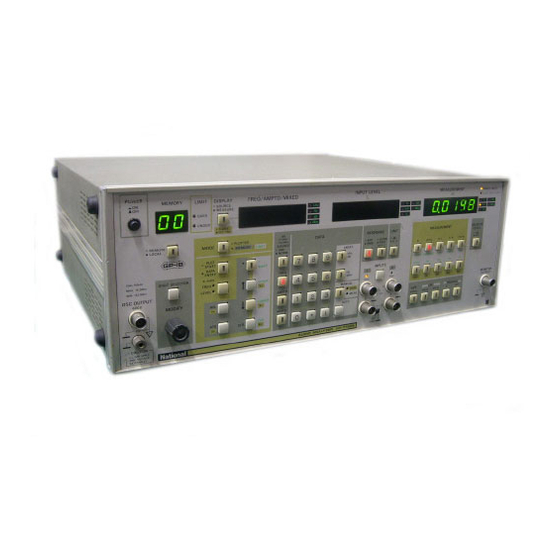
Model VP-7722P and VP-7722A are identical except indication of "A"
or
"P".
The model name VP-7722P
)
Communication
Matsushita
lnO.. str ial Co., Ltd.
4-3-1,
Tsunashima·Higashl
Yokohama, Japan
Kohol<u·ku,
Tel: (045) 531·1231
T-'
3822·671
a
ppears
in
manual
should
A
U
D I
0
V P
-
S
E
R
V I C E
be
read
as
VP-7722A.
A N A
L
Y Z E R
7 7 2 2 A
H A N U A
L
Printe d in Japan
Advertisement

Related Manuals for Panasonic VP-7722A


Summary of Contents for Panasonic VP-7722A
- Page 1 Model VP-7722P and VP-7722A are identical except indication of "A" "P". The model name VP-7722P ppears manual should read VP-7722A. A N A Y Z E R 7 7 2 2 A V I C E H A N U A...
- Page 2 VP- 7 7 22P CIRCUIT DESCRIPTION POWER 3 . 1 SUPPLY A4 power supply systems are installed , those are , digital Three � · circuit , oscillator , and analyzer . 3 . 1 . l Power supply for the digital circuit �...
- Page 3 VP-7722P -24V power supply is fed from smoothing capacitor regulator circuit of Ul7 ( NJM79M24A). The regulated -24V power supply is fed to the oscillator circuit via connector J21 and P2 1 . +lSV power supply regulated +24V output to the from regulator circuit...
- Page 4 VP- 7722P ( A ) power supply is fed from smoothing capacitor CSS r egulator composed of Q14 through Q16 lS ( NJM4558 1 / 2 ) . The regulated - 1 5 is supplied to the analyzer circuit via connectors J21 and P21 . common used as the reference voltage...
- Page 5 VP-7722P OSCILLATOR AS, A6 oscillator is made up with the OSC A6 and ATT AS boards. main 10 Hz to 1 10 kHz oscillation is installed oscillator board . amplitude of the oscillation.is controlled with amplitude regulator. the ATT board are the oscillator for the IMD TEST source , � mixer output amplitude controller .
- Page 6 VP- 7 7 22P br idged-T circuit is inserted in the negative feedback loop Since the signal attenuation factor of the bridged-T �ircui t , a mpl ifier Z XRCll1l , is l /n, an amplification of n times is whe n the f r equency i s giv en to the positive feedback loop for a stable oscillation .
- Page 7 VP-7722P When the peak detection system is used , the oscillation is likely to be stopped because of the external noise when the frequency is changed and some time required for restart of the oscillation. The oscillation restart circuit composed of U7 ( NJM3 1 1D ) , U8 ( TC4S28BP ), U6 ( AN6914 ) , and transistors serially monitors the oscillation...
- Page 8 VP -7722P 3 . 3 . 1 Input connector A7-1 input connectors of A and B per a channel is installed in the input cir cuit so that the balanced measurement can be performed. In the unbalanced input A circuit alone is used . balanced input , inp ut,...
- Page 9 VP-7722P IMD measurement filter A7-2 3 . 3 . 5 The output from the preamplif ier is also supplied to the IMD measurement filter (IMD represents the inter-modulation distortion) . The IMD measurement circuit consists 500 Hz high-pass filter composed the SOO Hz low-pass filter...
- Page 10 VP-7722P 500Hz high-pass filter output spectrum and waveform: ABSO LUTE VALUE output waveform: 500Hz output waveform numerator level) and lOHz LPF output waveform denominator level ) : Numerator level Denominator level Figure 3-3 Detection method for IMO measurement...
- Page 11 3-10 VP-7722P lST,. 2ND NOTCH BOARDS AS,. A9 The notch circuit ( the fundamental wave rejection filter) consists of two stages; and 2nd NOTCH board s . Two-stage multiple feedback is used obtain wide, but steep rejection of the fundamental wav e . 3 .
- Page 12 Equipment required for the adjustment are listed below. Digital voltmeter VP-2660B or equivalent Oscilloscope VP-5512A or equivalent Differential voltmeter Fluke 931AB or equivalent Frequency counter Frequency: lOHz to 500kHz RC oscillator VP-7214A or equivalent AC voltage calibrator Fluke 5100 or equivalent 6000 termination 6000 ±0.1% Calibrated VP-7722A...
- Page 13 VP-7722 P PREPARATION Preparations required for ad j u . s tments are as follows : ( 1 ) Turn power on and allow the instrument for warm-up for at least 30 minut e s . ( 2 ) Install all printed circuit boards t o the correct positions a s shown in Figure 4-1.
- Page 15 VP-7722P @ 0:-24V •••••••••••••••••• •••••••••••••••••• A:+SV ... I •• 0 : Oscillator voltage reguretor A: Analyzer voltage reguretor Figure 4-2 Test points on POWER SUPPLY b9ard...
- Page 16 772 2P Table 4-1 Voltage of each check point Test point Specifications ® ®�@ Within ±1000 mV 24 v �/osc - 24 Within ±1000 mV .--/ Osc ill ato r section 15 v Within ±100 mV Within ±150 mV - 1 5 v 15 v Within ±100 mV An al yz er se ct io n...
- Page 17 p -772 VP-7722P 4 . 3 . 2 80 MHz VCO The adjustment and check procedures are as follows : ( 1 ) Supply a 3 V , 2 kHz signal from the internal oscillato r . input range to 3 . 16 V , and measure ( 2 ) S e t the front panel t o THDl mode, range to 0 .
- Page 18 : Connect differential voltmeter to the OSC OUTPUT terminal shown VP-7722A Differential voltmeter Set the oscillation FREQUENCY to 400 Hz and the OUTPUT to 1 4 . 0 d B . , o.
- Page 19 VP-7722P ( 5 ) Change the oscillation frequency as listed in Table 4-3 and flatness as specified in the table . Table 4-3 Flatness verification Open termination With 600n termination Test frequency Unit (Reference) (Specification) ±3% Within ±3% 1 0 . 0 20 .
- Page 20 72 2P A'fl'EN UA TO R BO AR D AS ch e 1-�tiAA,,? C•tv . > ov- rl.e l M J) oscill ator output for IMD test signal t(., -1 .J.. 6 r;Us>v\. Th e ad justm ent procedure is as follows : Con nec t a differential voltmeter to test point TPl (U27 output ) .
- Page 22 77 22? 4-10 Out put OFF att enu ato r che ck The che ck procedure is as follow s : Set the oscillat or frequency t o 10.00 kHz , and the OUTPUT to 1 4 . 0 dB. ng the AMPTD key , key three times Set the output to OFF by pressi...
- Page 23 VP-7722P � ..a� (< ..9Cn. 0... 111111111 ::E: < . .._."' ::::::=== ""-· � ::E: ::E: t:... ;::.: : ("") E-< ("") 0... :2:: < Figure Adjus tment controls on PREAMPLIFIER board...
- Page 24 Adjust HF COM MODE C82 so that the waveform measured at test point TP3 is the smalles t . input preattenuator The setup for the A input preattenuator adjustment is as follows : VP-7722A Open termination ad · Just ment procedur e for the A input preatten uator is as follows : th e fl oa ti ng se le ct or to NO N FL T .
- Page 25 VP-7722P ( 2 ) Connect RC oscillator to the A input terminal and set its 1 4 . 0 dB (10 Vrms ) . controls for flatness of · waveform observed on ( 3 ) Adjust according to steps shown in Table 4-7 . Front panel settings : MODE : DISTN...
- Page 26 4-14 p - 77 2 2P Th e ad j u stment procedure for the A input preattenuator is as follows : output � the floating selector to FLT . Connect an oscilloscope to test l) Set p o int TP3 . cillos Si mu lta neously supply...
- Page 27 VP-7722P ( 3 ) Set the voltage calibrator output to 30 mV . Adjust I/P DC OST R90 for a display reading of 0.030 V on the LEVEL display on the area of the VP-7722P. ( 4 ) Change the voltage calibrator output to 3 V. Adjust I/P DC control for a display reading of 3 .
- Page 29 VP-7722P VP- 772 ( 1 ) Remove wiring for the input shortcircuit described in 4 . 8. 1 Connect input stages of lst a n d 2 n d notch stages as shown i n Figure �ate: · Connect with a wire . 1ST NOTCH 2ND NOTCH Board...
- Page 31 VP-7722P -ii- ·ii- 100 KHz REJ ro .... " T �..__ • , : � �l "' a111 111S • 6+s+ �*; ----i • "' --ii- C2 9 •02 [ [ .. [ ••• -il-- • • lST NOTCH - "...
- Page 32 4-20 p -772 2 P . 8 . fundamental wave rejection circuit adjustment procedure for the fundamental wave rejection circuit Th e pre para tion for the fine adjustments described latter is as follows : l ) Set the MODE to DISTN , the input range to 3 .
- Page 33 < '"O ..i ..i '"O T vT .."'T"T "l 1·1 �... ""---" " REJ 3 1 :: Adjust the rejection .REJ 2 Adjust the rejection factor at 1 kHz . factor at 10 Hz. C l 2 REJ 1 •...
- Page 35 VP-7722P ( 10 ) Reset the NOTCH HOLD . Verify that the auto tuning functions when the oscillator frequency changed between 16 kHz and 1 10 kHz . Note : Measure the output pins 1 and 7 of 018 and check if DC voltages satilated at ±10 V .
- Page 36 y p -7722 P 4-24 4• 9 . Offset amplifier 2 The adjustment procedure for the offset amplifier 2 is as follows : 'lCy ( l ) Connect an oscilloscope to pin 1 of U25 . ( 2) Fix the measurement range to 0 . 001%. (3 ) Adjust AMP OST1 control R l 3 7 for a OV offset .
- Page 37 p- 7 722P VP-7722P PSOPHO gain 4 . 9 . 5 The adjustment procedure is as follows : ( 1 ) Set the response to the AVE response � Adjus to be ( 2 ) Supply an 1 kHz , appr oximately 3 V signal from the internal oscillato the input terminal .
- Page 38 4-26 Set the NOTCH HOLD of the VP-7722P to be adjusted to 1 kHz . ( �) Set the output of the calibration VP-7722P t o -10 dB . ( S) Adju st variable resistor R22 so that the display reading o f the VP-7722P to be adjusted is -20.
- Page 39 VP-7 722P the display reads as follows when the frequency of ( 5 ) Check that 7 201P is changed to 300 kHz and 500 kHz : rerr. 300 kHz : -20 . 00 dB ± 1 dB 500 kHz : -20 .
- Page 40 4-28 vr -7722 P Change the oscillator frequency to 1 . 5 kHz and the notch hold to 1 . 5 kHz . Alternately adjust REJl and REJ2 controls R l l 5 and R l l 8 that rem ainder of fundamental wave and the measured value in the THDl mode are the smalles t .
- Page 41 4 . 1 2 TROU B LESHOOTING FLOW CH for VP-7722A Does the display Check A13 Inter change when any face circuit. key is pressed? Is the OSC output level correct? Does the LEVEL measure correctly? Does the DISTN measure correctly?
- Page 42 4 - 3 a & the TPl output Check the OSC of OSC circuit ALC circuits. co rr ec t? Check the A circuit. Is the DC OUTPUT Is the A 7 Pre Check A7 Pre output (R76) leve level of rear panel L and R.
- Page 43 VP-77 � Does the fundamental Check AS lst notch frequency reduced and A9 2nd notch at A9 TPl of 2nd notch filters. filter circuit. Check A7-2 Pre amp U31 U34. Check A12 Is the DSP MONITOR Dispay assy output of rear panel circuit.
- Page 44 6 - 1 VP-77 22P CIRCUIT DIAGRAMS & • PANEL CHASSIS • • • • • • • • • • . • • . • • . • • . • . • • . • • . • • . • • • • • . . . • •...
- Page 45 CA2J TRANS ASSY VP-7722P.
- Page 46 MONIT OR MON ITM REMOTE J l i J l J 6- _ 2 � 8!11T J 1 6 SYNC DS P CP- 18 -< 1 15 1 ASST J21515 .ne 1 .n2J PARALLEL P 1 2J P l l515 "' "' <...
- Page 47 VP-7722P, 2 5 0V I . 6AT...
- Page 48 6- 3 P 7 1 0 . 1 -{--< 4 (- 25 6 1 05 5 25 6 1 05 5 6 f- TRANSFORMER ASSY...
- Page 50 < J2 7 < J2 4 " " " " " " • 5V • 5V D GND < 0 GNO 0 GNO < -5 V A GNO I D I IN I A• I ! A•5V A•5V JA f---12 51 20 A•5V A•5V A•5V...
- Page 51 A • l !5V A- t 5V J 57 R I 0 ·NotsH 4 . 7 K l'CBJ A �� ��u � 3 � --t< OUT W T � 1 4- :--- -+-< NOTCH l'tBl REJ OUT '--t-< < A• t 5V A- 1!5V A•...
- Page 52 J7 5 >-1 NJ M2 93 0- 5 J7 1 C l I C l 2 C 1 3 C l 5 c 1 4 C 1 5 1 0000.IF 1 0000.IF 1 0000.IF 1 000 0.IF 1 00.ui= 1 00.Lf" 1 5V 1 5V 1 5V...
- Page 53 C 4 1 2 S C I C R l 5 4 . 7 1( :J : 2 i 2 5 C 8 2 6 � 2581 055 B00MA 1 00 � 1 0 V J 7 4 800MA P 7 4 J 7 5 P 7 6 2se 1 ess...
- Page 54 1 5V AO J > a: ::> W Ul >- a: ...J W 1 5 . 0K < ::X 1 1': � < o.. 1 /8'.J C l • · � - - --- - - --- POWER SUPPLY...
- Page 55 51 .206 1 . 408 6 . •os 15 . 49 1( •. 1 06 1 2 . 608 . 606 �}1Ll e . e os I Y. 2 5 . 606 l . 20S !°: I R250 � ttl. 5Z R276 ! •...
- Page 56 C9 � 1 1111( • . •1 Y. 25.60 6 P. 2 5 . b9r. ., Y. t 9 , 25Z 0- !IV 1129 !1 ( R25 6 R28 8 R255 R291 . , / . 1 eee 1851< R202 &.961': R27 7 R 2 8 1...
- Page 57 6- 6 .J51 1'51 .161 D•S Y l>-5Y �292 R291 C 1 1 5 - a. 11111 8.e&r: t l Y. 11AISI Cll2 1 11AISI 11A I SI CR2 Z 11AISI R29 7 CR ZJ CR24 1 8 . 2r. t l Y.
- Page 58 722P 2911 1 j ! 9rl t 1 X te . !S Y. · .- � I . 99K R J I R 1 5 R 1 7 R 1 9 ttl . 5Y. ttl , 25>: el!l!S K 39. er. 7 9 .
- Page 59 � · .. j 2 . 2M 1 . 2r: -, r -. I 1 1 111 1 1 2 .2M MAll59 2.2M R31l R3 2 0211 . n : R4 2 t 1 )( ... ,, � <15 � : O l e I R35 2SA9 I 4...
- Page 60 6 . - 7 e7r: 5 I ll J I 11 1 J2 1 1 7. I I >: 0• 1 s v • • ]I( 1 001 f' 1 6 V R 1 4 1 1 e e t I r. \1'111 6 5 .
- Page 61 VP-7722P. 500V O O K 0 . 0 1 500V 500V 5 0 0 V A+ l 5V CR3 1 C3 1 1 55 1 0 1 P53 CU OR P54 CR) 1 .LJF CR32 250V 1 55 1 0 1 I NP U T I >...
- Page 62 J. .f' 6- . 8 A- 1 5 V -� A+ J 5V C 4 3 47/.F 1 6V 1 6V A+ 1 5V I SS 1 0 1 I SS 1 0 1 :i,33 3S 1 0 :i,34 35 1 0 1 B .
- Page 63 R l 5 1 0K 0 . 055 VP -7722 P 1 5 . 9K 1 2 4 K R I B 1 0 . 2K · t I Y. 1 /8\I 40.2K .· C l 2 C 1 3 t l X 5 1 00 5 1 00...
- Page 64 0 . 02 P .77 t l X 1 /BU l/8U :t l 1 ;;; tl ;;; 68 . lK 1 /8\1 1 /8'./ ll!IK 1 /8U 1 0K 1 0 K :!:: t I Y. � 8 . P I ;;;...
- Page 65 1 .15:..1 1 1 .1 ,'V\ a ,..:.1 �: �K ��� � ! er: 1 1 /8\. .f 1 / 8� 1/8i./ 0 1 5 R ! 5 0 1 7 2N39e5 0 1 4 V R ! 2 S A 5 6 4 A 2SA564A IP.
- Page 66 O l:lE..U2 i i " -+< o � -+< • C I J R 2 1 1 511 I I . 991< RZ lR 2J .te . 25Y. " ..e s �� 1113 ---t< I J . 981( R 1 111 .te .
- Page 67 0 12il...i. >5Y. 1171 1eee A • tl! S V tl x * I Y. e . e t e · � o � c 1 1 A• 1ev HJnee 20T 1 . 1 1 I I )'; le. 211 11195 .
- Page 68 t+-zwo �A 6- 1 1 .126 NOTCH OUT • 0 11.t.LJ • 1 5V M1 1H K • 1 5Y /.• IY t z . 1 11 tt-- 0 1 11 1 4 2 tt-t- C11 • tj--t. CKJ +-<>& t,-i>5 1 1 6 4 �.
- Page 69 P-7722P our -tt 3 1 R l 4 2NO NOTCH 4 . 99K t l X � R l !5 93 1 R 2 1 t l X R2 2 t I >: tl x U 1 2 C l 2 H I 1 2fl l 39110 I >:...
- Page 70 G au._gu A• 3 , 41( C 3 1 1!5V 8 . 2 2 8 . 22 t5Y . t5r. 1 . 133 1 . 133 c " 38 1 1( t l r. 3900° t l x O tL..Qil C23 R60 C3 2 1 8 0...
- Page 71 6- 1 2 f<+SV tt-DJ � "07 +t"-06 f+-os f-<> 9 t+--02 1 011 4-o1 +-f-t. 1 1� f+--00 +f-t;c1< 4 tt- LCK 5 +t"-:LCK6 CMOS 41"59 1 · t;---.' · t c e 1 _t cee P27 I A • 1 5 V A - 1 5V R 1 85 R 1 64...
- Page 72 -:_7_7 ZFNS IOJA SN85500 • 5 V FLJ ZFN5 OJ� • C 5 1 220lF 2201.F - 0 . 6 . J v p 1 1 2 6N85500 2201.F DSP QO 2201F J I J STNC SNessoo J 1 2 JJ OO 1 11 1 /611 MONITOR...
- Page 73 • SV • 5V •5V • • S V GPDl5 AOtNT GPDS Z1' ADllR AOROL SN65500 ,,,. . 15. 3 V · ro . 1 C l5 1 - C59 ��glF - z•o OSPllRL MB 7 04 IOA S8MO 04 1 1 8 S8MI 04 I I A S8M3 04 1 28 58M3 04 1 2A 58M•...
- Page 74 •SV 6 • s v 6-13 • •• <• OSPllRh CNTRO � 1 - - - - -iznlCNTSTR � NRFD--t< TO J l 03 238 @JI] � � • 61'1Ht 20MHz •• J 1 0 5 COUNT OR...
- Page 76 ,... ,... U l 9 74HC 0 4 ,... I 2A >+--0 0 6 §! 1 29 >+--0 0 5 � N aa ::> 9B >-1-- !TIS ..;(; ac: I OOK 28!! 1 /l!U 4-AOINT � � � => "- ..
- Page 78 6-15.� J: I Y. :J: I Z R I + � l :r. 11811 C l I R 1 5 J . O ll ( • I OOU: • 1 :r. · l/&11 •5V 1 t1 v 1 / 8 11 R 1 &...
- Page 79 • S V VP-7722P • S Y l /6U 2SA56�A I S S I O I •SV •SY Sor< U l 9 U t 9 C I O R l 2 R I O 2200 1001< 1 /6U •SY • 5V "' U 1 9 U 1 9...
- Page 80 6-1 6 . • � lgll, � 11 1 e ... - -- i c� ,. , ie �1 5 V -2. pt" ,.t.. A QI\ s• •• .. r.o . • 51/ 101( 1 1 • " •SV ,.Z7 rt 1 «>...
- Page 81 VP-7722P. 221"t 1 / 8 11 n�<F I OO<F 0 . 1 I 1/8 11 1 6 V 1 6 Y 2SC I • S Y R l 7 R I O 17 0 U 1 6 1/811 1/811 71HCO...
- Page 83 -� VP-7722P 1 111 SAl!."'t ---k 711 1 111 11 15.8!( l/llV J l 0 5 f l ll5 O �Cl215 ---k eil'IH1� 3B : , I 51'155500 • C3 •5\"8 ---1. .( 3 A fol-. .- --l- --r- --r-l"l lrT'-t- --T- --_,. ..- - •...
- Page 85 •51 4 7 1 0522 LN431YPP 0523 LN4 31Yl'P 0625 LN431YPP re---! � --- - � 1i-1-i-1 1J-1- -----1 - ------- � � � !!� - - - - - - : : - - - - = n: ��----- -------------- �...
- Page 86 '5\° •5V 11 1 5 4 7 1 0522 0Sc6 LN43eYPP LNOllY!'P 11523 0527 LN4JllYPP LH4JIT"P 11 1 11 R l 3 4 7 11 4711 4711 � �- g ..� ';' -1-1- ,J, � 4- � � ,L. �...
- Page 87 6-19 _.!5V•5\' 112< · 11 2 1 DSJI LN4J8YPP DSJ2 LN4J9YPP 0526 OSJJ LN4J8Y!'P LN438Y PP DSJ4 1\ 1 9 LN4J8YPP DSJ5 1.N4J9Y!'P DSJ 6 LN4J9YPP -� MAIN PANEL A l 6...
- Page 88 71H C 01 "- J A > - " : - -H ..� ..,. 1>"6 • Jl 2 < :::> ., R6 ..I J C � •L � • � � � � E � D IS•LAT H 2 6 A - H 2 6 C l 0£...
- Page 89 • 5 V C l 7 0 . 0 1 1 0011 1 /611...
- Page 90 Ii � e f-r-- +;- - 6-20 +-j 1 3 1 1 23 +-+- I ii De• I IO'li • o � ++-- \ OQ.J<l � � 1-J--- :i--- � � � E-r- 21i ++ � 2 9 ++--- � 1 3 tt...
- Page 91 6-2 1 ' M3 1 1 5P 0 1 M3 1 1 55 1 3 J20 1 P20 1 STROSE 1 0 >-+- � � � � � � � � : � > >·I I > > I . 1' 8 B I T PARALLEL I NTERFACE p 1 5 >...
- Page 92 VP-772_ P l 23 .J223 --+-7 DB. 3 BUSY + 2 DB2 -t7 3 DB7 ---f7 4 ---f? DB6 --l-7 5 DBo + 7 DB5 -t7 STROBE -f-7 9. ---f7 DB 4 � 1 l � 1' 1' 1' 1' 1' 1' 1' �+ 1 2 �...
- Page 93 VP-7722P. . Q . I 2� 1 000 ±I X 2000 2 . 67K ± I X + 1 5V 1 P28 0 . 1 0 . 1 5 . 35K ± I X �� . NJM0820T u: o �: 49 K G �: t l X...
- Page 94 6-2 i · ---- ----·- - - - · C l I R l 4 2000 4 . 22K . t l Y. tl Y . C l 5 R l 3 R l 5 • 1 5V 1 6 . 45K 6 .
- Page 95 VP-7722P. ± I ± I IJTD I N -k � NJM082DT R � 5V -t< 5 A• 1 5V 1 47.LJF R 1 2 A- 1 5V-t-( 5 · ---+< � -t< D GND �TD ON -t<...
- Page 96 • 6-23 P 2 6 J 2 6 - · - 4 3K -- 0 . 0 1 5 1 5V 1 ± 1 7. ± 1 7. 10.uF 1 5V T R 4 >4- 1.1ro 6 . 04K ± 1 7. �...
- Page 97 VP-7722P �i� C2 1 R2 1 • 1 5V 1 3 . 3K 4700 R l 1 1 4 . 3K NJM o a2so- A ± 1 :;.: C 1 2 4 . 99K TI!. .l.Jf A GND -+ 8 6 �...
- Page 99 VP-.772.2P -- � - · · - :t I /. P 2 8 1 8 + 1 5V1 1 9K 1 9 . 5K 1 8 . 2K :1: 1 % :1: 1 % :1: 1 % :1: 1 % NJMOQ2DT \JTD �...
- Page 100 � ··--· 6-25 ± 1 + \ 5 V 1 - � - - - - - · - -- · - R l O ± 1 x 0 . 047 - 1 5 V 1 ± I X ±5x R 1 3 C l O 215 .
- Page 103 VP-7722P. + 1 5Vt 1 2 . 5K 34 . 8K ± 1 x l N f l.JTD � ;? �o � n 0 . 022 A GN0 --4-< ±5X ± I x 1 . 47K ± I X 1 . 95K R 1 8 ±...
- Page 104 6- 27 :. :t I i': 3 . 0 I K ±5% C I D 0 . 022 47 0 !-! % C l \ R I O 0 . 02 2 9 . 53 K 47 0 :tl % :t\ % ±2% 3 .
- Page 105 VP-7722P r-- � .t l : /. 1 5 . 8� .t l : /. R 'I R!:l 0 . 0 1 0 . 0 1 1 5 . 6K I OI\ .t P ': .t l • 1 5V 1 1 5111 p28 30 .
- Page 106 6-28 I /. R 1 5 1 5 . 5K :t I /. R I O R l 3 0 . 0 1 0 . 0 1 l OK 1 5 . 6 !{ :t I /. :t I /. :t I /.
- Page 107 VP-7722P · 1 5 .SK ± 1 % ±I ± t- 3000 3000 I OK 1 5 . 8K ±I ± 1 7. ± I ± I . R 1 + 1 5V1 . I I I 1 5 . 8K 3 0 .
- Page 108 6-29 R l 5 1 5 . 8K :1: 1 x t p i; :1: 1 x :!: I X R I O R 1 3 3000 300 0 I OK 1 5 . 8K :!: I X :!: I X :!: I X :l: I X R l 4...
- Page 109 VP-7722P PA LH- 1 l o '? E: A·� �D � 4.C?-1 � 1 /'. 3 S V R � - A l � V ...-. ., � 6 WT;:> ON A-ISV S" A-G-Nv �...
- Page 110 6:-30 I O .)J �'S" & · P w m o =! .q2 1::: .2 k;. � l o "-. A ·GN £) I /. t ..20 KHZ LOW PASS FILTER OPT6...
Need help?
Do you have a question about the VP-7722A and is the answer not in the manual?
Questions and answers