Table of Contents
Advertisement
Quick Links
INSTRUCTION MANUAL
Gas Powered Brush Cutter & String Trimmer
Model # PS4531
Have product questions or need technical support? Please feel free to contact us!
Website:
www.powersmartusa.com
Toll free: 1-800-791-9458 / 1-888-293-0024 Mon-Fri 9-5 EST
Email: support@amerisuninc.com / support@powersmartusa.com
1
Website
Advertisement
Table of Contents

Summary of Contents for Power smart PS4531
- Page 1 INSTRUCTION MANUAL Gas Powered Brush Cutter & String Trimmer Model # PS4531 Have product questions or need technical support? Please feel free to contact us! Website: www.powersmartusa.com Toll free: 1-800-791-9458 / 1-888-293-0024 Mon-Fri 9-5 EST Email: support@amerisuninc.com / support@powersmartusa.com Website...
-
Page 2: Table Of Contents
MAINTENANCE .............................14 TROUBLESHOOTING ...........................15 EXPLODED VIEW & PARTS LIST ......................16 WARRANTY ..............................18 TECHNICAL DATA Gas Powered 2 in 1 Brush Cutter &String Trimmer Model PS4531 Engine type: 4-Cycle, Single Cylinder Displacement: 37.7 cc Fuel tank capacity: 22.9 fl.oz Oil capacity: 2.8 fl.oz... -
Page 3: Introduction
INTRODUCTION Thank You for Purchasing a PowerSmart Product. This manual provides information regarding the safe ® operation and maintenance of this product. Every effort has been made to ensure the accuracy of the information in this manual. PowerSmart reserves the right to change this product and specifications at ®... -
Page 4: General Safety Rules For String Trimmer
GENERAL SAFETY RULES FOR STRING TRIMMER Safety is a combination of common sense, staying alert, and knowing how your lawn mower works. SAVE THESE SAFETY INSTRUCTIONS. WARNING: Do not operate this unit until you read this instruction manual for safety, operation and maintenance instructions. - Page 5 WARNING: This engine may emit highly flammable and explosive gasoline vapors, which can cause severe burns or even death if ignited. A nearby open flame can lead to explosion even if it isn’t directly in contact with gasoline. ● Do not operate near an open flame. ●...
- Page 6 Cutting Safety WARNING: Inspect area before starting unit. Remove all debris and hard objects such as rocks, glass, wire, etc., that can ricochet, be thrown, or otherwise cause injury or damage during operation. ● Keep others including children, animals, bystanders, and helpers at least 50 feet (15meters) away. Bystanders should be encouraged to wear safety glasses.
-
Page 7: Knowing Your Brush Cutter &String Trimmer
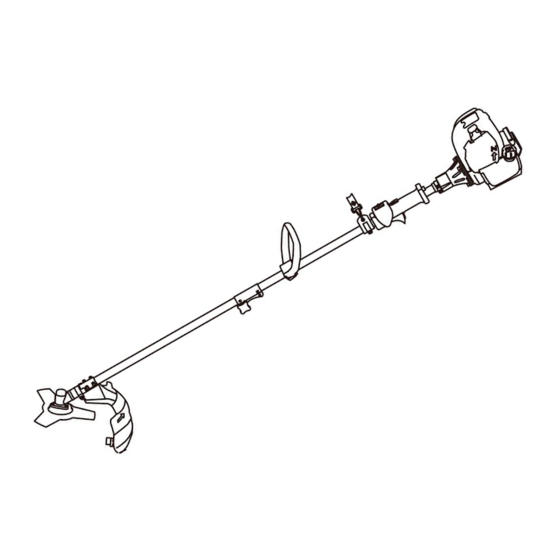
KNOWING YOUR BRUSH CUTTER &STRING TRIMMER Recoil Starter Handle Shoulder Strap Spark Plug Throttle Trigger START/STOP Switch Oil Fill & Dipstick Handlebar Fuel Tank Coupler Choke Lever Shaft Fuel Primer Bulb Cutting Blade Trimmer head Blade Shield Unpacking Unpack the machine and all its parts, and compare against the list below. Do not discard the carton or any packaging materials. -
Page 8: Assembly Instruction
ASSEMBLY INSTRUCTION WARNING: If any parts are damaged or missing do not operate this product until the parts are replaced. Use of this product with damaged or missing parts could result in serious personal injury. WARNING: Do not attempt to modify this product or create accessories not recommended for use with this product. - Page 9 Replacing The Blade WARNING: Wear protective gloves when handling or performing maintenance on the blade to avoid injury. The blade is sharp and can cut you even when it is not moving. WARNING: Do not attempt to use any blades, washers, nuts, or fastening hardware other than shown in the following illustrations.
- Page 10 Assembly Of Shoulder Strap WARNING: Proper shoulder strap and handlebar adjustments must be made with the engine completely stopped before using unit. 1. Assemble and adjust the shoulder harness and belt. 2. Adjust the shoulder-harness button,and move the hook to your waist, then adjust the belt (If there is a belt).
- Page 11 5. Next, insert the dipstick into the oil fill opening without screwing it in. Remove the dipstick to check the oil level mark. 6. If required, slowly add more oil until the mark reads just below the upper limit line on the dipstick. Do not overfill the crankcase.
-
Page 12: Operating Instruction
OPERATING INSTRUCTION WARNING: Be sure to read the fuel information in the safety rules before you begin. If you do not understand the safety rules, do not attempt to fuel your unit. Check Points Before Operation ● Check for loose bolts, nuts and fittings. ●... - Page 13 ● Hold throttle grip with your right hand with finger on throttle trigger. Keep unit below waist level. ● Keep shoulder strap pad centered on your left shoulder and danger sign centered on your back. ● Maintain full weight of tool on your left shoulder. ●...
-
Page 14: Maintenance
MAINTENANCE WARNING: Disconnect the spark plug before performing any maintenance. Check For Damaged Or Worn Parts Contact customer service for replacement of damaged or worn parts. ON/OFF Switch – Ensure ON/OFF switch functions properly by pushing and releasing the switch. Make sure engine stops. -
Page 15: Troubleshooting
Fuel System Adding fuel stabilizer helps to minimize the formation of fuel gum deposits during storage. Add stabilizer to the gasoline in the fuel tank and/or fuel storage container. Run the engine for at least 5 minutes after adding to distribute stabilizer throughout the system. Engine 1. -
Page 16: Exploded View & Parts List
EXPLODED VIEW & PARTS LIST... - Page 17 Item Stock# Description Item Stock# Description PS4531-001 Screw M5*15 PS4531-043 Gasket PS4531-002 Cylinder cover PS4531-044 Carburetor PS4531-003 Screw M5*12 PS4531-045 Cleaner inside cover PS4531-004 Cylinder valve cover PS4531-046 Screw M5*22 PS4531-005 Oil gas separator PS4531-047 Filter net PS4531-006 Inside cover...
-
Page 18: Warranty
Power Smart (“Seller") warrants to the original purchaser only, that all Power Smart consumer power tools will be free from defects in material or workmanship for a period of two (2) years from date of purchase. Ninety (90) days for all Power Smart Products, if the tool is used for professional or commercial use.


Need help?
Do you have a question about the PS4531 and is the answer not in the manual?
Questions and answers