
Related Manuals for Gainscha GE-2406T Series


Summary of Contents for Gainscha GE-2406T Series
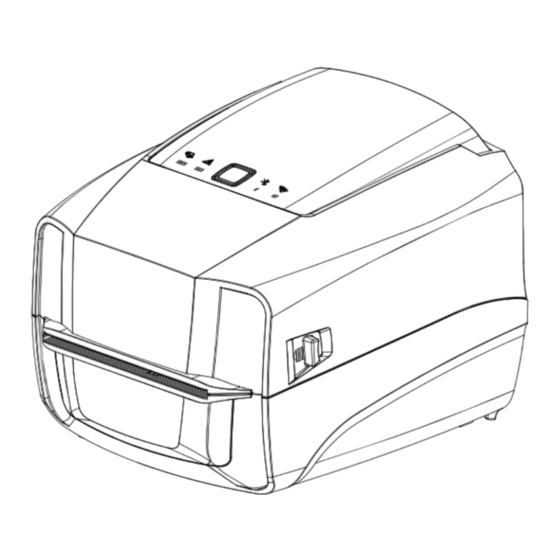
- Page 1 GE-2406T / GE-3405T Series THERMAL TRANSFER / DIRECT THERMAL LABEL PRINTER USER’S MANUAL Ver:1.1.2...
- Page 2 Agency Compliance and Approvals EN 55032, Class A EN 55024 This is a class A product. In a domestic environment this product may cause radio interference in which case the user may be required to take adequate measures. FCC part 15B, Class A This equipment has been tested and found to comply with the limits for a Class A digital device, pursuant to Part 15 of the FCC Rules.
- Page 3 Environmental protection Do not dispose of this product in an unsorted public trash can. You should recycle this product according to local regulations. For more information, please browse our website: http://www.gainscha.com.tw...
-
Page 4: Table Of Contents
Contents 1. Introduction .................................4 1.1 Product Introduction ............................4 1.2 Product Features..............................6 1.2.1 Printer Standard Features ........................6 1.2.2 Printer Optional Features ........................8 2. Operations Overview ............................... 9 2.1 Unpacking and Inspection ..........................9 2.2 Printer Overview ............................... 10 2.2.1 Front View ..............................10 2.2.2 Interior View ............................... - Page 5 3.2 Install Printer Driver ............................12 3.3 Loading the Ribbon ............................15 3.4 Loading the Media ............................16 3.4.1 Loading the Roll Labels ......................... 16 3.4.2 Ribbon and print media loading diagram ..................16 3.4.3 External Label Roll Mount Installation (Option) ................16 4.
- Page 6 3)Serial Port ................................ 25 4)Ethernet Port ..............................25 7. Troubleshooting ..............................26 7.1 Common Problems ............................26 8. Maintenance ................................28 9. Revise History ................................30...
-
Page 7: Introduction
1. Introduction 1.1 Product Introduction Thank you very much for purchasing Gainscha bar code label printer. The GE-2406T/GE-3405T series printer features the single motor that is capable of handling a large capacity of 110 meters ribbon and large rolls of media inside its sleek design. - Page 8 Applications o Parcel Post o Manufacturing & Warehousing Shipping/ Receiving Labels Work in Progress o Small Office/ Home Office Item Labels o Retail Marking Instruction labels Price tags Agency labels Shelf labels o Healthcare Jewelry tags ...
-
Page 9: Product Features
1.2 Product Features 1.2.1 Printer Standard Features PRINTER MODEL GE-2406T GE-3405T GE-2406T GE-3405T Grade Standard Standard Empower Empower Resolution 8dots/mm(203DPI) 12dots/mm(300DPI) 8dots/mm(203DPI) 12dots/mm(300DPI) Printing Method Thermal Transfer &Direct Thermal Max. print speed 152 mm (6”)/second 127 mm (5”)/second 152 mm (6”)/second 127 mm (5”)/second Max. - Page 10 Input: AC 100-240V, 2.5A, 50-60Hz, Output: DC 24V, 2.5A, 60W User Interface 1 power switch, 1 button (Feed & Pause), 5 LEDs (Online white, Error red, Ribbon green, Bluetooth blue, WIFI & Communication orange) Internal fonts 8 alpha-numeric bitmap fonts ...
-
Page 11: Printer Optional Features
Environment Operation: 5~40°C, 25~85% non-condensing condition Storage: -40~ 60°C, 10~90% non-condensing Environmental Comply with RoHS, REACH, WEEE concern Accessories Windows labeling software CD disk Quick start guide USB cable Power cord External universal switching power supply ... -
Page 12: Operations Overview
2. Operations Overview 2.1 Unpacking and Inspection This printer has been specially packaged to withstand damage during shipping. Please carefully inspect the packaging and printer upon receiving the bar code printer. Please retain the packaging materials in case you need to reship the printer. Unpacking the printer, the following items are included in the carton. -
Page 13: Printer Overview
2.2 Printer Overview 2.2.1 Front View 1. RIBBON indicator 2. ERROR indicator 3. ONLINE indicator (FEED &PAUSE button) 4. BT indicator 5. Comm. indicator 1 2 3 4 5 2.2.2 Interior View 1. Printer top cover 2. Top cover open tab 3. -
Page 14: Front View
2.2.3 Front View 1. Paper tearing edge 2. Front bezel; Accessory assembly ( Cutter / Peeler) 2.2.4 Rear View 1. Power socket 2. USB interface 3. USB host (For HID keyboard or scanner) 4. RJ-45 Ethernet interface 5. RS-232 interface 6. -
Page 15: Setup
3. Setup 3.1 Setting up the Printer Place the printer on a flat, secure surface, then follow the steps below: 1. Plug the power cord into the AC power cord socket at the rear of the printer. Then, plug the other side into a properly grounded power outlet. - Page 16 terms in license agreement], and click [Next]. 3. Click [Finish]. 4. Go to installation process, please click [Install Printer Driver], and then click [Next]. 5. Click [Other] and click [Next]. 6. Select printer model name, click to install and click [Next].
- Page 17 7. Please use a USB cable to connect the printer to the 8. Change the printer name as per need, and click computer, click the corresponding USB interface, and [Next]. click [Next]. 9. Click [Finish]. 10. The installation is completed, please click [Close]. 11.
-
Page 18: Loading The Ribbon
3.3 Loading the Ribbon 1. Pull down paper blocker, take ribbon over 2. Load ribbon right side first and then left side, paper blocker fix it well. 3.Load the empty roll right side then right. Pull out ribbon to cover the print head, and stick into the empty roll. Be careful with the front and back side of ribbon... -
Page 19: Loading The Media
3.4 Loading the Media 3.4.1 Loading the Roll Labels 2. Load print media into the printer; adjust the 1. Press two buttons on printer two sides to lift and open the cover. paper guide to be same width of print media. 3.4.2 Ribbon and print media loading diagram Ribbon Print Head... -
Page 20: External Label Roll Mount Installation (Option)
1. Insert a label spindle into a paper roll. Then, install it on the external paper roll mount. Note: When using the Gainscha External Label holder, the 1” core label spindle only supports a radius of 12 cm / 2” core label spindle only supports a radius of 10 cm / 3” core label spindle... -
Page 21: Led And Button Functions
4. LED and Button Functions 4.1 LED Indicator Event Description Thermal transfer mode White(ONLINE) and Green(RIBBON) solid, and the device is ready to use. ready Direct thermal mode ready White(ONLINE) solid, and the device is ready to use. Open cover When the cover is open, a beep sound will be made, and White(ONLINE), Red (ERROR), and Green(RIBBON) will flash. -
Page 22: Regular Button Functions
4.2 Regular Button Functions This printer has one button for feed, pause or cancel errors. There are different functions in different modes, as shown in the following table: Button Printer status Function Description Feed Ready Feed When the printer is ready (White LED ON), press button this button once, and the label will advance to the front of the next label... -
Page 23: Power-On Utilities
4.3 Power-on Utilities This printer has six power-on functions for setting or testing the printer's hardware. Press these buttons at the same time when the power is turned on, and release the buttons with the light signal to activate these functions. Follow these steps to enable the boot function: Description Status lights... - Page 24 close the printer cover light+Red C. Press FEED buttons then turn on the printer's light power. When the online Green and the error Red are on at the same time, release FEED buttons, when you hear a beep, the printer enters the dump mode and will print out "NOW IN DUMP MODE".
-
Page 25: Printer Utility
After opening the main screen, you can see the following function items: (5) Command Tool (1) Port Settings (6) Language (2) Printer Information (7) About (3) Printer Configuration (8) Exit (4) Printer Function NOTE: If you need more detailed information, please refer to Gainscha official website http://www.gainscha.com.tw/... -
Page 26: Printer Function
5.2 Printer Function 1. Click the Printer Configuration and Printer Setup Can open and close the printer general settings screen. 2. Click the Load Button to bring out all printer general setting information through the selected communication interface. Click the Set button to write the setting value to the printer (please execute the reading function before writing). -
Page 27: Communication Interfaces
6. Communication Interfaces 1)USB (A Type) Pin No. Pin Name VBUS 2)USB (B Type) Pin No. Pin Name VBUS... -
Page 28: 3)Serial Port
3)Serial Port Pin No. Pin Name Description Transmit Data Receive Data Connect to Pin6 Equipment to Judge System Ground Connect to Pin4 Equipment to Judge Clear to Send Request to Send Reserve (No output) 4)Ethernet Port Pin No. Pin Name... -
Page 29: Troubleshooting
7. Troubleshooting 7.1 Common Problems The following guide lists the most common problems that may be encountered when operating this bar code printer. If the printer still does not function after all suggested solutions have been invoked, please contact the Customer Service Department of your purchased reseller or distributor for assistance. - Page 30 Poor print quality Ribbon and media is loaded Reload the supply. incorrectly. Clean the print head. Dust or adhesive accumulation on Clean the platen roller. the print head. Adjust the print density and print ...
-
Page 31: Maintenance
8. Maintenance This session presents the clean tools and methods to maintain your printer. 1. Please use one of following material to clean the printer. Cotton swab Lint-free cloth Vacuum / Blower brush 100% ethanol 2. The cleaning process is described as following, Printer Part Method Print Head... - Page 32 Sensor Compressed air or vacuum Exterior Wipe it with water-dampened cloth Interior Brush or vacuum NOTE: Do not touch printer head by hand. If you touch it careless, please use ethanol to clean it. Please use 100% Ethenol.DO NOT use medical alcohol, which may damage the printer ...
-
Page 33: Revise History
9. Revise History Date Version Content 2022/9/6 Ver.1.1.2 Modify Printer size Modify WIFI indicator(Orange change Blue)
Need help?
Do you have a question about the GE-2406T Series and is the answer not in the manual?
Questions and answers