Table of Contents
Advertisement
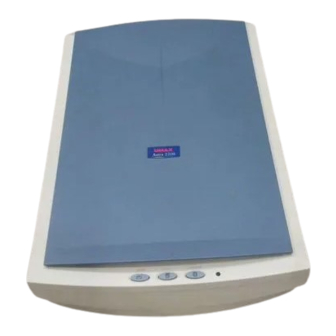
Astra 2200
Owner's Manual
Trademarks
UMAX is a trademark of UMAX Technologies, Inc. Astra is a trademark of UMAX
Technologies, Inc. IBM PC/AT is a trademark of International Business Machines Corporation.
Ms-Windows, Windows, and MS-DOS are trademarks of Microsoft Corporation. Macromedia
and Fireworks are registered trademarks of Macromedia, Inc. NetObjects Fusion is a trademark
of NetObjects, Inc. Presto! PageManager is a trademark of NewSoft Technology Corporation.
Other names and trademarks appearing herein are trademarks of their respective holders.
1
Advertisement
Table of Contents

Related Manuals for UMAX Technologies Astra 2200


Summary of Contents for UMAX Technologies Astra 2200
- Page 1 Astra 2200 Owner’s Manual Trademarks UMAX is a trademark of UMAX Technologies, Inc. Astra is a trademark of UMAX Technologies, Inc. IBM PC/AT is a trademark of International Business Machines Corporation. Ms-Windows, Windows, and MS-DOS are trademarks of Microsoft Corporation. Macromedia and Fireworks are registered trademarks of Macromedia, Inc.
-
Page 2: Table Of Contents
CHAPTER 1. GETTING STARTED…………………………………..…4 Introduction……………………………………………………………………………………….4 Unpacking the Scanner…………………………………………………………………………...4 Package Contents……………………………………………………………………………...4 Getting to Know Your Scanner…………………………………………………………4 Astra 2200 Scanner Elements………………………………………………………………….5 Astra 2200 Back Panel………………………………………………………………………...5 System Requirements…………………………………………………………………………….5 Installing Software………………………………………………………………………………..6 Installing Adobe PhotoShop LE on the PC……………………………………………………6 Installing Adobe PhotoShop LE on the Macintosh……………………………………………6 Installing Macromedia Fireworks on the PC…………………………………………………..6... - Page 3 Opening PhotoAlbum………………………………………………………………………...43 Creating a Photo Album……………………………………………………………………...43 CHAPTER 6. HOW TO GET HELP……………………………………44 Using Online Manuals…………………………………………………………………………..44 Accessing the UMAX VistaScan Online Manual……………………………………………44 Accessing the Presto! PageManager Online Manual………………………………………...45 Accessing the Caere OmniPage Online Manual……………………………………………..45 Installing Acrobat Reader for Macintosh Users……………………………………………...46 Troubleshooting…………………………………………………………………………………46 General Problems and Solutions……………………………………………………………..46...
-
Page 4: Chapter 1. Getting Started
Use this scanner to add variety and flare to your documents, or to help you share images with others. The Astra 2200 scanner is equipped with two SCSI connectors and a USB connector. Both the USB and SCSI interface connectors allow you to make a fast and easy connection to your computer. SCSI connectors are found on Macintosh computers and PC computers equipped with a SCSI interface card. -
Page 5: Astra 2200 Scanner Elements
System Requirements This section defines the minimum system requirements necessary to operate the Astra 2200 scanner. Please refer to the section below that applies to your computer type. PC Requirements • An IBM-Compatible PC with a Pentium processor or above •... -
Page 6: Installing Software
Installing the Software Installing Adobe PhotoShop LE on the PC 1. Insert the Adobe PhotoShop LE CD-ROM into your CD-ROM drive. 2. Click the Start button in the bottom left corner of the desktop. 3. Choose Run from the Start menu. The Run dialog box opens. 4. -
Page 7: Installing Macromedia Fireworks On The Macintosh
5. Once the software is installed, open the VistaScan folder. Open the Plug-in folder. Locate the UMAX VistaScan driver and select it by clicking on the icon. 6. To create a copy of the UMAX VistaScan driver, press the Option key and drag the driver icon to the Fireworks’ XTRAS folder. -
Page 8: Setting Up - General Information
Refer to the installation instructions that came with the SCSI card for information about installing the board. Checking Your Computer’s Connectors To use your scanner you need to understand what type of connectors you have on your computer. To determine the connector type, look at the back panel of your computer: •... - Page 9 1. Locate the USB cable that is provided. Plug the rectangular connector end of this cable firmly into the USB port on the back of the computer. 2. Plug the square connector end of this cable into the port located on the back panel of the scanner. Macintosh Connection 1.
-
Page 10: Connecting The Power Adapter
To change the scanner’s SCSI address: 1. Check the other peripherals for their SCSI address or ID number. Your Astra 2200 SCSI address is preset to 5. If no other peripherals have used 5 as a SCSI address or ID number – you are done. If another peripheral’s address is 5, proceed to the next step. -
Page 11: Chapter 2. Your First Scan
For PC Users Only: You can turn the scanner lamp on and off using the Astra 200’s built-in Power Saving utility. The lamp remains on whenever the scanner has power, unless you turn it off using the UMAX Power Saving utility. -
Page 12: Chapter 3. Scanning Basics
CHAPTER 3. Scanning Basics VistaScan is the primary program or driver you use to scan with your Astra 2200 scanner. It is a TWAIN- compliant program, which means that it can be run from other programs that support scanning, like OmniPage and others. -
Page 13: Scan Destination
The Show Ruler command displays or hides the rulers that border the top and left sides of the Preview window. These rulers correspond to the rulers on your scanner’s object glass. Clicking on the Show Ruler checkbox turns off (removes the checkmark) and hides the ruler. Clicking on the checkbox again turns the feature on (displays a checkmark) and shows the ruler. - Page 14 3. Enter the file name under which you want to store the scanned image files (such as TMP) in the File Name text box. 4. Select the file format in which you want to save scanned images from the File Format drop down list. Printer To specify which printer to use when printing scanned images: 1.
-
Page 15: Scanner Information
Scanner Information The Scanner Information tab displays important information about your scanner. The information includes: • Scanner Manufacturer • Scanner Model • Firmware Version • VistaScan Version • Maximum Scan Width and Length • Maximum Resolution VistaScan Beginner Window Features The VistaScan Beginner window appears when you launch VistaScan. - Page 16 2. Select what you want to do with the image after it is scanned using the Scan To icons. 3. Specify what kind of image you are going to scan, and start the final scan process using the Click To Scan icons.
- Page 17 Selecting the Scan Device or Application To specify the device or application to which you want to send the scanned item, click on the icon that represents this device or application. The icons include: name specified in the VistaScan Preferences. application specified in the VistaScan Preferences.
-
Page 18: Vistascan Advanced Features
UTA (Transmissive): Scans 4” x 5” or smaller photo transparencies. UTA (Negative): Scans 4” x 5” photographic negatives. Auto Doc Feeder: The Automatic Document Feeder option is not available for this scanner. NOTE: For more information about scanning photo transparencies or negatives, refer to Appendix B. - Page 19 Changing the Image Mode VistaScan can scan a wide variety of image types. True Color, RGB: Scans a full color photo or document. The RGB indicates the colors of Red, Green, and Blue. This setting creates larger files than the B/W Photo setting. True Color, CMYK: Converts RGB (video) color data into CMYK (printed) color data using a special color transformation process.
- Page 20 Changing the Resolution Setting Scanning resolution is measured in dots per inch (DPI). Resolution determines the amount of information the scanner will capture in a scanned image. The higher the resolution, the finer the image detail, and the larger the file sizes.
- Page 21 20.60 36.60 1200 82.40 NOTE: Choosing the True Color RGB 36-bit setting captures more data than the 24-bit setting. This means that the file sizes listed above will be larger if you scanned images using the True Color 36-bit RGB setting.
- Page 22 Changing the Descreen Feature The Descreen option helps eliminate the patterns that can appear when you scan printed images found in magazines, brochures, catalogues, etc. This is accomplished by changing the number of lines that appear in every inch (lines per inch) of the scanned image. The Descreen feature is unavailable when you have chosen the B/W Document, Fax, or OCR resolution settings.
- Page 23 Changing the Filter Setting Image filters are used to soften or sharpen edges and boundaries of an image. VistaScan provides the following filter options: No Filter – Use this option when you do not want to sharpen or blur the image. Sharpen –...
- Page 24 To automatically adjust the light and dark values: 1. Place the item you want to scan on the scanner object glass. 2. Click the Preview button from the VistaScan Advanced window. 3. Select an area that you want to adjust using the Frame tool.
-
Page 25: Using The Scan Control Unit
4. Click the Auto Adjustment check box. The selected area is adjusted and the preview image refreshes displaying the results you can expect when you perform the final scan. Using the Scan Control Unit The Scan Control unit contains the Preview and Scan buttons, and the Scan To options. Selecting the Scan to Device or Application To specify the device or application to which you want to send the scanned item: 1. -
Page 26: Using The Color Adjustment Features
To create more than one selection frame: 1. After you have scanned an image in Preview scan mode, click on the Multiple Frame tool. 2. Select the area you want contained in the first frame by clicking on the point at which you want to begin the frame, and then dragging the tool diagonally until the area of interest is contained in the marquis box. - Page 27 Adjusting Image Brightness, Contrast, Highlights, and Shadows When you click on the Brightness/Contrast tab from the Color Adjustment panel a series of slide bars appear. Adjust the associated tones by dragging the slider in one of the bars to the left or the right. Using the Brightness Bar This setting determines the overall intensity level (gray level) of an image.
-
Page 28: Adjusting The Image Tones
VistaScan provides gamma adjustment capabilities so you can compensate for this variance in your scanner. Moving the slider on the scroll bar to the right increases the brightness of the mid-range gray tones. Moving it to the left decreases the brightness of the mid-range gray tones. The default setting is 1.2. -
Page 29: Using Vistaaccess - Direct Access
Click on the Start bar. Click on the Programs option. When the Programs pop0-up menu appears, click the VistaScan option. The VistaScan pop-up menu appears. Click the VistaAccess option to display the scanner icon in the Windows Task bar (near the time display in the lower right corner of the window in the system tray). -
Page 30: Using Vistashuttle
To use VistaShuttle to create an E-Card (electronic greeting card you send via e-mail): 1. Click the scanner icon in the system tray (to the far right of the Windows task bar) using your right mouse button. Select the VistaShuttle application from the VistaAccess menu. The VistaShuttle Main window appears. - Page 31 4. Click Preview to preview the scanned item. You can edit the Preview image before scanning the final image using the “Zoom Tool” and the “Frame Selection Tool”. To find out more about how to use these tools, click on the user tips text that appears when your cursor pauses over the tool. NOTE: You must have a browser installed in order to view the VistaScan online help.
-
Page 32: Using The Umax Copy Utility
Using the UMAX Copy Utility The UMAX Copy utility is a PC-based application that lets you scan and automatically print copies of an image. NOTE: The UMAX Copy Utility is not Macintosh compatible. To use the copy utility: 1. Click on the Start bar. Click the Programs option. When the Programs pop-up menu appears, click the VistaScan option. -
Page 33: Chapter 4. Push Button Scanning
Chapter 4. Push Button Scanning The defining feature of the Astra 2200 is its push button functionality. You can scan an image to 3-mail, perform OCR (optical character recognition), or even use the scanner as a copy machine by pushing one of the three buttons on the front panel of the scanner. - Page 34 Clicking on the icon displays a window with variables. Configuring the Scanner Button Values 1. When the Push Button Configuration utility opens, the scanner settings are automatically displayed. Select the image editing software you want to scan to when you press the Scan push button, by clicking on the arrow to the right of the Scan Destination field.
- Page 35 9. Click the OK button to save the Scan push button configuration settings. These settings will be used whenever you press the Scan button on the front of the scanner. NOTE: You can also click the Default button to return the values in each field to the default settings.
- Page 36 Configuring the Custom Button Values 1. Click on the Custom icon to open the window that contains the variables you are adjusting. NOTE: The Custom icon controls the values for both the E-mail and OCR (optical character recognition) features. You configure the variables for each function separately. To configure the values for the e-mail function: 1.
-
Page 37: Using The Push Buttons
Using the Push Buttons Once you have configured the variables for each of the push buttons, you can scan images and text by simply pressing one of the buttons on your scanner. To scan using one of the scanner’s push buttons: 1. -
Page 38: Chapter 5. Scanning Projects
Chapter 5. Scanning Projects The UMAX Astra 2200 scanner includes bundled software to help you with a variety of tasks. This chapter shows you how to make a personalized calendar, create Web-ready images, and even turn a page of text into an online text document that you can edit. -
Page 39: Using Vistascan To Scan A Photo To E-Mail
1. Click the E-mail icon to set the scanner settings to the best values fro scanning an image to e-mail. NOTE: You may need to adjust the destination preferences in the VistaScan Beginner window. For information about setting preferences, refer to Setting the VistaScan Preferences section. -
Page 40: Using Presto! Pagemanager To Scan A Form And Edit It With Pagetype
File menu. The VistaScan Beginner window appears. 7. Lift the document cover and place the form you want to scan face-down in the center of the object glass of the scanner. 8. Click the Preview button. 9. Click the Text/Lineart icon in the Click to Scan area to begin the scan. -
Page 41: Converting Scanned Text To Editable Text With Omnipage
12. Fill in the form text desired using the PageType tools. 13. Save the image when you have finished editing the form by selecting Save As from the File menu and entering the relevant information. Converting Scanned Text to Editable Text with OmniPage OmniPage lets you scan an image that contains text and convert it to editable text so you do have to retype the text. -
Page 42: Converting Scanned Text With Omnipage Le
3. Double-click the OmniPage LE icon. An OmniPage toolbar appears. (If this toolbar does not appear, click on the Window menu and select Show Toolbar.) 4. Click Select Scanner from the Settings menu. Select UMAX Astra Series then click OK. Converting Scanned Text with OmniPage LE 1. -
Page 43: Opening Photoalbum
Opening PhotoAlbum: 1. Open the Presto! PhotoAlbum program. For PC Users: Click the Start bar in the bottom-left corner of the screen. Click Programs. Select Presto! PhotoAlbum from the Programs menu. Click Presto! PhotoAlbum. The PhotoAlbum window appears. For Macintosh Users: Double-click the Hard Drive icon. -
Page 44: Chapter 6. How To Get Help
Click OK to save the album. Chapter 6. How to Get Help The Astra 2200 scanner has been designed to be reliable, easy-to-install, and easy-to-use. If you encounter any problems while installing or using your scanner, please follow the solutions outlined below. -
Page 45: Accessing The Presto! Pagemanager Online Manual
If VistaScan is not open, follow the instructions below. 1. Double-click the Hard Drive icon on the desktop. 2. Double-click the UMAX VistaScan folder. 3. Double-click the VistaScan Help. Your Internet browser should launch the VistaScan User’s Guide. -
Page 46: Installing Acrobat Reader For Macintosh Users
6. Double-click the Install Acrobat 3.0 icon. Troubleshooting This scanner is designed to be reliable and easy to install. If you have any problems with your scanner, please read the notes that follow to find out probable causes of the problem. -
Page 47: Windows 98/95 Osr2 Problems And Solutions
To resume use of the scanner, reconnect the power cord, and then the USB cable. To use your Astra 2200 scanner, it is important that your computer is set up to correctly support a USB device. You must have the following: •... - Page 48 USB will not function properly without IRQ Steering. Problem: Scanner is not present in the Device Manager. The scanner must be present in the Device Manager. If there is no listing for it, the scanner will not work.
- Page 49 2. Click on Properties using the left mouse button. This brings up the Device Manager. 3. The scanner should be listed under the heading of Imaging Device. 4. If it is not present, insert the UMAX VistaScan CD-ROM into the CD-ROM drive and reinstall VistaScan.
-
Page 50: Macintosh Problems And Solutions
I cannot get the scanner to install properly, or it does not run once it is installed. Solution: If you are having problems installing or using the Astra 2200 scanner, ensure that Macintosh OS 8.0 or higher is installed on your computer. - Page 51 Remove all other devices from the USB chain, so the scanner is the only device on the USB chain. Make sure that the scanner power adapter is plugged directly into the wall, not into a power strip. Problem: The following error message appeared: “Error: No Driver Found”...
-
Page 52: Scsi Problems And Solutions
Macintosh system: “Scanner not found or ready” error message when accessing scanner. Solution: If you get one of the messages above when you run the scanner test or when you try to access the scanner, follow the instructions below: 1. Make sure the ready light on front of the scanner is solid and not blinking. -
Page 53: Contacting Technical Support
Check out the UMAX Web site at • E-mail UMAX with your technical support question at: • Contact your dealer or call the UMAX support line between 9 A.M. – 5 P.M. (CST), Monday- Friday, at 214-739-1915. Before calling, please have the following information ready: •... -
Page 54: Maintenance
Other observations that may aid the technician in identifying the problem and solution When you call, please be in front of your computer. You will need to have your scanner and the computer turned on. Try to have as much information about your problem as possible. This information allows the technician to more effective troubleshoot your problem. -
Page 55: Appendix B. Using The Universal Transparency Cover(Utc)
Appendix B. Using the Universal Transparency Cover (UTC) This scanner is equipped with a UTC, which gives you the capability to scan slides and transparencies. It can be difficult to get a great scan from negatives. Negative film normally contains an emulsion that affects the color of the image when scanned. -
Page 56: Index
Connecting USB cable, Macintosh, 9 Connecting USB cable, PC, 8, 9, 10 Connector types, 8 Copy button values, 35 Copy Utility features, 32 Copy Utility, UMAX, 32 Creating E-cards, 30 Custom button values, 36 Custom descreen settings, defining, 22 Custom resolution settings, 21... - Page 57 25 Scanner button values, 34 scanner cleaning, 54 Scanner connectors, 7 Scanner Information tab, 15 Scanner lamp, turning it on and off, 11 scanner specifications, 54 Scanning and printing with VistaScan, 38 scanning basics, 12 scanning features, VistaScan advanced, 18...
- Page 58 Tips Help, 13 Tone adjustment, 26 Tools, VistaScan Beginner window, 16 Troubleshooting, 46 Turning the scanner lamp on and off, 11 UMAX Technical Support, 53 Universal Transparency Cover (UTC), 5, 10 Unpacking the scanner, 4 USB cable, 8, 9 USB connector, 4...
Need help?
Do you have a question about the Astra 2200 and is the answer not in the manual?
Questions and answers