Advertisement
Quick Links
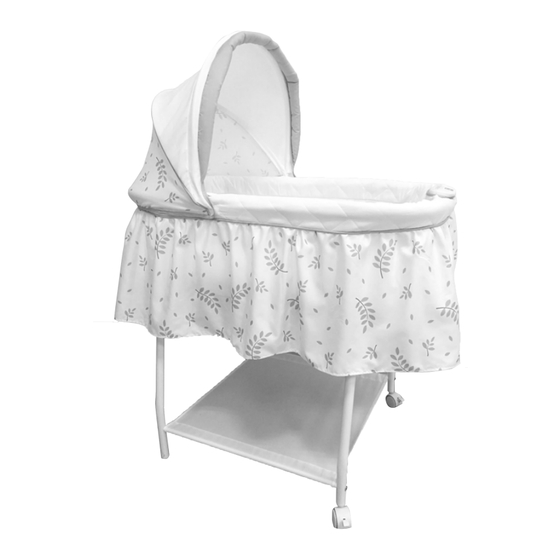
SILENT AUTO GLIDING
BASSINET
Read all instructions BEFORE assembly and USE of product. KEEP INSTRUCTIONS FOR FUTURE USE.
LF701406
ASSEMBLY INSTRUCTIONS
WARNING:
CHOKING HAZARD
Adult assembly required because of
small parts. Keep assembly parts out
of reach of children under 3 years.
REQUIRED: Phillips Screwdriver (not included)
IMPORTANT: Read all instructions before assembly and use of the product. Keep the
instructions for future reference.
INSTRUCTION MANUAL
www.DeltaChildren.com I Customer Service: (646) 435-8726
Styles and colors may vary
DCP-IM-11222019-F3
Advertisement

Related Manuals for Delta Children Little Folks LF701406


Summary of Contents for Delta Children Little Folks LF701406
- Page 1 SILENT AUTO GLIDING BASSINET INSTRUCTION MANUAL Read all instructions BEFORE assembly and USE of product. KEEP INSTRUCTIONS FOR FUTURE USE. LF701406 Styles and colors may vary ASSEMBLY INSTRUCTIONS WARNING: CHOKING HAZARD Adult assembly required because of small parts. Keep assembly parts out of reach of children under 3 years.
-
Page 2: Consumer Information
• If a sheet is used with the pad, use only the one provided by Delta Children or one specifically designed to fit the dimension of the bassinet mattress. -
Page 3: Extended Warranty
Contact our Customer Service Department directly for assistance (646) 435-8726 www.DeltaChildren.com • gcs@simmonkids.com ©2019 Delta Children’s Products, Inc. New York, NY 10001 EXTENDED WARRANTY DON’T MISS YOUR CHANCE TO BE COVERED FOR ALL OF LIFES MISHAPS! With Delta’s Extended Warranty, you’re covered for mechanical failure from normal use or if your item stops working due to normal wear and tear, plus all those unexpected surprises. - Page 4 Parts IMPORTANT! Please remove all parts from the package and identify them before assembly. Back Front Base Leg with Wire Base Leg (X1) Frame Connection (X1) (For auto glide and power cord attachment) Auto-Glide Housing (X1) (Needs 2 - M6 - 3.5cm - screws to attach to front base leg with wire connection) Mattress Support Board Support Tubes (X2)
- Page 5 Parts IMPORTANT! Please remove all parts from the package and identify them before assembly. Phillips Screwdriver (NOT INCLUDED) Locking Casters (X2) Hardware *Screws are shown in actual size - 10 total screws M6 - 1.7cm x 8pcs Canopy M6 - 3.5cm x 2pcs (Used for power housing assembly) Music Module WIRE 1...
-
Page 6: Top Frame Assembly
Top Frame Assembly NOTE: Make sure front of frame is aligned with top front mattress support • Place the frame on a flat surface and extend the support NOTE: You may need the help of another adult for assembly. legs out. •... - Page 7 Attaching Power Housing to Front Base Leg M6 Screw - 3.5cm - x2 - Actual Size Auto-Glide Housing Auto-Glide Housing THIS SIDE UP FACING INWARD M6 Screw Thread Auto-Glide Attach (x2) M6 Screws Housing Nub M6 Screw Thread Front Base Auto-Glide Housing Front Base...
- Page 8 Front Base Leg and Frame Assembly M6 Screw - 1.7cm - x2 - Actual Size FRONT BASE LEG MATTRESS SUPPORT BOARD FRAME • Locate the two (x2) M6 screw, a Phillips screwdriver, and the front base leg. • Insert the two (x2) M6 screw to the assembled front base leg and use the Phillips screwdriver to tighten on both sides.
- Page 9 Back Base Leg and Frame Assembly M6 Screw - 1.7cm - x2 - Actual Size BACK BASE LEG Align two side nubs to the three holes on frame MATTRESS SUPPORT BOARD BACK BASE LEG NOTE: You may need the help of another adult for assembly. •...
- Page 10 Storage Area Assembly Slide Support Tube Into Fabric Storage Liner Fabric Storage Liner Support Tube Align storage basket to Insert each end of the bottom base legs. support tubes to the entry hole of the base legs. Fabric Storage Liner Facing Upward M6 Screw - 1.7cm - x2 - Actual Size •...
- Page 11 Locking Casters Assembly *Once casters are assembled, turn the assembly bassinet upright. • Locate the two (x2) locking casters and insert into the bottom leg joints of the front base leg. • Insert the casters into the base legs. Push down until you hear the caster “CLICK”...
- Page 12 Consumer Information WARNING Read all instructions BEFORE assembly and USE of product. KEEP INSTRUCTIONS FOR FUTURE USE. CAUTION - Changes or modifications not expressly approved by the party responsible for compliance could void the user’s authority to operate the equipment. NOTE: This equipment has been tested and found to comply with the limits for a class B digital device.
- Page 13 Music Module Operation Attaching Music Module Volume Volume Light DOWN Auto Music Glide AUTO GLIDE WIRE 1 Auto Glide SMALL PLUG WIRE 2 Top Front Base Leg LARGE PLUG • To attach Music Module, remove the screws and line up music module to screw holes on front frame.
- Page 14 Attaching Fabric Music Module FRONT • Lift the skirt on the liner, snap all (8) of the straps around the top tube of the frame and all (4) snaps to the underside of the mattress boards. Mattress Pad With Sheet •...
- Page 15 Wire Connection Assembly WIRE 1 WIRE 1 Auto Glide SMALL PLUG Auto Glide SMALL PLUG WIRE 2 Top Front Base Leg WIRE 2 Top Front Base Leg LARGE PLUG LARGE PLUG Fig. 1 Fig. 1 Fig. 1A • Lift the fabric on the front of the bassinet. •...
- Page 16 Wire Connection Assembly Fig. 2 Fig. 3 Bottom Base Leg Connection Located On The Inside Of Base Leg Fig. 4 Fig. 2A • Locate the Power Cord. Insert underneath the fabric storage liner opening and plug into the Bottom Base Leg Connector (Fig.
-
Page 17: Care And Maintenance
Care and Maintenance • The frame, mattress pad, storage area, music module may be wiped clean using a mild cleaning solution and a damp cloth. Do not use bleach. Do not use harsh or abrasive cleaners. Rinse clean with water to remove residue. - Page 18 Customer Service Tel. (646) 435-8726 www.DeltaChildren.com...
- Page 19 Customer Service Tel. (646) 435-8726 www.DeltaChildren.com...
- Page 20 1-646-435-8726 www.DeltaChildren.com...
Need help?
Do you have a question about the Little Folks LF701406 and is the answer not in the manual?
Questions and answers