Table of Contents
Advertisement
Available languages
Available languages
Quick Links
OWNER'S MANUAL
GAS RANGE
Read this owner's manual thoroughly before operating the appliance
and keep it handy for reference at all times.
WArnInG
If the information in this manual is not followed exactly, a fire or explosion
may result causing property damage, personal injury or death.
• Do not store or use gasoline or other flammable vapors and liquids in the
vicinity of this or any other appliance.
• WHAT TO DO IF YOU SMELL GAS
- Do not try to light any appliance.
- Do not touch any electrical switch.
- Do not use any phone in your building.
- Immediately call your gas supplier from a neighbor's phone. Follow the
gas supplier's instructions.
- If you cannot reach your gas supplier, call the fire department.
• Installation and service must be performed by a qualified installer, service
agency, or the gas supplier.
SKSGR480GS
MFL68920524_08
Copyright © 2018 - 2019 Signature Kitchen Suite. All Rights Reserved.
www.signaturekitchensuite.com
Advertisement
Chapters
Table of Contents

Related Manuals for Signature SKSGR480GS

Summary of Contents for Signature SKSGR480GS
- Page 1 - If you cannot reach your gas supplier, call the fire department. • Installation and service must be performed by a qualified installer, service agency, or the gas supplier. SKSGR480GS www.signaturekitchensuite.com Copyright © 2018 - 2019 Signature Kitchen Suite. All Rights Reserved. MFL68920524_08...
-
Page 2: Table Of Contents
My Recipe Clock Themes Remote Start Sabbath Mode Wi-Fi SMArT FUnCTIOnS Remote Start Brightness SIGNATURE KITCHEN SUITE Application Display Smart Diagnosis™ Function Convection Auto Conversion Open Source Software Notice Information Language Selection FCC Notice Volume FCC RF Radiation Exposure Statement... - Page 3 TABLE OF CONTENTS MAInTEnAnCE Control Panel Gas Surface Burners Burner Grates Gas Cooktop Surface Griddle Exterior Front Manifold Panel and Knobs SpeedClean™ Self Clean Oven Air Vents Removing and Replacing the Lift-Off Oven Doors TrOUBLESHOOTInG FAQs Before Calling for Service WArrAnTY...
-
Page 4: Important Safety Instructions
IMPORTANT SAFETY INSTRUCTIONS IMPOrTAnT SAFETY InSTrUCTIOnS Read and follow all instructions when using the range to prevent the risk of fire, electric shock, personal injury, or damage. This guide does not cover all possible conditions that may occur. Always contact your service agent or manufacturer about problems that you do not understand. - Page 5 IMPORTANT SAFETY INSTRUCTIONS InSTALLATIOn SAFETY PrECAUTIOnS Have the installer show you the location of the range gas shut-off valve and how to shut it off if necessary. WArnInG • Make sure the range is properly installed and grounded by a qualified installer, according to the installation instructions.
- Page 6 IMPORTANT SAFETY INSTRUCTIONS SAFETY PrECAUTIOnS Gas appliances can cause minor exposure to four of these substances, namely benzene, carbon monoxide, formaldehyde and soot, caused primarily by the imperfect combustion of natural or LP gas. Correctly adjusted burners, indicated by a bluish rather than a yellow flame, will minimize imperfect combustion.
- Page 7 IMPORTANT SAFETY INSTRUCTIONS WArnInG • Never cover any slots, holes or passages in the oven bottom or cover an entire rack with materials such as aluminum foil. Doing so blocks air flow through the oven and may cause carbon monoxide poisoning. Aluminum foil linings may also trap heat, causing a fire hazard.
- Page 8 IMPORTANT SAFETY INSTRUCTIONS ELECTrICAL SAFETY CAUTIOn Be certain that all packing materials are removed from the appliance before operating. Keep plastic, clothes, paper, and other flammable materials away from parts of the appliance that may become hot. • Always disconnect power from the appliance before servicing. •...
- Page 9 IMPORTANT SAFETY INSTRUCTIONS WArnInG • Use proper pan size. Do not use pans that are unstable or that can be easily tipped. Select cookware with flat bottoms large enough to cover burners. To avoid spillovers, make sure the cookware is large enough to contain the food properly. This will both save cleaning time and prevent hazardous accumulations of food, since heavy spattering or spillovers left on the range can ignite.
- Page 10 10 IMPORTANT SAFETY INSTRUCTIONS BrOILEr Always use a broiler pan and a grid for excess fat and grease drainage. This will help to reduce splatter, smoke, and flare-ups. The igniter for the infrared ceramic broil burner on the ceiling of the oven will glow orange periodically during normal broil operation. WArnInG When using your broiler, the temperature inside the oven will be extremely high.
- Page 11 IMPORTANT SAFETY INSTRUCTIONS EnErGY SAVInG TIPS • Multiple-rack cooking saves time and energy. Whenever possible, cook foods requiring the same cooking temperature together in one oven. • For optimal performance and energy savings, follow the guides on page 44 for proper rack and pan placements.
- Page 12 12 IMPORTANT SAFETY INSTRUCTIONS SAFETY WHEn CLEAnInG • Open a window or turn on a ventilation fan or hood before self-cleaning. • If the oven is heavily soiled with oil, self-clean the oven before using the oven again. The oil could cause a fire. •...
-
Page 13: Product Overview
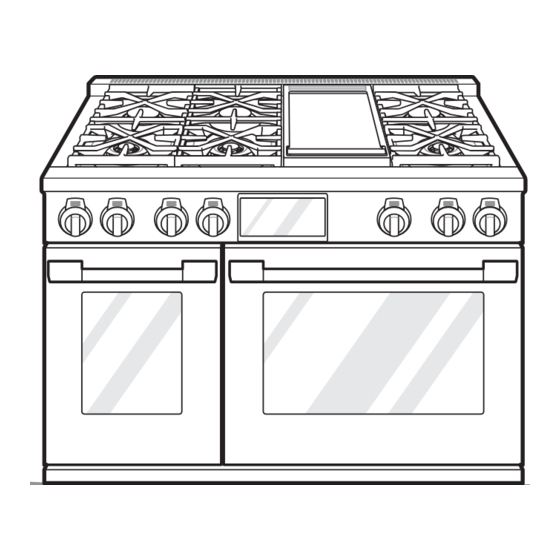
PRODUCT OVERVIEW PrODUCT OVErVIEW Parts Griddle Rating label model and serial Gas Cooktop number plate Cooktop control knob Display Panel Controller Gasket Rack Left Oven Door Right Oven Door Accessories Included Accessories Large gliding rack Grid Broiler pan Meat probe Owner’s manual (2ea) (1ea) -
Page 14: Installation
Engage the anti-tip device Test run Product Specifications The appearance and specifications listed in this manual may vary due to constant product improvements. Oven range Models SKSGr480GS Description 48” Gas Pro Range Electrical requirements 1.4 kW 120 VAC " (W) x 35 "... -
Page 15: Before Installing The Range
If you did not receive an anti-tip bracket with your of the range and carefully Leveling purchase, call 1-855-790-6655 (SIGNATURE Anti-tip attempt to tilt it forward. bracket KITCHEN SUITE) to receive one at no charge. - Page 16 16 INSTALLATION Preparing for Installation Tools needed Phillips screwdriver Flat-blade screwdriver " Nut driver Pliers Level Open-end or Drill Safety glasses Dolly adjustable wrench Pipe wrench (2) Tape measure Gloves (one for support) Parts Provided Template (1) Anti-tip bracket kit (1) Front rail (1) Anchor sleeves (6) Lag bolts (6)
-
Page 17: Ventilation Requirement
INSTALLATION Ventilation requirement • Non-combustible surfaces are as defined in 'National Fuel Gas Code'(ANSI Z223.1, Current Edition). It is recommended that these ranges be installed in Clearances from non-combustible materials are not conjunction with a suitable overhead vent hood. part of the ANSI Z21.1 scope and are not certified •... - Page 18 18 INSTALLATION Install Clearance " " (36 mm) (1216 mm) Countertop Width to cooking surface 36" (914.4 mm) Height Leg height 3" " (76.2 mm) (679 mm) Depth to front edge Universal Utility Locations 13" (330.2 mm) Non-Combustible Material 36" (914.4 mm) 48"...
- Page 19 INSTALLATION Combustible Materials Combustible Materials The back guard is required when 6" (152 mm) min. installing against a combustible surface. to combustible surface with Flush Island Trim " (3 mm) " (3 mm) clearance to clearance to a back or side a back or side wall below the wall below the...
-
Page 20: Gas Supply
20 INSTALLATION Gas Supply Installing the range Unpacking the range The range is designed to operate at a pressure of 5" of water column on natural gas or 10" of water CAUTIOn column on LP. Make sure you are supplying the range with the type •... - Page 21 INSTALLATION Moving the range Carefully tilt the range from the side and insert a dolly under the range to remove the range from CAUTIOn the pallet. Use additional help as required to remove the product from the pallet. To prevent •...
- Page 22 22 INSTALLATION Installing the Anti-tip Device Leveling the range Front Legs WArnInG Level the range by adjusting the leveling legs with a Tip - Over Hazard wrench. Extending the legs slightly may also make it A child or adult can tip the range and easier to insert the rear leg into the anti-tip bracket.
- Page 23 INSTALLATION Installing the Leg Cover Installing Front rail Remove the plastic covers from the stainless Remove the plastic film from the stainless steel steel leg covers. front rail. Slide each small leg cover inside a larger leg Insert the front rail onto the flange below the cover.
-
Page 24: Connecting The Range To Gas
24 INSTALLATION Connecting the range to Gas Flexible Connector Hookup This appliance must be installed in accordance with local codes or, in the absence of local codes, with the National Fuel Gas Code, ANSI Z223.1/NFPA 54 or, in Canada, the Natural Gas and Propane Installation "... -
Page 25: Electrical Connections
INSTALLATION Electrical Connections Do not use an adapter plug. Disconnecting the power cord places undue strain on the adapter and leads to eventual failure of the adapter ground terminal. Electrical requirements Installation must conform with local codes or, in the 120 Volt, 60 Hz, properly grounded dedicated circuit absence of local codes, with the National Fuel Gas protected by a 15 or 20 Amp circuit breaker, or slow... -
Page 26: Engaging The Anti-Tip Device
26 INSTALLATION Engaging the Anti-tip Device Test run • Move the range close enough to the opening to Check if the range is properly installed and run a test plug into the receptacle. cycle. • Slide the range into position ensuring that the back Remove all packing materials from inside the oven. -
Page 27: Checking Ignition Of The Surface Burners
INSTALLATION Checking Ignition of the Adjusting the Surface Burner to the Low Flame (Simmer) Setting Surface Burners • The continuous simmer setting needs to be Electric Ignition adjusted on all burners. • The Extra Low Simmer settings on the small (15K Select a surface burner knob and simultaneously BTU) burners are adjusted automatically as the push in and turn to the Lite position. -
Page 28: Operation
28 OPERATION OPErATIOn Control Panel Overview The position of the control knobs and buttons varies by model. 1 Left Front Burner Control 6 Griddle Control 2 Left rear Burner Control 7 right rear Burner Control 3 Center Front Burner Control 8 right Front Burner Control 4 Center rear Burner Control 9 night Light On/Off... -
Page 29: Getting Started
OPERATION Getting Started Changing Oven Settings Settings After turning on the range for the first time, adjust the settings to suit your preferences. To adjust settings after the initial setup, touch the If needed, touch POWER to wake up the display. display to open the Main screen. -
Page 30: Date & Time
30 OPERATION Sabbath Mode Unlock Touch any part of screen while Lockout is on. Sabbath mode is used on the Jewish Sabbath and Holidays. A popup screen appears. Touch Unlock for 3 While the oven is in Sabbath mode, the temperature seconds. -
Page 31: Wi-Fi
OPERATION Wi-Fi Display Connect the appliance to a home Wi-Fi network to Set the length of time before the display sleeps. use Remote Start and other smart functions. See the There are three options you can select. Smart Functions section for more details. •... -
Page 32: Language Selection
32 OPERATION Language Selection Thermostat Adjustment Set the display language to English, Spanish, or Your new oven may cook differently from the one French. it replaced. Use your new oven for a few weeks to become more familiar with it before adjusting the thermostat. -
Page 33: Smart Diagnosis
OPERATION Smart Diagnosis™ Factory Data reset Smart Diagnosis™ can be run through a smartphone This function returns all settings to the factory application or by calling for support. Place your defaults. smartphone's mouthpiece near the top left corner of Touch Settings at the center bottom of the Main the screen. -
Page 34: Using The Cooktop
34 OPERATION Using the Cooktop Cooktop Timers Each cooktop control knob has an LED display at the Gas Cooktop Module top which provides information such as heat level, temperature, or time remaining. The gas control The size and location of gas burners vary depending knobs include a timer function. -
Page 35: The Gas Surface Burners
OPERATION The Gas Surface Burners Using the Gas Surface Burners Be sure that all of the surface burners and grates Before Use are placed in the correct positions. Read all instructions before using. Place cookware on the grate. Make sure that all burners are properly placed. Burner locations differ depending on the range model. -
Page 36: Setting The Flame Size
36 OPERATION Setting the Flame Size Cookware for Gas Burners Watch the flame, not the knob, as you reduce heat. Medium-weight cookware is Match the flame size on a gas burner to the cookware recommended because it heats being used for fastest heating. quickly and evenly. -
Page 37: Extra Low Simmer (Small Burners Only)
OPERATION Extra Low Simmer (Small Burners Using the Wok Grates Only) The large burner grates can be flipped over to handle a wide variety of round-bottom woks. • Extra Low Simmer is only available on small Turn off all burners and allow the grates and burners. -
Page 38: The Gas Built-In Griddle (Available On Some Models)
38 OPERATION The Gas Built-in Griddle Using the Griddle (available on some models) Turn the Griddle knob to set the desired cooking temperature. The available temperature range is 200 °F to 450 °F (93 °C to 232 °C). Use the built-in griddle instead of a saucepan for foods such as eggs, burgers, and pancakes. - Page 39 OPERATION Setting Griddle Cook Time Alarm Most foods benefit from a preheated griddle. Use the chart below as a guide and adjust as Use the control knob and LED ring to set the preferred. Preheat for approximately 10 minutes at temperature and cook time for the griddle.
-
Page 40: Using The Oven
40 OPERATION Using the Oven Using Oven racks The racks have a turned-up back edge that prevents Before Using the Oven them from being pulled completely out of the oven cavity. nOTE • Because the oven temperature cycles, an oven thermometer placed in the oven cavity may not Installing Gliding racks show the same temperature that is set on the... -
Page 41: Accessories
OPERATION Accessories Timer Broiler Pan and Grid The oven timers don't affect oven operation or cooking time. Use them as extra kitchen timers. Once Use a broiler pan and grid when preparing meats for the time runs out, the oven chimes and "End" appears Convection Roast, and Broil. -
Page 42: Bake
42 OPERATION Bake Changing the Cook Settings Touch Edit in the display to bring up the Cook Bake is used to prepare foods such as pastries, Settings screen. breads and casseroles. The oven can be programmed to bake at any Adjust the settings using the number pad or temperature from 170 °F(80 °C) to 550 °F(285 °C). -
Page 43: Convection Modes
OPERATION Convection Modes Changing the Cook Settings Touch Edit in the display to bring up the Cook Convection Bake and Convection Roast use a fan to Settings screen. circulate heat evenly within the oven. This improves heat distribution and allows for even cooking and Adjust the settings using the number pad or excellent results whether cooking on one rack or scroll function. -
Page 44: Recommended Baking And Roasting Guide
44 OPERATION recommended Baking and roasting Baking rack Guide Guide rack position Food Baking results will be better if baking pans are Left right centered in the oven as much as possible. If cooking Oven Oven on multiple racks, place the oven racks in the •... -
Page 45: Broil
OPERATION Broil Smoking Due to the intense heat associated with broiling, it The Broil function uses intense heat from the upper is normal to experience smoke during the cooking heating element to cook food. Broiling works best for process. This smoke is a natural by-product of tender cuts of meat, fish, and thinly cut vegetables. -
Page 46: Recommended Broiling Guide
46 OPERATION recommended Broiling Guide The size, weight, thickness, starting temperature, and your preference of doneness will affect broiling times. This guide is based on meats at refrigerator temperature. For best results when broiling, use a pan designed for broiling. Left Oven right Oven Quantity and/or... -
Page 47: Warm
OPERATION Warm Tips for Broiling Beef The Warm mode maintains an oven temperature of 200°F or less. Use the Warm mode to keep cooked • Steaks and chops should always be allowed to rest food at serving temperature for up to three hours after for five minutes before being cut into and eaten. - Page 48 48 OPERATION Proof Probe This feature maintains a warm oven for rising yeast The probe accurately measures the internal leavened products before baking. temperature of meat, poultry and casseroles. It should not be used during broiling, self clean, warming or proofing.
- Page 49 OPERATION Using the Probe Changing the Cook Settings Insert the probe into the food. Touch Edit in the display to bring up the Cook Settings screen. Connect the probe to the jack in the oven, and Adjust the settings as desired. “Probe is connected”...
-
Page 50: My Recipe
50 OPERATION My recipe Editing My recipe • The Edit function cannot add or remove cooking For frequently used cooking menus, you can combine stages to a recipe. Only the oven temperature, up to three different temperatures and cooking modes probe temperature and cook time can be changed. -
Page 51: Remote Start
Start If the appliance is registered on a home Wi-Fi network, the preheating function of the oven can be started or stopped using the SIGNATURE KITCHEN SUITE smart phone app. Preparing the Oven for a remote Start Open the oven door to make sure the oven is empty and ready for preheating. -
Page 52: Smart Functions
• The appliance supports 2.4 GHz Wi-Fi networks Application only. To check your network frequency, contact your Internet service provider or refer to your The SIGNATURE KITCHEN SUITE application allows wireless router manual. you to communicate with the appliance using a • SIGNATURE KITCHEN SUITE is not smartphone. -
Page 53: Smart Diagnosis™ Function
Turn on alerts in the app to receive notifications about display screen. the current status of the appliance. Push alerts are sent even if the SIGNATURE KITCHEN SUITE app is off. Touch Start. Keep the phone in place until the tone Timer transmission has finished. -
Page 54: Open Source Software Notice Information
Open Source Software notice SIGnATUrE KITCHEn SUITE Smart Diagnosis™ Information Use the Smart Diagnosis feature in the SIGNATURE To obtain the source code under GPL, LGPL, MPL KITCHEN SUITE application for help diagnosing and other open source licenses, that is contained issues with the appliance without the assistance in this product, please visit http://opensource. -
Page 55: Fcc Notice
SMART FUNCTIONS FCC notice FCC rF radiation Exposure Statement The following notice covers the transmitter module contained in this product. This equipment complies with FCC radiation exposure This equipment has been tested and found to comply limits set forth for an uncontrolled environment. This with the limits for a Class B digital device, pursuant transmitter must not be co-located or operating in to Part 15 of the FCC Rules. -
Page 56: Maintenance
56 MAINTENANCE MAInTEnAnCE Cleaning Burner Heads/Caps For even and unhampered flame, the slits in the nOTE burner heads must be kept clean at all times.The burner heads and caps can be lifted off. • Depending on the model, your range may contain different cooktop modules requiring •... -
Page 57: Burner Grates
MAINTENANCE Burner Grates Gas Cooktop Surface The convertible wok grates should be used in the CAUTIOn front, and the remaining grates in the back. • To avoid burns, do not clean the cooktop Left Grate Center Grate Right Grate surface until it has cooled. •... -
Page 58: Griddle
58 MAINTENANCE Griddle Cleaning the Griddle Scrape off large food debris with a heatproof Clean the griddle plate using hot water and liquid dish silicone or wood spatula immediately after soap. cooking. Do not use metal utensils on the griddle. To clean heavy soil, soak the griddle plate then use a brush to remove soil. -
Page 59: Exterior
MAINTENANCE Exterior Broiler Pan and Grid Painted and Decorative Trim For general cleaning, use a cloth with hot soapy Grid Broiler pan water. For more difficult soils and built-up grease, • Do not store the soiled broiler pan and grid in the apply a liquid detergent directly onto the soil. -
Page 60: Front Manifold Panel And Knobs
60 MAINTENANCE Front Manifold Panel and Oven Door Knobs • Use soapy water to thoroughly clean the oven door. Rinse well. Do not immerse the door in water. It is best to clean the manifold panel after each use of •... -
Page 61: Speedclean
The SpeedClean™ feature takes advantage of SIGNATURE KITCHEN SUITE'S • Makes for a better self-clean experience new enamel to help lift soils without harsh chemicals, - Delays the need for a self-clean cycle... - Page 62 62 MAINTENANCE SpeedClean™ Instruction Guide A tone will sound at the end of the 10 minute cycle. Touch End of Cleaning to clear the Remove oven racks and accessories from the oven. display and end the tone. Scrape off and remove any burnt-on debris with After the cleaning cycle and during a plastic scraper.
-
Page 63: Self Clean
MAINTENANCE Self Clean Cleaning Tips • Allow the oven to cool to room temperature before The Self Clean cycle uses extremely hot temperatures using the SpeedClean™ cycle. to clean the oven cavity. While running the Self Clean • A plastic spatula can be used as a scraper to cycle, you may notice smoking or an odor. - Page 64 64 MAINTENANCE Setting Self Clean CAUTIOn The Self Clean function has cycle times of 2, 3 or 4 • Do not leave small children unattended near hours. the appliance. During the Self Clean cycle, the outside of the range can become very hot to •...
-
Page 65: Oven Air Vents
MAINTENANCE Oven Air Vents During Self Clean • The Self Clean cycle uses extremely hot Air openings are located at the rear of the cooktop, temperatures to clean the oven cavity. While at the top of the oven door, at the front of oven cavity running the Self Clean cycle, you may notice and at the bottom of the range. -
Page 66: Removing And Replacing The Lift-Off Oven Doors
66 MAINTENANCE removing and replacing the replacing the Door Lift-Off Oven Doors Firmly grasp both sides of the door at the top. With the door at the same angle as the removal CAUTIOn position, seat the indentation of the hinge cams into the bottom edge of the hinge slots. -
Page 67: Troubleshooting
• Only use flat-bottom woks or 14" round-bottom drippings instead. (If foil has already melted onto the woks when using a SIGNATURE KITCHEN SUITE bottom of the oven, it will not interfere with the oven's supplied wok grate. - Page 68 68 TROUBLESHOOTING My range is still dirty after running the Is it safe for my convection fan, broil burner or SpeedClean™ cycle. What else should I do? heater element to get wet during SpeedClean™? The SpeedClean™ cycle only helps to loosen light Yes.
-
Page 69: Before Calling For Service
TROUBLESHOOTING Before Calling for Service Before you call for service, review this list. It may save you time and expense. The list includes common occurrences that are not the result of defective workmanship or materials in this appliance. Symptoms Possible Causes / Solutions •... - Page 70 70 TROUBLESHOOTING Symptoms Possible Causes / Solutions • Control not set properly. Follow instructions under Setting Oven Controls. • Meat too close to the element. Reposition the rack to provide proper clearance between the meat and the element. Preheat broil element for searing. •...
- Page 71 TROUBLESHOOTING Symptoms Possible Causes / Solutions • A convection fan may automatically turn on and off. - This is normal. Fan noise • The fans that exist to cooling for the range are turned on and off according to the temperature of the range. - This is normal.
- Page 72 72 TROUBLESHOOTING Symptoms Possible Causes / Solutions • The password for the Wi-Fi network was entered incorrectly. - Delete your home Wi-Fi network and begin the registration process again. • Mobile data for your smartphone is turned on. - Turn off the Mobile data on your smartphone before registering the appliance. •...
-
Page 73: Warranty
WARRANTY WArrAnTY (USA) Should your SIGNATURE KITCHEN SUITE Gas Range fail due to a defect in materials or workmanship under normal home use, during the warranty period set forth below, SIGNATURE KITCHEN SUITE will at its option repair or replace the product. This limited warranty is valid only to the original retail purchaser of the product and applies only when purchased and used within the United States including U.S. - Page 74 74 WARRANTY • The removal and reinstallation of the Product if it is installed in an inaccessible location or is not installed in accordance with published installation instructions, including SIGNATURE KITCHEN SUITE'S owner’s and installation manuals. • Damage resulting from misuse, abuse, improper installation, repair, or maintenance. Improper repair includes use of parts not approved or specified by SIGNATURE KITCHEN SUITE.
- Page 75 WARRANTY Problem Cause Prevention • Burner cap is dull or 1. Scratching • Do not use steel wool or has changed color abrasive cleansers to clean. 2. Use of detergent or abrasive cleansers • To remove burnt-on food, 15 k Burner Cap soak the burner heads in hot water for 20–30 minutes.
- Page 76 SIGNATURE KITCHEN SUITE at the number below. For assistance or service, call 1-855-790-6655. If you need further assistance, you can write to SIGNATURE KITCHEN SUITE with any questions or concerns at the address below: SIGNATURE KITCHEN SUITE, 201 James Record Road, Huntsville, Alabama 35813...
- Page 77 - Si no puede comunicarse con su compañía de gas, llame al departamento de bomberos. • La instalación y el mantenimiento deben ser realizados por un instalador, una agencia de mantenimiento o una compañía de gas calificados. SKSGR480GS www.signaturekitchensuite.com Copyright © 2018 - 2019 Signature Kitchen Suite. Todos los Derechos Reservados. MFL68920524_08...
- Page 78 ÍNDICE ÍNdICE INStRUCCIONES IMPORtANtES Actualización del programa Modo Demo dE SEGURIdAd Restablecimiento de los datos de fábrica Licencia de código abierto Uso de la estufa dESCRIPCIÓN GENERAL dEL Módulo de cocina de gas PROdUCtO Temporizadores de cocina Piezas Uso de los quemadores de gas de superficie Accesorios Antes de usar Uso de los quemadores de superficie de...
- Page 79 ÍNDICE FUNCIONES INtELIGENtES Aplicación SIGNATURE KITCHEN SUITE Función Smart Diagnosis™ (Diagnóstico Inteligente) Información del aviso de software de código abierto Aviso de la FCC Declaración sobre exposición a la radiación de RF de la FCC MANtENIMIENtO Panel de control Quemadores de superficie a gas Rejillas de los quemadores Limpieza de la superficie de la placa de cocción...
-
Page 80: Instrucciones Importantes De Seguridad
INSTRUCCIONES IMPORTANTES DE SEGURIDAD INStRUCCIONES IMPORtANtES dE SEGURIdAd Lea y siga todas las instrucciones cuando utilice la cocina para evitar riesgos de incendios, descargas eléctricas, lesiones personales o daños. Esta guía no incluye todas las situaciones posibles que podrían ocurrir. Siempre comuníquese con su agente de servicio técnico o con el fabricante cuando haya problemas que no comprenda. - Page 81 INSTRUCCIONES IMPORTANTES DE SEGURIDAD PRECAUCIONES dE SEGURIdAd PARA LA INStALACIÓN Pida que el instalador le muestre el lugar de la válvula que corta el gas de la cocina y cómo apagarla si fuera necesario. AdvERtENCIA • Haga que un instalador calificado instale y conecte a tierra su cocina de acuerdo con las Instrucciones de instalación.
- Page 82 INSTRUCCIONES IMPORTANTES DE SEGURIDAD PRECAUCIONES dE SEGURIdAd Los aparatos de gas causan exposición mínima a cuatro de estas sustancias: benceno, monóxido de carbono, formaldehido y hollín, causados primordialmente por la combustión incompleta de gas natural o gas LP (Propano). Los quemadores bien ajustados, indicados por una llama azul en vez de una llama amarilla, minimizarán la combustión incompleta.
- Page 83 INSTRUCCIONES IMPORTANTES DE SEGURIDAD AdvERtENCIA • Nunca cubra ranuras, aberturas ni conductos del fondo del horno ni un estante completo con materiales como papel de aluminio. Al hacerlo, se bloquea la corriente de aire a través del horno y esto puede provocar envenenamiento por monóxido de carbono. El revestimiento de papel metálico también puede concentrar calor, generando un peligro de incendio.
- Page 84 INSTRUCCIONES IMPORTANTES DE SEGURIDAD SEGURIdAd ELÉCtRICA PRECAUCIÓN Asegúrese de retirar todos los materiales del embalaje antes de la puesta en funcionamiento. Mantenga el plástico, telas, papel y otros materiales inflamables lejos de las partes del electrodoméstico que se podrían calentar. •...
- Page 85 INSTRUCCIONES IMPORTANTES DE SEGURIDAD AdvERtENCIA • Use el tamaño adecuado de sartén. No use sartenes inestables o que puedan volcarse con facilidad. Seleccione utensilios de cocina con fondos planos lo suficientemente grandes como para cubrir los quemadores. Para evitar derrames, asegúrese de que la olla tenga el tamaño suficiente para contener los alimentos de manera adecuada.
- Page 86 10 INSTRUCCIONES IMPORTANTES DE SEGURIDAD ASAdOR Siempre use una cacerola de asado y una parrilla para drenar el exceso de grasa y cebo, esto ayudará a reducir salpicaduras, humo y llamaradas. El encendedor del asador cerámico infrarrojo que se encuentra localizado en la parte superior del interior del horno brillará anaranjado periódicamente durante la operación normal del asador.
- Page 87 INSTRUCCIONES IMPORTANTES DE SEGURIDAD SUGERENCIAS PARA AHORRAR ENERGÍA • Cocinar en varios estantes ahorra tiempo y energía. Siempre que sea posible, cocine alimentos que requieran la misma temperatura de cocción en un único horno. • Para un desempeño óptimo y ahorro de energía, siga las pautas de la página 44 para colocar correctamente los estantes y las bandejas.
- Page 88 12 INSTRUCCIONES IMPORTANTES DE SEGURIDAD SEGURIdAd AL LIMPIAR • Abra una ventana y encienda un ventilador o campana extractora antes de realizar la autolimpieza. • Si el horno está muy sucio con aceite, realice la autolimpieza antes de volver a utilizarlo. El aceite podría causar un incendio.
-
Page 89: Descripción General Del Producto
DESCRIPCIÓN GENERAL DEL PRODUCTO dESCRIPCIÓN GENERAL dEL PROdUCtO Piezas Plancha Placa de modelo y Cocina de gas número de serie Perilla de modo de cocción de cocción Pantalla Controlador Junta Estante Puerta izquierda del horno Puerta derecha del horno Accesorios Accesorios incluidos Rejilla deslizante grande Parrilla (1 c/u) -
Page 90: Instalación
Prueba de funcionamiento Especificaciones del producto La apariencia y las especificaciones detalladas en este manual podrían variar, debido a mejoras constantes en el producto. Modelos de cocinas SKSGR480GS con horno descripción 48" Estufa de Gas Pro Requisitos eléctricos 1,4 kW 120 VAC "... -
Page 91: Antes De Instalar La Cocina
Si usted no recibió un soporte anti-vuelco con su compra, Para verificar que se haya llame al 1-855-790-6655 (SIGNATURE KITCHEN SUITE) para insertado la pata de nivelación recibir uno sin coste alguno. en el soporte antivuelco, sujete... - Page 92 16 INSTALACIÓN Preparación para instalación Herramientas necesarias Destornillador Phillips Destornillador plano Llave para tuercas de " Pinzas Nivel Llave de boca o ajustable Taladro Gafas de seguridad Plataforma móvil Llave de tubos (2) Cinta medidora Guantes (uno para soporte) Piezas incluidas Plantilla (1) Juego del soporte antivuelco (1) Carril delantero (1)
-
Page 93: Requerimiento De Ventilación
INSTALACIÓN Requerimiento de ventilación • Superficies no combustibles según se define en el 'Código Nacional de Gas Combustible' (ANSI Z223.1, Edición Actual). Se recomienda que estas estufas se instalen junto con una Los espacios libres de materiales no combustibles no campana de ventilación aérea adecuada. - Page 94 18 INSTALACIÓN Instalación de espacios libres " (36 mm) " (1216 mm) De encimera Ancho a la superficie de cocción 36" (914.4 mm) Altura Altura de las patas 3" " (76.2 mm) (679 mm) Profundidad hasta el borde frontal Ubicaciones de suministros universales 13"...
- Page 95 INSTALACIÓN Materiales combustibles Materiales combustibles Se requiere el uso del protector trasero al realizar 6" (152 mm) mínimo la instalación sobre una superficie combustible. para superficie combustible con moldura tipo isla " (3 mm) de " (3 mm) de espacio hasta espacio hasta una pared una pared...
-
Page 96: Suministro De Gas
20 INSTALACIÓN Suministro de gas Instalación de la estufa desembalaje de la estufa Su cocina está diseñada para funcionar con una presión de 5" de columna de agua a gas natural o 10" de columna de agua a PRECAUCIÓN Asegúrese de suministrar a su cocina el tipo de gas para el •... - Page 97 INSTALACIÓN desplazamiento de la estufa Incline cuidadosamente la estufa de lado e inserte una plataforma móvil debajo de la estufa para retirar la estufa PRECAUCIÓN del palet. Utilice ayuda adicional según sea necesario para quitar el producto del palet. Para evitar daños a los •...
- Page 98 22 INSTALACIÓN Instalación del dispositivo antivuelco Nivelación de la cocina Patas delanteras AdvERtENCIA Nivele la cocina al ajustar las patas de nivelación con una Riesgo de vuelco llave. Si extiende las patas ligeramente, podría ser más fácil Es posible que un niño o un adulto inclinen insertar la pata trasera en el soporte antivuelco.
- Page 99 INSTALACIÓN Instalación de la cubierta de la pata Instalación del carril delantero Retire las cubiertas de plástico de las cubiertas de las Retire la película de plástico del carril delantero de acero patas de acero inoxidable. inoxidable. Deslice cada cubierta pequeña de la pata dentro de una Inserte el carril delantero en la brida que está...
-
Page 100: Conexión De La Cocina Al Gas
24 INSTALACIÓN Conexión de la cocina al gas Montaje del conector flexible Este artefacto debe instalarse de acuerdo con los códigos locales o, en ausencia de estos, según lo establecido en el Código Nacional de Gas Combustible, ANSI Z223.1/NFPA 54 o, en Canadá, conforme al Código de Instalación de Gas y "... -
Page 101: Conexiones Eléctricas
INSTALACIÓN Conexiones eléctricas No utilice un enchufe adaptador. Desconectar el cable de alimentación genera tensión indebida en el adaptador y genera una falla eventual en el terminal a tierra del adaptador. Requisitos eléctricos La instalación debe cumplir los códigos locales o, en ausencia Circuito exclusivo conectado a tierra de forma adecuada de de estos, según lo establecido en el Código Nacional de Gas 120 V CA y 60 Hz protegido por interruptor de circuito de 15 o... -
Page 102: Colocación Del Dispositivo Antivuelco
26 INSTALACIÓN Colocación del dispositivo Prueba de funcionamiento antivuelco Verifique que la cocina esté bien instalada y realice un ciclo de prueba. • Mueva la cocina para que quede cerca de la abertura para Retire todos los materiales de empacado del interior enchufar en el receptáculo. -
Page 103: Verificación De Encendido De Los Quemadores De
INSTALACIÓN verificación de encendido de Ajuste del quemador de superficie en la configuración Llama baja (Fuego los quemadores de superficie lento) Encendido eléctrico • El ajuste continuo de cocción a fuego lento debe ajustarse Seleccione la perilla de un quemador de superficie y empuje en todos los quemadores. -
Page 104: Funcionamiento
28 FUNCIONAMIENTO FUNCIONAMIENtO descripción general del panel de control La posición de los mandos y botones de control varía según el modelo. 1 Control del quemador frontal izquierdo 6 Control del plancha 2 Control del quemador trasero izquierdo 7 Control del quemador trasero derecho 3 Control del quemador frontal centro 8 Control del quemador frontal derecho 4 Control del quemador trasero centro... -
Page 105: Introducción
FUNCIONAMIENTO Introducción Cambio de las configuraciones del horno Después de encender la estufa por primera vez, ajuste los ajustes para que se adecuen a sus preferencias. Configuraciones Si es necesario, toque POWER (Encendido) para que se Para ajustar la configuración después de la configuración encienda la pantalla. -
Page 106: Date & Time
30 FUNCIONAMIENTO Sabbath mode desbloquear Toque cualquier parte de la pantalla mientras Lockout El modo Sabbath se usa en el Sabbat judío y en días festivos. esté activado. Mientras el horno está en modo Sabbath, la temperatura no se puede cambiar y las funciones de timer, light y alarm están Aparecerá... -
Page 107: Wi-Fi
FUNCIONAMIENTO Wi-Fi visualización Conecte el dispositivo a una red Wi-Fi doméstica para utilizar Establezca el período de tiempo antes de que la pantalla se Remote Start y otras funciones inteligentes. Consulte la apague. sección Funciones inteligentes para obtener más detalles. Hay tres opciones que puede seleccionar. -
Page 108: Selección De Idioma
32 FUNCIONAMIENTO Selección de idioma Ajuste del termostato Establezca el idioma de la pantalla en inglés, español o Su nuevo horno puede cocinar de forma diferente a la que francés. reemplazó. Utilice su nuevo horno durante unas semanas para familiarizarse con él antes de cambiar los ajustes de temperatura. -
Page 109: Smart Diagnosis
FUNCIONAMIENTO Smart diagnosis™ Restablecimiento de los datos de fábrica Smart Diagnosis™ puede ejecutarse a través de una aplicación de teléfono inteligente o llamando al servicio técnico. Esta función devuelve todos los ajustes a los valores Coloque el micrófono de su teléfono inteligente cerca de la predeterminados de fábrica. -
Page 110: Uso De La Estufa
34 FUNCIONAMIENTO Uso de la estufa temporizadores de cocina Cada mando de control de la cocina tiene una pantalla LED Módulo de cocina de gas en la parte superior que proporciona información como el nivel de calor, la temperatura o el tiempo restante. Los mandos de El tamaño y la ubicación de los quemadores de gas varían control de los cocina de gas incluyen una función timer. -
Page 111: Uso De Los Quemadores De Gas De Superficie
FUNCIONAMIENTO Uso de los quemadores de gas Uso de los quemadores de superficie de gas de superficie Asegúrese de que todos los quemadores de superficie y Antes de usar rejillas se colocan en las posiciones correctas. Lea todas las instrucciones antes de usar. Coloque los utensilios de cocina sobre la parrilla. -
Page 112: Ajuste Del Tamaño De Llama
36 FUNCIONAMIENTO Ajuste del tamaño de llama Batería de cocina para la superficie de la cocina Mire la llama, no la perilla mientras reduce el calor. Haga coincidir el tamaño de la llama con la olla que usará para Se recomienda el uso de batería de calentar más rápido. -
Page 113: Extra Low Simmer
FUNCIONAMIENTO Extra Low Simmer (pequeños Uso de las rejillas para wok Las rejillas de los quemadores grandes se pueden voltear para quemadores solamente) manejar una amplia variedad de woks de fondo redondo. • Extra Low Simmer sólo está disponible en pequeños Apague todos los quemadores y deje que las rejillas y quemadores. -
Page 114: La Plancha De Gas Integrada
38 FUNCIONAMIENTO La plancha de gas integrada Uso de la plancha (disponible en algunos) Gire el mando de la plancha para ajustar la temperatura de cocción deseada. El rango de temperatura disponible es de 200 °F a 450 °F (93 °C a 232 °C). Utilice la plancha integrada en lugar de una sartén para alimentos como huevos, hamburguesas y panqueques. - Page 115 FUNCIONAMIENTO Ajuste de la alarma del tiempo de A la mayoría de los alimentos les viene bien que la plancha esté precalentada. Utilice la tabla siguiente como guía para cocción de la plancha los tiempos de precalentamiento y ajuste como se prefiera. Precalentar durante aproximadamente 10 minutos a 450 °...
-
Page 116: Uso Del Horno
40 FUNCIONAMIENTO Uso del horno Uso de los estantes del horno Los estantes tienen un borde posterior doblado hacia arriba Antes de usar el horno que evita que salgan de la cavidad del horno. NOtA • Como la temperatura del horno es cíclica, el termómetro Cómo instalar la estante deslizante que esté... -
Page 117: Accesorios
FUNCIONAMIENTO Accesorios temporizador Asadera y parrilla Los temporizadores del horno no afectan al funcionamiento del horno ni al tiempo de cocción. Utilícelos como temporizadores Use una asadera y una parrilla cuando prepare carnes para de cocina adicionales. Una vez que el tiempo se agota, el Convection Roast y Broil. -
Page 118: Bake (Hornear)
42 FUNCIONAMIENTO Bake (Hornear) Cambiar Cook Settings Toque Edit en la pantalla para abrir la pantalla Cook La función Hornear se utiliza para preparar alimentos como Settings. pasteles, panes y estofados. Es posible programar el horno para hornear a cualquier Cambie los ajustes utilizando el teclado numérico o la temperatura entre 170 °F (80 °C) y 550 °F (285 °C). -
Page 119: Modos De Convección
FUNCIONAMIENTO Modos de convección Cambiar Cook Settings Toque Edit en la pantalla para abrir la pantalla Cook Convection Bake y Convection Roast utilizan un ventilador Settings. para hacer circular el calor uniformemente dentro del horno. Esto mejora la distribución del calor y permite una cocción Cambie los ajustes utilizando el teclado numérico o la uniforme y excelentes resultados, ya sea cocinando en una función de desplazamiento. -
Page 120: Guía De Recomendaciones Para Hornear Y
44 FUNCIONAMIENTO Guía de recomendaciones para Guía de ubicación de los estantes para hornear hornear y rostizar Posición del estante Los resultados del horneado serán mejores si las bandejas Alimento están centradas en el horno lo mejor posible. Si se cocina en Horno Horno varios estantes del horno, colóquelos en la posición que se... -
Page 121: Broil (Asar)
FUNCIONAMIENTO Broil (Asar) Humo Debido al calor intenso que se produce cuando se asa, es La función Asar usa calor intenso proveniente del elemento normal que haya humo durante el proceso de cocción. Este calentador superior para cocinar el limento. Este método de humo es un producto natural resultante del sellado y no cocción es ideal para cortes de carne tiernos, pescados y debería ser motivo de preocupación. -
Page 122: Guía De Recomendaciones Para Asar
46 FUNCIONAMIENTO Guía de recomendaciones para asar El tamaño, peso, espesor, temperatura inicial y su preferencia de cocción afectarán el tiempo de asado. Esta guía se basa en carnes a temperatura de refrigerador. Para obtener mejores resultados al asar, use una bandeja especial para asar. - Page 123 FUNCIONAMIENTO Warm (Calentar) Consejos para asar Filete Esta función mantiene la temperatura del horno a 200 °F. La función Calentar mantiene la comida cocida caliente para servir • Los bistecs y las chuletas siempre se deben dejar reposar hasta tres horas después de terminada la cocción. La función durante cinco minutos antes de cortarlos y comerlos.
- Page 124 48 FUNCIONAMIENTO Proof (Leudar) Sonda Esta característica mantiene el horno tibio para leudar La sonda mide con precisión la temperatura interna de las productos con levadura antes de hornearlos. carnes, aves y cazuelas. No debe utilizarse durante la cocción a la parrilla, limpieza automática, calentamiento o prueba. Configuración de la función Leudar Siempre desenchufe y extraiga la sonda del horno cuando retire los alimentos.
- Page 125 FUNCIONAMIENTO Uso de la sonda Cambiar Cook Settings Inserte la sonda en el alimento. Toque Edit en la pantalla para abrir la pantalla Cook Settings. Conecte la sonda al conector del horno y aparecerá Cambie los ajustes como desee. "Probe is connected" en la pantalla y el icono sonda aparecerá...
- Page 126 50 FUNCIONAMIENTO My Recipe Edición de My Recipe • La función Edit no puede añadir ni quitar fases de cocción a Para menús de cocción de uso frecuente, puede combinar una receta. Sólo se puede cambiar la temperatura del horno, hasta tres temperaturas y modos de cocción diferentes en una la temperatura de la sonda y el tiempo de cocción.
- Page 127 Settings, luego seleccione On. Siga las instrucciones del menú emergente que se abre en la pantalla. Siga las instrucciones de la aplicación de teléfono inteligente SIGNATURE KITCHEN SUITE para utilizar la función de inicio remoto. NOtA • La función de Inicio remoto se encuentra desconectada en las siguientes situaciones: −...
- Page 128 KItCHEN SUItE para revisar la frecuencia de su red. • SIGNATURE KITCHEN SUITE no es responsable La aplicación SIGNATURE KITCHEN SUITE le permite por ningún problema de conexión en red, falla, mal comunicarse con el electrodoméstico usando un teléfono...
- Page 129 En caso de experimentar algún problema con el aparato, el mismo tiene la capacidad de transmitir datos a través de su teléfono al Centro de información del cliente de SIGNATURE SpeedClean™ KITCHEN SUITE. Los modelos equipados con NFC o Wi- Le permite establecer alertas de SpeedClean™, leer la guía...
- Page 130 SIGNATURE KITCHEN SUITE. Además del código fuente, podrá descargar las condiciones Siga las instrucciones en la aplicación SIGNATURE KITCHEN de las licencias, exención de responsabilidad de la garantía y SUITE para realizar un diagnóstico inteligente usando su avisos de copyright.
- Page 131 FUNCIONES INTELIGENTES Aviso de la FCC declaración sobre exposición a la radiación de RF de la FCC El siguiente aviso cubre el módulo transmisor contenido en este producto. Este equipo cumple con los límites de exposición a la radiación Este equipo fue probado y se determinó que cumple con de la FCC establecidos para entornos no controlados.
- Page 132 56 MANTENIMIENTO MANtENIMIENtO Limpieza de las tapas/los cabezales del quemador NOtA Para lograr que la llama salga pareja y libremente, las aberturas • Dependiendo del modelo, su estufa puede contener en los cabezales de los quemadores deben estar iempre diferentes módulos de cocina que requieran diferentes limpias.
- Page 133 MANTENIMIENTO Rejillas de los quemadores Limpieza de la superficie de la placa de cocción Las rejillas de wok convertibles se deben utilizar en la parte delantera, y las rejillas restantes en la parte posterior. PRECAUCIÓN Rejilla izquierda Rejilla centro Rejilla derecha •...
- Page 134 58 MANTENIMIENTO Plancha Limpieza de la plancha Raspe los restos de alimentos grandes con una Limpie la plancha con agua caliente y jabón líquido para espátula de silicona o de madera resistente al calor platos. inmediatamente después de cocinar. No utilice utensilios Para limpiar la suciedad abundante, remoje la plancha y luego de metal sobre la plancha.
- Page 135 MANTENIMIENTO Exterior Asadera y parrilla Moldura pintada y decorativa Para limpieza general, utilice un paño con agua caliente Parrilla Asadera jabonosa. Para suciedad más difícil y grasa acumulada, • No almacene la asadera y la parrilla sucias en la estufa. aplique un detergente líquido directamente sobre la suciedad.
- Page 136 60 MANTENIMIENTO Panel frontal y mandos Puerta del horno • Use agua jabonosa para limpiar bien la puerta del horno. Lo mejor es limpiar el panel después de cada uso de la estufa. Enjuague bien. No sumerja la puerta en agua. Para limpiarlo, use un paño húmedo y agua jabonosa suave •...
- Page 137 En comparación con el proceso más intenso de Autolimpieza, el horno SIGNATURE KITCHEN SUITE'S le brinda la opción de limpiar con MENOS CALOR, en MENOS TIEMPO y, prácticamente, SIN HUMO NI VAPORES.
- Page 138 62 MANTENIMIENTO Guía de instrucciones de Se emitirá un tono al final del ciclo de 10 minutos. Toque End of Cleaning para borrar la pantalla y finalizar el SpeedClean™ tono. Quite los estantes y los accesorios del horno. Después del ciclo de limpieza y durante la limpieza a mano, se debe mantener suficiente agua en el fondo del Raspe y retire los residuos quemados con un raspador horno para sumergir completamente todos la suciedad.
- Page 139 MANTENIMIENTO Self Clean (Autolimpieza) Consejos de limpieza • Deje que el horno se enfríe a temperatura ambiente antes El ciclo Autolimpieza usa temperaturas sumamente altas de usar el ciclo SpeedClean™. para limpiar la cavidad del horno. Cuando se ejecute el ciclo •...
- Page 140 64 MANTENIMIENTO Ajuste de Self Clean PRECAUCIÓN La función Self Clean tiene tiempos de ciclo de 2, 3 o 4 horas. • No deje a niños pequeños sin supervisión cerca del electrodoméstico. Durante el ciclo Autolimpieza, el • Si el ciclo Self Clean se ejecuta en el horno, no se puede exterior de la cocina puede estar muy caliente al tacto.
- Page 141 MANTENIMIENTO ventilación de aire del horno durante el ciclo de Autolimpieza • El ciclo Autolimpieza usa temperaturas sumamente altas Las aberturas de aire están ubicadas en la parte posterior de la para limpiar la cavidad del horno. Cuando se ejecute el ciclo placa de cocción, en las partes superior e inferior de la puerta Autolimpieza, es posible que sienta humo u olor.
- Page 142 66 MANTENIMIENTO Remoción y reemplazo de la Colocación de la puerta puerta removible del horno Tome firmemente ambos lados de la puerta desde la parte superior. PRECAUCIÓN Con la puerta en el mismo ángulo que la posición de remoción, apoye la hendidura de los brazos de las •...
- Page 143 14" cuando use una rejilla para wok provista por rendimiento del horno). SIGNATURE KITCHEN SUITE. ¿Puedo usar papel de aluminio en los estantes? ¿Por qué los elementos calentadores parecen encenderse No cubra los estantes con papel de aluminio.
- Page 144 68 SOLUCIÓN DE PROBLEMAS Mi cocina todavía está sucia después de ejecutar el ciclo ¿Es seguro que el ventilador de convección, el quemador SpeedClean™. ¿Qué más debo hacer? para asar o el elemento calentador se mojen durante la función SpeedClean™? El ciclo SpeedClean™...
- Page 145 SOLUCIÓN DE PROBLEMAS Antes de llamar al servicio técnico Antes de llamar para solicitar servicio, revise esta lista. Puede ahorrarle tiempo y gastos. La lista incluye sucesos comunes que no son consecuencia de problemas de fabricación ni de los materiales de este electrodoméstico. Síntomas Causas/soluciones posibles •...
- Page 146 70 SOLUCIÓN DE PROBLEMAS Síntomas Causas/soluciones posibles La luz del horno no • Este horno utiliza iluminación LED que debe ser reparada o reemplazada por un técnico funciona. autorizado. • El control no está bien configurado. Siga las instrucciones para el ajuste de los controles del horno.
- Page 147 SOLUCIÓN DE PROBLEMAS Síntomas Causas/soluciones posibles • El ventilador de convección se puede encender y apagar automáticamente. - Es normal. Ruido del ventilador. • Los ventiladores existentes para el enfriamiento de la estufa se activan y desactivan de acuerdo con la temperatura de la misma. - Esto es normal.
- Page 148 72 SOLUCIÓN DE PROBLEMAS Síntomas Causas/soluciones posibles • La contraseña de la red Wi-Fi fue ingresada de forma incorrecta. - Borre su red Wi-Fi doméstica e inicie el proceso de registro de nuevo. • Los datos móviles de su teléfono inteligente están activados. - Desactive los datos móviles en su teléfono inteligente antes de registrar el dispositivo.
- Page 149 GARANtÍA (EE. UU.) Si la cocina a gas SIGNATURE KITCHEN SUITE fallara debido a defectos de materiales o de fabricación en el uso doméstico normal, durante el período de garantía que se establece a continuación, SIGNATURE KITCHEN SUITE tendrá la opción de reparar o reemplazar el producto.
- Page 150 • La extracción y nueva instalación del producto si está instalado en una ubicación inaccesible o si no está instalado de acuerdo con las instrucciones de instalación publicadas, incluyendo los manuales de instalación y del propietario de SIGNATURE KITCHEN SUITE.
- Page 151 GARANTÍA Problema Causa Prevención • La tapa del quemador 1. Rascar • No utilice lana de acero o está apagada o ha limpiadores abrasivos para 2. Uso de limpiadores detergentes o abrasivos cambiado de color limpiar. Tapa del quemador 15 k •...
- Page 152 SIGNATURE KITCHEN SUITE al número de abajo. Para asistencia o servicio, llame al 1-855-790-6655. Si necesita más ayuda, puede escribir a SIGNATURE KITCHEN SUITE con cualquier pregunta o duda a la siguiente dirección: SIGNATURE KITCHEN SUITE, 201 James Record Road, Huntsville, Alabama 35813...
- Page 153 MEMO MEMO...
- Page 154 78 MEMO MEMO...
- Page 155 MEMO MEMO...
- Page 156 Customer Information Center For inquiries or comments, call: 1-855-790-6655 USA Printed in Korea...
Need help?
Do you have a question about the SKSGR480GS and is the answer not in the manual?
Questions and answers