Advertisement
Available languages
Available languages
Quick Links
Advertisement

Related Manuals for MAXNOMIC CASUAL-SPORT

Summary of Contents for MAXNOMIC CASUAL-SPORT
- Page 1 CASUAL-SPORT MONTAGE-ANLEITUNG / ASSEMBLY INSTRUCTIONS...
-
Page 2: Before We Begin
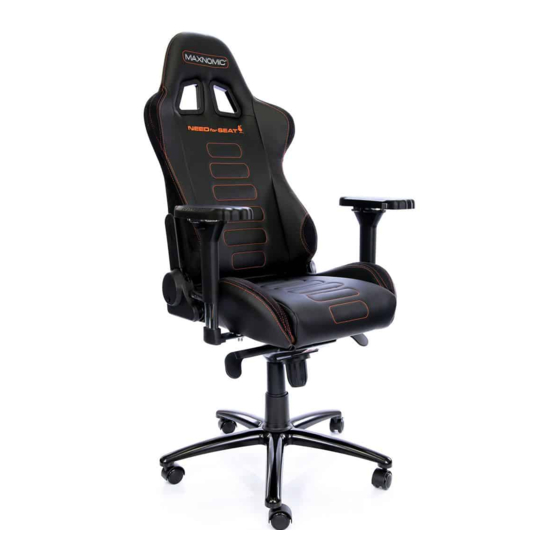
The chair shown in the photos might be a different model, however, t he assembly is t he same f or all You have select ed a high-qualit y product of t he CASUAL-SPORT cat egory. and we wish you many years of sat isf act ion. - Page 3 Neben der Sitzfläche und Rückenlehne ist das Dein Zubehör für den Aufbau: Hinweis zur Verwendung der „SMALL“ Gasdruckfeder Lieber Kunde, wir möcht en Dich darauf hinweisen, dass die „ SMALL“ Gasdruckf eder einen Hub von nur 5cm hat . Auf grund der Größe der SMALL Gasdruckf eder ist die Mont age der Teleskopabdeckung nicht möglich und auch nicht erf orderlich.
- Page 4 Bevor Du den St uhl aus dem Kart on ent nimmst , bringe Ent nehme alle Teile aus dem Kart on und nut ze die Schaumstoff-Platten als Unterlage bei zunächst die Armlehnen in die höchst e Posit ion. empfindlichen Böden. Dies erleicht ert die Ent nahme der weit eren Teile.
- Page 5 Set ze nun die Rückenlehne vorsicht ig zwischen Auf beiden Seit en alle 4 Schrauben die beiden Gelenk-Laschen der Sitzfläche ein. per Hand eindrehen. Dann die Rückenlehne ausricht en. Alle 4 Schrauben auf beiden Seit en f est ziehen. Set ze die Seit enabdeckungen mit der eingest eckt en NICHT ZU FEST ANZIEHEN! Schraube auf und schraube die Kappe mit dem Universal - Die Abdeckungen dienen nur der Opt ik...
- Page 6 Bringe nun die Rückenlehne mit Hilf e des seit lichen Drehe den St uhl, so dass die Unt erseit e der Sitzfläche nach oben zeigt. Hebels in die hint ere Posit ion. Set ze nun die Wippmechanik wie gezeigt auf die Schraube die mit gelief ert en M8 Schrauben Gewindeöffnungen.
- Page 7 Stecke die beiden Kunststoffhebel auf die Achsen der Wenn beide Hebel in der richt igen Posit ion st ehen, Wippmechanik auf. Die flachen Enden sollten dabei dann die Hebel f est auf die Achsen schieben. auf beiden Seiten zur Vorderkante der Sitzfläche zeigen. Bei der „...
- Page 8 Fette die Öffnung des Fusskreuzes ein. Nimm Dir nun das Fusskreuz und die Rollen. St ecke das Fusskreuz auf die Gasdruckf eder Fet t e die St eckbolzen der Rollen ein. auf und drücke es möglichst f est an. Das erleicht ert das Einset zen. Hebe nun den St uhl vom Boden auf .
- Page 9 Wir wünschen Dir viel Freude mit Deinem Gasdruckf eder und Fusskreuz f est verbinden. neuen MAXNOMIC ® St uhl! In unserer CASUAL-SPORT Kategorie haben wir 2 verschiedene Lordosenkissen: Für Modelle mit Für Modelle ohne Gurt durchf ührungen Gurt durchf ührung –...
- Page 10 Wippmechanik Bedienknopf drücken: vor/ zurück und recht s/ links Bedienknopf drücken: seit lich schieben PFLEGEHINWEISE Set ze Deinen MAXNOMIC ® möglichst NICHT direkt em Sonnenlicht z. B. am Fenst er aus, da das Mat erial dadurch schneller ausbleicht oder brüchig werden kann.
- Page 11 In addition to the seat and backrest, this is your accessory for the assembly: Notice for the use of the “ SMALL“ gas spring Dear Cust omer, we would like t o inf orm you t hat t he “ small“ gas spring has a shaf t f rom only 5cm.
- Page 12 Bef ore you t ake t he chair of t he box, pull t he armrest Unpack t he cont ent s of t he box. int o t heir highest posit ion. This f acilit at es Tip: Use t he f oam packaging t o prot ect any damageable floor.
- Page 13 Place t he backrest caref ully bet ween t he t wo Screw back t he 4 M8 screws by hand loosely. bracket s of t he seat . Then align t he backrest . Tight en all t he 4 screws alt ernat ely. NOT OVERTIGHTEN ! ! ! Fit t he side cover wit h t he pre-mount ed screw t o t he The cover has only an opt ical f unct ion and could be...
- Page 14 Bring t he backrest , using t he side lever, Turn t he chair over so t hat t he bot t om of t he int o it ‘ s backmost posit ion. seat is showing upwards. Now place t he t ilt mechanism ont o t he pref abricat ed screw holes as shown.
- Page 15 Place one plast ic lever on each axle of t he t ilt mechanism. When bot h levers are in t he right posit ion push The rounded edge of t he levers should point t o t he t hem t ight ly on t he axles. edge of t he seat .
- Page 16 Take t he base and t he cast ers. Grease t he opening of t he base. Grease t he cast ers enabling t hem t o Push the base firmly on the gas spring. be easier t o assemble. Now pick the chair up from the floor using one hand on Insert t he wheels, one by one int o t he base.
- Page 17 Finished! We wish you a lot of pleasure wit h your base will fit tighter together. new MAXNOMIC chair. ® Our CASUAL-SPORT categorie includes 2 different lumbar cushions: For t ypes wit h recess f or For t ypes wit hout recess f or mount ing st raps...
-
Page 18: Cleaning Instructions
/ right Press but t on: slide sideways CLEANING INSTRUCTIONS DO NOT expose your MAXNOMIC ® t o direct sunlight e. g. near a window, due t o t his t he mat erial could bleach and become brit t le. - Page 19 Die häufigsten The most asked Fragen questions beim Aufbau eines MAXNOMIC during the assembly of a MAXNOMIC ® ® WARUM HABE ICH KEINE TELESKOPABDECKUNG ERHALTEN? WHY DIDN‘ T I RECEIVE A TELESCOPIC COVER? Wenn Du ei ne SMALL Gasdr uckf eder zu Dei nem St uhl best el l t If you have or der ed a “...
- Page 20 ® FÜR SCHÄDEN, DIE DURCH ÜBERLASTUNG UND / ODER NICHTBEACHTUNG DIESER SICHERHEITSHINWEISE ENTSTEHEN, ÜBERNEHMEN WIR KEINE HAFTUNG / GEWÄHRLEISTUNG! IT IS ONLY ALLOWED TO USE OUR ORIGINAL MAXNOMIC CASTERS! ® WE DO NOT ASSUME ANY WARRANTY AND LIABILITY FOR DAMAGE CAUSED BY FALSE USAGE OF THE CHAIR OR FOR NOT OBEYING THE SAFETY INSTRUCTIONS!.
Need help?
Do you have a question about the CASUAL-SPORT and is the answer not in the manual?
Questions and answers