Advertisement
- 1 Parts
- 2 Before using for the first time
- 3 Cleaning your steam generator before use
- 4 Filling your steam generator
- 5 Filling during use
- 6 Steam ironing
- 7 Ironing without steam
- 8 Vertical steam ironing
- 9 Auto-off function
- 10 Important
- 11 Care and cleaning
- 12 Self-cleaning
- 13 Troubleshooting
- 14 After sales service and replacement parts
- 15 Important Safety Information
- 16 Electrical safety
- 17 Documents / Resources
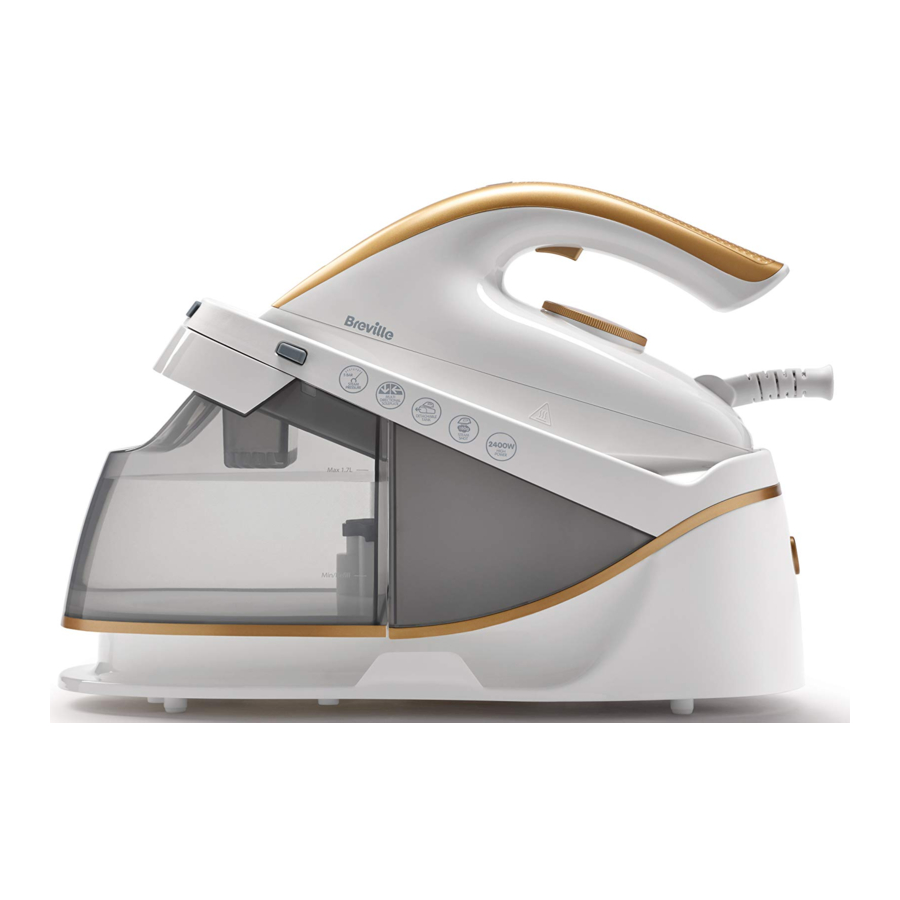
Parts

- Clean indicator light / Self-clean button
- Temperature indicator light
- Iron handset
- Steam trigger
- Temperature control dial
- Lock button
- Unlock button
- Removable water tank
- Power switch (I/O)
- Base station
- Steam cord
- Power cord
- Cleaning tray
Before using for the first time

Remove all packaging including any soleplate protection before operating your steam generator.
- Wipe over the soleplate with a soft cloth.
- Position the iron handset
![]() on the base station
on the base station ![]() , on your ironing board (if it is large enough) or on a heat resistant and secure surface at the same height as your ironing board.
, on your ironing board (if it is large enough) or on a heat resistant and secure surface at the same height as your ironing board. - Before connecting your steam generator to the mains supply, make sure your supply voltage is the same as the one indicated on your steam generator.
- When you first use your steam generator, there may be a slight odour and it may smoke slightly for the first few minutes of operation. This is quite normal and will disappear.
 on the base station
  , on your ironing board (if it is large enough) or on a heat resistant and secure surface at the same height as
On first use the water system will need priming before the handset will create steam. It is necessary to operate the steam boost function a few times before the unit will be ready to create steam. To operate the steam boost function, double-click the steam trigger  quickly a number of times until steam is produced.
Cleaning your steam generator before use
Follow these simple steps to remove any impurities or residues inside your steam generator that may be left over from the manufacturing process.
- Follow the instructions under filling your steam generator and fill the water tank
![]() as described.
as described. - Empty the water tank to rinse out any foreign particles then refill it.
- Follow the instructions under steam ironing. Set the temperature to the MAX setting
![]() .
. - Iron an old piece of cloth (cotton or towels is ideal) for a few minutes. While ironing, press the steam trigger
![]() 4 or 5 times. Upon first usage the pump will need priming and you may need to hold the steam trigger to pull water through r the system and create steam.
4 or 5 times. Upon first usage the pump will need priming and you may need to hold the steam trigger to pull water through r the system and create steam. - Any impurities will be flushed from your iron by the steam and absorbed by the cloth. Your iron is now ready for use.
Filling your steam generator
- Remove the water tank
![]() by holding the handle and pulling the tank forwards from the base station
by holding the handle and pulling the tank forwards from the base station ![]() .
. - Slide the water tank out.
- Fill the water tank with cold tap water to the MAX mark.
- Slide the water tank back into the base unit until it latches securely into place. You should hear an audible click.
Filling during use
You can fill your steam generator during use. Simply remove the water tank  as described above and add water as required. Do not fill past the MAX indicator mark on i as the tank.
Your steam generator will beep twice and the power indicator light  will flash to let you know that the water tank needs filling.
Steam ironing
The smart features of the iron prevent you from creating steam in temperature settings below  . This is to ensure that delicate fabrics are protected from ironing with steam.
It is recommended that for harder to iron fabrics such as cotton and linen, steam should be used when ironing.
When ironing delicate fabrics like nylons, acrylics and synthetics. Steam should never be used.
- Fill the water tank
![]() with water.
with water. - Plug your steam generator into the mains supply and press the on (I) /off (O) button
![]() to switch your steam generator on.
to switch your steam generator on. - Rotate the temperature control dial
![]() to set the pointer to between the
to set the pointer to between the ![]() setting and the maximum heat (MAX) setting.
setting and the maximum heat (MAX) setting. - The temperature indicator light
![]() will pulse as your steam generator heats up. When the temperature indicator light turns solid your steam generator is ready to use.
will pulse as your steam generator heats up. When the temperature indicator light turns solid your steam generator is ready to use. - With the soleplate in contact with the garment, press the steam trigger
![]() for a couple of seconds. It is not necessary to hold the trigger down continuously as steam will still be emitted from the soleplate for a short time after the trigger has been released. If more steam is required, press the steam trigger again.
for a couple of seconds. It is not necessary to hold the trigger down continuously as steam will still be emitted from the soleplate for a short time after the trigger has been released. If more steam is required, press the steam trigger again. - To operate the steam boost function, double-click the steam trigger quickly. The iron will generate a highly concentrated steam boost for a short period of time.
Always release the steam trigger and allow any residual steam to be released before replacing the iron on its stand.
Ironing without steam
If you intend to dry-iron fabrics, there is no need to fill the water tank. However, if water is already in the water tank, you do not need to empty it.
- Rotate the temperature control dial
![]() to set the pointer to the desired heat setting.
to set the pointer to the desired heat setting. - When the temperature indicator light
![]() turns solid your steam generator is ready to use.
turns solid your steam generator is ready to use. - Iron your laundry without pressing the steam trigger
![]() .
.
Vertical steam ironing
Vertical steam ironing is especially useful for ironing items such as curtains while they are hanging, or jackets, suits and coats.
Select a temperature setting higher than  . Once the temperature indicator light
  turns solid, your product is ready to use. Hold the iron in a vertical position and press the steam trigger as required.
Hot steam is emitted from the soleplate. Do not iron/steam a garment whilst wearing it. Do not operate steam in the direction of yourself or anybody else.
Auto-off function
The iron has an auto-off safety function that will operate when your appliance has not been used for 5 mins. The unit will enter a sleep mode and all the lights will turn off. To restart simply pull the steam trigger . The unit will restart and may need a short time to reheat to the desired temperature, which will be indicated by the pulsing temperature indicator light .
Important
Your steam generator takes time to heat up and cool down. If you change the temperature setting on your steam generator, you must give it time to adjust to the new setting.
This is especially important when you change from a high setting to a lower one. It takes your steam generator longer to cool down than it does to heat up and this is the reason we recommend that you begin ironing at lower temperatures.
For example, you have been ironing using the  setting and wish to change to the setting:
- Turn the temperature control dial
![]() to set the pointer to the
to set the pointer to the ![]() setting. Initially, the temperature indicator light
setting. Initially, the temperature indicator light ![]() may pulse while the unit adjust to the new temperature.
may pulse while the unit adjust to the new temperature. - Wait until the temperature indicator light comes on solidly again. Your steam generator has now cooled to the correct temperature.
Care and cleaning
Do not use harsh abrasives, chemical cleaners or solvents to clean the exterior of your iron.
Allow your iron to completely cool down and wipe the soleplate with a soft damp cloth. If polyester has burnt to the soleplate, iron a damp cotton cloth while your iron is still hot. Wipe over the rest of your iron with a soft damp cloth then wipe dry. Do not immerse the appliance or power cord or plug in water or any other liquid.
Self-cleaning
 Only activate the self-clean when you want to activate the self-cleaning system. Never activate the self-clean function when ironing.
The self-clean function removes scale and impurities. The steam generator has an intelligent reminder cleaning mode which activates after continuous steam ironing over a total of 25 hours. If you are in a hard water area you can perform the cleaning cycle sooner than the allocated 25 hours by following the steps below.
The cleaning indicator light  will illuminate to remind users to clean the machine.
- To activate the self-clean function, adjust the temperature control knob
![]() to the Max setting. Press and hold the self-clean button
to the Max setting. Press and hold the self-clean button ![]() for 3 seconds. The clean indicator light will flash. Place the iron handset
for 3 seconds. The clean indicator light will flash. Place the iron handset ![]() on the cleaning tray
on the cleaning tray ![]() and pull the steam trigger
and pull the steam trigger ![]() once then remove hands from the handset, this will initiate the cleaning function.
once then remove hands from the handset, this will initiate the cleaning function. - Hot water and steam will be ejected from the holes in the soleplate along with any impurities. During the cleaning process there is no need to hold the product.
- The cleaning cycle takes approximately 1 minute. When the clean indicator light stops flashing, the cleaning cycle is complete, and you can switch off your unit and store when cooled.
- To cancel the self-clean function, press and hold the self-clean button for 3 seconds. The clean indicator light will stop flashing.
 and
and
Do not attempt to pick up the handset while the clean indicator light is flashing as hot water and steam may be ejected. Only remove from the cleaning tray once the clean indicator light has stopped flashing and you have switched off the power. Always use the cleaning tray provided and do not leave unattended during the clean cycle.
Troubleshooting
| Issue | Root cause | Possible solution |
| The iron does not produce steam. | Water tank level is too low. Your steam generator will beep twice, and the power indicator light will flash to let you know that the water tank needs filling. | Fill water tank. |
| Water tank is not fully inserted to the base station. Check if power light is flashing. | Remove and re-insert the water tank until an audible click is heard. | |
| If it is on first use the unit may have not been primed. | Operate the steam boost a few times by double-clicking the steam trigger in quick succession. | |
| The unit is still heating up. The steam will only operate when the temperature indicator light is solid. Check if light is flashing. | Wait until the temperature indicator light stops flashing and turns to solid. | |
| Brown particles are emitted from the soleplate | The handset needs to be de-scaled. | Operate the self-clean process. Follow instructions provided in "Self-cleaning" section. |
| No display lights are showing. | Steam generator has not used steam function for 5 minutes and entered auto-off mode. | Pull the steam trigger. Unit should come out of auto-off mode. You may need to wait a short time for unit to heat up before it can produce steam. When the temperature indicator light turns solid the unit is ready for use. |
For further troubleshooting and FAQs visit www.breville.co.uk/faqs
After sales service and replacement parts
In the case the appliance does not operate but is under warranty, return the product to the place it was purchased for a replacement. Please be aware that a valid form of proof of purchase will be required. For additional support, please contact our Consumer Service Department at United Kingdom: 0800 028 7154 | Spain: 0900 81 65 10 | France: 0805 542 055. For all other countries, please call +44 800 028 7154. International rates may apply. Alternatively, e-mail: BrevilleEurope@newellco.com.
Important Safety Information
READ CAREFULLY AND KEEP FOR FUTURE REFERENCE
This appliance can be used by children aged 8 years and above and by persons with reduced physical, sensory or mental capabilities or lack of experience and knowledge if they have been given supervision or instruction concerning use of the appliance in a safe way and understand the hazards involved. Children shall not play with the appliance. Cleaning and user maintenance shall not be made by children without supervision.
Keep the appliance and its cord out of the reach of children less than 8 years old when it is switched on or cooling down.
Never use this appliance for anything other than its intended use. This appliance is for household use only. Do not use this appliance outdoors.
If the supply cord is damaged, it must be replaced by the manufacturer, its service agent or similarly qualified persons in order to avoid a hazard.
The appliance must not be left unattended when it is connected to the mains supply.
The appliance must be unplugged from the mains supply socket before filling the water tank with water.
Always use the appliance on a stable, secure, dry and level surface. When placing the appliance on its stand, ensure that the surface on which the stand is placed is stable.
Do not use the appliance if it has been dropped, if there are any visible signs of damage or if it is leaking.
Always ensure that hands are dry before handling the plug or switching on the appliance.
Do not touch the metal parts of the appliance during use as they may become very hot.
This appliance must not be placed on or near any potentially hot surfaces (such as a gas or electric hob).
Always allow the appliance to cool before cleaning or storing.
Never immerse any part of the appliance or power cord and plug in water or any other liquid.
Never let the power cord hang over the edge of a worktop, touch hot surfaces or become knotted, trapped or pinched.
Always place the iron on the base station when not in use.
Electrical safety
This appliance must be earthed.
This appliance is fitted with either a moulded or rewirable BS1363, 13 amp plug. The fuse should be ASTA approved to BS1362. If the fuse in a moulded plug needs to be changed, the fuse cover must be refitted. The appliance must not be used without the fuse cover fitted.
If the plug is unsuitable, it should be dismantled and removed from the supply cord and an appropriate plug fitted as detailed below. If you remove the plug it must not be connected to a 13 amp socket and the plug must be disposed of immediately.

If any other plug is used, a 13 amp fuse must be fitted either in the plug or adaptor or at the distributor board.

Documents / Resources
References
Download manual
Here you can download full pdf version of manual, it may contain additional safety instructions, warranty information, FCC rules, etc.
Download Breville PressXpress VIN410X - 2400W Steam Generator Manual
Advertisement


Need help?
Do you have a question about the PressXpress VIN410X and is the answer not in the manual?
Questions and answers