Advertisement
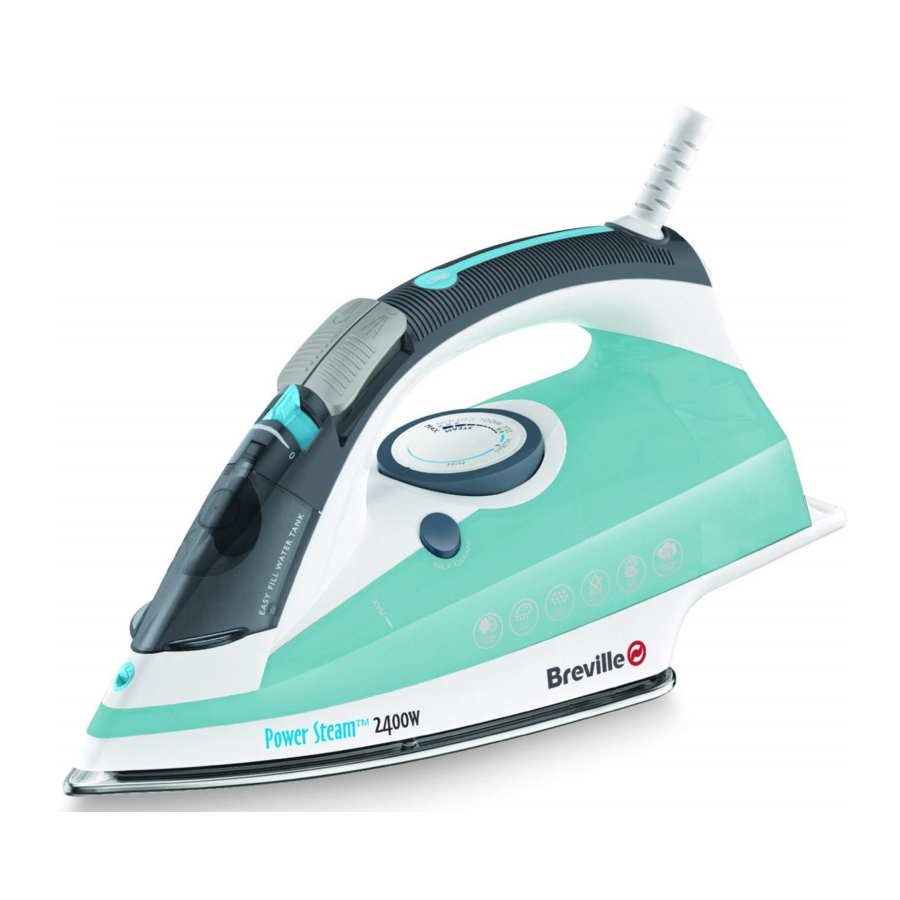
Features

Due to our policy of continuous improvement, the actual product may differ slightly from the one illustrated in these instructions.
- Water tank inlet cover
- Steam control
- Shot of steam button
- Spray button
- Temperature indicator light
- Temperature selector
- Power indicator light
- Flexible cord protector
- Heel rest
- Cord wrap
- Stainless steel soleplate
- Self-clean button
- Pointer
- Water level maximum indicator
- Water tank
- Spray nozzle
Before First Use
 Remove all packaging including any soleplate protection before using your iron.
General
Wipe over the soleplate with a cloth moistened with methylated spirit. Wipe off the methylated spirit with a damp cloth then dry the soleplate thoroughly.
Before connecting your iron to the mains supply, make sure your supply voltage is the same as the one indicated on your iron.
When you first use your iron, there may be a slight odour and it may smoke slightly for the first few minutes of operation. This is quite normal and will disappear.
Cleaning your iron before use
Follow these simple steps to remove any impurities or residues inside your steam iron that may be left over from the manufacturing process.
- Follow the instructions under filling your iron and fill the water tank as described. Empty the water tank to rinse out any foreign particles then refill it.
- Follow the instructions under steam ironing. Set the temperature to the MAX setting and the steam control to the high steam setting.
- Iron an old piece of cloth (cotton or towelling is ideal) for a few minutes. While ironing, press the steam button 4 or 5 times.
- Any impurities will be flushed from your iron by the steam and absorbed by the cloth.
- Your iron is now ready for use.
Filling Your Iron
Never add fabric conditioner, starches or any other chemicals to the water in your iron.
- Ensure your iron is switched off and unplugged from the mains supply socket.
- Set the steam control to the no steam position (0).
- Open the water tank inlet cover.
- Fill the water tank with ordinary tap water. To avoid air locks, tilt your iron slightly while filling it.
- Don't fill the iron above the water level indicator MAX marking. Check the water level by standing the iron on its heel.
- When the iron is filled close the water tank inlet cover.
Using Your Iron
We recommend that you:
- Start by ironing those items of laundry that require the lowest temperature (e.g. synthetics). Finish by ironing fabrics which respond best to higher temperatures and steam-such as cotton and linen.
- If you iron a fabric made of a blend of fibres set the temperature of your iron to the most delicate fibre.
- Never use the burst of steam button on silks or synthetics.
- When using starch, it should be sprayed onto the reverse side of the fabric and the soleplate cleaned more frequently.
- Do not iron over sharp or hard objects such as buttons, studs or zippers as they will scratch the soleplate of your iron.
Important
Your iron takes time to heat up and cool down. If you change the temperature setting on your iron, you must give it time to adjust to the new setting.
This is especially important when you change from a high setting to a lower one. It takes your iron longer to cool down than it does to heat up and this is the reason we recommend that you begin ironing at lower temperatures.
If you do need to reduce the temperature of your iron, wait until the temperature indicator light goes out and then comes on again before ironing. This will ensure that your iron has reached the lower temperature and is not too hot for the fabric being ironed.
For example, you have been ironing using the  setting and want to change to the
  setting:
- Move the temperature control dial to the
![]() setting. Initially, the temperature indicator light will be lit because your iron is still at a higher temperature.
setting. Initially, the temperature indicator light will be lit because your iron is still at a higher temperature. - Wait until the temperature indicator light goes out and then comes on again. Your iron has now cooled to the correct temperature.
 setting. Initially, the temperature indicator light will be lit because your iron is still at a higher temperature.
Ironing without steam
If you intend to dry-iron fabrics there is no need to fill the water tank. However, if water is already in the water tank, you don't need to empty it.
- Set the steam control to the no steam position (0).
- Plug your iron into the mains supply and switch on.
- Rotate the temperature control dial until the desired setting is aligned with the dial pointer.
- When the temperature indicator light comes on, your iron is ready to use.
Steam ironing
During steam ironing, if you do not allow your iron to reach the selected temperature water may drip from the soleplate.
It is recommended that for harder to iron fabrics such as cotton and linen, steam should be used when ironing.
When ironing cotton and linen, always select the highest temperature. Steam should never be used on delicate fabrics like nylons, acrylics and synthetics.
- Fill your iron with water.
- Plug your iron into the mains supply and switch on.
- Set the temperature control dial to the
![]() setting. The hotter your iron, the more steam is generated.
setting. The hotter your iron, the more steam is generated. - When the temperature indicator light comes on your iron is ready to use. The temperature indicator light will turn on and off during ironing as your iron maintains the correct temperature.
- Adjust the steam control lever to select the desired steam output.
- Move the steam control lever to the high steam (
![]() ) setting to increase the amount of steam, or towards the off (0) setting to decrease the amount of steam.
) setting to increase the amount of steam, or towards the off (0) setting to decrease the amount of steam. - The steam can be shut off at any time by setting the steam control to the off (0) position.
 setting. The hotter your iron, the more steam is generated.
Burst of steam
The temperature control dial must be set within the  and
and  setting. Wait several seconds between each press of the steam button.
Press the shot of steam button whenever you have a stubborn crease that needs extra steam. Steam will burst from the holes in the soleplate of your iron into the fabric.
Vertical steam ironing
Never iron garments when they are being worn.
Your iron can be used for vertical steam ironing curtains, dresses on hangers etc.
- Fill your iron with water.
- Plug your iron into the mains supply and switch on.
- Set the temperature control dial to the
![]() setting. The hotter your iron, the more steam is generated.
setting. The hotter your iron, the more steam is generated. - When the temperature indicator light comes on, your iron is ready to use.
- Hold your iron 15cm (6 inches) from the fabric.
- Press the shot of steam button. The steam will penetrate the fabric removing the creases. To apply more steam press the shot of steam button again. Wait several seconds between each press of the button.
 setting. The hotter your iron, the more steam is generated.
Spraying
The spray function will only operate when there is water in the water tank.
- The water spray can be used to help iron heavy fabrics or difficult areas (collars, pockets, sleeves, creases, etc). It can also be used when ironing delicate fabrics which cannot be steam ironed.
- Simply press the button as required to produce a spray of water. If the spray is being used for the first time, or if the iron has been standing for some time, you may need to press the spray button a few times before it works correctly.
Anti-drip feature
When the temperature of your iron is insufficient to create steam, the supply of water is cut off automatically to avoid any drips from the soleplate.
Anti-scale filter
Your iron is fitted with a permanent anti-scale filter. This filter is fixed and cannot be removed for cleaning.
The filter is designed to reduce the build-up of limescale inside your iron. Limescale occurs during steam ironing due to water hardness.
Water hardness varies from one area to another. The effectiveness of the filter will depend on how 'hard' your water is.
Care and Cleaning
Do not use harsh abrasives, chemical cleaners or solvents to clean the exterior of your iron because they will damage the surface.
Cleaning the soleplate of your Iron
After each use, allow your iron to completely cool down before wiping the soleplate with a soft damp cloth. If polyester has burnt to the soleplate, iron a damp cotton cloth while your iron is still hot. If necessary, allow your iron to completely cool down then wipe over the soleplate with a soft cloth moistened with methylated spirits. Wipe off the methylated spirits with a damp cloth then dry the soleplate.
Self-cleaning
Only press the self-clean button when you want to activate the self cleaning function. Never press the self-clean button when ironing.
The self-clean function removes scale and impurities. Use the self-clean function once every two weeks. If the water in your area is very hard, the self clean function should be used more frequently.
- Ensure your iron is switched off and unplugged from the mains supply socket.
- Set the steam control to the no steam (0) position.
- Fill your iron with water to the MAX level.
- Stand your iron on its heel rest, plug in and switch on at the mains supply.
- Set the temperature control dial to the highest (MAX) setting. Allow your iron to heat up until the temperature indicator light comes on.
- Unplug your iron and hold it over a sink with the soleplate facing downwards.
- Press and hold the self-clean button. Hot water and steam will be ejected from the holes in the soleplate along with any impurities.
- Release the self-clean button after one minute or when the water tank is empty.
- Stand your iron on its heel rest, plug it in to the mains supply socket and switch on. When the temperature indicator light comes on, iron an old piece of cloth to allow any remaining water to escape.
- After use, switch off and unplug your iron from the mains supply and allow it to fully cool. Empty out any remaining water.
Cleaning the steam holes
To remove any build-up in or around the steam holes which may affect steam performance, use a cotton wool tip moistened with methylated spirits. Wipe off the methylated spirits with a damp cloth then dry the soleplate.
Cleaning the exterior of your Iron
To clean the exterior of your iron, wipe it with a soft damp cloth and wipe dry.
Storing
Storing your iron
- Set the steam control to the no steam position (0).
- Switch the mains supply socket off and remove the plug.
- When the soleplate has cooled, empty the remaining water from the tank.
- Always store your iron on its heel rest. Do not store your iron resting on its soleplate, or in the carton.
- Do not wrap the power cord around the soleplate. The cord can be neatly wrapped around the heel of your iron.
Connection to the Mains Supply
This appliance must be earthed.
Plug should be BS1363 approved Fit a 13 Amp Fuse

Ensure that the outer sheath of the cable is firmly held by the clamp
This appliance is fitted with either a moulded or rewirable BS1363, 13 amp plug. The fuse should be rated at 13 amps and be ASTA approved to BS1362.
If the fuse in a moulded plug needs to be changed, the fuse cover must be refitted. The appliance must not be used without the fuse cover fitted.
If the plug is unsuitable, it should be dismantled and removed from the supply cord and an appropriate plug fitted as detailed below. If you remove the plug it must not be connected to a 13 amp socket and the plug must be disposed of immediately.
The wires of the mains lead are coloured in accordance with the following code:
GREEN/YELLOW = EARTH
BLUE = NEUTRAL
BROWN = LIVE
The wire which is coloured GREEN/YELLOW must be connected to the terminal in your plug which is marked with an E or by the earth symbol (![]() ) or coloured GREEN or GREEN /YELLOW.
) or coloured GREEN or GREEN /YELLOW.
The wire which is coloured BLUE must be connected to the terminal in your plug which is marked with the letter N or coloured BLACK.
The wire which is coloured BROWN must be connected to the terminal in your plug which is marked with the letter L or coloured RED.
If any other plug is used, a 13 amp fuse must be fitted either in the plug or adaptor or at the distributor board.
After Sales Service
These appliances are built to the very highest of standards. There are no user serviceable parts. Follow these steps if the unit fails to operate:
- Check the instructions have been followed correctly.
- Check that the fuse has not blown.
- Check that the mains supply is functional.
If the appliance will still not operate, return the appliance to the place it was purchased for a replacement. To return the appliance to the Customer Service Department, follow the steps below:
- Pack it carefully (preferably in the original carton). Ensure the unit is clean.
- Enclose your name and address and quote the model number on all correspondence.
- Give the reason why you are returning it.
- If within the guarantee period, state when and where it was purchased and include proof of purchase (e.g. till receipt).
- Send it to our Customer Service Department at the address below:
Customer Service Department
Jarden Consumer Solutions (Europe) Limited
Middleton Road
Royton
Oldham
OL2 5LN, UK.
Telephone: 0161 621 6900
Fax: 0161 626 0391
e-mail: info@pulse-uk.co.uk
Product Safety
READ CAREFULLY AND KEEP FOR FUTURE REFERENCE
This product can be used by children aged 8 years and above, and persons who require supervision, provided:
- they are familiar with the hazards associated with the product, and,
- they receive instruction by a competent person on how to safely use the product.
Children must not play with the product. Cleaning and user maintenance must not be done by children unless they are supervised.
Keep the appliance and its cord out of reach of children less than 8 years old when it is switched on or cooling down.
The appliance must not be left unattended when it is connected to the mains supply.
The appliance must be unplugged from the mains supply socket before filling the water tank with water.
Always use the appliance on a stable, secure, dry and level surface. When placing the appliance on its stand, ensure that the surface on which the stand is placed is stable.
Do not use the appliance if it has been dropped, if there are any visible signs of damage or if it is leaking.
If the supply cord is damaged, it must be replaced by the manufacturer, its service agent or similarly qualified persons in order to avoid a hazard.
- Never use this appliance for anything other than its intended use. This appliance is for household use only. Do not use this appliance outdoors.
- Always ensure that hands are dry before handling the plug or switching on the appliance.
- Do not touch the metal parts of the appliance during use as they may become very hot.
- This appliance must not be placed on or near any potentially hot surfaces (such as a gas or electric hob).
- Always allow the appliance to cool before cleaning or storing.
- Never immerse any part of the appliance or power cord and plug in water or any other liquid.
- Never let the power cord hang over the edge of a worktop, touch hot surfaces or become knotted, trapped or pinched.
- This appliance produces steam which can cause burns. Handle with care especially when using the vertical steam feature. Never direct steam at persons or animals.
- Ensure the appliance is switched off and unplugged from the supply socket before filling or emptying the water tank, after use and before cleaning.

Documents / ResourcesDownload manual
Here you can download full pdf version of manual, it may contain additional safety instructions, warranty information, FCC rules, etc.
Download Breville Power Steam VIN222 - 2400W Steam Iron Manual
Advertisement


Need help?
Do you have a question about the Power Steam VIN222 and is the answer not in the manual?
Questions and answers