Bosch HCP50652UC, HCP56652UC - Wall Hood 36" Stainless Steel Manual
- Use and care manual (48 pages) ,
- Installation manual (36 pages) ,
- Use and care manual (16 pages)
Advertisement
- 1 Operating Modes
- 2 Touch Control Panel
- 3 Operating the Unit
-
4
Home Connect
- 4.1 Cooktop-Hood Sync
- 4.2 Setting up
- 4.3 What do you need to connect your unit to Home Connect
- 4.4 Installing the Home Connect app
- 4.5 Initial start-up: Connecting your unit to your home network (Wi-Fi)
- 4.6 Connecting your product to another Home Connect account
- 4.7 Software update
- 4.8 Reseting the connection
- 4.9 About Data Protection
- 5 Cleaning and maintenance
- 6 Troubleshooting
- 7 Customer service
- 8 Accessories
- 9 Safety
- 10 Documents / Resources
Operating Modes
You can use this appliance in the air extraction or the recirculation mode.
Exhaust air mode

The air that is drawn in is cleaned by the grease filters and conveyed to the exterior by a pipe system.
Note: Ventilation may not exit through an already operational smoke or exhaust chimney, nor a duct used for ventilating furnace installation areas.
- If the ventilation is intended to pass through a smoke or exhaust that is not in operation, the responsible area heating inspector must give approval.
- If the ventilation passes through an external wall, use a telescope wall sleeve.
Circulating-air mode

The air that is drawn in is cleaned by the grease filters and an activated carbon filter and conveyed back into the kitchen.
Note: To bind odors in circulating-air mode, you must install an activated carbon filter. The different options for operating the appliance in circulating-air mode can be found in the brochure. Alternatively, ask your dealer. The required accessories are available for purchase from specialist retailers, from customer service or from the Online Shop.
The accessory numbers can be found at the end of the instructions for use.
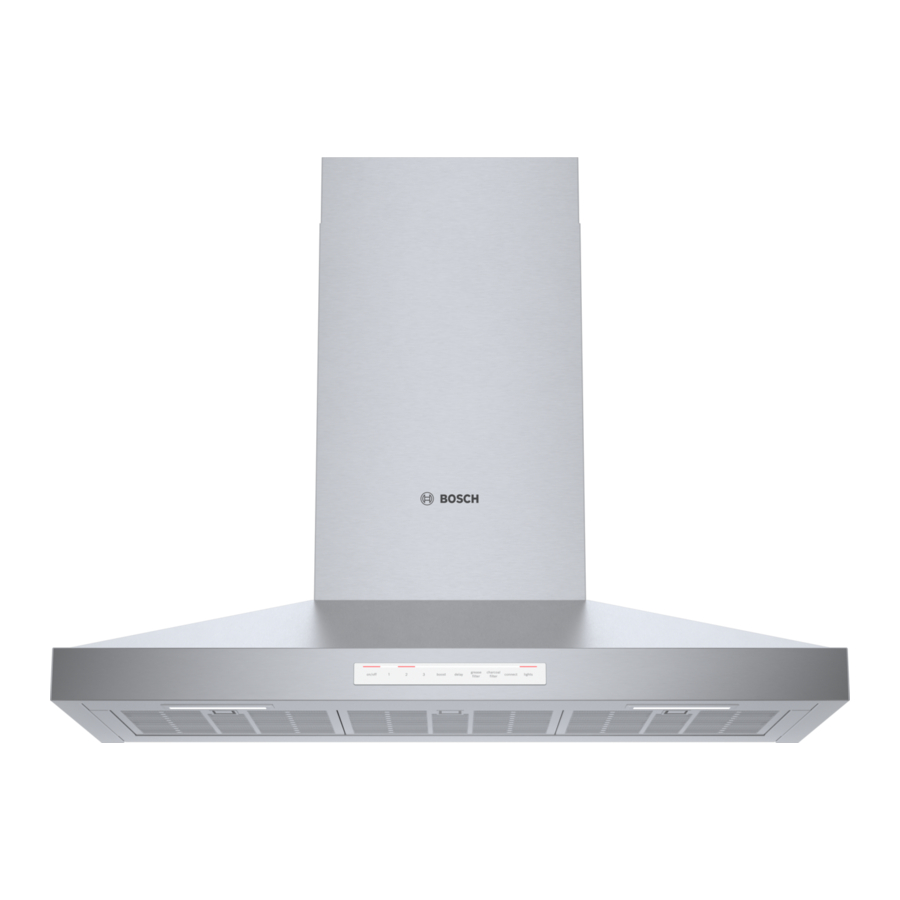
Touch Control Panel
NOTE: Not all features referred to in this manual applies to all models.

| OFF Touch ON/OFF once to turn the blower off and reset the control. |
| Fan Speed
boost – High |
| Delay Shut Off If the blower is off when the DELAY button is pressed, the blower will turn on to speed 3 setting for 10 minutes. Once time has elapsed, the blower will automatically turn off. If the blower is on when the DELAY button is pressed, the blower runs for 10 minutes from the time the DELAY button was pressed at the current speed then turns off. During the 10 minute timed period, the DELAY button is illuminated. To interrupt a timed period, press one of the fan speed buttons or "on/off" button to turn off. Ability to choose a different time period and speed than the default setting is possible through the Home Connect TM app in the settings menu. |
| Clean Grease Filter Reminder After 40 hours of operation, the GREASE FILTER button will illuminate indicating that the filters need to be cleaned. When this indicator illuminates clean the filters. After cleaning, press and hold the GREASE FILTER button for 3 seconds until it beeps to reset the 40-hour period and to turn the reminder off. Receive clean filter reminder notification through the Home Connect app when activated in Settings section, as well as see filter saturation status. |
| Charcoal Filter Replacement Reminder After 120 hours of operation, the CHARCOAL FILTER button will illuminate indicating that the filters need to be changed. When this indicator illuminates change the filters. After changing, press and hold the CHARCOAL FILTER button for 3 seconds until it beeps to reset the 120-hour period and to turn the reminder off. Receive clean filter reminder notification through the Home Connect app when activated in Settings section, as well as see filter saturation status. |
| Home Connect Control tone |
| LED Light Control This button controls the LED lighting. The first press turns the lights on. A second press dims the lights. A third press turns the lights off. 0-100% light slider in Home Connect app allows additional control to obtain the perfect level of light. |
Operating the Unit
For Better Results
- The blower should be turned on for about 5 minutes before cooking in order to establish air currents upward through the hood. Thus when heat, smoke, moisture, grease and cooking odors are produced, they will be carried outside instead of drifting into other rooms.
- Use the low speeds for normal use and the higher speeds for strong odors or fumes.
- Drafts across the range or cooktop will reduce the effectiveness of the hood. Such drafts should be prevented when possible.
- The best job of ventilation in the kitchen is done where the only air currents are those created by the blower itself.
- Regular use of the fan system while cooking helps keep the kitchen comfortable and less humid.
- Use a rear burner when browning or pan frying meat.
- For optimal performance, the width of the hood should equal that of the cooktop or rangetop or exceed it by 3 inches on either side. Install these hoods only with Bosch blowers.
Home Connect
With Home Connect, the appliance is Wi-Fi-capable and can be remotely controlled using a mobile device (e.g. tablet PC, smartphone). Home Connect app offers additional functions which are a perfect complement to the networked appliance.
Home Connect does not work over Wi-Fi networks that require browser registration, i.e. a user name and password entered via a web browser. You should have a stable wireless network with good reception and access to the internet.
If the appliance is not connected to the WLAN network (home network), it functions in the same way as a typical hood with no network connection and can be operated as usual via the Touch Panel.
NOTE: Please ensure that you follow the safety instructions given at the beginning of this instruction manual and that these are also observed when operating the appliance via the Home Connect app and when away from home. Please also follow the instructions in the Home Connect app.
NOTE: Operation on the appliance itself always takes priority, and during this time it is not possible to operate the appliance using Home Connect App.
Cooktop-Hood Sync
You can connect this appliance to a matching cooktop (if the cooktop supports connection to the hood) and then control the functions of the hood via your cooktop.
There are various options for connecting the appliances:
Home Connect
Two appliances can be connected using the Home Connect app provided that both appliances are Home Connect compatible.
Refer to the Home Connect documents supplied for more information.
Connecting appliances directly
If the appliance is connected directly to a cooktop, it cannot be connected to your home network as well. The appliance will function in the same way as a hood that is not connected to the network and you can continue to operate it via the touch control panel.
Connecting appliances via your home network
If the appliances are connected to each other via your home network, both the hood controls on the cooktop and Home Connect can be used to operate the appliance.
Notes
- Make sure you follow the safety instructions in the instruction manual for your hood and that these are complied with even when operating the appliance via the hood controls on the cooktop.
- If the hood is being operated by means of the touch control panel on the hood itself, this mode of operation always has priority. It is not possible to use the hood controls on the cooktop during this time.
Setting up a connection
To set up the connection between the hood and the cooktop, the hood must be switched off and the cooktop must be switched on before you can connect the cooktop and hood.
Connecting directly
Ensure that the cooktop is switched on and is in search mode.
To do this, refer to the section entitled "Connecting to the hood" in the instruction manual for your cooktop.
Notes
- If your hood is connected directly to the cooktop, it cannot be connected to your home network as well and you will not be able to use Home Connect.
- The cooktop must not be connected to your home network. To break a connection, follow the instructions in the section entitled "Disconnecting from the network".
Press and hold the CONNECT button until it starts to flash.
The hood has been connected to the cooktop when the CONNECT button stops flashing and remains continuously lit.
Connecting via your home network
Follow the instructions in the section entitled "Connecting your hood to your home network (Wi-Fi).
Once the hood is connected to your home network, you can connect to the hob via the Home Connect app. To do this. follow the instructions on your mobile device.
Setting up
To implement settings via Home Connect, you must have installed the Home Connect App on a mobile device (e.g. tablet PC, smartphone).
Follow the steps specified by the app to implement the settings.
What do you need to connect your unit to Home Connect
- Your smartphone or tablet PC must be running the latest version of the operating system it uses.
- A home network signal (Wi-Fi) at the location where the home appliance is located.
- Name and password for your home network (Wi-Fi).
Installing the Home Connect app
- On your smartphone or tablet PC, go to the App Store (Apple devices) or Google Play Store (Android devices).


- Enter "Home Connect" in the store's search field.
- Select the "Home Connect (America)" app published by BSH Home Appliances Corporation and install it on your smartphone or tablet.
- Open the Home Connect app and press "Register" to create a new Home Connect account. The app will guide you through the registration process. Don't forget to make a note of your e-mail address and password afterwards.
Initial start-up: Connecting your unit to your home network (Wi-Fi)
- Connect the appliance.
- Check whether your home network router has A WPS function (automatic connection) and locate the WPS button. Refer to the router manual for more information.
- Does your router have a WPS function (automatic connection)?
Yes: Now go on section – Automatic connection (WPS).
![]()
No: Now go on section – Manual connection (Professional mode).
![]()


Automatically connecting your hood to your home network (Wi-Fi)
- Press SPEED 1 button.
- CONNECT and SPEED 1 buttons flash.
- WPS connection process started.
- Note: To connect the hood to your home network, the hood and the light must be switched off. You can cancel the process at any time by pressing "0".
- Press and hold the "CONNECT" button until "0" and "CONNECT" start flashing.
- Press "1".
Note: "1" and "CONNECT" will flash. - If you have WPS (see previous page) press the WPS button on your router.
Note: Please consult your router's manual to locate the WPS button. - When "CONNECT" and "3" flashes your appliance is connected to the home network.
Error: If the "CONNECT" and "2" light flashes then the hood could not establish a connection with your home Wi-Fi within 2 minutes.
Fix: Check whether your hood is in range of your Wi-Fi and repeat the process. If unsuccessful, refer to section below to connect the oven manually.
Manually connecting your hood to your home network (Wi-Fi)
- Note: To connect the hood to your home network, the hood and the light must be switched off.
You can cancel the process at any time by pressing "0". - Press and hold the "CONNECT" button until it start flashing.
- Press "2".
Note: "2" and "CONNECT" will start flashing. - Open general settings on your mobile device and then open Wi-Fi settings. Connect to the network named "HomeConnect".
This is your hoods Wi-Fi-network.
Use the following login information to connect:
Wi-Fi-Name/SSID: HomeConnect
Password/Key: HomeConnect - Open the Home Connect App on your mobile device.
- The app will prompt you to enter your home Wi-Fi's network name and password.
Note: The app may take a few minutes to find your hood. - Next, follow directions in the App.
- When "CONNECT" and Fan Setting "3" flashes your appliance is connected to the home network.
Error: The appliance fails to connect to the app (The "CONNECT" light will turn off).
Fix: Ensure your smartphone or tablet is connected to the same home network (Wi-Fi). Check that your wireless connection is stable and has a strong signal. Then repeat the process from section "Connecting your unit to your home network"
Connecting your product to another Home Connect account
- Open general settings on your mobile device and then open Wi-Fi settings. Connect to the same home network (Wi-Fi) as the hood.
- Press and hold the "CONNECT" button until the "CONNECT" and 3 buttons start flashing.
- Open the app on your mobile device and follow the instructions.
- The registration process is complete once "CONNECT" stops flashing on the hood.
If you want to change the wireless home network that is connected to the hood, reset the connection to your hood by:
- Press and hold the "CONNECT" and fan setting "0" buttons on your hood for at least 3 seconds. The "CONNECT" button will turn off.
- Repeat the process from section "Connecting your unit to your home network"
Software update
Using the software update function, your hood's software can be updated (e.g. for the purpose of optimization, troubleshooting or security updates). To do this, you need to be a registered Home Connect user, have installed the app on your mobile device and be connected to the Home Connect server.
As soon as a software update is available, you will be informed through the Home Connect app and will be able to start the software update via the app.
Once the update has been successfully downloaded, you can start installing it via the Home Connect app if you are on your local area network.
The Home Connect app will inform you once installation is complete.
Notes
- You can continue to use your hood as normal while updates are downloading.
- Depending on your personal settings in the app, software updates can also be set to download automatically.
- We recommend that you install security updates as soon as possible.
Reseting the connection
You can reset the connections you have saved on your home network and on Home Connect™ at any time.
- Press and hold the 0 and CONNECT buttons at the same time until the CONNECT symbol is no longer illuminated.
About Data Protection
When your appliance is connected for the first time to a WLAN network, which is connected to the Internet, your appliance transmits the following categories of data to the Home Connect server (initial registration):
- Unique appliance identification (consisting of appliance codes as well as the MAC address of the installed Wi-Fi communication module).
- Security certificate of the Wi-Fi communication module (to ensure a secure IT connection).
- The current software and hardware version of your domestic appliance.
- Status of any previous resetting to factory settings.
This initial registration prepares the Home Connect functions for use and is only required when you want to use these Home Connect functions for the first time.
NOTE: Ensure that the Home Connect functions can be used only in conjunction with the Home Connect app. Information on data protection can be accessed in the Home Connect app.
Cleaning and maintenance


To avoid risk of fire and explosion do not use flammable liquids or solvents. Always unplug or disconnect the appliance from the power supply before servicing. Do not use steam cleaners to clean the appliance. Hidden surfaces may have sharp edges. Use caution when reaching behind or under appliance.

The appliance will become hot when in use, especially in the area surrounding the bulbs. Let cool before cleaning.

RISK OF ELECTRIC SHOCK
Penetrating damp can cause electric shock. Only clean appliance with a damp cloth. Prior to cleaning, pull the plug or flip the breaker in the fusebox.
Cleaning agents
To prevent various surfaces from becoming damaged due to incorrect cleaning agents, follow the specifications given in the table. Do not use
- cleaning agents that are harsh or scouring,
- cleaning agents with high alcohol content,
- hard scouring pads or sponges,
- high-pressure cleaners or steam cleaners.
Thoroughly rinse all new sponges before use.
Observe all instructions and warnings accompanying cleaning agents.
| Area | Cleaning agents |
| Stainless steel | Warm soapy water: Clean with a non-abrasive, non-sponge dish towel and dry with a clean, soft towel. Only clean stainless steel with the grain. Specific products for stainless steel care are available for purchase from customer service or from specialized retailers. Apply a thin layer of the care product with a soft cloth. |
| Varnished surfaces | Warm soapy water: Clean with a non-abrasive, non-sponge dish towel and dry with a clean, soft towel. Do not use stainless steel cleaner. |
| Aluminum and plastic | Glass cleaner: Clean with a soft cloth. |
| Glass | Glass cleaner: Clean with a soft cloth. Do not use a glass scraper. |
| Controls | Warm soapy water: Clean with a non-abrasive, non-sponge dish towel and dry with a clean, soft towel. Risk of damage to electronics due to permeating damp. Never clean controls with a wet cloth. Do not use stainless steel cleaner. |
Cleaning the metal grease filter
These instructions apply to several appliance models. It is possible that individual features are described that do not apply to your appliance.
RISK OF FIRE
Grease deposits in the grease filter can ignite.
Clean the grease filter at least every two months, or as frequently as necessary
Never operate the appliance without the grease filter.
Notes
- Do not use any aggressive, acidic or alkaline cleaning agents.
- When cleaning the metal grease filters, also clean the metal grease filter holder in the appliance with a moist cloth.
- You can clean the metal grease filters in a dishwasher or by hand.
By hand:
Note: You can use a special grease solvent if soiling is stubborn. You can order it via the online shop.
- Soak the metal grease filters in hot soapy solution.
- Use a brush for cleaning and then rinse the filters well.
- Allow the metal grease filters to drip dry.
In the dishwasher:
Note: Slight discoloration is possible when cleaning the grease filters in the dishwasher. This does not affect the metal grease filter's functioning.
- Do not clean extremely dirty metal grease filters with dishes.
- Loosely position the metal grease filter in the dishwasher. The metal grease filters must not be jammed in.
Uninstalling metal grease filter
- Open the latch and fold down the metal grease filter. Simultaneously use your other hand to grasp under the metal grease filter.
- Remove the metal grease filter from its mounting.

Notes- Grease can gather in the bottom of the metal grease filter.
- Hold metal grease filter horizontally to prevent grease from dripping.
- Clean metal grease filter.

Installing metal grease filter
- Insert metal grease filter.
Simultaneously use your other hand to grasp under the metal grease filter. - Flip metal grease filter up and snap the latch into place.
Troubleshooting
You can often easily eliminate problems that may occur on your own. Before calling customer service, take into account the following information.
RISK OF ELECTRIC SHOCK
Improper repairs are dangerous. Only an authorized servicer may perform repairs and may replace damaged connecting leads. Remove the fuse or deactivate the breaker in the fuse box or breaker box if the appliance is damaged. Call Customer Service.
| Disruption | Possible cause | Solution |
Appliance is not working | Power outage | Check whether other kitchen appliances are working |
| Fuse blown | Check in the fuse box whether the fuse for the appliance is in working order | |
Lighting not working | Lights burnt out | The LED lights are replaceable by a service technician only. See the support contact information in Customer Service section. |
Customer service
Our customer service department is there for you if your appliance requires repair. When calling, please give the Product Number (P-No.) and the Serial Number (S-No.) so that we can offer you the best service. The identification plate listing the numbers can be found inside of the appliance (remove metal grease filter to find it).
So that you don't have to search for them when you need them, you can enter your appliance information and the customer service number here.
Please note that a service visit to provide instruction on the use of the appliance is not covered by the warranty. Please find the contact data of all countries in the enclosed customer service list.
To book service or for product advice
US 800 944 2904 toll-free
Accessories
(not included in the delivery)
| Accessories | Material number |
| Recirculation module | HCREC5UC |
| Charcoal filter | HCIFILTUC |
| Flue duct | HCPEXT5UC |
Safety
INSTALLER: Save these instructions for the local electrical inspector's use. Please leave these instructions with this unit for the owner. Show the owner the location of the circuit breaker or fuse. Mark it for easy reference.
OWNER: Please retain these instructions for future reference.
If the information in this manual is not followed exactly, fire or shock may result causing property damage or personal injury.
If the information in this manual is not followed exactly, fire or shock may result causing property damage, personal injury or death

- DO NOT store or use gasoline or other flammable vapors and liquids in the vicinity of this or any other apppliance.
- WHAT TO DO IF YOU SMELL GAS
- DO NOT try to light any appliance.
- DO NOT touch any electrical switch.
- DO NOT use any phone in your building.
- Immediately call your gas supplier from a neighbor's phone. Follow the gas supplier's instructions.
- If you cannot reach your gas supplier, call the fire department.
- Installation and service must be performed by an authorized servicer, service agency or the gas supplier.
Turn off power circuit at service panel and lock out panel before wiring this appliance. Requirement: 120 VAC, 60 Hz 15 A. Allow the appliance to cool after the power has been turned off before servicing the appliance.
Automatically Operated Device
To reduce the risk of injury disconnect from power supply before servicing.
TO REDUCE THE RISK OF FIRE, ELECTRIC SHOCK, OR INJURY TO PERSONS, OBSERVE THE FOLLOWING:
- Use this unit only in the manner intended by the manufacturer. If you have questions, contact the manufacturer at the address or telephone number listed on the back page.
- Before servicing or cleaning unit, switch power off at service panel and lock the service disconnecting means to prevent power from being switched on accidentally. When the service disconnecting means cannot be locked, securely fasten a prominent warning device, such as a tag, to the service panel.
DO NOT repair or replace any part of the appliance unless specifically recommended in the manuals. Improper installation, service or maintenance can cause injury or property damage. Refer to this manual for guidance. All other servicing should be done by an authorized servicer.
ELECTRICAL SHOCK HAZARD

- DO NOT remove connections.
- DO NOT use an extension cord.
![burn hazard]()
![shock hazard]()
Failure to follow these instructions can result in death, fire, or electrical shock.

Grounding Instructions
Improper grounding can result in a risk of electric shock. This appliance must be grounded. In the event of an electrical short circuit, grounding reduces the risk of electric shock by providing an escape wire for the electric current.
Be sure your appliance is properly installed and grounded by a qualified technician. Installation, electrical connections and grounding must comply with all applicable codes.
If required by the National Electrical Code (or Canadian Electrical Code), this appliance must be installed on a separate branch circuit.
To reduce the risk of fire or electrical shock, DO NOT use this appliance with any solid state speed device.
Safety Codes and Standards
This appliance complies with one or more of the following Standards:
- UL 507, The Standard for the Safety of Electric Fans
- CSA C22.2 No. 113, Fans and Ventilators
It is the responsibility of the owner and the installer to determine if additional requirements and/or standards apply to specific installations.

Unit is heavy and requires at least two people or proper equipment to move and install.
Hidden surfaces may have sharp edges. Use caution when handling the appliance. Failure to do so may result in property damage or personal injury.

Proposition 65 Warnings
This product may contain a chemical known to the State of California, which can cause cancer or reproductive harm. Therefore, the packaging of your product may bear the following label as required by California:
STATE OF CALIFORNIA PROPOSITION 65 WARNING:
Cancer and reproductive harm - www.P65Warnings.ca.gov.
Never modify or alter the construction of the appliance. For example, do not remove panels, wire covers or brackets/screws.
For general ventilating use only. DO NOT use to exhaust hazardous or explosive materials and vapors.
To reduce the risk of fire, use only metal ductwork.
Use a qualified installer.
Remove all tape and packaging before using the appliance. Destroy the packaging after install. Never allow children to play with packaging material.
TO REDUCE THE RISK OF FIRE, ELECTRIC SHOCK, OR INJURY TO PERSONS, OBSERVE THE FOLLOWING:
- Installation work and electrical wiring must be done by qualified person(s) in accordance with all applicable codes and standards, including fire-related construction.
- Sufficient air is needed for proper combustion and exhausting of gases through the flue (chimney) of fuel burning equipment to prevent back drafting. Follow the heating equipment manufacturer's guideline and safety standards such as those published by the National Fire Protection Association (NFPA), and the American Society for Heating, Refrigeration and Air Conditioning Engineers (ASHRAE), and the local code authorities.
- When cutting or drilling into wall or ceiling, do not damage electrical wiring and other hidden utilities.
- Ducted fans must always be vented to the outdoors.
TO REDUCE THE RISK OF A RANGE TOP GREASE FIRE:
- Never leave surface units unattended at high settings. Boilovers cause smoking and greasy spillovers that may ignite. Heat oils slowly on low or medium settings.
- Always turn hood ON when cooking at high heat or when cooking flambéing food (i.e. Crepes Suzette, Cherries Jubilee, Peppercorn Beef Flambe).
- Clean ventilating fans frequently. Grease should not be allowed to accumulate on fan or filter.
- Use proper pan size. Always use cookware appropriate for the size of the surface element.
TO REDUCE THE RISK OF INJURY TO PERSONS IN THE EVENT OF A RANGE TOP GREASE FIRE, OBSERVE THE FOLLOWING:a
![]()
SMOTHER FLAMES with a close fitting lid, cookie sheet, or metal tray, then turn off the burner. BE CAREFUL TO PREVENT BURNS. If the flames do not go out immediately, EVACUATE AND CALL THE FIRE DEPARTMENT.- NEVER PICK UP A FLAMING PAN - you may get burned.
- DO NOT USE WATER, including wet dishcloths or towels - a violent steam explosion will result.
- Use an extinguisher ONLY if:
- You know you have a class ABC extinguisher, and you already know how to operate it.
- The fire is small and contained in the area where it started.
- The fire department is being called.
- You can fight the fire with your back to an exit.
aBased on "Kitchen Fire Safety Tips" published by NFPA.

Documents / Resources
References

Download manual
Here you can download full pdf version of manual, it may contain additional safety instructions, warranty information, FCC rules, etc.
Download Bosch HCP50652UC, HCP56652UC - Wall Hood 36" Stainless Steel Manual
Advertisement


Need help?
Do you have a question about the HCP50652UC and is the answer not in the manual?
Questions and answers