
Subscribe to Our Youtube Channel
Related Manuals for Dixon MB100 Series


Summary of Contents for Dixon MB100 Series
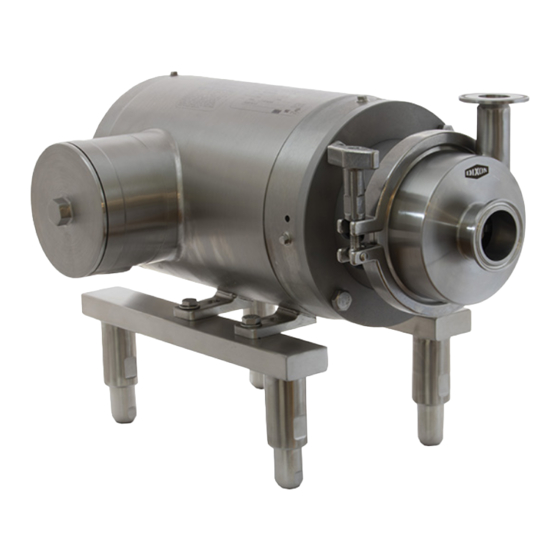
- Page 1 MB100-Series Centrifugal Pump dixonvalve.com Customer Service 800.789.1718 MB100 | IOM dixonvalve.com • 800.789.1718...
-
Page 2: Table Of Contents
Table of Contents Safety ..........................................3-4 Care of Stainless Steel....................................5 Technical Specifications .....................................6-7 Installation & Start Up .....................................8 Unpacking ........................................8 Tools Needed ......................................9 Welding ........................................9 Function Testing ......................................10 Orientation .........................................10 General Maintenance ....................................16 Maintenance Intervals ....................................17 Lubrication .........................................17 Inspection ........................................18 Cleaning ....................................... -
Page 3: Safety
• If any modification work is performed on the product by the owner, Dixon shall no longer be considered the manufacturer of the device. In such cases, all components must be subjected to a new certification process for any applicable certifications that the equipment holds. - Page 4 Safety Owner Must Ensure... • The product is used only as authorized. • The product is used only when it is in fault-free, fully functional condition and the safety equipment is regularly checked to ensure that it is fully functional. •...
-
Page 5: Care Of Stainless Steel
Care of Stainless Steel The stainless steel components in Dixon Sanitary equipment are machined, welded, and assembled by skilled craftsmen using manufacturing methods that preserve the corrosion-resistant quality of the stainless steel. Retention of corrosion-resistant qualities under processing conditions requires regular attention to the precautions listed below. Examples of corrosion that can result from improper care are included below. -
Page 6: Technical Specifications
Technical Specifications Materials of Construction Technical Data • Product contact components: AISI 316L • Non-product contact components: AISI 304 Sealing Materials Technical Data • Product contact components: FKM, EPDM, PTFE Product Temperature Technical Data • Maximum operating temperature: 212°F (100°C) •... - Page 7 Performance Curves Based on H2O @ 70°F Frequency: 60 HZ RPM: 1750 & 3500 Size: 1.5 x 1 x 3.68 MB100 | IOM dixonvalve.com • 800.789.1718...
-
Page 8: Installation & Start Up
The following should be performed upon receiving the product and prior to installation and use of the product. It is important that all the following processes and procedures are carefully followed and adhered to. Dixon is not responsible for any damage that ®... -
Page 9: Tools Needed
Tools Needed The following tools will be required for any maintenance of the product: Item 1: Jax Purgel Klear food grade grease ® Item 2: 5/16" box wrench Item 3: gasket pick tool Item 4: 3/16" allen wrench Item 5: 13/16" socket & ratchet Item 6: liquid thread locker Item 7: adjustable wrench Welding... -
Page 10: Function Testing
Installation and Start Up Function Testing • Check visually to ensure that the equipment is not leaking. • Any defective seal that could have been damaged during disassembly or assembly must be replaced. • Check all equipment components for any signs of damage and replace damaged components. •... - Page 11 Piping: Suction Guidelines • Make sure line sizes used are equal to or larger than suction side (supply side) port connections on the pump. • It is optimal to have the suction side piping as straight and short as possible. Any restrictions will affect the NPSHa. •...
- Page 12 Piping: Discharge Guidelines • Discharge side should be short and direct. Use a minimal number of restrictions (see figure 4). • Discharge port should be oriented between 0° and 90° (see figure 5). • While increasing the discharge line size is recommended, please note: - Using too large of a line size may lead to motor overload and cavitation.
- Page 13 Piping: Valve Isolation • An isolation valve should be installed at both the suction and discharge sides of the pump. This will allow you to remove the pump for preventative maintenance or repair without the need to drain your system. •...
- Page 14 Mounting: Leg Kits Installation and Leveling The pump can be easily leveled by installing a leg kit to the motor of the pump assembly. Depending on the style of leg kit, the legs can be individually adjusted by either loosening the set screw and adjusting the leg bar or by rotating the bottom of the leg to raise or lower the leg.
- Page 15 • Verify pump rotation. An arrow sticker is supplied with every pump to show the correct pump rotation. If the arrow sticker is missing, contact Dixon Sanitary for a replacement. • Correct rotation is counterclockwise when facing pump inlet connection (see figure 7).
- Page 16 Cleaning - Before Start Up IMPORTANT: Before operating the equipment during formal production, please follow the guidelines listed below to ensure that your equipment is clean and ready for service. • Ensure that the equipment is installed in a proper orientation to allow the equipment to be cleaned and drained properly. Reference the installation and start up section of the manual for orientation guidelines.
-
Page 17: General Maintenance
General Maintenance To ensure proper operation of your Dixon equipment, proper maintenance must be performed at regular intervals. To prevent ® damage, check all fitting connections and screw connections for any loosening of the connections during equipment operation. Maintain adequate spare parts stock for all replacement components on the piece of equipment. Please refer to the repair kits section of the manual for complete component part numbers and kit part numbers. -
Page 18: Inspection
General Maintenance Inspection Inspection of the components listed below should be done during regular servicing intervals. Before removing the equipment from the process line, please take care to do the following: • Clean the process line completely to remove any product that may be harmful if contacting a person. •... -
Page 19: Cleaning
Please follow the instructions contained in this manual carefully and be sure to follow any safety warnings contained herein. If any questions should arise during the assembly or disassembly process that are not addressed in this manual, please feel free to contact Dixon Sanitary at 800.789.1718. Assembly Place the pump shaft (item 17) onto the motor shaft and slide down until it bottoms out completely. - Page 20 Disassembly Loosen the casing clamp wing nut and remove the casing clamp (item 6). Remove the casing (item 1) from the pump assembly. Remove the casing seal O-ring (item 2) from the backplate. Using an adjustable wrench, hold the impeller vane while using the 13/16" socket wrench to loosen and remove the impeller nut (item 3) from the stub shaft (item 17).
-
Page 21: Repair Kits
® damage and improper operation, use only genuine replacement parts and kits offered by Dixon to maintain the integrity of the equipment. Make sure the parts are properly matched to the series, model, and serial number and revision level of the equipment. -
Page 22: Bill Of Materials
Bill of Materials Part Type Part # Item # Material Description Casing MB100-PC-C 316L MB100 casing Casing seal * MB100-PCOR-V MB100 casing seal Impeller nut MB100-IN 316L MB100 impeller nut Impeller O-ring * MB100-NOR-V MB100 impeller O-ring Impeller MB100-IMP-3680 CF3M MB100 impeller 3.680"... -
Page 23: Dimensions
Dimensions MB100 | IOM dixonvalve.com • 800.789.1718... -
Page 24: Model Numbers & Part Numbers
Part Number Key Pump Port Impeller Seal Frame Motor Power & Dixon MB100-Series Centrifugal Pump Finish Connections Elastomer Electrical Series Size Size Type Size Type Speed Part Number Key Example: MB15A01C1EA1A01 Pump Series Code MB100 Port Size Code 1-1/2" inlet x 1" outlet... -
Page 25: Troubleshooting
Material must be in contact with seal at all times. Catastrophic Dry running. failure will occur. Abrasive product. Contact Dixon Sanitary: 800.789.1718. Rapid Seal Wear Readjust shaft settings, tighten shaft screws if loose. If bent, Shaft loose or bent. replace shaft and inspect impeller hub for uneven wear, replace if impeller is worn. -
Page 26: Warranty
DIXON VALVE AND COUPLING COMPANY, LLC (herein called "Dixon") warrants the products described herein and manufactured by Dixon to be free from defects in material and workmanship for a period of one (1) year from date of shipment by Dixon under normal use and service. - Page 27 Dixon Sanitary N25 W23040 Paul Road Pewaukee, WI 53072 Phone: 800.789.1718 Email: sanitarysales@dixonvalve.com connect with us on © 2023 DVCC Printed in the USA MB100_IOM_Rev B_1123...
Need help?
Do you have a question about the MB100 Series and is the answer not in the manual?
Questions and answers