Table of Contents
Advertisement
Quick Links
Advertisement
Table of Contents

Subscribe to Our Youtube Channel
Related Manuals for 1010 Music nanobox tangerine

Summary of Contents for 1010 Music nanobox tangerine
- Page 1 nanobox | tangerine User Manual V. 1.0 Dec 11, 2023 Copyright 1010music LLC 2023...
-
Page 2: Table Of Contents
TABLE OF CONTENTS WELCOME SETTING UP THE HARDWARE CONNECTING A MIDI CONTROLLER TO THE TANGERINE UPDATING TO THE LATEST FIRMWARE FINDING YOUR WAY AROUND Basic Controls The Teleporter Pads Screens Keys & Grid Screens Sequencer Screens LOADING AND PLAYING PRESETS ABOUT PRESETS OPENING THE PRESETS SCREEN LOADING A PRESET... - Page 3 SAVING YOUR CHANGES AS A NEW PRESET GLOBAL NANOBOX CONFIGURATION SETTINGS Global nanobox Configuration Settings Global Nanobox Settings (continued) MIXING, MUTING, AND APPLYING EFFECTS NAVIGATE TO THE MIXER, MUTES, AND FX SCREENS CONTROL THE MIX MUTE A PAD ADJUST FX SEND LEVELS ADJUST FX 1: DELAY SETTINGS ADJUST FX 2: REVERB SETTINGS SEQUENCING...
- Page 4 CONTROLLING SEQUENCES WITH THE TRANSPORTS Set the Tempo and Metronome Adjust the Metronome Adjust the Swing Start Recording Playing Sequences with Different Pads EDITING PADS THE PAD MACRO SCREEN/MACRO CONTROLS ADJUSTING PAD LEVELS AND PITCHES Level and Pitch Parameters in the Pad Configuration Screen Accessing the Level and Pitch Parameters over MIDI ADJUSTING PAD FILTERS Filter Parameters in the Pad Configuration Screen...
- Page 5 EDITING PAD POSITION PARAMETERS Open the Pad Position Parameters Screen EDITING PAD POSITION PARAMETERS IN SAMPLE MODE Set Start and End Points in Sample Pad Mode Editing the Sample Start and Length in the Pad Position Parameters Screen Editing the Sample Start and Length in the Waveform Screen Enable Looping in Sample Pad Mode Set Up Loops in Sample Pad Mode Edit Loop Points in the Position Parameters Screen...
- Page 6 LOADING SAMPLES INTO PADS Load a WAV File into an Empty Pad Replace the WAV File in a Loaded Pad Load a Multi-sample Set RECORDING NEW SAMPLES Setting Up for Recording Opening the Record and Load Screen Record a Single WAV RECORDING A MULTI-SAMPLE SET USING MIDI TRIGGERS ASSEMBLING YOUR OWN SAMPLES INTO MULTI-SAMPLE FILE SETS...
- Page 7 CONTROLLING THE NANOBOX | TANGERINE OVER MIDI MIDI CONFIGURATION PARAMETERS Pad-Specific MIDI Settings Global MIDI Settings TRIGGERING PADS FROM SPECIFIC NOTES ON THE MIDI GLOBIN CHANNEL Setting the MIDI GlobIn Channel Try This: Change the MIDI Notes That Trigger Pads PLAYING A PAD ON A PAD SPECIFIC MIDI IN CHANNEL Try This: Play the 10 Grand Preset over MIDI MODULATING PAD PARAMETERS OVER A PAD SPECIFIC...
- Page 8 LOADING PRESETS OVER MIDI To load presets from a MIDI controller: SYNCHRONIZING OVER MIDI Receiving MIDI Clock from Other Instruments Sending MIDI Clock Messages to External Devices PIN MAPPING FOR MINI TRS JACK TO MIDI 5 PIN DIN CONNECTORS WORKING WITH THE MICRO SD CARD CONNECTING AND FORMATTING MICROSD CARDS SAFELY EJECTING MICROSD CARDS BACKING UP YOUR FILES...
-
Page 9: Welcome
WELCOME This user manual will walk you through the full set of features and capabilities of the tangerine. If you want to get up and running quickly, take a look at the 4 page Quick Start Guide available on the 1010music tangerine Learning Material support page. -
Page 10: Setting Up The Hardware
SETTING UP THE HARDWARE Insert the microSD (1) card into the microSD card slot (2) if it’s not already inserted. The card must be in the slot for the tangerine to boot up. The card is spring-loaded. Push to eject when needed, but leave it in for now. Connect the stereo Line Out (3) to your mixer, speakers or headphones. -
Page 11: Connecting A Midi Controller To The Tangerine
CONNECTING A MIDI CONTROLLER TO THE TANGERINE Connect your MIDI controller to the tangerine’s MIDI IN. The tangerine MIDI In can be connected to devices that support TRS MIDI Type A or Type B. You can also use the included TRS MIDI Adapter to connect to MIDI 5 Pin DIN controllers. TRS MIDI Adapter TRS Cable Be sure to use a TRS cable (not a TS cable) to connect to your MIDI Devices. -
Page 12: Updating To The Latest Firmware
UPDATING TO THE LATEST FIRMWARE This User Guide is based on Version 1.0 of the tangerine firmware. To see which version is on your product, push the Home button to go to the Pads Home screen, then push the Left Arrow button to go to the nanobox Config screen. -
Page 13: Finding Your Way Around
FINDING YOUR WAY AROUND Let’s get familiar with the basic controls and the maps of available screens. Basic Controls When you first power up the tangerine, you will see the Pads Home screen. You can dive right in by tapping the pads and you will hear the pads play. Here is an overview of the hardware controls and the onscreen controls on the Pads Home screen. -
Page 14: The Teleporter
The Teleporter The Teleporter map will guide you around the tangerine’s key functions. It is also a quick way to jump directly to any of the primary screens. Hold down the Home button from anywhere to open the Teleporter. Then touch a box to jump to that screen. -
Page 15: Pads Screens
Pads Screens Trigger one shots and clips, tweak a pad’s sound, and configure playback options on the Pads screens. Push Layer from the Pads Home screen to access the Mixer and the FX screens. WAVEFORM PADS HOME MACRO MANAGEMENT Adjust end CONTROLS Play pads and Select and... -
Page 16: Keys & Grid Screens
Keys & Grid Screens Select a pad on the Pads home screen, then use either the Keys screen or Keys Grid screen to play that pad melodically. From the Pads Home screen, push the Home button to access the Keys screen, and then push the Right or Left Arrow button to toggle between the Keys and Grid screens. -
Page 17: Loading And Playing Presets
LOADING AND PLAYING PRESETS In this section, you will learn to load and play presets and to perform related tasks that will help you get started with the nanobox | tangerine: ■ Opening the Presets Screen ■ Loading a Preset ■... -
Page 18: About Presets
ABOUT PRESETS The sounds and sequences in the tangerine are organized into Presets. Presets hold all of the Pad, Mixer, FX and Sequence settings together in one place. There are 80+ factory Presets loaded on the microSD card. You can customize these and save your changes in place of the original preset or as a new preset. -
Page 19: Opening The Presets Screen
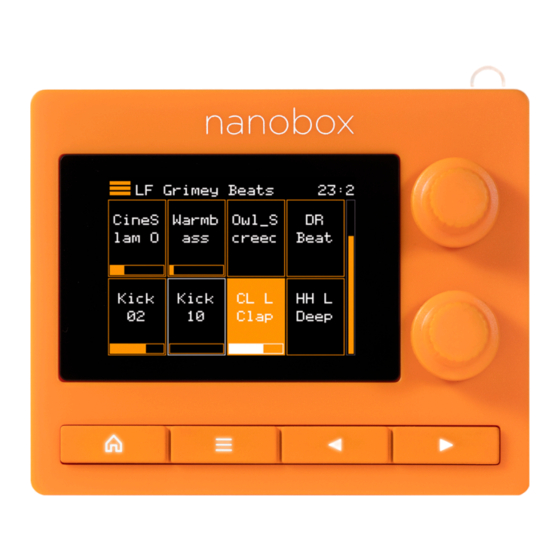
OPENING THE PRESETS SCREEN Push the Home button until you see the Pads Home screen. The name of the current preset appears at the top of the Pads Home screen. Touch the preset name in the Pads Home screen. The Presets screen opens. -
Page 20: Loading A Preset
LOADING A PRESET Open the Pads Home screen, then touch the preset name at the top of the Pads Home screen. The Presets screen opens. Turn either of the tangerine’s knobs to select the preset you want to load, then touch the Load button. - Page 21 If the tangerine’s transport was running before you loaded the preset, you might hear a sequence playing or some pads looping before you play anything. A playback counter in the the top right corner of the screen indicates if the transport is running or not.
-
Page 22: Triggering The Pads
TRIGGERING THE PADS It’s time to make some noise! The Pads Home screen has 8 pads which can be customized to organize the samples you need for your song. Triggering Pads from the Pads Home Screen Push the Home button if needed until you see the Pads Home screen. PAD 7 PAD 6 PAD 8... -
Page 23: Triggering Pads From A Midi Controller
Triggering Pads from a MIDI Controller The tangerine is designed to be played with a MIDI Controller. Many of the presets are set up to support sound dynamics related to MIDI velocity, so you can get more variety in your playback. -
Page 24: Play With The Keys Screen
PLAYING NOTES The Keys screens allow you to play samples pitch shifted chromatically, or to trigger slices in a WAV. When you select a single sample or clip pad to play with Keys, tangerine will play the WAV file for that pad pitch-shifted based on the triggered note. The sample will play at its original pitch when you play the root note, and it will shift up or down the appropriate number of semitones based on the note you play. -
Page 25: Play With The Grid Screen
Play with the Grid Screen Select a pad on the Pads home screen, then use either the Keys screen or Keys Grid screen to play that pad chromatically. Use these screens to play single samples or multi-sample patches, like 1010 Grand, when you are away from your MIDI controller. KEYS SCREEN KEYS GRID Play the selected pad... -
Page 26: Play With A Midi Controller
Play with a MIDI Controller You can also use a MIDI keyboard or other controller to play an individual pad chromatically. To enable this, map the pad to a MIDI channel that will be sent by the connected controller. On the Pads Home screen, select a pad. Push Right Arrow to open the macro screen, then touch Conf to open the Configuration Parameters screen. -
Page 27: Playing Pads From The Sequencer
PLAYING PADS FROM THE SEQUENCER To open the Sequencer Home screen, press the Home button until the Sequencer Home screen appears. SEQUENCES MENU CLOCK Touch to copy, paste, and clear Touch to open the sequences or undo edits. Transports pop-up. SEQUENCE THUMBNAILS See which pads... -
Page 28: Recording A Sequence
RECORDING A SEQUENCE You can record a sequence that is played directly on the pads, the Keys screen, the Grid Screen, or over MIDI inputs. Push the Home button until the Sequencer Home screen appears. Sequencer Home Touch an empty sequence to select it. This is the sequence that you will record into. Open the Transports pop-up by touching the clock or holding down the Right Arrow button. -
Page 29: Saving Your Changes As A New Preset
SAVING YOUR CHANGES AS A NEW PRESET Presets are not automatically saved, so when you load another preset or power down the nanobox, any unsaved changes will be lost. Rather than save your changes to the original preset on the microSD card, you may save a copy of the current preset that includes any changes you made to the pads, sequences, and effects. - Page 30 Enter a name for the preset and touch Enter. You can touch letters in the on screen keyboard to type them. Turn the top knob to move the cursor position. Turn the bottom knob to scroll through characters arcade style. When you touch Enter, all changes are saved to a newly created preset, which is then loaded.
-
Page 31: Global Nanobox Configuration Settings
GLOBAL NANOBOX CONFIGURATION SETTINGS The tangerine maintains a set of global parameters that are independent of any preset that you might load. You can access all global parameters from a single place called the nanobox Configuration screen. To open the Nanobox Configuration Screen, open the Pads Home screen, then press the Left Arrow button. -
Page 32: Global Nanobox Settings (Continued)
Global Nanobox Settings (continued) Parameter Description Compressor When On, an audio compressor is applied to limit the Line Out signal to avoid clipping. Options: On, Off MIDI GlobIn Specifies the MIDI channel a MIDI controller must use to trigger each pad with a specific key, or to send MIDI data that can be used for modulating the FX1 Delay and FX2 Reverb effects. -
Page 33: Mixing, Muting, And Applying Effects
MIXING, MUTING, AND APPLYING EFFECTS The tangerine lets you control the level and panning of each pad from the Pad Macro and Pad Parameter screens. For convenience, you can also adjust the pad levels and panning settings from a central Mixer screen, which has an associated Mutes screen for temporarily muting pads without changing the mixer levels. -
Page 34: Navigate To The Mixer, Mutes, And Fx Screens
NAVIGATE TO THE MIXER, MUTES, AND FX SCREENS You can navigate to the Mixer and FX screens from the Pads Home screen by pushing the Layer button. The diagram below shows how you can also navigate to the Mutes and FX1: Delay and FX2: Reverb screens with the Right Arrow button. -
Page 35: Control The Mix
CONTROL THE MIX The Mixer screen arranges the level and panning controls in a grid, with the controls for Pad 1 in the lower left position and the controls for Pad 8 in the upper right position. On the Mixer screen, simply select a pad and then turn a knob to control its settings. The number on the pad represents the dB level of the audio output. -
Page 36: Mute A Pad
MUTE A PAD The Mutes screen arranges the mute controls in a grid, with the mute control for Pad 1 in the lower left position and the mute control for Pad 8 in the upper right position. On the Mutes screen, touch a pad to toggle the mute state of the pad. Red is muted, green is not muted. -
Page 37: Adjust Fx Send Levels
ADJUST FX SEND LEVELS On the FX Sends screen, you choose how much of the audio signal for each pad is sent to FX1 - Delay, and FX2 - Reverb. Select a pad from the grid and turn the knobs to adjust the sends for FX1, shown on the top graph, and FX2, shown on the bottom graph. -
Page 38: Adjust Fx 1: Delay Settings
ADJUST FX 1: DELAY SETTINGS Open the FX 1: Delay screen by navigating to the FX Sends screen and then pressing the Right Arrow button. FX 1: Delay Turn the top knob to choose a parameter, then turn the bottom knob to select a value. The following table describes each parameter. -
Page 39: Adjust Fx 2: Reverb Settings
ADJUST FX 2: REVERB SETTINGS Press the Layer button while on the FX 1 Delay screen to open the FX 2: Reverb screen. Here you can add some reverb to a pad to lengthen the sound. FX 2: Reverb Turn the top knob to choose a parameter, then turn the bottom knob to select a value. The following table describes each parameter. -
Page 40: Sequencing
SEQUENCING Once you find your jam, you can record it as a sequence. The sequencer will record anything you play, and will keep track of which pad you’re playing while it records. Each tangerine preset has 16 sequences that you can record, overdub, undo, and other sequence management operations. -
Page 41: Selecting Sequences
SELECTING SEQUENCES You can select sequences for playback or recording on the Sequence Home screen. Here, you can also access sequence management tools for copying, pasting, and clearing sequences and for undoing the most recently recorded notes. Open the Sequence Home Screen Push the Home button twice from the Pads Home screen to open the Sequence Home screen. -
Page 42: Copy, Paste, Clear And Undo Sequences
Copy, Paste, Clear and Undo Sequences You can get a head start on your next sequence by copying and pasting a sequence in the same preset or another preset. (Remember to save changes before switching presets.) If you want to start fresh, you can clear a sequence. Push Home until you see the Sequence Home screen. -
Page 43: Adjusting The Step Length And Step Count
ADJUSTING THE STEP LENGTH AND STEP COUNT By default, sequences use a step length of 1/16 and are 16 steps long. This will result in a 1 bar sequence. You can adjust the step length or step count in the Sequence Settings screen before or after recording a sequence. -
Page 44: Adjust The Sequence Settings
Adjust the Sequence Settings The following table describes the parameters in Sequence Settings screen. Setting Description Step Len The length of time between note event triggers for this sequence. Range: 1/64, 1/32T, 1/32, 1/16T, 1/16, 1/8T, 1/8, 1/4T, 1/4, 1/2T, 1/2, 1 bar, 2 bars, 4 bars, 8 bars (T = Triplet) Step Count... -
Page 45: Controlling Sequences With The Transports
CONTROLLING SEQUENCES WITH THE TRANSPORTS There are two ways to quickly access the Transports pop-up from anywhere in tangerine: ■ Touch the Clock in the top right corner of the screen. ■ Hold down the Right Arrow button. From here, you can start and stop playback and recording of sequences, control playback of clip pads, and set up the metronome. -
Page 46: Set The Tempo And Metronome
Set the Tempo and Metronome Sequence playback speed is determined by adjusting the BPM setting in the tangerine’s Transports Pop-up. The BPM setting establishes a global tempo that affects all sequences, and is saved with each preset. The Transports Pop-up gives you two options for setting the global tempo: ■... -
Page 47: Start Recording
Start Recording Once you have selected a sequence and adjusted the sequence settings, tempo, and metronome, you can start recording. If you are going to record from a MIDI controller, set the MIDI controller to send notes on the MIDI In channel of the pad you want to record while playing chromatically, or to the GlobIn channel if you want to trigger multiple pads. -
Page 48: Playing Sequences With Different Pads
Trigger the pads or play the notes you want to record. The sequence will play in a loop when it reaches the end of the sequence, which is 1 measure long by default. You can continue triggering pads and playing notes to record as the sequence repeats. -
Page 49: Editing Pads
EDITING PADS In this section, you’ll learn to do basic pad editing and to perform related tasks that will help you advance your skills with the nanobox | tangerine: ■ Selecting a pad for editing ■ Opening the Pad Macro screen. ■... -
Page 50: The Pad Macro Screen/Macro Controls
THE PAD MACRO SCREEN/MACRO CONTROLS Here are the settings you will find on the Macro Controls screen. These same parameters are repeated on the Configuration parameters screen where you may apply modulation to them. Pad editing starts in the Pad Macro screen for each pad. Open the Pads Home screen, and tap the pad you want to edit to select it for editing. - Page 51 Look at the Pad Grid indicator and verify you are looking at the macro controls for the correct pad. The Pad Grid indicator indicates the selected pad with a solid orange square in the pad’s position on the Pads Home screen. Pads are numbered 1 to 8, starting with pad 1 in the lower left pad: Pad Grid Indicator for Pad 1 Press the Layers button a few times and watch as the Pad Grid selection moves to...
- Page 52 As you tap the Pad Trigger, adjust the four parameters to hear their effect. You can tap and drag any of the onscreen knobs directly, or you can tap to select a pair of them, and then turn the top and lower knobs adjust the top and lower onscreen knobs.
-
Page 53: Adjusting Pad Levels And Pitches
ADJUSTING PAD LEVELS AND PITCHES When you open the Macro screen, you see the Level and Pitch controls. Tap either knob and notice they form a group. You can now adjust the pad’s volume and pitch with tangerine's two encoders. While adjusting individual pad volumes is key to balancing the pads in the tangerine’s output mix, adjusting the individual pad pitches is critical to ensure that the pads are in tune with each other, whether by shifting their pitches by note intervals or by fine-tuning... -
Page 54: Accessing The Level And Pitch Parameters Over Midi
Accessing the Level and Pitch Parameters over MIDI MIDI controllers can send Continuous Controller (CC) messages that change the Level and Pitch parameters directly, with the same results as turning the controls in the Pad Macro screen. The tangerine has a set of CC numbers reserved for eight sets of pad parameters, one set for each pad. -
Page 55: Adjusting Pad Filters
ADJUSTING PAD FILTERS When you open the Macro screen, you see two controls to the right of the Level and Pitch knobs: Filte (filter cut-off), Res (resonance). Tap either knob and notice they form a group. You can now adjust the filter cut-off and resonance with tangerine's two knobs. Adjusting the cut-off frequency and resonance of a filter is among the simplest and most effective ways to change the sonic character of any electronic sound. -
Page 56: Accessing Filter Parameters Over Midi
Accessing Filter Parameters over MIDI MIDI controllers can send Continuous Controller (CC) messages that change the filter cut- off and resonance directly, with the same results as turning the controls in the Pad Macro screen. The tangerine has a set of CC numbers reserved for eight sets of pad parameters, one set for each pad. -
Page 57: Adjusting The Envelope
ADJUSTING THE ENVELOPE When you open the Macro screen, you see an on-screen button, labeled Env. Touch Env to open the tangerine’s Envelope screen. The Envelope screen lets you configure an ADSR envelope that performs the same function as the VCA envelopes featured on more or less all electronic musical instruments. -
Page 58: Adjusting The Lfo
ADJUSTING THE LFO When you open the Macro screen, you see an on-screen button, labeled LFO. Touch LFO to open the tangerine’s LFO screen. PAD TRIGGER Touch to trigger this pad. Flashes when triggered by MIDI or Sequence. GRAPH Updates to show parameter changes. -
Page 59: Managing Pads
MANAGING PADS As you’ve seen so far, the tangerine makes it easy to make temporary changes to presets that you have loaded from the microSD card and to discard your changes simply by loading other presets. You’ll now learn how you can make more significant changes to existing presets, and then save those changes to microSD for later use. -
Page 60: Accessing The Pad Management Menu
ACCESSING THE PAD MANAGEMENT MENU The Hamburger Menu in the top left corner of the Pads Home screen has several options to help you manage your pads. MENU Touch to access pad MENU management OPTION options. Touch to select. From here, you can copy and paste pads within and across presets, or clear a pad. Clear a Pad Select the pad you want to clear on the Pads Home screen. -
Page 61: Cut, Copy And Paste A Pad
Cut, Copy and Paste a Pad You don’t have to start from scratch each time you create a pad. You can copy a pad that is close and make adjustments from there. You can also copy a pad from one preset to another for use in a different kit. -
Page 62: Changing The Pad Mode
CHANGING THE PAD MODE A pad mode defines one of several unique ways that tangerine can play samples. Each pad can have a different Pad Mode. You can use the same WAV file in different pads, each in a different Pad Mode. To change a pad’s Pad Mode: Open the Pads Macro screen and touch the Pad Mode text at the top of the screen. - Page 63 The table below can help you pick the correct pad mode: Pad Mode Description Reverse Beat Set Loop Play Poly- Playback Sync Points Slices phony Sample Use to play one-shots or √ √ 16 * drum hits. You can control start and end points for playback and looping.
-
Page 64: Editing Pad Configuration Parameters
EDITING PAD CONFIGURATION PARAMETERS Open the Pad Configuration Screen From the Pad Macro screen, touch Config. The pad’s Configuration Parameters screen opens. The first several parameters correspond to the Level, Pitch, Filter Cut-off, Resonance, and Panning, all of which appear in the Pad Macro, and Mixer screens. - Page 65 The remaining configuration parameters determine how you can play the pad and may vary based on the pad’s Pad Mode. The following table summarizes the purpose of these parameters. Parameter Description Launch Mode Specifies how the tangerine behaves when you play a pad. Options include Gate, Trigger, Piano, and Toggle.
-
Page 66: Choose A Launch Mode That Suits The Pad Mode
Choose a Launch Mode that Suits the Pad Mode Each pad has a Launch Mode setting that determines how the tangerine responds when you play the pad. Description Mode Trigger The tangerine plays the pad’s samples from beginning to end. Until the sample playback ends, the pad’s envelope remains in its sustain phase and never reaches its Release stage. -
Page 67: Editing Pad Position Parameters
EDITING PAD POSITION PARAMETERS Use the parameters on the Position screen to control looping, start and end points, playback direction, Clip synchronization and Slice selection. The tangerine establishes initial values for sample position parameters by reading metadata embedded in each WAV file that it loads, or if metadata does not include all required details, by applying default values. - Page 68 The following table summarizes the sample position parameters and values supported by each Pad Mode. Table: Position Parameters Supported by Pad Modes Parameter Single-sample Multi- Slicer Clip values values Sample values values Loop Mode None, Forward, None, On, Off On, Off Bidirect Forward, Bidirect...
-
Page 69: Editing Pad Position Parameters In Sample Mode
EDITING PAD POSITION PARAMETERS IN SAMPLE MODE The following table summarizes the pad position parameters that apply to single and multi-samples: Parameter Description Range of Values Target Loop Mode Controls whether the WAV file plays in a loop, None: Plays once from and the direction of the loop. - Page 70 The following parameters apply only to single samples Parameter Description Range of Values Target Start Point where playback will begin when 0 to number playing forward or ends when playing in of samples in reverse. Expressed as a sample number. the file Length When Loop Mode is None, how long the...
-
Page 71: Set Start And End Points In Sample Pad Mode
Set Start and End Points in Sample Pad Mode You can configure the start and end points for single-sample pads in Sample Pad Mode by editing the following Pad Position parameters: Parameter Description Range of Values Start Point where playback will begin when 0 to number of samples in playing forward or ends when playing in the file... -
Page 72: Editing The Sample Start And Length In The Waveform Screen
Editing the Sample Start and Length in the Waveform Screen Open the Waveform screen from the pad’s Macro screen by pressing Right Arrow. Play the pad over MIDI or by touching the play button at the top of the screen. Check the Pad Grid in the top left of the screen to verify you are editing the correct pad. -
Page 73: Enable Looping In Sample Pad Mode
Enable Looping in Sample Pad Mode To set up sample loops for playback in Sample Pad Mode: Open the Pad Position Parameters screen. Select and change the Loop Mode parameter to either Forward or Bidirect. This enables looping on this pad and also specifies if the sample should play repeatedly from the the Loop Start point to the Loop End point (Loop Mode = Forward) or it should alternate between playing the sample from Loop Start to Loop End and then playing in reverse from the Loop End to Loop Start (Loop Mode =... -
Page 74: Set Up Loops In Sample Pad Mode
Set Up Loops in Sample Pad Mode You can edit the pad’s loop points numerically in the Position parameters screen or visually in the Waveform screen. Edit Loop Points in the Position Parameters Screen Open the Pad Position Parameters screen and make sure you are about to edit the correct pad’s loop parameters. -
Page 75: Edit Loop Points In The Waveform Screen
Edit Loop Points in the Waveform Screen When Loop Mode is Forward or Bidirect, the Waveform screen presents loop start and end point markers. Loop Start and Loop End Points in the Waveform Screen When a pad’s Loop Mode is Off, the Waveform screen hides the loop point Note: controls. -
Page 76: Applying Loop Fade To Create Smoother Loops
Applying Loop Fade to Create Smoother Loops Samples often produce clicks when they play in a loop. Even if loop points have been carefully edited. To create smoother loops, the tangerine offers a Loop Fade option in the Pad Position Parameters screen. Loop Fade specifies a percentage of the loop that the tangerine will fade out while simultaneously fading in audio from just before the start of the loop. -
Page 77: Save Samples With Embedded Position Parameters
Save Samples with Embedded Position Parameters If you edit the Sample, Length, Loop Start, or Loop End position parameters for a pad in Sample Pad Mode, you can save those values in the WAV file’s metadata. If you load the updated Wav file into another preset, the tangerine will recognize the markers and automatically set the pad’s position parameters for you. -
Page 78: Editing Pad Position Parameters In Slicer Mode
EDITING PAD POSITION PARAMETERS IN SLICER MODE A Slicer is a pad that loads a single sample file that contains a set of markers that define non-overlapping regions, known as slices. When you load a WAV file with slice markers into a Pad, the tangerine automatically changes the pad’s Pad Mode to SLICE and maps the slices to a range of keys starting at C3 (note #36) so you can play the slices as if they were individual samples. -
Page 79: Defining Slices In The Waveform Screen
Defining Slices in the Waveform Screen Load the file you want to slice into an available pad, then open the pad’s Macro screen and change the Pad Mode to SLICE. From the Pad Macro screen, press the Right Arrow button to open the Waveform screen. Waveform for Slicer pad At the top of the screen, to the right of the pad grid indicator, there are three small dots, forming an ellipsis. -
Page 80: Manually Create Or Remove Slices
Manually Create or Remove Slices When you configure slices manually, you use the Split and Join menu options to add and remove splits. The manual process may also be used to refine the results after you use auto scan or slice to grid. On the Waveform screen for the slicer pad touch the menu item with the three dots “. -
Page 81: Use Slice To Grid
Use Slice to Grid When you use the slice to grid option, you define a fixed number of slices and the tangerine creates splits that evenly divide the WAV file into the specified number of slices. From the Waveform screen for the slicer pad, touch the menu item with the three dots “. -
Page 82: Position Parameters In Slicer Mode
Position Parameters in Slicer Mode The parameters in the table below and on the next screen apply to Slicer mode. Parameter Description Range of Values Target Loop Mode Controls whether the slice playback is looped. ON, OFF This does not work with Launch Mode of Trigger. Use Launch Mode of Gate or Toggle if you want to loop slices. - Page 83 Parameter Description Range of Values Target Slice Indicates which slice will be played 1 through the number of slices in when a note is triggered. You can the pad. use modulation to vary this value over time. Slice Seq When Slice Seq is set to a value None: This parameter will not be other than None, each new note will used to control the order of...
-
Page 84: Slicer File Requirements
Slicer File Requirements When the tangerine loads a file into a pad, it will recognize slice markers in the WAV file metadata if the file contains Slice Markers or Cue points. The tangerine supports sliced files created on the 1010music blackbox. You can also use applications such as the following to create slice files: ■... -
Page 85: Saving A Sliced Wav File
Saving a Sliced WAV File You can save slices in a sample’s WAV file with the tangerine’s built-in Wav Management features. After saving a sliced WAV file, you can load it into another preset, and the tangerine will recognize the slices, saving you from having to create the slices again. In the Waveform screen, touch the filename at the top of the screen to open the Wav Management menu. - Page 86 If you transfer the file to a computer you can open it with an application such as Sound Forge and see the slices in the metadata, such as the following Regions List: nanobox | tangerine User Manual P. 86 Dec 11, 2023...
-
Page 87: Editing Pad Position Parameters In Clip Mode
EDITING PAD POSITION PARAMETERS IN CLIP MODE Clip Mode is best suited to sample files that have been created with time-stretching and pitch-stretching in mind. Some characteristics that make wav files more suitable for Clip Mode: ■ First down beat is at start of file, with no empty space before it. ■... -
Page 88: Clip File Requirements
Clip File Requirements To be compatible with the tangerine’s Clip model, a WAV must meet the following criteria: ■ There should be no extra blank space at the beginning or end of the file. ■ The file must be created so that if you play consecutive copies it will sound like a loop. ■... -
Page 89: Position Parameters In Clip Mode
Position Parameters in Clip Mode The following parameters apply when the Pad is in Clip mode. Parameter Description Range of Mod Target Values Loop Mode Controls whether the WAV file plays in a On, Off loop. The whole WAV file will be played in the loop for clip pads. -
Page 90: Configuring Loops In Clip Pad Mode
Configuring Loops in Clip Pad Mode Unless you configure a Clip Pad to loop, it will play only once. Most often, a Clip Pad will contain rhythmic content that can synchronize with the tangerine’s transport clock. At the same time that the tangerine is time-stretching the sample, it also pitch-shifts the sample to keep it’s pitch consistent even if the tempo changes. -
Page 91: Synchronizing Samples In Clip Pad Mode
Synchronizing Samples in Clip Pad Mode Let’s talk some more about Quant Size and Sync. When a Quant Size other than None is selected, the playback of the wave file will be delayed until the next selected unit of music as specified in Quant Size. -
Page 92: Loading Samples Into Pads
LOADING SAMPLES INTO PADS With nanobox | tangerine, you can customize the built in presets by adjusting parameters and swapping WAV files. You can also create your own presets and pads from WAV files copied onto the microSD card or by recording your own sounds. Here we will cover how to load, record and configure pads. -
Page 93: Replace The Wav File In A Loaded Pad
Replace the WAV File in a Loaded Pad In this procedure, you will replace a pad’s current sample by loading it from microSD card. Select the pad on the Pads Home screen. Waveform Push Right Arrow two times to open the Waveform screen. Either touch the WAV file name in the header or push Right Arrow to open the WAV Management screen. -
Page 94: Recording New Samples
RECORDING NEW SAMPLES You can use the Line In jack on the tangerine to record a new WAV file for use in pads in this or in other presets. You can record a single sample or you can record a collection of related samples for a multi-sample Pad. -
Page 95: Opening The Record And Load Screen
Opening the Record and Load Screen Most of the tangerine’s recording controls and options are in the Record and Load screen, which you can open in multiple ways: ■ To record a sample for an empty Pad, touch an empty pad in the Pads Home screen, then push Right Arrow. -
Page 96: Record A Single Wav
Record a Single WAV Open the Record and Load screen as described in Opening the Record and Load screen. Record and Load Use the knobs to set the desired parameters for the recording. Set the Rec Input to match the audio source. For example, if you are recording a ▪... - Page 97 RecThresh is ON, so recording will not start until the the audio input level exceeds the threshold level. During recording, you will see the recording progress in Bars: Beats and seconds and at the bottom of the screen, a Stop button. To finish the recording, touch Stop.
- Page 98 The following table summarizes the recording parameters: Single-Sample Recording Parameters Table nanobox | tangerine User Manual P. 98 Dec 11, 2023...
-
Page 99: Recording A Multi-Sample Set Using Midi Triggers
RECORDING A MULTI-SAMPLE SET USING MIDI TRIGGERS The nanobox | tangerine can be set up to automatically trigger over MIDI a range of notes to be recorded for a multi-sample set. Connect a MIDI cable between the MIDI output of the tangerine the instrument to be sampled. - Page 100 Multi-Sample Recording Parameters Table Recording Description Range of Values Parameter Filename The name of the folder that will store the Must not contain any of the multi-sample bank recordings. It will also be following characters: used as a prefix for the individual file names. “...
-
Page 101: Assembling Your Own Samples Into Multi-Sample File Sets
ASSEMBLING YOUR OWN SAMPLES INTO MULTI-SAMPLE FILE SETS When you use the tangerine to record a multi-sample file set, the tangerine names each WAV file in the following manner: prefix-notenumber-notevelocity.wav These automatically-generated filenames provide enough information for the tangerine to determine how to map WAV files to an appropriate span of MIDI notes and MIDI velocities. -
Page 102: Where The Tangerine Looks For Note And Velocity Information
NOTE: The tangerine will not recognize or load sample files that do not meet its naming criteria. Where the tangerine Looks for Note and Velocity Information When the tangerine loads a multi-sample file set, it looks for each file’s Root Note so it can map the file to a MIDI Note, and if multiple files have the same Root Note, the tangerine looks for velocity information so it can map each file to a range of MIDI Note velocities and respond dynamically to the way a performer plays each note. -
Page 103: Guidelines For Recording Multiple Velocity Layers
Guidelines for Recording Multiple Velocity Layers For realistic recreation of a sampled instrument, you can build pads with multi-sample file sets, with individual samples mapped across a minimal number of notes, to avoid the artifacts of transposing samples by more than a couple of semitones. To make a multi-sample instrument respond in an even more natural manner, multi- sample file sets can include multiple samples for each note, each sample containing the sound of the original instrument being played with different dynamics, divided into a small... -
Page 104: Modulating Pad And Effects Parameters
MODULATING PAD AND EFFECTS PARAMETERS Modulation is the technique of using one feature to influence another feature. Here are some common applications of modulation: ■ Create a vibrato effect by modulating the pitch of a note with a sine wave LFO signal. ■... -
Page 105: Impact Of Modulation On Parameter Values
IMPACT OF MODULATION ON PARAMETER VALUES When you apply modulation to a parameter, each modulation source contributes to the modulation of the parameter’s current value. The degree of that modulation depends on: ■ the value range of the parameter being modulated, ■... -
Page 106: Parameters That Support Modulation
PARAMETERS THAT SUPPORT MODULATION Parameters that can be modulated appear in tangerine configuration pages with three small boxes to the right of the parameter value. For example, the modulation indicators appear in the Pad Configuration and Pad Position pages: Modulation Indicators in Pad Configuration and Pad Position Pages In this example, the screen indicates that Level, Pitch, Filter (cutoff), Resonance and Pan parameters can be modulated. - Page 107 The following table summarizes the pad parameters that can be modulated. Pad Parameters That Support Modulation Pad Parameter Page Level Pad Configuration Pitch Pad Configuration Filter Pad Configuration Res (Filter resonance) Pad Configuration Pad Configuration Attack Pad Envelope Decay Pad Envelope Release Pad Envelope LFO Rate...
-
Page 108: Accessing Parameter Modulation Settings
Modulation indicators also appear in the global FX1: Delay and FX2: Reverb pages. The following table describes MIDI continuous controller mappings for FX1: Delay and FX2: Reverb parameters. Table: Effects Modulation Sources Effect Parameter Page Delay Time FX1: Delay Feedback FX1: Delay Cut-off FX1: Delay... -
Page 109: Modulating Pad Parameters
MODULATING PAD PARAMETERS To add modulation to a parameter: Select the pad to which you want to apply modulation. Open the pad page that contains the parameter you want to modulate. For details, “Parameters That Support Modulation” on page 106. Scroll to the parameter with the top knob. - Page 110 The following table identifies the sources that can serve as a modulation source for pad parameters. Table: Modulation Sources for Pad Parameters Source Description MIDI Note On velocity MIDI Note On/Off number (bipolar modulation values) LFO (bipolar modulation values) PTCH MIDI Pitch wheel (bipolar modulation values) MODW MIDI Mod Wheel (CC 1)
-
Page 111: Modulating Delay And Reverb Effects
MODULATING DELAY AND REVERB EFFECTS There are two main differences between options for modulating pad parameters and for modulating the Delay and Reverb effects: ■ Each pad has its own FX1 and FX2 send levels, but the Delay and Reverb effects themselves are configured with a single set of parameters, which are part of the preset. -
Page 112: Configuring Effects Parameter Modulation
Configuring Effects Parameter Modulation Choose the modulation source you want to use for modulating one of the Delay or Reverb parameters. The following table identifies the sources that can serve as a modulation source for pad parameters. Table: Modulation Sources for Delay and Reverb Parameters Source Description PTCH... -
Page 113: Removing Modulation From A Parameter
REMOVING MODULATION FROM A PARAMETER To clear the modulation settings for a specific pad or effects parameter: Open the configuration page that contains the pad, Delay, or Reverb parameter currently being modulated. Scroll to the pad parameter currently being modulated with the top knob. The parameter’s MOD page opens. -
Page 114: Controlling The Nanobox | Tangerine Over Midi
CONTROLLING THE NANOBOX | TANGERINE OVER MIDI The nanobox | tangerine flourishes when you control it over MIDI. Not only does MIDI let you play one or more Pads at the same time, but it also lets you use your preferred MIDI controllers to change or modulate Pad and effects settings. -
Page 115: Midi Configuration Parameters
MIDI CONFIGURATION PARAMETERS The tangerine’s MIDI features are configured through a set of pad-specific and global parameters. Pad-Specific MIDI Settings Each of the eight Pad Configuration pages include the MIDI In parameter, which lets a MIDI controller play each pad over a specific MIDI channel. Playing each pad over a specific MIDI channel lets you play chords and sustain multiple notes over MIDI, up to the pad’s polyphony limit, which defined by the Poly Mode parameter,which is also in the Pad Configuration page. -
Page 116: Global Midi Settings
Global MIDI Settings The tangerine’s nanobox Configuration page includes a set of global parameters that determine the state of MIDI-related features and the MIDI channels that it associates with features that are not preset-specific. The table below explains these settings. MIDI-Related Global Parameters (nanobox Configuration page) Description... - Page 117 For details on features affected by the GlobIn and CC In channels, see “Triggering Pads From Specific Notes on the MIDI GlobIn Channel” on page 118 “Controlling Pad Parameters on the MIDI CC In Channel” on page 124. For details on playing a pad on a specific MIDI channel, see Playing Pads On the MIDI In Channel.
-
Page 118: Triggering Pads From Specific Notes On The Midi Globin Channel
TRIGGERING PADS FROM SPECIFIC NOTES ON THE MIDI GLOBIN CHANNEL You can use a MIDI controller to trigger pads at their default note, just as you might trigger them from the PADS HOME screen. For this purpose, each pad has a specific note assigned to it. -
Page 119: Setting The Midi Globin Channel
Setting the MIDI GlobIn Channel Navigate to the nanobox Configuration page: Push the Left Arrow button. The nanobox Configuration page opens. Use the tangerine’s knobs to scroll down to the MIDI GlobIn parameter and set it to Omni. Push the Right Arrow button to return to the PADS HOME page. Verify you can trigger each pad over MIDI by playing the corresponding note on your controller. -
Page 120: Try This: Change The Midi Notes That Trigger Pads
Try This: Change the MIDI Notes That Trigger Pads Make sure your MIDI controller is set to the GlobIn channel. In the Pads Home screen, push the Right Arrow button. The Pad Macro page opens. Touch Config. The Pad Configuration page opens. Scroll down to the last parameter, Pad Note, with the top knob or touch-sensitive screen. -
Page 121: Playing A Pad On A Pad Specific Midi In Channel
PLAYING A PAD ON A PAD SPECIFIC MIDI IN CHANNEL Each pad can be configured to be played or controlled from a MIDI controller through the MIDI In parameter (Pad Configuration page). MIDI In Parameter in Pad Configuration Page If you set each pad’s MIDI In parameter to different channels, you can play the tangerine as eight separate instruments and configure them to respond to MIDI channel messages that your controller might send, such as pitch bend, mod wheel, volume, and panning. -
Page 122: Try This: Play The 10 Grand Preset Over Midi
Try This: Play the 10 Grand Preset over MIDI Load the 10 Grand preset from the tangerine’s factory microSD card. When the preset finishes loading, Pad 1 is ready for playing from the Pads Home page. Verify the 10 Grand piano samples loaded by touching Pad 1. You hear a single piano note. -
Page 123: Modulating Pad Parameters Over A Pad Specific Midi In Channel
MODULATING PAD PARAMETERS OVER A PAD SPECIFIC MIDI IN CHANNEL Some tangerine Pad parameters can be modulated by MIDI Channel messages, such as Mod Wheel, Note-On, and Pitch-bend messages. LFO Depth Modulation Sources Pad Parameter Modulation settings are Pad-specific, so your MIDI controller must be configured to send these MIDI CCs on the MIDI channel that matches the Pad’s MIDI In channel (Pads Configuration page). -
Page 124: Controlling Pad Parameters On The Midi Cc In Channel
CONTROLLING PAD PARAMETERS ON THE MIDI CC IN CHANNEL Some Pad parameters can be changed over MIDI in addition to being modulated by MIDI sources. Changing a pad parameter over MIDI has the same effect as changing a pad parameter from the tangerine’s touch screen. The tangerine reserves a set of MIDI continuous controllers (CCs) for controlling pad parameters independently for each pad. -
Page 125: Modulating Fx1 Delay And Fx2 Reverb Settings On The Midi Globin Channel
MODULATING FX1 DELAY AND FX2 REVERB SETTINGS ON THE MIDI GLOBIN CHANNEL You can modulate FX1: Delay and FX2: Reverb settings over MIDI by configuring your controller to send on the same MIDI channel as the tangerine’s MIDI GlobIn channel. The tangerine supports FX send levels for each pad, but the effects parameters themselves are independent of the Pads so their settings are global. -
Page 126: Tangerine Parameter Value Mappings To Cc Values
TANGERINE PARAMETER VALUE MAPPINGS TO CC VALUES MIDI continuous controllers (CCs) support 128 integer values from 0 to 127, but the tangerine’s parameters support a variety of parameter value ranges and resolutions. The following sections describe how the tangerine maps its parameters to the CC values. For details on controlling and modulating Pad and Effects parameters over MIDI, see the following sections: ■... -
Page 127: Level Mappings To Cc Values
Level Mappings to CC Values The tangerine maps continuous controller values in the range of 0-127 to the dB Levels in the Mixer and Pad Configuration pages as follows: Pitch Mappings to CC Values The tangerine maps the Pitch Values in the Macro and Pad Configuration pages to continuous controller values in the range of 0-127 as follows: Pitch CC Values... -
Page 128: Slice And Slice Sequence Mappings To Cc Values
Slice and Slice Sequence Mappings to CC Values The tangerine maps Slice Seq parameter options to continuous controller values in the range of 0-127 as follows: Slice Seq CC Values None 0 – 12 Forward 13 – 46 Backwards 47 – 79 Random 80 –... -
Page 129: Loading Presets Over Midi
LOADING PRESETS OVER MIDI You can load tangerine presets from the microSD card by sending MIDI Program Change messages from a MIDI controller. The tangerine uses preset names instead of numbers, but it interprets MIDI program numbers (0-127) as positions in its list of presets, in alphabetical order. -
Page 130: To Load Presets From A Midi Controller
To load presets from a MIDI controller: Open the nanobox Configuration to determine the tangerine’s current GlobIn parameter value. If it is None, the tangerine will not recognize MIDI Program changes. Set the tangerine’s MIDI ProgChg parameter to “On.” Set the MIDI controller to transmit on the same MIDI channel specified by the tangerine’s GlobIn parameter (nanobox Configuration page). -
Page 131: Synchronizing Over Midi
SYNCHRONIZING OVER MIDI The tangerine can synchronize with other instruments over MIDI by receiving and sending MIDI System Real-Time messages. The tangerine supports the following MIDI System Real-Time messages: MIDI Receive Transmit Message MIDI Clock Start Stop Con�nue Receiving MIDI Clock from Other Instruments To enable MIDI Clock In: Enable the MIDI ClkRcv parameter (On/Off) in the nanobox Configuration page. -
Page 132: Pin Mapping For Mini Trs Jack To Midi 5 Pin Din
PIN MAPPING FOR MINI TRS JACK TO MIDI 5 PIN DIN CONNECTORS The musical instrument industry currently uses several different ways of mapping MIDI 5 Pin DIN signals to mini TRS jack connectors. The diagram below shows the numbering of the pins on a MIDI connector and the labels of the connection components of a mini TRS jack. -
Page 133: Working With The Micro Sd Card
WORKING WITH THE MICRO SD CARD The tangerine stores all of its data on the microSD card. The following table lists the files used by the tangerine. File File Location Description NANOTANG. The tangerine firmware. This file must be in the microSD card’s root folder when the tangerine first starts. -
Page 134: Connecting And Formatting Microsd Cards
CONNECTING AND FORMATTING MICROSD CARDS There are different types of adapters available to allow you to use your microSD card with the SD Card slot and USB input on your computer. With any of these adapters, you will need to choose the option to eject the card before you pull the adapter out of the computer in order to avoid corrupting the card. -
Page 135: Managing Wav Files
MANAGING WAV FILES You can use the microSD card with your computer to manage the WAV files on the card. You can load new WAV files onto the card or backup your existing WAV files for safekeeping. Organizing WAV Files You can use a microSD Adapter to insert your microSD card into your computer. -
Page 136: Troubleshooting Microsd Issues
TROUBLESHOOTING MICROSD ISSUES If you get the message “Please insert microSD” when you insert the microSD card, open the nanobox Configuration page and set the SD Mode parameter to Compatible. Changing SD Mode to Compatible may also help if your tangerine has trouble writing to high speed microSD cards. -
Page 137: Updating Tangerine Firmware
UPDATING TANGERINE FIRMWARE 1010music strongly recommends that you check the 1010music forum, https:// forum.1010music.com, for the latest firmware release. New releases may contain bug fixes and new features. Firmware update instructions will be available on the forum in the Learning Content sub-forum for nanobox | tangerine. nanobox | tangerine User Manual Dec 11, 2023 P.
Need help?
Do you have a question about the nanobox tangerine and is the answer not in the manual?
Questions and answers