
Subscribe to Our Youtube Channel
Related Manuals for Lantronix 222 Series


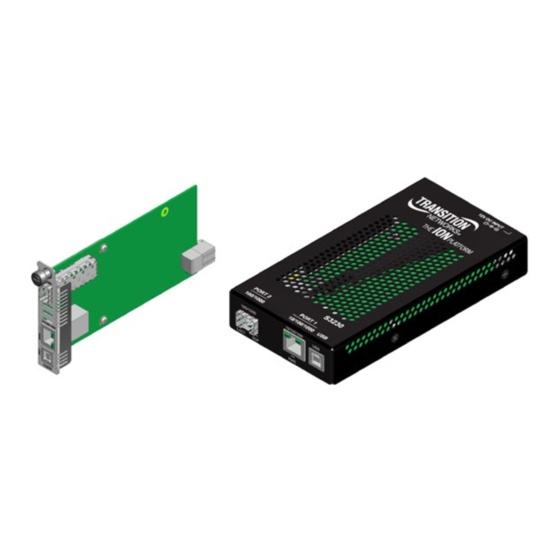
Summary of Contents for Lantronix 222 Series
- Page 1 ION System x222x / x32xx Remotely Managed Network Interface Device (NID) Install Guide Part Number 33433 Revision D August 2023...
- Page 2 ION x222x / x32xx Install Guide Intellectual Property © 2022, 2023 Lantronix, Inc. All rights reserved. No part of the contents of this publication may be trans- mitted or reproduced in any form or by any means without the written permission of Lantronix.
- Page 3 Lantronix ION x222x / x32xx Install Guide Cautions and Warnings Definitions Cautions indicate that there is the possibility of poor equipment performance or potential damage to the equipment. Warnings indicate that there is the possibility of injury to person. Cautions and Warnings appear here and may appear throughout this manual where appropriate.
-
Page 4: Table Of Contents
Lantronix ION x222x / x32xx Install Guide Contents 1. Introduction ............................6 About This Manual ............................ 6 Product Overview ............................. 6 Physical Specifications ..........................7 All Model x222x / x32xx ........................7 C2220 Series ............................8 C322x Series ............................8 S322x Series ............................ - Page 5 Lantronix ION x222x / x32xx Install Guide List of Figures Figure 1: Chassis Installation ........................10 Figure 2: Tabletop Installation ........................12 Figure 3: Wall Mount Installation ........................ 13 Figure 4: AC Power Connection ........................ 14 Figure 5: Model C2220-1040 Connectors and LEDs ................. 15 Figure 6: Model S2220-1040 Connectors and LEDs .................
-
Page 6: Introduction
ION x222x / x32xx Install Guide 1. Introduction About This Manual The purpose of this manual is to provide the user with an understanding of the Lantronix x222x / x32xx network interface devices (NIDs). Product Overview The x222x / x32xx are a group of Ethernet Network Interface Devices (NIDs) that are designed as either a standalone module (S222x / S32xx) or a slide-in module (C222x / S32xx) that installs in an ION system chassis. -
Page 7: Physical Specifications
RMS19-SA4-02: 4-Slot Media Converter Shelf, includes 4 brackets and 3 slot blanks WMBD: 5″ [127 mm] DIN Rail Mount Bracket Fits all Stand-Alone Converters; 1- or 2-Slot ION Chassis SFP modules supported on some slide-in cards; see the Lantronix SFP webpage. SFP Modules: Note: all units feature USB port for local management application. -
Page 8: C2220 Series
Lantronix ION x222x / x32xx Install Guide SIC: Powered by the Chassis Environment 0 to 50°C (32 to 122°F) operating; 5% - 95% humidity (non-condensing) 0 to 10,000 ft. altitude Storage Temp -40 to 85°C (-40 to 185°F) C2220 Series Standards IEEE Std. -
Page 9: Mtbf Specifications
6. Release Notes (software version specific) 7. Product Documentation Postcard, 33504 This manual may provide links to third part web sites for which Lantronix is not responsible. Information in this document is subject to change without notice. All information was deemed accurate and complete at the time of publication. -
Page 10: Installation And System Setup
Web interface). Installing the Chassis Model (C222x / C32xx) The Cx2xx NID is a slide-in module that can only be installed in a Lantronix ION chassis (ION001-x and ION219-x). For a complete list of ION platform products, go to the ION This section describes how to install the Cx2xx in the ION chassis. -
Page 11: Installing The Standalone Model (S222X / S32Xx)
Wall mounted Rack Mount Installation The S222x / S32xx standalone module can be mounted into a Lantronix E-MCR-05 media converter rack, which can be installed on a tabletop or in a standard site rack. For installation details, see the E-MCR-05... -
Page 12: Tabletop Installation
Lantronix ION x222x / x32xx Install Guide Tabletop Installation The S222x / S32xx is shipped with four rubber feet for optional installation on a table or other flat, stable surface in a well-ventilated area. 1. Remove the rubber feet from the card. -
Page 13: Wall Mount Installation
Lantronix ION x222x / x32xx Install Guide Wall Mount Installation 1. Remove the four #4 Philips head screws securing the cover to the device and orient the device as shown in the figure below. Figure 3: Wall Mount Installation 2. Mount one of the bracket assemblies to the device using two of the #4 Philips head screws. -
Page 14: Connecting To Ac Power
Lantronix ION x222x / x32xx Install Guide Connecting to AC Power After the standalone NID has been installed, connect it to the AC-DC power adapter. Use the AC power adapter shipped with the NID. Warning: Risk of electrical shock. 1. Insert the barrel connector of the AC power adapter to the power inlet on the back of the standalone NID. -
Page 15: Connections And Leds
Lantronix ION x222x / x32xx Install Guide Connections and LEDs The connections and LEDs resident on the various models are described on the following pages. Model x2220-1040 The x2220-1040 connectors and LEDs are shown in the two figures below, and described in Table 6. -
Page 16: Table 1: Model X2220-1040 Connectors And Led Descriptions
Lantronix ION x222x / x32xx Install Guide The x2220-1040 connectors and LEDs are described in the table below. Table 1: Model x2220-1040 Connectors and LED Descriptions Connector/LED Description 100/1000 Lets you install a Small Form-Factor Pluggable (SFP) device of your choice in SFP port connector order to make a fiber connection. -
Page 17: Model X3221-1040
Lantronix ION x222x / x32xx Install Guide Model x3221-1040 The x3221-1040 connectors and LEDs are shown in the two figures below, and described in Table 7. Figure 7: Model C3221-1040 Connectors and LEDs Figure 8: Model S3220-1040 Connectors and LEDs 33433 Rev. -
Page 18: Table 2: Model X3221-1040 Connectors And Led Descriptions
Lantronix ION x222x / x32xx Install Guide The x3221-1040 connectors and LEDs are described in the table below. Table 2: Model x3221-1040 Connectors and LED Descriptions Connector/LED Description 100/1000 Lets you install a Small Form-Factor Pluggable (SFP) device of your SFP port connector choice in order to make a fiber connection. -
Page 19: Model X32X0-10Xx
Lantronix ION x222x / x32xx Install Guide Model x32x0-10xx The x32x0-1040 connectors and LEDs are shown in the two figures below and described in Table 7. Figure 9: Model C32x0-10xx Connectors and LEDs Figure 10: Model S32x0-10xx Connectors and LEDs 33433 Rev. -
Page 20: Model S3221-1040-T
̊ C to +65 ̊ C. The bundled external AC/DC power supply adapter is also ”hardened” to meet the operating temperature range of the S3221-1040-T. SFPs used with the S3221-1040-T require an extended operating temperature range to match the S3221- 1040-T. See the Lantronix SFP product page for SFP details. -
Page 21: Installing The Usb Driver - Windows 8
Lantronix ION x222x / x32xx Install Guide Installing the USB Driver - Windows 8 IMPORTANT The following driver installation instructions are for the Windows 8 operating system only. Installing the USB driver using another operating system is similar, but not necessarily identical to this procedure. - Page 22 Lantronix ION x222x / x32xx Install Guide Configuring HyperTerminal After the USB driver has been installed, you must set up the terminal emulator software (e.g., HyperTerminal) to use the USB COM port. 1. On the desktop, right-click on My Computer.
- Page 23 Lantronix ION x222x / x32xx Install Guide Starting a USB Session in HyperTerminal The procedure below describes how to access the x222x/x32xx via a USB connection. The x222x/x32xx can be controlled from a remote management station via a HyperTerminal session over an Ethernet connection.
- Page 24 Lantronix ION x222x / x32xx Install Guide Enter a go command to change the location for the command prompt. The go command format go [c=<1-16>] [s=<1-32>] [l1ap=<1-15>] [l2ap=<1-15>] (l1p=<1-5>|l2p=<1-15>|l3p=<1-15>|l1d|l2d|l3d) (for a slide in card), or go [c=<0-16>] [s=<0-32>] [l1ap=<1-15>] [l2ap=<1-15>] (l1p=<1-5>|l2p=<1-15>|l3p=<1-15>|l1d|l2d|l3d) (for a standalone card).
-
Page 25: Access Via An Ethernet Network
Lantronix ION x222x / x32xx Install Guide Access via an Ethernet Network The NID can be managed remotely through the Ethernet network via either a Telnet session or the Web interface. Before this is possible, you must set up the IP configuration for the NID. - Page 26 Lantronix ION x222x / x32xx Install Guide 10. If the NID is controlled by the ION Management Module, go to step 11. If the NID is not controlled by the ION Management Module, go to step 12. 11. Enter a go command to change the location for the command prompt. The go command format go [c=<1-16>] [s=<1-32>] [l1ap=<1-15>] [l2ap=<1-15>] (l1p=<1-5>|l2p=<1-15>|l3p=<1-15>|l1d|l2d|l3d)
-
Page 27: Initial Setup With A Static Ip Address Via The Cli
Lantronix ION x222x / x32xx Install Guide Initial Setup with a Static IP Address via the CLI The x222x/x32xx supports IPv4-based application protocols. The x222x/x32xx can be assigned IP address statically or dynamically using DHCP. The x222x/x32xx supports DNS, which lets you assign it a hostname instead of an IP address. -
Page 28: Accessing The Nids
Lantronix ION x222x / x32xx Install Guide IPv6 management configuration: ------------------------------------------------------------------------ Management State: disable Link Local Address: fe80::2c0:f2ff:fe21:177 Global Address Mode: static Global Address: Management Prefix: Duplicate Address Detect: false Gateway Mode: static Gateway Address: server index addr_type address ------------------------------------------------------------------------... -
Page 29: Access Via Local Serial Interface (Usb)
Lantronix ION x222x / x32xx Install Guide Access via Local Serial Interface (USB) The x222x / x32xx NIDs can be connected to a local management station (PC) through a serial interface using a USB connection. The NID is controlled by entering command line interface (CLI) commands at the local management station. - Page 30 Lantronix ION x222x / x32xx Install Guide To change the device switch mode to local, do the following: 1. Start a USB session (see “Starting a USB Session”). 2. At the command prompt type set switch mode=local. 3. Press the Enter key.
-
Page 31: Troubleshooting
6. Write down your initial 2-3 guesses as to the cause of the problem. 7. Verify that the Lantronix product supports the function you are attempting to perform. Your partic- ular Lantronix product or firmware version may not support all the features documented for this module. -
Page 32: Error Indications And Recovery Procedures
17. Review the “Recording Model Information and System Information” section on page before calling Lantronix Tech Support. Error Indications and Recovery Procedures The types of indications or messages reported include: LED Fault and Activity Displays (page 36) •... -
Page 33: Led Fault And Activity Displays
Lantronix ION x222x / x32xx Install Guide LED Fault and Activity Displays Refer to this section if the LEDs indicate a problem. For any LED problem indication, review the “Front Panel Connections and LEDs” section, and then perform the following steps. -
Page 34: Jumper Settings
The x222x/x32xx NIDs have on-board components that can be used to configure device operation, typically at the direction of a Lantronix technical support specialist. In most cases, the factory default settings provide optimal configuration settings; however, Jumper setting changes may be required for operating mode changes or troubleshooting purposes. - Page 35 Lantronix ION x222x / x32xx Install Guide J11 – Reset to Factory Defaults (N/F) Doing a Reset To Factory Config resets the NID configuration to the state it was in when it shipped from the factory. This permanently removes all current configuration details and loads the system configuration with the factory default settings.
-
Page 36: Recording Model Information And System Information
Device Description: ___________________ IP Address Mode: ____________________ 4. Provide additional Model and System information to your Technical Support Specialist. See “Basic ION System Troubleshooting” on page 38. Your Lantronix service contract number: ____________________________ 33433 Rev. D https://www.lantronix.com/ Page 36 of 42... - Page 37 A description of any action(s) already taken to resolve the problem (e.g., changing switch mode, rebooting, etc.): __________________________________________________________________ _________________________________________________________________________________ ________________________________________________________________________________ The serial and revision numbers of all involved Lantronix products in the network: ________________________________________________________________________________ _________________________________________________________________________________ A description of your network environment (layout, cable type, etc.): _________________________...
-
Page 38: Appendix A. Compliance And Safety Information
TAA Compliant MEF Certifications Lantronix has received MEF 9, 14, and 21 certification for the x2220, x3220, x3230 and S3240 products at the time of this publication. The MEF Carrier Ethernet Certification Program is designed to ensure that global equipment and services comply with MEF standards and pave the way for interoperability. The... - Page 39 In accordance with European Union Directive 2002/96/EC of the European Parliament and of the Council of 27 January 2003, Lantronix will accept post usage returns of this product for proper disposal. The contact information for this activity can be found in the ‘Contact Us’...
-
Page 40: Declaration Of Conformity
Lantronix ION x222x / x32xx Install Guide Declaration of Conformity Manufacture’s Name: Lantronics, Inc. Manufacture’s Address: 48 Discovery, Suite 250, Irvine, California 92618 USA Model number(s): C3230-10xx, C3231-10xx, C3220-10xx, C3221-10xx, S3230-10xx, S3231-10xx, S3220-10xx, S3221-10xx ION x22x & x32xx multi-port NIDs conform to the following directive(s) and standard(s): EMC Directive 2004/108/EC;... -
Page 41: Electrical Safety Warnings
Lantronix ION x222x / x32xx Install Guide Electrical Safety Warnings Electrical Safety IMPORTANT: This equipment must be installed in accordance with safety precautions. Elektrische Sicherheit WICHTIG: Für die Installation dieses Gerätes ist die Einhaltung von Sicherheitsvorkehrungen erforderlich. Elektrisk sikkerhed VIGTIGT: Dette udstyr skal 41nstallers i overensstemmelse med sikkerhedsadvarslerne. - Page 42 Lantronix Corporate Headquarters 48 Discovery, Suite 250 Irvine, CA 92618, USA Toll Free: 800-526-8766 Phone: 949-453-3990 Fax: 949-453-3995 Technical Support Online: www.lantronix.com/technical-support/ Sales Offices For a current list of our domestic and international sales offices, go to www.lantronix.com/about/contact.
Need help?
Do you have a question about the 222 Series and is the answer not in the manual?
Questions and answers