Table of Contents
Advertisement
Advertisement
Table of Contents

Related Manuals for Fender SWITCHBOARD


Summary of Contents for Fender SWITCHBOARD
- Page 1 OWNER’S MANUAL ENGLISH...
-
Page 2: Table Of Contents
CONTENTS Click on any item below to go to that section; click any page number to return to the table of contents. INTRODUCTION BANK MODE: CREATING PRESETS CONTROL PANEL FAVORITES Favorites Editor REAR PANEL Creating Favorites Loading Favorites to Preset Slots BASICS AND SETUP Converting Favorites to Presets CONTROL FUNCTIONS... -
Page 3: Introduction
SWITCHBOARD EFFECTS OPERATOR This owner’s manual provides a thorough guide to the features and function of the Switchboard Effects Op- erator. It’s the ultimate pedalboard control solution—a versatile command center and performance-friendly footswitch interface that lets you toggle pedal groups on and off, reorganize your signal path and even change setting on MIDI-enabled pedals. -
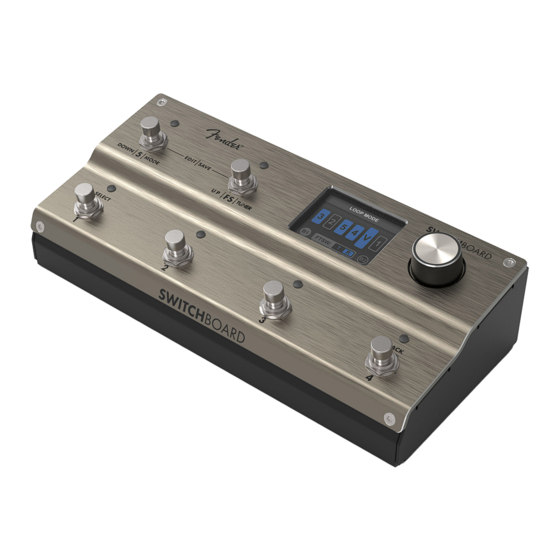
Page 4: Rear Panel
1. Connect the Switchboard send jack to the effect pedal input MIDI OUT: Connect external MIDI device here to jack and the Switchboard return jack to the effect pedal send MIDI PC and CC messages. output jack. -
Page 5: Basics And Setup
MIDI messages. Presets are stored in groups of four called banks. Switchboard’s 100 banks can be named and are easily scrolled through using foot controls in Bank Mode. Recalling presets lets the player rearrange the signal path and turn multiples pedals on and off with the push of a single footswitch. - Page 6 • PHYSICAL PLACEMENT: For easy access to its input and output, placing Switchboard at lower right on a pedalboard is recommended. • SIGNAL PATH PLACEMENT: Place Switchboard as close to the beginning of your signal path as possible to make full use of its onboard tuner, internal volume pedal and high-quality buffers. Note that Switchboard’s internal buffers can be turned off for use with impedance-sensitive pedals (such as a vintage fuzz) in one of the loops.
-
Page 7: Control Functions
Encoder menu controls MODES Switchboard operates in two modes—LOOP MODE and BANK MODE, both of which put flexible and reliable real-time effect control conveniently at your feet. Both modes can be changed at any time during operation with the work done in each remaining in place until the user returns, providing two active pathways for performing, writing or creating new presets. -
Page 8: Edit Menu
EXIT TUNER Press and hold Footswitch FS for one second to activate Switchboard’s onboard tuner; press it again to exit and return to LOOP MODE. The LED above Footswitch FS illuminates red when the tuner is active. Note that output is muted when the tuner is active, and footswitches 1-5 retain their function from the previous screen (i.e., turning effects on/off, changing presets). -
Page 9: Loop Mode
LOOP MODE LOOP MODE delivers performance-focused real-time pedalboard control and is ideal for creating presets. It offers straightforward manual on/off control of the five effects loops, footswitch control of the rear-panel FTSW jack and control of the internal volume pedal using the rear-panel EXP jack and an external expression pedal. LOOP MODE controls the footswitches in real time, consequently locking the ENCODER’s scroll and press functions to prevent accidental changes. -
Page 10: Effects On/Off
In LOOP MODE, footswitches 1-5 are real-time controls that toggle each loop on and off. Turning an effect loop on sends the instrument signal out of Switchboard and through the effects in that loop, then back into Switch- board in the order shown onscreen. When all effects are bypassed, Switchboard offers buffered or true bypass depending on the buffer status described previously. -
Page 11: Internal Volume Pedal
INTERNAL VOLUME PEDAL Switchboard’s internal volume pedal can be controlled in real time by connecting an expression pedal to the EXP PEDAL jack. By default, the volume pedal is active and placed in the fifth position of the signal path; it can be moved to a different location or turned off using the LOOP MODE EDITOR. -
Page 12: Loop Mode Editor Screen
LOOP MODE EDITOR SCREEN For full editing of all LOOP MODE parameters, the LOOP MODE EDITOR displays the signal path graphic with the same four icon types as LOOP MODE, plus two additional icons (loop order arrows and a menu icon in the top right corner). - Page 13 (right). Once all five loops and the volume pedal have been placed, the new signal path will be saved and Switchboard ENTER LOOP ORDER ENTER LOOP ORDER will automatically return to the LOOP MODE EDITOR screen.
- Page 14 FTSW: FTSW: using Switchboard in conjunction with imped- ance-sensitive fuzz pedals and in other instanc- es in which true bypass may be preferred. For optimal signal strength, keeping both buffers on is recommended.
- Page 15 The FTSW symbol at the bottom center of the LOOP MODE EDITOR screen is used to configure the conductor connections made in the FTSW OUT jack when Footswitch FS is pressed. This lets Switchboard control an amp or other external device that accepts footswitch commands, with seven T/R configurations to choose from.
-
Page 16: Loop Mode: Creating Presets
Once the FTSW conductor configuration has been confirmed, Switchboard will automatically return to the LOOP MODE EDITOR screen. LOOP MODE EDITOR LOOP MODE EDITOR LOOP MODE EDITOR V 3 4 V 3 4 FTSW: FTSW: FTSW: F. EDIT MENU To access the EDIT MENU from the LOOP MODE EDITOR screen, use the encoder to select the menu symbol in the upper right corner. -
Page 17: Save To Favorites
SAVE TO FAVORITES Selecting SAVE TO FAVORITES saves the current parameters in the next available favorite slots. The NAME FAVORITE screen will appear with the autogenerated name FAVORITE ###, in which ### shows the next avail- able Favorite slot number it will be saved to. To rename the favorite, use the encoder or footswitches to scroll through and select up to 15 characters. -
Page 18: Bank Mode
BANK MODE BANK MODE is a streamlined interface for organizing and accessing user-made presets that are saved in the 100 banks. Up to four user-defined presets can be stored per bank. Each preset can hold several parameters: loop on/ off status, loop order, volume pedal location, FTSW OUT jack conductor selection and status, internal buffer on/ off status, outward MIDI PC commands, and outward MIDI CC commands. -
Page 19: Bank Mode: Scrolling
01 : BANK 1 01 : BANK 1 1 - PRESET NAME 001 1 - PRESET NAME 001 2 - PRESET NAME 002 - PRESET NAME 002 3 - PRESET NAME 003 3 - PRESET NAME 003 01 : BANK 1 01 : BANK 1 1 - PRESET NAME 001 1 - PRESET NAME 001... - Page 20 ACTIVE BANK 01 : BANK 1 01 : BANK 1 1 - PRESET NAME 001 2 - PRESET NAME 002 1 - PRESET NAME 001 3 - PRESET NAME 003 ACTIVE BANK 2 - PRESET NAME 002 3 - PRESET NAME 003 01 : BANK 1 01 : BANK 1 1 - PRESET NAME 001...
-
Page 21: Preset Editor
PRESET EDITOR The PRESET EDITOR provides full control of all parameters saved to a preset using an easily accessible graph- ic menu. The user can rearrange effect loop order/status, rearrange internal volume pedal placement/status, select FTSW conductors to be activated, turn the input/output buffers on and off, edit MIDI messages and rename presets. -
Page 22: Preset Editor Screen
PRESET EDITOR SCREEN For full preset parameter editing, the PRESET EDITOR displays the signal path graphic and options as the LOOP MODE EDITOR, with the addition of MIDI and preset name editing. The encoder rotary and press-switch functions can now be used to toggle through and select each icon, letting the user select and edit each parameter individually. - Page 23 G. MIDI EDIT MENU Switchboard can send MIDI PC and MIDI CC messages to outboard gear when loading a preset. The expression pedal can also be assigned to control any MIDI CC parameter with each preset. These messages can be assigned and edited using the MIDI EDITOR.
- Page 24 VOLUME PEDAL EDITOR. RENAME CHANNELS Switchboard’s MIDI channels 1-16 can be renamed to a user-defined name, making it more convenient to identify the MIDI channel’s corresponding pedal or external gear. To rename a channel, select that channel and then use the encoder of footswitches to enter a new name.
-
Page 25: Bank Mode: Creating Presets
H. EDIT VOLUME PEDAL This menu option mirrors the function of LOOP MODE EDITOR, with the additional ability to hard-set the in- ternal volume pedal level. Once set, this volume pedal level will be loaded when activating the preset, and the expression pedal will no longer control the volume pedal. -
Page 26: Favorites
A new Favorite can be created in any of the three editor screens. In LOOP MODE EDITOR or PRESET EDITOR, sim- ply select SAVE AS FAVORITE from the SAVE MENU when setting the parameters to preference. Switchboard will save these parameters in the next available Favorite slot. -
Page 27: Converting Favorites To Presets
Favorite. BANK EDITING Switchboard’s 100 banks can be renamed and rearranged as needed. Banks are edited from the EDIT MENU by selecting EDIT BANKS and using the encoder or footswitches to select the desired bank for editing. -
Page 28: Editing/Clearing Bank Presets
EDITING/CLEARING BANK PRESETS Bank presets can be edited using the EDIT BANK PRESETS option in the EDIT BANKS menu. In the EDIT BANK PRESETS MENU, selecting any of the four preset slots will open the PRESET EDITOR for that preset. When exiting the PRESET EDITOR, the user is returned to the EDIT BANK PRESETS MENU. -
Page 29: Global Settings
SELECT LOOP SCREEN BRIGHTNESS Switchboard’s LCD screen brightness can be adjusted for a variety of lighting situations. To do so, select SCREEN BRIGHTNES from the GLOBAL SETTINGS menu and use the encoder or footswitches to adjust the onscreen brightness control knob. Press the encoder or Footswitch 1 to save. -
Page 30: Display Mode
MOMENTARY OPTIONS LED BRIGHTNESS To set Switchboard’s LED brightness for optimal visibility in a variety of lighting situations, select LED BRIGHTNESS from the GLOBAL SETTINGS menu. Use the encoder or footswitches to adjust the onscreen brightness control knob; press the encoder or Footswitch 1 to save. -
Page 31: Firmware Updates
FIRMWARE UPDATES The rear-panel USB-C port is used to connect Switchboard to a computer for installing periodic firmware up- dates available at fender.com/firmware/support. FACTORY RESET Performing a factory reset will delete all all user-saved presets and settings and will restore all Switchboard default settings. - Page 32 345 CESSNA CIRCLE CORONA, CALIF. 92878 U.S.A. PANEL DE CONTROL DE EFECTOS IMPORTADO POR: Fender Ventas de México, S. de R.L. de C.V. Calle Huerta #279, Int. A. Col. El Naranjo. C.P. 22785. Ensenada, Baja California, México. RFC: FVM-140508-CI0 Servicio al Cliente: 01(800) 7887395, 01(800) 7887396, 01(800) 7889433 Fender®...
Need help?
Do you have a question about the SWITCHBOARD and is the answer not in the manual?
Questions and answers
My expression/volume pedal is calibrating but it's not engaging in the patch.
@Shawn Paddock It worked before...all I did was change the cable...it's still seeing it because it's calibrating...
The Fender SWITCHBOARD expression/volume pedal may be calibrating but not engaging in the patch because the volume pedal is turned off. According to the manual, if the volume pedal is turned off, the connected expression pedal will no longer affect the volume. This is useful when using the expression pedal to send MIDI information without engaging the volume pedal. To resolve this, ensure the volume pedal status is set to "ON" in the configuration.
This answer is automatically generated