
Related Manuals for FMS FMS023P


Summary of Contents for FMS FMS023P
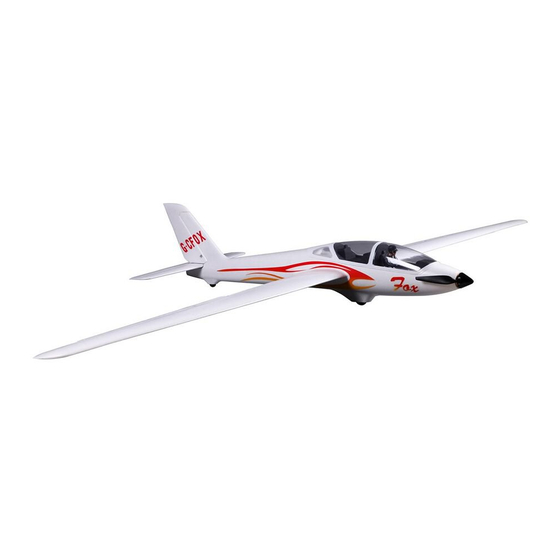
- Page 1 2300MM FOX Instruction Manual 操作手册 MAN-G0057 FMSHOBBY.COM SIMPLE ROBUST STABLE SIMPLE ASSEMBLY STRONG DURABLE EPO SMOOTH FLYING PERFORMANCE...
- Page 2 WARNING WARNING: Read the ENTIRE instruction manual to become familiar with the features of the product before operating. Failure to operate the product correctly can result in damage to the product,personal property and cause serious injury. This is a sophisticated hobby product and NOT a toy. It must be operated with caution and common sense and failure to do so could result in injury or damage to the product or other property.
-
Page 3: Table Of Contents
LiPo battery, the FMS 2300mm Fox, gives the budding modeler a new level of high performance excitement. T Table of contents The FMS Fox features built-in reinforcing rods and plates in its wings, a horizontal stabilizer and vertical stabilizer that are a Introduction ·····························································... -
Page 4: Model Assembly
Model assembly Flap and aileron Linkage rod installation 1.Open the accessory bag and take out the control horn and gasket for ailerons and flaps. Install the control horns and gaskets in aileron and flap slots as shown and screw in place. KA1.7*7 2.Make sure the servos are in neutral position. - Page 5 Model assembly Horizontal stabilizer installation 1.Take out the control horn and gasket for elevator from the accessory bag. Install the control horn and gasket in elevator slot as shown and screw in place. 2.Install the horizontal tail to the bottom slot of the vertical tail as shown, and secure it in place using the attached screws. 3.Apply the elevator linkage rod to control horn (refering to the installation method of flap and aileron linkage rods).
- Page 6 Model assembly Vertical stabilizer installation 1.Take out the control horn and gasket for rudder from the accessory bag. Install the control horn and gasket in rudder KA2.0*12 slot as shown and screw in place. 2.Apply the rudder linkage rod to control horn (refering to the installation method of flap and aileron linkage rods).
-
Page 7: Battery Installation
Battery installation 1.Pull back on the latch and remove the battery hatch. 2.Apply the hook tape to the cable end of the battery. 3.Slide the fully charged battery into the battery compart - ment with the power supply cable toward the rear end of the plane. -
Page 8: Clevis Installation
Get your model ready to fly Transmitter and model setup Before getting started, bind your receiver with your transmitter. Bank left Please refer to your transmitter manual for proper operation. CAUTION: To prevent personal injury, DO NOT install the propeller assembly onto the motor shaft while testing the control surfaces. -
Page 9: Control Horn And Servo Arm Settings
Control horn and servo arm settings More control throw Horns Arms The table shows the factory settings for the control horns Less control throw and servo arms. Fly the aircraft at the factory settings before making changes. After flying, you may choose to adjust the linkage positions for the desired control response. -
Page 10: Flying Course
Before flying the model Monitor your flight time Monitor and limit your flight time using a timer (such as on a wristwatch or in your transmitter if available). When the batteries are getting low you will usually notice a performance drop before the ESC cuts off motor power, so when the plane starts flying slower you should land. -
Page 11: Troubleshooting
Trouble shooting Problem Possible Cause Solution Aircraft will not respond to -Lower throttle stick and throttle trim to lowest settings. -ESC is not armed. the throttle but responds to -Reverse throttle channel on transmitter. -Throttle channel is reversed. other controls. -Damaged spinner, propeller, -Replace damaged parts. -
Page 12: Brushless Esc Introduction
Brushless ESC Introduction Important warnings ZTW is not responsible for your use of this product, or any damage or injuries you may cause or sustain as a result of its usage. Always place safety as priority when you use the product. An electric motor that is connected in combination with a battery and/or ESC may start unexpectedly and cause serious damage and so should always be used with care and respect. - Page 13 Brushless ESC Introduction Throttle calibration (Important: Please make the throttle calibration for the first time using ESC!!!) Turn on the trans- The motor will beep for Connect the battery pack mitter, move the twice, then move the throttle to the ESC and wait for throttle stick to stick to the bottom position in about 2 seconds.
- Page 14 Brushless ESC Introduction Programming tone reference table “beep.beep “beep.beep “beep- - “beep- - Tones “beep” “beep.beep” “beep- -” .beep” .beep.beep” beep” beep.beep” Items 1short tone 2short tone 3short tone 4short tone 1long 1long 1short 1long 2short SMR Function *OFF Brake Type *OFF Soft Brake Mid Brake...
- Page 15 Brushless ESC Introduction Trouble shooting Trouble Possible Reason Action After powering up, ESC ESC doesn't set throttle range. Set throttle range again. emits the sound of battery cells, but motor can't run. After powering up, motor 1.Bad connection between ESC and battery. 1.Clean the connectors or replace them, doesn't run and doesn't check the connection polarity.
- Page 16 警告 警告:在组装、调整及飞行前请务必认真阅读产品说明书以熟知产品的特性。请严格按照说明书提示进行飞机的 组装、调整及飞行。如操作不当会造成产品本身损坏及其它财产损失,甚至造成严重的人身伤害。 声明:模型不是玩具,具有一定的危险性,操作者需要具备一定的飞行经验,初学者请在专业人士指导下操作。 禁止十四岁以下儿童操作、飞行。 安全须知 本产品飞行由无线电遥控器控制,在飞行过程中可能会受到外 界强信号源干扰而导致失控,甚至坠机。因此,在飞行 过程中务必始终与飞机保持一定的安全距离,避免意外碰撞、 受伤。 ——请勿在发射器电池低电量的情况下操纵模型飞机。 ——请勿在公路、人群、高压线密集区、机场附近及其它法律法规明确禁止飞行的场合飞行。 ——请勿在雷雨、大风、大雪或者其它恶劣气象环境下飞行。 ——请严格遵照产品指导说明及安全警告操作本产品及其相关配置(例如充电器、电池等)。 ——请勿将相关化工类产品、零部件、电子部件等置于儿童可触及的范围。 ——请勿将电子件暴漏于潮湿的环境中,以免造成损坏。 ——请勿将本品任意处置于口中,以免造成人身伤亡。 锂聚合物电池使用安全须知 使用锂聚合物电池时,须严格遵守制造商说明、要求并了解相关风险,使用不当会导致锂聚合物电池起火,从而造 成严重的财产损失甚至人身伤害。 禁止使用变形、胀气的锂聚合物电池。 禁止使用过充、放电的锂聚合物电池,避免发生危险。长时间不使用须将锂聚合物电池放电至存储电压(3.8~3.85V / 节)。锂聚合物电池须储存在室内干燥区域(4.5~48.5℃),禁止将锂聚合物电池置于阳光下暴晒或车内,高温可 能会导致锂聚合物电池起火,造成财产损失和人身伤害。 请使用专用充电器对锂聚合物电池进行充放电,禁止使用其它如:镍氢电池充电器。充放电时,禁止将锂电池放置 于高温物体表面,建议使用锂电池防爆袋。不正确的充放电操作会对锂聚合物电池造成损伤,甚至会引起火灾,造 成财产损失和人身伤害。 禁止将锂聚合物电池单节电压放至低于 3V,禁止给已损坏的锂聚合物电池充电。 锂聚合物电池充放电须在有人看管的情况下进行,避免发生意外造成不必要的损失。 飞机电池充电警告: 请确保使用合格的电池充电器给锂电池充电。在使用充电器前,请认真阅读充电器说明书。充电过程中,请确保把 电池置于耐热的表面。建议把锂电池置于防火充电袋内充电,防火充电袋可在相关模型实体店或网上买到。...
-
Page 17: 产品特点
产品特点 目录 MDM FOX是一款特技滑翔机,它在第一次公开亮相时,就在 世界锦标赛中获得了第一名!从那时起,它就成为了世界各地领 产品特点 ········ ·····························································17 奖台上的常规飞机。 产品组成 ·········· ·························································17 FMS 2300mm FOX采用高弹性EPO泡沫,高质量模具造就完 ········ ·········· ·················································18 机体安装 美外形,组合动力丰沛的无刷电机和锂电池,给初学者一个更高 电池安装 ·········· ········ ········································ ········20 级别的体验!FOX机翼、平尾、垂尾内置加强管和加强片,有效 接收机连接示意图 ········ ·········· ··························· ········21 增加机体强度。此外,坚固结实的机体结构免去玩家暴力飞行的 遥控器设置 ·········· ·········· ································ ·······21 后顾之忧。 夹头安装方式 ········... -
Page 18: 机体安装
机体安装 主翼连接钢丝安装 1.拆开附件包,取出副翼和襟翼所需的舵角和垫片。如图示, 将舵角和垫片安装在副翼和襟翼槽位,并用螺丝固定到位。 KA1.7*7 2.如图所示,保持舵机在回中状态,分别将舵面和副翼舵面的连接钢丝由外侧装入相应的舵机摇臂孔位(请参考舵角和舵机摇臂 安装步骤)再将钢丝另一端的球头扣安装到各舵角球头上。 主翼安装 1.将主翼对接管装入图示机身槽位。 注意:安装主翼对接管时需松开箭头所示位置的螺丝。 (螺丝处增加箭头展示) 2.安装左右两侧机翼至机身。 注意: 连接CH1、CH6到Y线上 3.拧紧螺丝将机翼固定到位。... - Page 19 机体安装 平尾安装 1.取出平尾所需的舵角和垫片。如图示,将舵角和垫片安装在平尾槽位,并用螺丝固定到位。 2.如图示,将平尾安装至垂尾底部槽位,并使用所附螺丝固定到位。 3.安装平尾连接钢丝 (参考襟翼和副翼连接钢丝的安装方式) KA1.7*7 HKM3*32...
-
Page 20: 电池安装
机体安装 垂尾的连接钢丝安装 1.取出垂尾所需的舵角和垫片。如图示,将舵角和垫片安装在 垂尾槽位,并用螺丝固定到位。 2.安装垂尾连接钢丝 (参考襟翼和副翼连接钢丝的安装方式) KA2.0*12 电池安装 1. 移开电池盖。 2. 取下电池板上的魔术贴(毛面)贴于电池上面。 3. 如图所示,将电池置于电池舱内,用魔术带绑紧,使有电源 线的那端朝向飞机的尾部。 注意:由于不同电池厂家生产的电池重量有轻微的差异,需要 调整电池的前后位置来平衡飞机的重心位置。... -
Page 21: 接收机连接示意图
接收机连接示意图 如图所示,以Futaba遥控器为例,将舵机信号线按照图示顺序 插入接收机通道,将所有连接线整理整齐并固定在电池舱后部 副翼 的凹槽里,随后固定好接收机。请注意,如产品配有LED,则 平尾 LED信号线可插入任何闲置通道。 油门 垂尾 襟翼 Flap 遥控器设置 警告:为保证安全,在遥控器参数设置及舵面调整过程中,请务必拆下螺旋桨,以免电机意外启动发生事故。遥控器发射机开机 前,确保油门杆在最低位置,其它摇杆在中立位置。开发射机并给接收机通电,随后听到电调初始化音(音符释义见后文“电子 调速器说明书”)。观察所有舵面是否回中,如果没有回中,尽量通过调整舵机摇臂角度、连杆长度的方式来使舵面回中,若调 整长度在安全范围内仍未回中,则使用遥控器通道微调或者菜单中的“SubTrim”选项来使舵面归中。如下图所示观察摇杆动作与 舵面动作的对应关系,如发生舵面反向需要使用遥控器中的通道反向功能来纠正。 左推 1.移动发射器上的控制杆位置,确保舵面可以自如移动。 副翼 右推 转左 爬升 升降 转向 转右 降落 推荐舵面行程 大 小 升降舵 20mm 上 / 下 16mm 上 / 下 温馨提示:首飞建议用小舵面行程 副翼舵... -
Page 22: 夹头安装方式
夹头安装方式 1. 保证舵机为回中状态,将连接杆夹头调整到合适位置。 2. 将 O 型圈移开,打开夹头,将夹头安装到舵角孔位。 3. 将 O 型圈移回相应位置,锁紧夹头。 舵角和舵机摇臂安装 大舵面 舵角 摇臂 平尾 垂尾 图示是舵角和舵面摇臂的出厂设置。首飞建议用出厂设置 的小舵角飞行。首飞后,可按图调整舵角。 小舵面 副翼 襟翼 重心调整 通过移动电池在电池舱内的前后位置调整飞机的重心 ,使飞机保 持水平或稍微头重的状态。首飞以后,重心位置可以根据你自 40mm 己的飞行偏好再做更改。 1.如图所示,推荐重心位置是机翼前缘往后 40mm 处(安 装电池以后)。推荐把食指放在机翼下面的重心位置来帮助调 整重心。 2.在调整飞机重心的时候请确定飞机处于组装完毕待飞的状态。 飞行前准备 起飞前的检查 合适的飞行场地 每次飞行前须做严格的地面检查,可有效避免飞行事故的发生。 航模飞行须远离人群、建筑物、树木、高压线及禁飞 1. 检查全机螺丝是否安装到位、舵角摇臂连接可靠。机翼快拆装置 区的空旷场地(至少... -
Page 23: 故障检修指导
飞行前准备 关于飞行时间 厂家推荐的飞行时间是使用厂家推荐型号的电池,由有经验的爱好者在微风天完成飞行测试得到的飞行时间,该时间与电池 参数、飞机全备重量、飞行条件以及飞行手法相关,不同飞行条件可能得到不同的飞行时间。 建议爱好者在飞行时使用遥控器的“计时功能”,建议初始飞行时间设定为 4 分钟,飞行时间倒计时告警后,降落飞机并测 量电池电压,方可估算飞行时间并重新调整遥控器计时。如发射机没有计时功能,需要其他设备辅助测算飞行时间,以保证 飞行安全。 在电池放电后期, 禁止将飞机飞入下风区(风向指向的远端),防止动力不足而导致飞机不能安全返航。 故障检修指导 问题 问题原因 解决方式 油门推杆无响应,但舵机 ——降低油门推杆和油门微调设定 ——电调未连接电机 有响应 ——反过来重新装油门通道 ——油门通道反向 ——桨罩、桨、电机、电机架坏了 ——更换损坏的配件 桨的噪音过大或者震动过大 ——桨或者桨罩的小部件松动了 ——把桨、桨夹和桨罩的小部件拧紧 ——桨装反了 ——反过来重新装桨 飞行时间变短,飞机无力 ——电池电量低 ——重新给电池充电 ——桨装反了 ——依照电池说明书更换新的电池 ——电池坏了 ——舵面、舵角、连接杆、舵机坏了 ——更换或者维修坏了的配件 飞舵面不动,或者动作响 ——连接线坏了或者接头松了 ——检查所有连接线,确保所有接头无松 应较慢 动现象... - Page 24 无刷电子调速器说明 安全须知 检验无线电接收装置上的正确设置,第一次测试电调和马达时不要在马达上安装螺旋桨或传动小齿轮。 只有当您确认了无线电 接收装置上的设置正确后方能安装螺旋桨或传动小齿轮。 不要使用裂开或被刺破的蓄电池组电池。 不要使用会变得过热的电池组。 不要使用短路电池或马达接线端。 电缆绝缘要用正确的绝缘材料。 使用正确的电缆连接器。 电池或伺服系统的数量不要超过电调的规定。 错误的电池极性会损坏电调。 主要特性 1.功率输出元器件(MOSFET)选用新—代的制作工艺,发热低,瞬间承受电流大,可靠性高。 2.高性能32位处理器,运算能力更强,运行速度更快。 3.超流畅的启动与精准的油门线性。 4.效率高,电调更节能,续航时间更长。 5.SBEC5V/6V两档可调,持续8A电流供应,给舵机提供更强劲的动力(40A/50A/60A/80A/100A具有SBEC可调)。 6.多重保护:启动保护,过温保护,低压保护,缺相保护,信号丢失保护。 7.自动识别马达进角,支持高RPM马达,可兼容巿面上绝大多数马达。 8.支持手机App或LCD编程,操作更简单方便(需单独购买ZTW蓝牙模块或LCD编程卡)。 产品规格 持续/瞬时 尺寸(mm) 是否支持 型号 PN#Model 输入电压 重量(g) BEC输出 电流(A) 长*宽*高 编程 是 Beatles 20A SBEC G2 3020211 20A/30A 5-12NC/2-4Lipo 5.5V/4A 60*25*10...
- Page 25 无刷电子调速器说明 首次使用电调并设置油门行程 温馨提示:在首次使用本电调或更换其他遥控器使用时,请务必先重新设定油门行程。 开启遥控器,把 连接电池 听到 “滴-滴” 在3秒内将油 油门推到最高点 等待2秒 两声确认声 门拉到最低 油门行程校准完成 “滴----滴” 最后一声确认音 N声短音代表锂电节数 首次使用电调并设置油门行程 编程项简要说明(黑体字为出厂默认值) 1.SMR功能:关闭/打开 通过切换电机正反向,快速停止。 出厂默认是关闭,此时1Pin信号线完全无效。 如需打开,通过App设置或遥控器编程打开SMR功 能,将3Pin信号线接入油门通道,将1Pin信号线接入接收机任意的2段开关通道,打开遥控器2段开关, 此时SMR功能开启,拨动遥 控器2段开关即可调整电机正反向。 警告:此功能只能在50%油门以下才有效,且只允许在飞机降落至地面使用,否则有可能引起电调烧毁! 2.刹车力度:关闭/软/中度/最大 3.进角:自动/低/中/高(分别为5度/15度/25度) 4.马达方向:正向/反向(正向:电机默认旋转方向,反向:将电机旋转方向更改) 5.SR功能:打开/关闭(效率更高,更节能,续航时间更长) 6.锂电节数:自动/2S/3S/4S/5S/6S 7.低压保护点:3.0V/3.2V/3.4V/3.6V (例如:使用3节锂电,设定为3.0V为低电压保住值,则低压保护阈值为:3*3.0=9.0V) 8.保护方式:降低功率/立即关断 降低功率:当达到预设的低压保护阈值时,电调减少输出功率至70% 立即关断:当达到预设的低压保护阈值时,电调立即关断输出功率 9.BEC: 5V/6V 40A、 50A、 60A.80A、 100A电调BEC电压输出可设置5V/6V 10.加速度:普通/柔和...
- Page 26 无刷电子调速器说明 电子调速器编程设置模式 首先将遥控器油门拉杆推至最高位置,打开遥控器电源,将电池组连接到调速器,2秒后电机"滴-滴滴"声响,停3秒,发出123特殊声 音,表示进入编程模式。 设置音按以下顺序滚动播放: “ . 嘀 ” SMR功能 (1短音) “ . 嘀 嘀 ” 刹车力度 (2短音) “ . 嘀 嘀 嘀 ” 进角 (3短音) “ . 嘀 嘀 嘀 嘀 ” 马达转向 (4短音) “ . 嘀 ⸺ ” SR功能...
- Page 27 无刷电子调速器说明 保护功能 1.启动保护:当推油门启动后,如在两秒内未能正常启动电机,电调将会关闭电机,油门需要重新设置,才可以重新启动。 可能原因:电调与电机接线断开或接触不良、 螺旋桨被其他物体阻挡、 减速齿卡死等。 ⒉温度保护:当电子调速器工作温度超过110度时,电调将自动降低输出功率进行保护,但不会将输出功率全部关闭,最多降到全 功率的70%,以保证电机留有一定动力,避免摔机。 3.油门信号丢失保护:当电调检测到油门信号丢失l秒后,将自动减少对马达的输出功率,然后油门信号丢失超过2秒,电调将自动 关断马达。 如果在降功率过程中油门信号恢复,电调可以立即恢复油门控制。 这样在瞬间信号丢失情况下(2秒以下),电调并不会 进行油门保护;只有当遥控信号确实长时间丢失,才进行保护,但电调不是立即关闭输出,而是有一个逐步降低输出功率的过程,给 玩家留有一定的救机时间,兼顾安全性和实用性。 4.过负荷保护:当负载突然变得很大时,电调会切断动力,或自动重启,出现负载急剧增加的原因通常是马达堵转。 常见问题解答 出现的问题 可能的原因 解决方法 接通电调后有自动检测电池节数声音, 电调没有油门行程设置 对电调进行油门行程设置 但马达不能启动 马达不工作, 连接电池后马达未发音乐 电池组与电调之间接触不良 清理连接器终端或替换连接器 声, 伺服系统也未运行 没接通电源 用刚充满电的电池组替换 焊接不牢固(接头易断) 再次焊接电缆连接 电池电缆极性错误 检查并确认电缆极性 电调信号线与接收机连接极位相反 检查连接在电调上的信号线以确保处于 正确极性 电调有问题 更换电调 马达不工作,连接电池后马达未发出音...
- Page 28 Fax:+86-0757-29955904 Tel:+86-0757-29955904 E-mail:support@fmsmodel.com Add: Unit A, Building 6, Jicheng Science and Technology Innovation Park, Shunde, Foshan City, Guangdong Province, 528306 Foshan Zhengze Model Technology Co., Ltd. 电话:86-0757-29955904 邮箱:support@fmsmodel.com 地址:广东省佛山市顺德区北滘镇顺江社区三乐东路25号集成科创园 6栋 佛山市正泽模型科技有限公司...
Need help?
Do you have a question about the FMS023P and is the answer not in the manual?
Questions and answers