Advertisement
Available languages
Available languages
Quick Links
Advertisement

Related Manuals for MONZA Splasher SP3509


Summary of Contents for MONZA Splasher SP3509
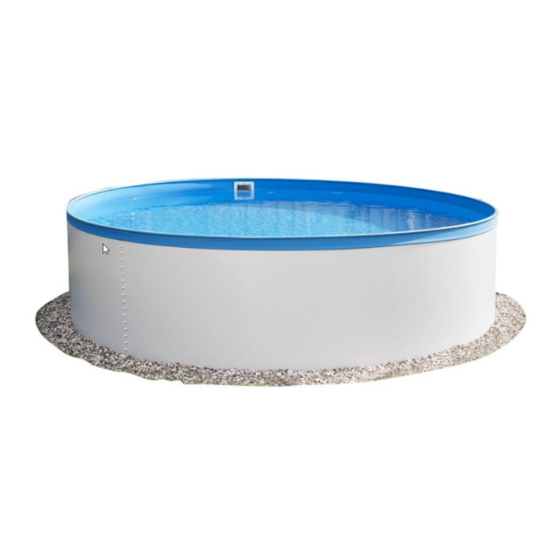
- Page 1 Artikelnummer: OD 060362 OD 060363 Modelnummer: SP3509 SP4609 ZWEMBAD HANDLEIDING...
- Page 2 VEILIGHEIDSVOORSCHRIFTEN - Vergeet niet dat veiligheid het belangrijkste is bij het opzetten van uw zwembad. Veiligheid heeft voorrang boven het decoratief voorkomen. Niet leunen, springen, zitten of rechtstaan op de wand, noch stappen op de boven profielen. Dit zwembad werd hiervoor niet ontworpen. - Nooit in het zwembad duiken of springen van een ladder of van de boven profielen.
- Page 3 is voor kinderen. De ladder moet steeds op een stevige grond geplaatst worden en stabiel staan. De ladder mag maar door één persoon tegelijkertijd in gebruik zijn. Richt de ladder naargelang de in- en uitgang van het zwembad. Gebruik de ladder nooit voor andere doeleinden. - Als uw zwembad voorzien is van een filter, verzeker uzelf er dan van dat het zwembad met water gevuld is en de filter juist geï...
- Page 4 ENKELE RICHTLIJNEN VOOR HET OPZETTEN VAN UW ZWEMBAD 1) Neem uw tijd en lees aandachtig de volgende instructies door voordat U met de installatie van het zwembad begint. Volg alle instructies op. 2) Dit zwembad is ontworpen om gemakkelijk geï nstalleerd te worden. Het eindresultaat en de lange levensduur van uw zwembad hangen af van de aandacht en de zorg die U toewijdt aan de montage en van de correcte opvolging van deze handleiding.
- Page 5 waterpas te maken, zie eerst na of er elektrische kabels, telefoonlijnen of leidingen onder begraven zijn. Bomen en hun bewoners (vogels, insecten, …) zijn niet de beste vrienden van zwembaden. Vallende bladeren, takken en hars kunnen een duurzaam probleem betekenen voor wat de helderheid van het water betreft.
- Page 6 Let op : de lengte van zowel de onder als de bovenrail moet aangepast worden aan de zwembadrand. U kunt daarvoor het best een ijzerzag gebruiken (zie tekening) Schroef de wand met de moeren en sluitringen aan de buitenzijde van de wand. Draai als alle schroeven geplaatst zijn alles goed vast.
- Page 7 INSTALLATIE VAN DE LINER De liner is het meest delicate onderdeel van het zwembad. Gebruik geen mes om de verpakking van de liner af te halen (om beschadiging te voorkomen). Verzeker uzelf ervan dat de liner niet beschadigd is. Bevestig de liner in het zwembad (werk van het midden naar buiten). Gebruik klemmen (of wasknijpers) om de liner aan de wand te bevestigen (tijdelijk) Vul het bad met ca 2cm water en veeg de vouwen zover mogelijk glad.
- Page 8 No Name Material M6x30 bolt SUS304 M6 washer SUS304 M6 cap nut SUS304 Step M6 lock nut SUS304 M6x40 bolt SUS304 Bracket Coated steel 2 Studdle Coated steel 2 Foot bar Coated steel 4 Lock M6 nut SUS304 Handrail Coated steel 2 Sitting platform PP M6x45 SUS304...
- Page 9 SLANG EN SKIMMER AANSLUITING Montage van de water in-outlet slang connector Volg de zwembadhandleiding voor het uitsnijden van gaten voor de inlet/outlet en skimmer Vul het zwembad met water tot min 6 cm onder het uitgesneden inlet/outlet. Schroef de inlet connector kit door de wand, zorg dat de hele schroefdraad is voorzien van pakking teflon tape Bevestig de onderdelen (diagram 2) Om het water te stoppen schroef de plug (p8613)in de achterkant van de connectorkit (diagram 3)
- Page 10 binnenzijde plaats dichting p6779 en p6778 afdekplaat. Schroef deze voorzichtig vast door de liner, schroef niet te vast.zorg dat de behuizing (skimmer) goed uitgelijnd (waterpas ) bevestigd is. Beschadig de liner niet (maak geen extra schroefgaten) schroef de plug in de skimmer om water weg te laten lopen. (zie diagram 5) . Indien het filtersysteem gebruikt wordt moet de plug verwijderd worden.
- Page 11 HET ZWEMBAD VERDER VULLEN Alvorens het zwembad verder af te vullen dienen nogmaals alle schroeven aangedraaid te zijn . Verzeker uzelf ervan dat er geen lossen delen meer zijn ( in en om het zwembad). Het zwembad is vol indien er nog ca 15cm over is tot aan de rand van het zwembad. ONDERHOUD EN GEBRUIK VAN UW ZWEMBAD Onderhoud van het water Alle zwembaden hebben een chemisch onderhoud nodig zodat het water ontsmet en helder blijft.
- Page 12 niet, dan kan de liner zwaar beschadigd worden. Het is eenvoudiger om het water te onderhouden dan vuil water helder te maken. Maak veelvuldig gebruik van uw filter. Stel uw filter tewerk als er geen baders in het zwembad zijn. Minstens één keer per week het pH- en chloorgehalte nakijken. Regelmatig : a) Analyseer de pH van het water en indien nodig, pas het aan tussen 7,2 en 7,6.
- Page 13 toevriest. .Controleer alle koppelingen en schroeven. Verzeker uzelf ervan dat de staalwand zich nog steeds in de bodemrails bevinden. Verzeker uzelf ervan dat de schroeven goed vast zijn. Controleer roestplekken . Werk alle schrammen en roestplekken bij met antiroestverf. Controleer de liner Verzeker uzelf ervan dat de bovenkant van de liner stevig vastzit met de U-profielen.
- Page 14 Onderdelenlijst 1. Bodem en top profielen 2x14st ( (Ø4,60 = 2x 17 stuks), dienen nog aangepast te worden (zie handleiding) 2. Kleine montage buisjes for profielen 56stuks (4.60 68stuks) 3. Afdekstrip 1stuk 4. Liner 1stuk 5 M6x11 schoeven 20stuks 6 M6 moeren 20stuks 7 M6 ring 20stuks 8 Beschermkapjes 20st 9 Zijwand voor zwembad 1stuk...
-
Page 15: Parts List
UK Table of Contents: Important information’s – parts lists Do NOT set I. Necessary tools .. up the pool in II. Finding the right location for the pool ... III. Inspecting the pool components windy weather! IV. Preparing the ground V. -
Page 16: Necessary Tools
Safety Information • Do not allow anyone to use the pool unless an adult is present. • Never dive or jump into the water from the edge of the pool. Never sit or climb on the wall of the pool. The top seat cover on the uppermost part of the pool wall is not designed for such loads. - Page 17 III. Inspecting the Pool Components We recommend that you ensure that you have the correct number of components before assembling the pool. See the separate checklist at the front of the manual. IV. Preparing the Ground Place a marking peg in the middle of the location selected for the pool. Tie a string to the peg. The length of the string must be equal to the radius of the pool, plus a recommended 25 cm.
- Page 18 Assembling the Pool 1. Collection of the bottom rails In the pool area, the profi les are connected into a round bottom frame (use 14 of the profi les). Fig. 1 Check that the circle is round and correctly placed in rela- tion to the marking peg used in the base.
- Page 19 5. Check the Work Completed So Far Check one more time that the base of the pool is completely level and that the pool wall forms a perfect circle in order to avoid problems from arising in the subsequent installation of the liner. The latter can be done by mea- suring the diameter across the pool.
- Page 20 VI. Safety ladder A ladder is included with this pool. The maximum load on the ladder is 85 kg. Start by installing the ladder steps before the two sides of the ladder are fi nally assembled NAME MATERIAL M6x30 bolt SUS304 M6 washer SUS304...
- Page 22 VII. Installing the pool skimmer...
- Page 24 VIII. Upgrading with an external sandfi lter system (optional – not included with the pool) Return in-let and In-Wall Skimmer The Kreta garden pool is prepared so that it easily can be “upgraded” later to be used with an external sand fi lter system. A sand fi...
- Page 25 Make sure that the skimmer gaskets are uniformly installed along the perforation on both sides. Tighten the screws in pairs diagonally and tighten evenly to ensure that it is watertight. Only use a manual screwdriver and be careful not to over-tighten the threads (do not use an electric machine!). Using a sharp knife, remove the liner around the edge inside the skimmer opening.
-
Page 26: Installation
Do not place the pool above electric cables in the ground, gas cables in the ground, or in areas with high levels of ground water. Do not place the pool under electric cables in the air. Select a location that provides shelter and where there are no trees close to the pool as leaves otherwise continuously will enter the pool. - Page 27 be done in stages. Make approx. 30 cm at a time all the way around up the pool every time. Do not tamp the material very hard as it can put pressure on the pool wall and cause dents. Note that if you choose to install an oval pool in-ground in this traditional way it is always imperative to esta- blish supporting walls on each long side of the pool to relieve the inward pressure from the ground.
-
Page 28: Warranty
3. Make sure that there is no rust. Paint all rusted areas with anti-rust paint. 4. Check the liner. Make sure the top of the liner is securely attached to the pool wall with the plastic list. Do not remove the liner from the pool. -
Page 29: Lista Części
PL Spis treści: NIE WOLNO Ważne informacje – wykazy elementów Wymagane narzędzia ustawiać basenu II. Znalezienie odpowiedniego miejsca na basen III. Sprawdzenie elementów basenu podczas wietrznej IV. Przygotowanie podłoża pogody! Montaż basenu VI. Drabinka VII. Dysza powrotna i fi ltr przelewowy zamonto- wany na stałe (nie wchodzą... -
Page 30: Informacje Dotyczące Bezpieczeństwa
Informacje dotyczące bezpieczeństwa • Zabrania się korzystać z basenu pod nieobecność osoby dorosłej. • Nie wolno nurkować ani skakać do basenu z jego krawędzi. Nie wolno siadać ani wspinać się na krawędź basenu. Osłona górnej części basenu nie jest przystosowana do takich obciążeń. •... - Page 31 III. Sprawdzenie elementów basenu Przed przystąpieniem do montażu basenu zaleca się sprawdzenie, czy wszystkie elementy są dostępne we właściwej liczbie. Zob. oddzielna lista kontrolna na początku instrukcji. IV. Przygotowanie podłoża Wbij kołek do znakowania na środku miejsca przeznaczonego na postawienie basenu. Przywiąż do kołka sznurek.
-
Page 32: Należy Pamiętać
Monta ż basenu 1. Zestaw szyn dolnych Profi le w obszarze basenu tworzą po połączeniu okrągłą ramę dolną (należy użyć 14 profi li) RYS. 1 Należy upewnić się, że okrąg jest równy i prawidłowo ust- awiony w stosunku do kołka do zaznaczania zastosowa- nego w podstawie. - Page 33 5. Kontrola wykonanych dotychczas prac Należy jeszcze raz upewnić się, czy podstawa basenu jest całkowicie rów- na, a ściana basenu tworzy idealny okrąg, aby uniknąć problemów przy późniejszym montażu powłoki basenu. Okrąg można sprawdzić, mierząc średnicę basenu. Wszelkie błędy należy naprawić przed przejściem do kolejnego etapu montażu.
- Page 34 VI. Drabinka Wraz z basenem dostarczana jest drabinka. Maksymalne obciążenie drabinki wynosi 85 kg. NAME MATERIAL M6x30 bolt SUS304 M6 washer SUS304 SUS304 M6 cap nut step M6 lock nut SUS304 SUS304 M6x40 bolt bracket Coated steel studdle Coated steel foot bar Coated steel lock...
- Page 36 VII. Dysza powrotna i fi ltr przelewowy zamontowany na stałe (opcjonalne — nie wchodzą w skład zestawu) Basen ogrodowy Kreta jest przygotowany do łatwej późniejszej rozbudowy o system z zewnętrznym fi ltrem piaskowym. Działający system z fi ltrem piaskowym o wydajności co najmniej 4 m3/h zapewnia lepszą czystość i klarowność wody, minimalizuje konieczność...
- Page 37 Upewnij się, że uszczelki fi ltru przelewowego są jednakowo zamontowane wzdłuż otworu z obu stron. Dokręć wkręty równomiernie parami po przekątnej w celu zapewnienia wodoszczelności. Używaj wyłącznie ręcznego wkrętaka, uważając, by nie przekręcić gwintów (nie używaj elektronarzędzi!). Używając ostrego noża, usuń powłokę wokół krawędzi wewnątrz otworu fi ltru przelewowego. Następnie jeszcze raz ostrożnie dokręć...
- Page 38 Nie umieszczaj basenu na przewodach elektrycznych, gazowych ani w miejscach z wysokim poziomem wód gruntowych. Nie stawiaj basenu pod napowietrznymi liniami energetycznymi. Wybierz miejsce osłonięte, gdzie w bezpośrednim pobliżu nie ma drzew, gdyż w przeciwnym razie do base- nu będą wpadać liście. Filtr przelewowy basenu umieść tak, by wiatr w normalnych warunkach dmuchał w jego stronę.
- Page 39 może to powodować wgniecenia w ścianie basenu i odkształcenia. Należy pamiętać, że w przypadku zdecydowania się na wkopanie owalnego basenu w taki sposób, należy zawsze przewidzieć ścianę oporową przy każdym boku basenu, aby zapobiec naporowi ziemi od zewnątrz. Konserwacja basenu: Należy sprawdzać, czy basen jest w nienagannym stanie.
- Page 40 7. Czyszczenie Dodaj odpowiedni składnik do wody w basenie po czyszczeniu i dodaniu chloru. Zapobiega on osadzaniu się wodorostów i kamienia w basenie. 8. Filtr. Odłącz od fi ltru węże biegnące od basenu. Wylej z fi ltru piaskowego całą wodę i schowaj na zimę w miejscu nie narażonym na mróz.
Need help?
Do you have a question about the Splasher SP3509 and is the answer not in the manual?
Questions and answers