Advertisement
Quick Links
Advertisement

Subscribe to Our Youtube Channel
Related Manuals for YitaHome FTKDRH-0005


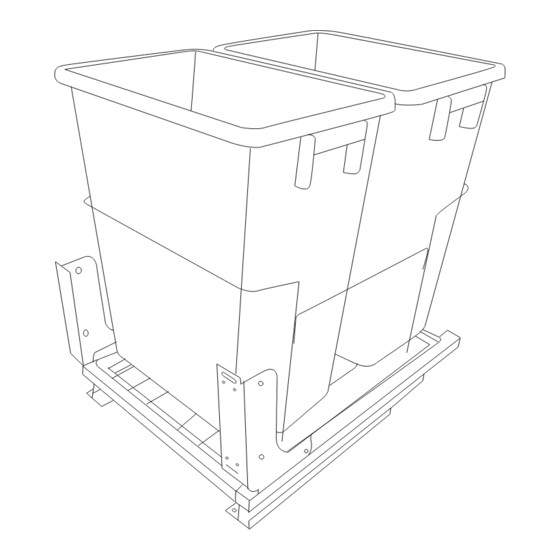
Summary of Contents for YitaHome FTKDRH-0005
- Page 1 ASSEMBLY INSTRUCTIONS ZSGH-V2 FTKDRH-0005 FTKDRH-0006 KITCHEN RUBBISH BIN...
- Page 2 ASSEMBLY INSTRUCTIONS 1.Gather and organize all required parts prior to assembly. 2.Assemble on a flat, clean and soft surface. Item no. Reference Image Item no. Reference Image Qty. Qty. I 1extra M4*25 1extra M5*30...
- Page 3 ASSEMBLY INSTRUCTIONS Item no. Reference Image Item no. Reference Image Qty. Qty. 1extra 1extra M5*8 X18+ 1extra 4extra ST4*14 1extra M6*12...
- Page 4 ASSEMBLY INSTRUCTIONS 6pcs Align the arrow directionv of the paper card with the edge of the cabinet, place the center line of the paper card on the center line of the cabinet, and drill pre-installation holes in the cabinet bottom using a 2.5 mm drilI bit.Align left and right A with the holes in the figure,and fix the first step with six ST4x14mm tapp ing screws.
- Page 5 ASSEMBLY INSTRUCTIONS 4pcs 2pcs 2pcs...
- Page 6 ASSEMBLY INSTRUCTIONS 2pcs 4pcs 4pcs...
- Page 7 ASSEMBLY INSTRUCTIONS 1pcs 2pcs 2pcs...
- Page 8 ASSEMBLY INSTRUCTIONS 2pcs 4pcs I (this product cabinet door thickness requirements for more than 14mm is suitable for installation) Install the door as shown in the picture, use a 2.5mm drill to drill 4 pre-installed holes, and fix the cabinet door’ s part I with 4 x ST4x14mm screws. Please note that the 4 fixing holes are long, so screws should be secured in the middle position, leaving space to facilitate slight door adjustment in the next step.
- Page 9 ASSEMBLY INSTRUCTIONS 8pcs 4pcs 4pcs 2pcs...
- Page 10 ASSEMBLY INSTRUCTIONS Installation Completed...
Need help?
Do you have a question about the FTKDRH-0005 and is the answer not in the manual?
Questions and answers