Table of Contents
Advertisement
Quick Links
Advertisement
Table of Contents

Related Manuals for Conlin GT6A

Summary of Contents for Conlin GT6A
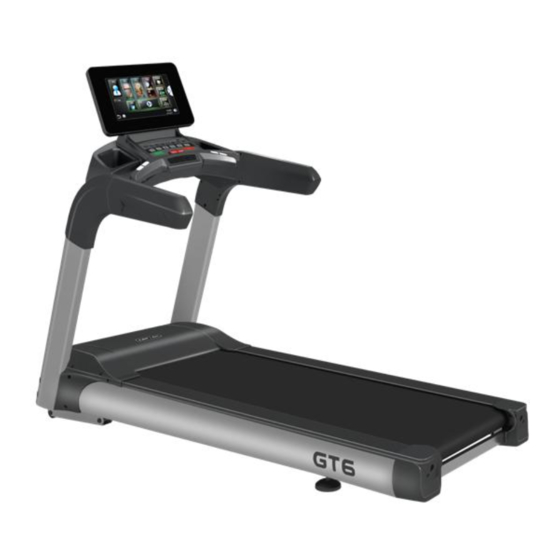
- Page 1 GT6A Android Commercial Motorized Treadmill...
-
Page 2: Table Of Contents
Thank you very much to choose our products. Before installation and usage, please read the instructions carefully. Contents I. Warning, main technical parameters and features ………………………………………………….…….....1 II. Product introduction ……………………………………………………..…………………………………....3 III. Product explosion diagram …………………………………………………………….………………..…..4 IV. Particular sheet of explosion diagram………………………………………………...…………………....5 V. - Page 3 Main technical parameters Input power voltage: AC220V-240V (50Hz-60Hz) Rated voltage: 11A Operating ambient temperature: 0~40℃ Motor power: 3375W Scope of operating speed: 1~20 (km/h) Gradient regulating range: 0-18% Time display range: 0: 00: 00~ 99: 59: 59 (H: M: S) ...
-
Page 4: Product Introduction
II. Product introduction - 3 -... -
Page 5: Product Explosion Diagram
III. Product explosion diagram - 4 -... -
Page 6: Particular Sheet Of Explosion Diagram
IV. Particular sheet of explosion diagram Part name Qty. Part name Qty. Lower Console Welding part of left upright pole M6X25 hexagon socket head cap bolt M10 small flat gasket M6 flat shim Bulkhead of upright pole Screen M10X30 round head hexagon socket screw Safety switch M8X20 hexagon socket pan head screw Decorative element at lower left of the... -
Page 7: Assembly Step
V. Assembly step All parts of electric treadmill have been strictly assembled and debugged before the ex works. An electric treadmill can be easily assembled into if the installation is carried out by observing following steps. Step I: Install upright pole: Open the packing box (box Step II: Install meter head: Open the packing box (box B) and then bring out the treadmill. -
Page 8: Display And Function Operation Of Electronic Meter
M4×10 round head tail-cut tapping screw M4X8 flat head screw Step V: Install bulkhead and power line: Firstly, plug the installing holes below the left and right upright poles and the meter head with 6 bulkhead; finally, connect the power line with one-piece power switch of the treadmill (note: guarantee the power line is off before connecting the power line, so as to avoid personal injury), as shown in the figure below: Step VI: Carefully check if each part of the treadmill is tightened. - Page 9 WiFi,802.11b/g/n Wi-Fi The formats supporting high definition include MP3, WMA, WAV, APE, Video file FLAC, AAC, OGG, M4A, 3GPP, etc. Audio file MP3,WMA etc. 1 USB HOST Start/Pause, Stop, Speed+, Speed -, Incline︽, Incline︾, Volume switch, Physical button Fresh air switch, Main interface button, Return button, Speed shortcut key, Incline shortcut key Bluetooth output Bluetooth output one...
- Page 10 2. Functions of panel keys of the electronic meter: “START/PAUSE” key: in case that power is on and safe lock is fully attracted, press this key to start the treadmill; during operation of the treadmill, press this key to pause the treadmill and keep the operating data, and press the key again to continue with the just-set parameters.
- Page 11 Main interface of display screen of the electronic meter have two pages and display interfaces are as follows after entering into standby state: Page 1 Page 2 Touch the icon " "in the display screen interface to switch to the interface on page 2. Touch the icon " "in the display screen interface to switch to the interface on page 1, and the left and right sliding screens respectively can also switch to the main interface.
- Page 12 Manual mode 3.4.1 A. Directly press “Start” key in standby state. The screen starts three-second count-down with warning tone. After count-down ends, the treadmill operates with the speed of 1.0km/h and incline of 0; and then enter into “Target” window of the exercise interface. B.
- Page 13 3.4.3 “Time” key: after setting exercise time, user starts to move and ends exercise after expected exercise time is achieved. During exercise, user can freely increase and decrease speed and incline and directly press “Stop” to stop its operation. Operating steps are as shown in the following figure: touch “Time” key, determine your target exercise time and press “Start”...
- Page 14 The operation steps are as follows: Touch the "Exercise Program" button, select the built-in program (the built-in program table consists of 3 pages), press the arrow to select the upper and lower pages, or slide the screen left and right to select the upper and lower pages, click the program you need, set the program exercise time, and press "Start"...
- Page 15 SPEED Road INCLINE SPEED Race INCLINE SPEED Slow INCLINE walk SPEED Quick INCLINE walk SPEED Random INCLINE SPEED INCLINE SPEED Sprint INCLINE SPEED Gradual INCLINE SPEED Learner INCLINE SPEED Basic INCLINE SPEED Strides INCLINE SPEED Park INCLINE SPEED Accelerate INCLINE SPEED Endurance INCLINE...
- Page 16 Cardio INCLINE SPEED Long INCLINE Distance SPEED Tempo INCLINE 3.6 Virtual Scenes: (Users Purchase Themselves as Needed) After selecting the scene, start to operate the treadmill. During exercise, the scene will give people an immersive feeling. During exercise, users can freely increase and decrease speed and incline, or directly press “Stop”...
- Page 17 3.7.3 Record data historical exercise of the treadmill is synchronous with data of terminals of cellphone and pad. Open Sports show on terminals of cellphone and pad and check data. Data records are shown in right figure. Specific operation shown “Sports show.pdf”.
- Page 18 3.9 Help Operating steps shown in right figure: touch “Help” key, window displays precautions during use of treadmill and introduction to functions of keys on main interface. 3.10 Wireless network Operating steps are as shown in right figure: touch “Wireless network”...
- Page 19 3.11.2 Cache cleaning The operation steps are as shown in the right figure: touch the "cache cleaning" button, select the application that needs to clean the cache, and touch "cache cleaning" button complete the cleaning. 3.11.3 One-click Restore Operating Steps: Touch "One Button Restore"...
- Page 20 3.13 Time zone User can freely adjust time zone time according to your time zone.Operating steps are as shown in right figure: touch “Time zone”key, enter into submenu and set required time zone and then return to main interface. 3.14 Internet Browse webpage online.
- Page 21 3.18 Main interface key Click the icon in the lower left corner of the display screen in any interface to return to the main interface; The operation function is synchronized with the key function of the electronic watch panel. 3.19 Return key Click the icon in the lower left corner of the display screen in any interface to return to the previous operation interface or exit the application program;...
-
Page 22: Use Method And Safety Protection For Treadmill
How to use: Turn on the Bluetooth switch of the external device, search and pair the Bluetooth of the treadmill (Bluetooth name of the treadmill: Conlin), after the pairing is successful, the treadmill will emit a beep. When playing audio from an external device, the volume of the audio is controlled by the external device. -
Page 23: Precautions
1.1 After the installation is completed, position the safety lock to the corresponding position of electronic meter. 1.2 Before the powering, inspect whether the power ground wire is well grounded and pull the running belt with hands to check whether it can run flexibly without any abnormal sound. 1.3 Plug in the power supply and open the power supply lock. -
Page 24: Daily Servicing And Maintenance Of Electric Treadmill
surface is uneven, it should be stably padded with carpet or rubber plate. 2.4 Pay attention to the interior hygiene usually to reduce indoor dust because its sensibility may be influenced by the dust adhered on the electronic components. 3. Precautions before or during exercise 3.1 For your safety, wear sports clothes and select suitable sports shoes when using the treadmill. - Page 25 special tools, lift the running belt about 10-15cm, pour a good amount of special lubricating oil on the top surface of the running board, and smear it evenly and tighten the running belt. (For adjustment method, see the “Adjusting method for the tightness of running belt”) The over lubrication should be avoided. As for the lubrication, it is by no means “the more the better”.
-
Page 26: Elimination Methods For Common Faults
clockwise adjust the right adjusting bolts or anticlockwise adjust the left adjusting bolts. The deflections of running belt are mainly maintained and repaired by the user. As the deflection may seriously damage the running belt, the deflection should be timely corrected if any. 6. -
Page 27: Precautions For Exercise
System protection. It should be restarted in case A. Overload of artificial blocking E04- Overcurrent fault B. Driving position is blocked or Adjust the driving position or add lubricating oil obstructed C. Internal short circuit of motor Replace motor E05- Overload fault D. - Page 28 Attention: The right of final interpretation for the appearance, specification, model, etc. of products is owned by our company. Any product is subjected to change without notices and product pictures are for reference only! - 25 -...
Need help?
Do you have a question about the GT6A and is the answer not in the manual?
Questions and answers