Table of Contents
Advertisement
Quick Links
Advertisement
Table of Contents

Related Manuals for Conlin GT6

Summary of Contents for Conlin GT6
- Page 1 Commercial Motorized Treadmill...
-
Page 2: Table Of Contents
Thank you very much to choose our products. Before installation and usage, please read the instructions carefully. Contents I. Warning, main technical parameters and features ………………………………………………………1 II. Product introduction…………………………………………………………………………………………3 III. Product explosion diagram ………………………………………………………………………………4 IV. Particular sheet of explosion diagram……………………………………………………………………5 V. - Page 3 Main technical parameters Input power voltage: AC220V-240V(50Hz-60Hz) Rated voltage: 11A Operating ambient temperature: 0~40℃ Motor power: 3375W Scope of operating speed: 1~20 (km/h) Gradient regulating range: 0~18% Time display range: 0 : 0 0 ~ 1 8 0 ( M : S ) ...
-
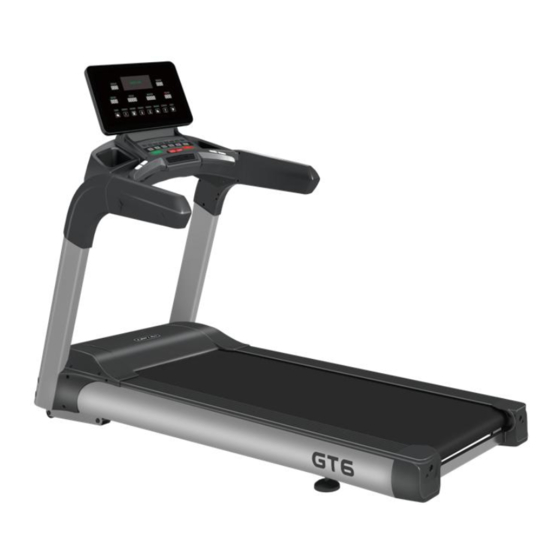
Page 4: Product Introduction
II. Product introduction - 3 -... -
Page 5: Product Explosion Diagram
III. Product explosion diagram - 4 -... -
Page 6: Particular Sheet Of Explosion Diagram
IV. Particular sheet of explosion diagram Part name Qty. Part name Qty. Lower Console Welding part of left upright pole M6X25 hexagon socket head cap bolt M10 small flat gasket M6 flat shim Bulkhead of upright pole Screen M10X30 round head hexagon socket screw Safety switch M8X20 hexagon socket pan head screw Front roller... -
Page 7: Assembly Step
V. Assembly step All parts of electric treadmill have been strictly assembled and debugged before the ex works. An electric treadmill can be easily assembled into if the installation is carried out by observing following steps. Step I: Install upright pole: Open the packing box Step II: Install meter head: Open the packing box (box B) and then bring out the treadmill. -
Page 8: Display And Function Operation Of Electronic Meter
Step V: Install bulkhead and power line: Firstly, plug the installing holes below the left and right upright poles and the meter head with 6 bulkhead; finally, connect the power line with one-piece power switch of the treadmill (note: guarantee the power line is off before connecting the power line, so as to avoid personal injury), as shown in the figure below: Step VI: Carefully check if each part of the treadmill is tightened. - Page 9 2. Display functions: “Incline”window:Display the current slope value. “Speed”window: Display the current speed. “Calorie”window: Display Calories (Count up and count down) “Time”window: Display time (Count up and count down), display “FAT”during the program selection. “Distance”window:Display distance (Count up and count down) “Pulse”window: Display the heart rate, display the program number during the program selection.
- Page 10 running, it is used to adjust the speed, the adjusting interval is 0.1 for each press. It will continue to increase or decrease if the user press and hold the button for more than 0.5 seconds. 3.6 Incline︽ & Incline︾ buttons:In the standby state, it is used to adjust the set value. During the running, it is used to adjust the slope of the running deck.
- Page 11 4.2.4 Press “Incline︽” key to increase incline of the treadmill. 4.2.5 Press “Stop” key so that the treadmill will slow down and stop operation. 4.2.6 Heartbeat data will be displayed for about 3 seconds (heartbeat data is only used for general reference of exercise, and cannot be used as medical data) when the sporter holds the heartbeat handle with both hands.
- Page 12 10 11 12 13 14 15 16 SPEED Lose weight INCLINE SPEED Burn fat INCLINE SPEED Mountain INCLINE SPEED Road INCLINE SPEED Race INCLINE SPEED Slow walk INCLINE SPEED Quick walk INCLINE SPEED Random INCLINE SPEED INCLINE SPEED Sprint INCLINE SPEED Gradual INCLINE...
- Page 13 INCLINE SPEED Repeat INCLINE SPEED Interval INCLINE SPEED Mixed INCLINE SPEED Cardio INCLINE SPEED Long INCLINE Distance SPEED Tempo INCLINE 4.5 User defined program: Except 12 system built-in programs, treadmill is equipped another three user defined programs that allows self to set according to personnel situation: U01, U02 and U03. 4.5.1 Custom program settings:...
- Page 14 F-3, F-4, F-5 interfaces (f-1-gender, f-2-age, f-3-height, f-4-weight, F-5- body mass detection), Press the "Slope ︽" , "Slope ︾" , "Speed+," Speed-"keys to set the parameters of 01-04 (the parameters are shown in the following table). After setting, press the" Target Setting "key to enter the F-5 physical examination interface.
-
Page 15: Use Method And Safety Protection For Treadmill
How to use: Turn on the Bluetooth switch of the external device, search and pair the Bluetooth of the treadmill (Bluetooth name of the treadmill: Conlin), after the pairing is successful, the treadmill will emit a beep. When playing audio from an external device, the volume of the audio is controlled by the external device. -
Page 16: Precautions
1. Debugging of treadmill 1.1 After the installation is completed, position the safety lock to the corresponding position of electronic meter. 1.2 Before the powering, inspect whether the power ground wire is well grounded and pull the running belt with hands to check whether it can run flexibly without any abnormal sound. 1.3 Plug in the power supply and open the power supply lock. -
Page 17: Daily Servicing And Maintenance Of Electric Treadmill
1.8 If you have any questions about the treadmill, please contact the distributor. It is not allowed for laymen to disassemble or maintain the treadmill for fear of damaging the treadmill. 2. Placing environment 2.1 It is only proper for the treadmill to be placed indoors for protection against humidity. It is forbidden to splash water on the treadmill. - Page 18 accumulation of the dust and dirt under the running belt. 1.2 The running belt can be wiped with soft cloth dipped with soapsuds. Don’t let the water flow to the bottom of the running belt and into the shield. 1.3 Regularly check each bolt and nut. Please tighten and fix them immediately with tools if they are loose.
- Page 19 the operating of running belt with feet. At this time, if the running belt stops running, the front drum continues running, but the running belt continues running after being released, indicating that the running belt is excessively loose. Meanwhile, the user may feel the halt at sometimes, and the long-term use under the loose state may shorten the service life of running belt.
-
Page 20: Elimination Methods For Common Faults
Adjusting method for motor belt: Clockwise adjust the motor belt adjusting bolts by half a circle with auxiliary tools. X. Elimination methods for common faults Fault or phenomenon Possible reasons Handling method A. Power supply isn’t connected or Plug power line into AC line or check AC there is no power supply socket No display on the treadmill... -
Page 21: Precautions For Exercise
D. Signal line fault of frequency Replace frequency converter converter A. Treadmill is erected or placed Adjust and horizontally place treadmill not horizontally E13 - anti-inverted off-on action B. Poor line due to inversion of Replace actuator actuator Overvoltage higher than Stop using... - Page 22 Breath: During the exercise, it is not allowed to hold the breath. Generally, inhale from noise when doing the preparing or homing actions and exhale from mouth when putting forth the strength. The breath should be coordinating with the actions. In case of short breath, stop exercising immediately.
- Page 23 Attention: The right of final interpretation for the appearance, specification, model, etc. of products is owned by our company. Any product is subjected to change without notices and product pictures are for reference only! - 22 -...
Need help?
Do you have a question about the GT6 and is the answer not in the manual?
Questions and answers