Table of Contents
Advertisement
Available languages
Available languages
Quick Links
USA office: Fontana
AUS office: Truganina
GBR office: Ipswich
If you're having difficulty, our friendly
customer team is always here to help.
FRA office: Saint Vigor d'Ymonville
USA:cs.us@costway.com
AUS:cs.au@costway.com
GBR:cs.uk@costway.com
FRA:cs.f r @costway.com
Space Heater
Radiateur Électrique
EP25439
THIS INSTRUCTION BOOKLET CONTAINS IMPORTANT SAFETY INFORMATION. PLEASE READ AND KEEP FOR FUTURE REFERENCE.
Advertisement
Table of Contents

Related Manuals for Costway EP25439


Summary of Contents for Costway EP25439
- Page 1 GBR office: Ipswich FRA office: Saint Vigor d'Ymonville USA:cs.us@costway.com If you're having difficulty, our friendly AUS:cs.au@costway.com customer team is always here to help. GBR:cs.uk@costway.com THIS INSTRUCTION BOOKLET CONTAINS IMPORTANT SAFETY INFORMATION. PLEASE READ AND KEEP FOR FUTURE REFERENCE. FRA:cs.f r @costway.com...
-
Page 2: Important Instructions
IMPORTANT INSTRUCTIONS When using this appliance, basic precautions should always be followed to reduce the risk of fire, electric shock and injury to persons, and hyperthermia, including the following: Before You Start CAUTION- High temperature, keep electrical cords, drapery, and other furnishings at least 3 feet (0.9m) from the front of the heater Please read all instructions carefully. -
Page 3: Product Specifications
18.To avoid excessive room temperatures which can cause hyper- Model number:EP25439 thermia: DO NOT leave product running unattended in a confined Rated voltage:120V, 60 Hz space around infants, or individuals with reduced physical, sensory, Power input:1500W... -
Page 4: Switching On/Off
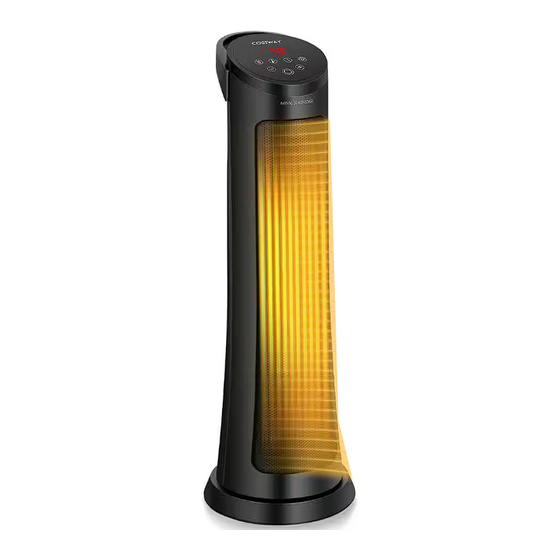
Switching on/off Control panel button (temperature setting) Handle button (mode selection) WARNING Risk of electric shock Display Air outlet grille ♦Always set the power switch (M) to O position before connecting button (swing function) Air vent cover the power plug (N) to a socket outlet. button (timer function) Power switch WARNING High temperature... - Page 5 Adjusting temperature Tip-over protection ♦Use the © button (F) and ㊀ button (H) to set the thermostat to the ♦If the appliance tips over, it switches off automatically. To resume desired temperature between 45 °F and 99 °F. operation, position the appliance in upright position and press button ♦After setting the temperature, the display (C) shows a blinking set (G).
-
Page 6: Instructions Importantes
INSTRUCTIONS IMPORTANTES 14. Ne faites pas passer le cordon sous la moquette. Ne couvrez pas le cordon avec des carpettes, des tapis de passage ou autres. Disposez le cordon à l'écart des zones de circulation et là où il ne Lors de l'utilisation de cet appareil, des précautions de base doivent risque pas de trébucher. -
Page 7: Spécifications Du Produit
(augmenter la valeur d'entrée) bouton (marche/arrêt) Spécifications du Produit bouton (diminuer la valeur d'entrée) bouton (réglage de la température) Numéro de modèle : EP25439 bouton (sélection de mode) Tension nominale : 120V, 60Hz Grille de sortie d'air Entrée de puissance : 1500W Couvercle d'aération... - Page 8 Allumer/éteindre Télécommande REMARQUE Insérez toujours les piles correcte- ment en respectant la polarité (+ et -) AVERTISSEMENT Risque de choc électrique indiquée sur la pile et la télécom- mande (P). ♦ Réglez toujours l'interrupteur d'alimentation (M) sur la position O avant de brancher la fiche d'alimentation (N) sur une prise de 1.
- Page 9 REMARQUE Fonction swing ♦ Appuyez sur le bouton (D) pour activer ou désactiver la fonction Lors de la mise en marche après une utilisation précédente, l'appar- swing. eil revient aux réglages de l'utilisation précédente. Les indicateurs ♦ Pour répartir le flux d'air sur une plus grande surface, appuyez sur correspondants sur le panneau de commande (A) s'allument.
- Page 10 ♦ Retirez le couvercle d'aération (L) (Fig. 3). Nettoyez-le à l'eau tiède savonneuse. Frottez avec une éponge ou une brosse douce si nécessaire. Remontez le couvercle d'aération (L) après qu'il soit complètement sec. ♦ Essuyez l'appareil après le nettoyage. Return / Damage Claim Instructions ♦...
Need help?
Do you have a question about the EP25439 and is the answer not in the manual?
Questions and answers
Mode switch operation not define in manual
To operate the mode switch on the Costway EP25439, press the mode selection button (J) on the control panel. This allows you to switch between different operating modes of the heater.
This answer is automatically generated
On the control panel what do the 4 symbols to the left of the temperature mean?
What are the mode settings and what are icons for each