Table of Contents
Advertisement
Available languages
Available languages
Quick Links
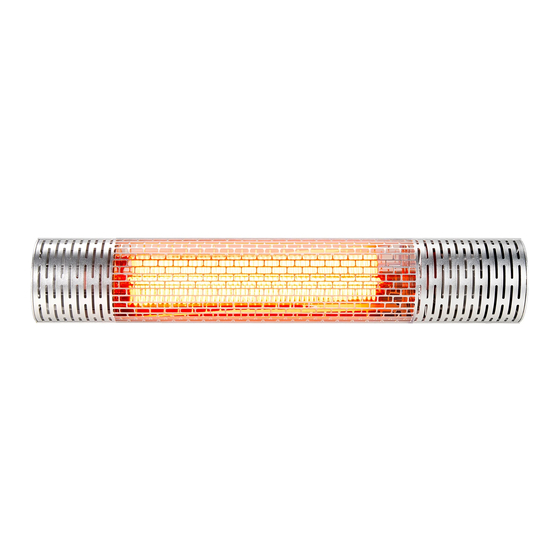
USER'S MANUAL
Electric Infrared Heater
EP25150US-SL
THIS INSTRUCTION BOOKLET CONTAINS IMPORTANT SAFETY INFORMATION. PLEASE READ AND KEEP FOR FUTURE REFERENCE.
Follow Costway
Please give us a chance to make it right and do better!
Contact our friendly customer service department for help first.
Replacements for missing or damaged parts will be shipped ASAP!
EN
FR
Advertisement
Table of Contents

Subscribe to Our Youtube Channel
Related Manuals for Costway EP25150US-SL


Summary of Contents for Costway EP25150US-SL
- Page 1 USER’S MANUAL Electric Infrared Heater EP25150US-SL THIS INSTRUCTION BOOKLET CONTAINS IMPORTANT SAFETY INFORMATION. PLEASE READ AND KEEP FOR FUTURE REFERENCE. Follow Costway Please give us a chance to make it right and do better! Contact our friendly customer service department for help first.
-
Page 2: Before You Start
Contact Us! Do NOT return this item. Contact our friendly customer service department for help first. E-mail US: cs.us@costway.com UK: cs.uk@costway.com Before You Start Before You Start Please read all instructions carefully. Retain instructions for future reference. Separate and count all parts and hardware. - Page 3 ASSEMBLY & OPERATION INSTRUCTION Please read carefully and Save this instruction Warning THESE INSTRUCTIONS SHOULD BE READ CAREFULLY AND RETAINED FOR FUTURE REFERENCE, We cannot be liable for any damages caused by failure to observe these instructions. IMPORTANT SAFETY INSTRUCTIONS READ CAREFULLY-The infrared heater is designed for safe operation.
- Page 4 9. To protect against electric shock, do not immerse cord or plug in water or any other liquid. 10. Do not insert or allow foreign objects to enter any ventilation or exhaust opening , as this may cause an electric shock, fire or damage to the heater.
- Page 5 21. NEVER place hands under the heating elements. ALWAYS allow heating element to cool at least 10 minutes before touching the heating tube or adjacent parts. 22. This product contains recyclable materials. Do not dispose this product as unsorted municipal waste. Please contact your local municipality for the nearest collection point.
- Page 6 This heater is for use on 120 volts. The cord has a plug as shown at A in Figure 68.1. An adapter as shown at C is available for connecting three-blade grounding-type plugs to two-slot receptacles. The green grounding lug extending from the adapter must be connected to a permanent ground such as a properly grounded outlet box.
- Page 7 Warning Tools Needed: *Level * Pencil *Hammer *Screw Driver *Power Drill and drill bits A wall mounting bracket is provide with the heater which has been specifically designed to allow this product to be fitted to a wall or ceiling before drilling the holders for the wall/ceiling is solid and that there are no hidden water pipes or electric wires.
- Page 8 9.Observe the minimum safe distance between the heater body and the inflammable surfaces when mounted. 10.The heater should always have a minimum clearance of 0.5m from a ceiling and adjacent walls. 11.If the heater is to be used outside, a weatherproof outlet is recommended.
- Page 9 Installation Accessories...
- Page 10 Wall Mounted Installation...
-
Page 11: Important Safety Instructions
Warning IMPORTANT SAFETY INSTRUCTIONS The heater must be installed at least 1.9m above the floor Attention: cable should not passing thought the heater... - Page 12 Correct Mounting Installation Position...
- Page 13 Remote Control Instructions 1.POWER BUTTON: Turn the heater off. 2.UP BUTTON: Increase timer and level. 3.DOWN BUTTON: Decrease timer and level. 4.LEVEL BUTTON: Use to adjust the heat levels(L1-L2). Press the Level button then use the up and down buttons(buttons 2 and 3) to increase or decrease the heating level.
- Page 14 Inserting Batteries(not included) Insert 2 AAA/ Alkaline type batteries into your remote control 1.Flip the backside of your remote control and pull out battery cover. Insert the batteries in accordance with the instructions and polarity the batteries. 2.Change the batteries in the same way depicted above. NOTICE: 1.Replace the old batteries with the same type batteries.
- Page 15 CLEANING AND MAINTENANCE Warning Regular and careful cleaning helps your infrared heater operate efficiently for many trouble free years. To clean your heater follow steps below: 1.Unplug the power cord for your safety before cleaning your appliance. 2.Make sure the heater is cool before continuing. 3.To keep the heater clean, the outer shell maybe cleaned with a soft, damp cloth.
- Page 16 5.Do not attempt to repair or adjust any electrical or mechanical functions on this heater. 6.The heater contains no user serviceable parts. Should the product suffer damage or breakdown, it must be repaired by a qualified technician. 7.Damaged supply cords to be replaced by the manufacturer or similarly qualified person in order to avoid hazard.
-
Page 17: Manuel D'utilisation
MANUEL D'UTILISATION Chauffage à infrarouge EP25150US-SL CE MANUEL D’INSTRUCTIONS CONTIENT DES INFORMATIONS IMPORTANTES SUR LA SÉCURITÉ. VEUILLEZ LIRE ET CONSERVER POUR LA RÉFÉRENCE FUTURE. Suivez Costway VEUILLEZ NOUS DONNER UNE OCCASION DE L’AMELIORER ET FAIRE MIEUX! Contactez d’abord notre service à la clientèle amical pour l’aide. -
Page 18: Avant De Commencer
Contactez-nous ! Ne retournez pas cet article. Contactez d’abord notre service à la clientèle amical pour l’aide. E-mail CA:service@costway.com Avant de Commencer Veuillez lire attentivement toutes les instructions. Conservez les instructions pour la référence future. Séparez et comptez toutes les pièces et les outils de matériel. -
Page 19: Consignes De Sécurité Importantes
INSTRUCTIONS DE MONTAGE ET D'UTILISATION Veuillez lire attentivement cette notice et la conserver. Avertissement CES CONSIGNES DOIVENT ÊTRE LUES AVEC ATTENTION ET CONSERVÉES POUR RÉFÉRENCE ULTÉRIEURE. Nous ne pouvons être tenus responsables de tout dommage résultant du non-respect de ces instructions. CONSIGNES DE SÉCURITÉ... - Page 20 l'avant de l'appareil et gardez-les toujours éloignés des côtés et de l'arrière. 8. Ne pas utiliser près ou à proximité immédiate d'une baignoire, d'une piscine ou de toute source de liquide. 9. Afin de prévenir les risques d'électrocution, ne pas immerger le cordon ou la fiche dans l'eau ou tout autre liquide.
- Page 21 19. Pour éviter toute surchauffe de l'appareil, gardez les entrées et sorties d'air propres et exemptes de tout obstacle. Vérifiez régulièrement toutes les entrées et sorties d'air pour vous assurer qu'il n'y a aucune accumulation de saleté ou de poussière. NE PAS COUVRIR. 20.
- Page 22 Ce radiateur est destiné à être utilisé sur 120 volts. Le cordon est muni d'une fiche comme indiqué en A sur l'image 68.1. Un adaptateur tel qu'illustré en C est disponible pour connecter des fiches à trois lames avec mise à la terre à des prises à deux fentes. La cosse de mise à la terre verte qui sort de l'adaptateur doit être reliée à...
-
Page 23: Installation
INSTALLATION Outils nécessaires : * Niveau * Crayon * Marteau * Tournevis * Perceuse électrique et forets Un support de montage mural est fourni avec le radiateur qui a été spécialement conçu pour vous permettre d'installer ce produit sur un mur ou un plafond. - Page 24 7.Gardez le câble d'alimentation loin du corps du radiateur qui chauffera pendant l'utilisation. 8.N'installez pas le radiateur sur une surface inflammable. 9.Respectez la distance minimale de sécurité entre le corps du radiateur et les surfaces inflammables lors du montage. 10.L'appareil doit toujours être à une distance minimale de 0,5 m du plafond et des murs adjacents.
- Page 25 Accessoires d’installation Support En équerre 4PCS Cheville plastique 4PCS PA5mm*25mm 4PCS Boulon M6mm*12mm 4PCS Écrou M6mm 2PCS Rondelle Ø6mm*1mm 2PCS Boulon M6mm*12mm 2PCS...
- Page 26 Installation murale...
- Page 27 Warning IMPORTANT SAFETY INSTRUCTIONS Le radiateur doit être installé à au moins 1,9 m du sol. Attention : le câble ne doit pas passer à travers l'appareil.
- Page 28 Position correcte de montage...
- Page 29 Instructions pour la télécommande 1.BOUTON D'ALLUMAGE/ permet d'éteindre le radiateur. 2.TOUCHE HAUT : permet de régler la minuterie (+) et le niveau. 3.TOUCHE BAS : permet de régler la minuterie (-) et le niveau. 4.TOUCHE TEMPÉRATURE : permet de régler les degrés de chaleur (L1-L2).
- Page 30 Insertiton des piles (non incluses) Insérez 2 piles de type AAA/alcaline dans votre télécommande. 1.Retournez votre télécommande et retirez le couvercle des piles. Insérez les piles en respectant les instructions et les polarités. 2.Changez les piles de la manière décrite ci-dessus. REMARQUE : 1.Remplacez les piles usagées par des piles de même type, autrement, votre appareil risque de ne pas fonctionner correctement.
-
Page 31: Nettoyage Et Entretien
NETTOYAGE ET ENTRETIEN Warning Un nettoyage régulier et minutieux permet à votre radiateur infrarouge de fonctionner efficacement pendant de nombreuses années, sans incident. Pour nettoyer votre radiateur, veuillez suivez les étapes ci-dessous : 1. Pour votre sécurité, débranchez le cordon d'alimentation avant de nettoyer votre appareil. - Page 32 d'alcool ou d'essence mentholée. 5.N'essayez pas de réparer ou de régler les fonctions électriques ou mécaniques de ce radiateur. 6.L'appareil ne contient aucune pièce réparable par l'utilisateur. En cas de dommage ou de panne, le produit doit être réparé par un technicien qualifié.
Need help?
Do you have a question about the EP25150US-SL and is the answer not in the manual?
Questions and answers