Table of Contents
Advertisement
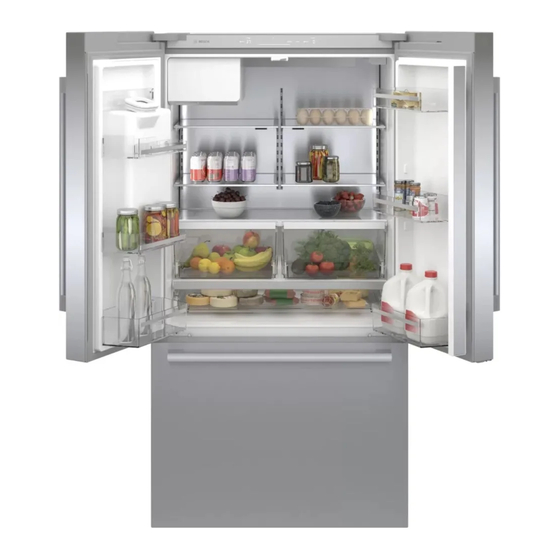
Refrigerator-freezer
Réfrigérateur / congélateur combiné
Refrigerador/congelador
B36CD...
en
Installation and Using Instructions ...................................... 2
fr
Notice de montage et d'utilisation .................................... 35
es
Instrucciones de uso y montaje ......................................... 69
Advertisement
Table of Contents

Related Manuals for Bosch B36CD50SNS/02


Summary of Contents for Bosch B36CD50SNS/02
- Page 1 Refrigerator-freezer Réfrigérateur / congélateur combiné Refrigerador/congelador B36CD... Installation and Using Instructions ........2 Notice de montage et d’utilisation ........35 Instrucciones de uso y montaje ......... 69...
-
Page 2: Table Of Contents
en-us en Table of contents e n I n s t a l l a t i o n a n d U s i n g I n s t r u c t i o n s Light of ice and water dispenser....21 Important safety instructions . -
Page 3: Important Safety Instructions
Important safety instructions en-us Important safety instructions READ INSTRUCTIONS - DO NOT DISCARD! Important safety instructionsI m p o r t a n t s a f e t y i n s t r u c t i o n s R EAD INSTRUCTIONS - DO NOT DISCARD! Children should be supervised to ensure Definitions ■... -
Page 4: Risk Of Cold Burns
en-us Important safety instructions Important safety instructions READ INSTRUCTIONS - DO NOT DISCARD! The appliance, cord and accessories Risk of fire ■ should only be repaired or replaced by Portable multi-outlet power strips and the manufacturer or an authorized portable power supplies may overheat, service provider. -
Page 5: Intended Use
Intended use en-us 8Intended use 5 Installation and connection U se this appliance I n t e n d e d u s e only for cooling and freezing food, ice making ■ C ontents of package and water dispensing. I n s t a l l a t i o n a n d c o n n e c t i o n only in the home and in the home environment. - Page 6 en-us Installation and connection Installation dimensions ¾ ″ (1441 mm) ¹¹/ ″ ⁹/ ″ (93 mm) (268 mm) ¾ ″ ⅜ ″ (45 mm) (1102 mm) 90° 90° 118° ½ ″ (1765 mm) Minimum clearances Leave a clearance of 1/2 ˝ (12.7 mm) above the appliance.
- Page 7 Installation and connection en-us Use a 2.5 mm Allen wrench to tighten the bottom Ventilation pre-assembled screws clockwise. Never cover or block ventilation openings. Aligning the appliance CAUTION To avoid damaging the floor, always move the ■ appliance with the height-adjustable feet Installing the door handle screwed upwards.
- Page 8 en-us Installation and connection Loosen the safety screw. Align refrigerator compartment doors Aligning the vertical gap of the doors: CAUTION Do not remove the safety screw. Remove any items contained in the doors. Note: Remove T20 screw and cover cap on the door hinge.
- Page 9 Installation and connection en-us Push up the adjustable part and turn by 60° until Aligning the horizontal gap between the doors and the desired position is reached. drawer: – The door height can be set at 2 levels, adjusted by 1/16" (1.6 mm) in each case. The higher level is followed by the lower.
- Page 10 en-us Installation and connection Loosen the upper screw on both sides. Aligning the drawers Do not remove the screws. Note: You can align the drawer vertically: Open the drawer as far as it will go and remove the bin. Remove the center screw on both sides. Lift the drawer and remove the lower screw on If you want to reset the drawer to the factory Note:...
- Page 11 Installation and connection en-us Loosen the upper and lower screw on both sides. You can adjust the angle of the drawer: Do not remove the screws. Note: Open the drawer as far as it will go and remove the bin. Remove the center screw on both sides.
-
Page 12: Saving Energy
en-us Installation and connection Saving energy If you follow the instructions below, your appliance will use less power. Note: The arrangement of the equipment does not affect the energy consumption of the appliance. Installing the appliance Keep the appliance out of direct sunlight. The appliance needs to cool less frequently at low ambient tempera- tures and therefore consumes less power. -
Page 13: Before Using For The First Time
Installation and connection en-us Before using for the first time Electrical connection Remove information material, adhesive tape and CAUTION protective foil. Remove the power cord from inside the Do not connect the appliance to electronic energy saver plugs. appliance. Clean the appliance. ~ "Cleaning"... -
Page 14: Getting To Know Your Appliance
en-us Getting to know your appliance *Getting to know your appliance A ppliance G e t t i n g t o k n o w y o u r a p p l i a n c e bottle )"... -
Page 15: Operating Controls
Getting to know your appliance en-us Operating controls 0 8 @ ` h )" )* )2 ): Refrigerator compartment Û super button ÿ power button Switches super cooling on or off. Switches the appliance on or off. Refrigerator compartment temperature alarm off button display Switches off the alarm. -
Page 16: Ice And Water Dispenser
en-us Getting to know your appliance Ice and water dispenser Equipment Storage compartment You can remove the storage compartment: Lift up the storage compartment and remove. ■ bottle Shelf You can remove and adjust the shelf: )" Lift shelf and remove. ■... - Page 17 Getting to know your appliance en-us Vegetable bin Frozen food bin (top) You can remove the bin: CAUTION Pull out the bin all the way, lift at the front and ■ DAMAGE TO EQUIPMENT remove. Never remove the partition wall from the bin. You can insert the bin: Pull out the telescopic rails all the way.
- Page 18 en-us Getting to know your appliance You can remove the ice cube bin: Ice maker Grasp the left and right-hand notch under the bin ■ and pull forward to remove. WARNING RISK OF INJURY! Never reach under or into the ice maker. Notes Ice cube production will start as soon as freezer ■...
-
Page 19: Operating The Appliance
Operating the appliance en-us Water filter 1Operating the appliance After installing a new water filter, for hygiene Note: reasons discard the ice cubes produced within the S witching the appliance on first 24 hours and dispense water for 5 minutes and O p e r a t i n g t h e a p p l i a n c e discard. -
Page 20: Setting The Temperature
en-us Operating the appliance Setting the temperature Energy saving mode You can set the appliance to save energy with the Recommended temperature energy-saving mode. Refrigerator compartment: 37 °F (3 °C) The appliance automatically sets the following Freezer compartment: 0 °F (–18 °C) temperatures: Refrigerator compartment: 43 °F (6 °C) Cooling compartment... -
Page 21: Sabbath Mode
Operating the appliance en-us Sabbath mode Change filter alarm All non-essential functions are switched off so you When the change filter alarm switches on, the can also use the appliance on the Sabbath. change filter button lights up. The alarm is designed to switch on every 6 months. -
Page 22: Setting The Bottle Fill Water Amount
en-us Alarm Setting the bottle fill water amount MAlarm You can adjust the factory-set water bottle filling amount: D oor alarm A l a r m The maximum fill time is 60 seconds. The light Note: If the appliance door is left open for a while, a bars flash during the operation. -
Page 23: Home Connect
Cn. ■ sheet, which is available for download at http:// Press the Y/X submenu button repeatedly until www.bosch-home.com together with the submenu display shows SA and the instructions. To do so, enter the E-number of your settings display OF. -
Page 24: Installing Updates For The Home Connect Software
en-us Home Connect Connecting the refrigerator to the Reset Home Connect settings Home Connect app If there is a problem when trying to establish a The appliance automatically connects to the app connection, or if you would like to register the with set-up for the first time after a connection to the appliance on a different WLAN home network (Wi-Fi), WLAN home network has been established (Wi-Fi). -
Page 25: Information On Data Protection
Refrigerator compartment en-us Information on data protection URefrigerator The first time your Home Connect appliance is compartment registered on a WLAN home network connected to the Internet (Wi-Fi), your appliance will transmit the following types of data to the Home Connect server T he refrigerator compartment is suitable for storing (initial registration): R e f r i g e r a t o r c o m p a r t m e n t... -
Page 26: Cold Storage Bin
en-us Freezer compartment Cold storage bin ;Ice and water dispenser The temperatures in the cold storage bin are lower than in the refrigerator compartment. Temperatures Y ou can use the ice and water dispenser to below +32 °F (0 °C) may occur. I c e a n d w a t e r d i s p e n s e r dispense: Ideal for storing fish, meat and sausage. -
Page 27: Operation Of The Ice And Water Dispenser
Defrosting en-us Operation of the ice and water dispenser Bottle fill option You can dispense a specific water amount with the When the appliance door is open, the ice and ■ bottle fill option: water dispenser stops, and the button lock is switched on. -
Page 28: Cleaning
en-us Cleaning Telescopic rails DCleaning Removing telescopic rails Pull out telescopic rail. CAUTION Push lock in the direction of the arrow. C l e a n i n g AVOID DAMAGING THE APPLIANCE AND THE Detach telescopic rail from the rear pin. EQUIPMENT. - Page 29 Cleaning en-us Vegetable bin cover Installing the cover: Attach the cover at the back. Remove the cover: Attach the cover at the front on one side. Take out the vegetable bin. Bend down the cover slightly in the middle and Bend down the cover slightly in the middle and attach at the front on the other side.
-
Page 30: Odors
en-us Odors Shelf above the vegetable bin Drip tray Pull out the vegetable bin all the way. Press down and remove drip grate in top right Lift the shelf at the front and take out. corner. Wipe drips away with a soft cloth and clean the drip tray with lukewarm water. -
Page 31: Noises
Noises en-us Preventing noises >Noises Appliance is not level: Align appliance. ~ "Aligning the appliance" on page 7 N ormal noises N o i s e s The appliance is not "free-standing": Make sure Droning: A motor is running, e.g. refrigerating unit, the appliance is not touching other surfaces and the fan, water valve is activated. -
Page 32: Dispenser
en-us Troubleshooting – what to do? Display indicates E…. The electronics have detected an error. Disconnect the appliance from power for 1 minute, either by removing the power cord from the wall outlet or by switching off the circuit breaker. After reconnecting the appliance, if error persists please con- tact customer service. - Page 33 Troubleshooting – what to do? en-us Ice and water dispenser not working. Water is dripping from dispenser. Air may be trapped in the water system. To remove air, allow water to dispense for at least 5 minutes and discard. Repeat this step if you still experience water dripping.
-
Page 34: Customer Service
en-us Customer service 4Customer service B efore calling customer service, please check C u s t o m e r s e r v i c e whether you can correct the fault yourself. If you are unable to correct the fault, please contact customer service. - Page 35 *8001188554* 8001188554 (0006) en-us, fr-ca, es-mx...
Need help?
Do you have a question about the B36CD50SNS/02 and is the answer not in the manual?
Questions and answers
Does not make ice
The Bosch B36CD50SNS/02 may not be making ice due to several possible reasons:
1. Ice maker is not cycling properly, causing water to overflow instead of forming ice.
2. Ice cubes may be stuck and blocking the ice chute.
3. The ice cube bin may not be correctly installed.
4. Water supply may not be connected or turned on.
5. There may be a leak or damage in the water supply line.
6. A newly installed filter might be leaking slightly.
7. The dispenser or ice maker could be locked.
8. Doors may not be fully closed, which affects ice production.
Try checking and correcting these issues. If the problem persists, disconnect power for 1 minute and reconnect. If ice is still not produced, contact customer service.
This answer is automatically generated
b36cd50sns/03 is freezing in freshfood side also.