Advertisement
Quick Links
Advertisement

Related Manuals for White Knight DW1460IA


Summary of Contents for White Knight DW1460IA
- Page 1 DW1460IA 14 place se ttings...
-
Page 2: Table Of Contents
Dear Customer, Please carefully read this manual before using the dishwasher, it will help you to use and maintain the dishwasher properly. Control Panel...........3 Keep it as a refer in the later days. Dishwasher Features........3 Pass it on to any subsequent owner of the appliance. This manual contains sections on safety Instructions, 、... - Page 3 When using your dishwasher, follow the precautions listed below: This appliance can be used by children aged from 8 years and above and persons with reduced physical, sensory or mental capabilities or lack of experience and knowledge if they have b een given supervision or instruction concerning use of the appliance in a safe way and understand the hazards involved.
- Page 4 This appliance must be earthed. In the event of a malfunction or breakdown, earthing will reduce the risk of an electric shock by providing a path of least resistance of electric current. This appliance is equipped with a cord having an equipment-earthing conductor and a grounding plug.
- Page 5 2) Warning: Knives and other utensils with sharp points must be loaded in the basket with their points down or placed in a horizontal position. Check that the detergent powder is empty after completion of the wash cycle. Do not wash plastic items unless they are marked dishwasher safe or the equivalent.
- Page 6 Dispose of the dishwasher packaging material correctly. All packaging materials can be recycled. Plastic parts are marked with the standard international abbreviations: for polyethylene, e.g. sheet wrapping material for polystyrene, e.g. padding material POM polyoxymethylene, e.g. plastic clips polypropylene, e.g. Salt filler ABS Acrylonitrile Butadiene Styrene, e.g.
-
Page 7: Control Panel
For detailed operating m ethod read the corresponding content on the instruction manual. Switch on the ap pliance Open the door,press the On/Off button to switch on the appliance . With each wash cycle. Compartment Fill the dete rgent dispenser For programmes with pre-wash only. - Page 8 To get the best performance from your dishwashe r, read all operatin g instructions before usin g it for the first time. 6.Half load functions Button: To select Half load 1.Power indicator: To show when the power on. functions. (With this Half load function you can only use it when yo u have only about or less than 2.S alt and rins e aid wa rn ing li ght s: To show 6 place setting dish ware , and you will see less...
- Page 9 Before using your dishwasher for the first time: Set the water softener Add 1.5Kg dishwasher salt and then full fill the salt container with water Fill the rinse aid dispense r Fill in detergent The water softener must be set manually, using the water hardness dial. The water softener is designed to remove minerals and salts from the water, which would have a detrimental or adve rse effect on the operation of the appliance.
- Page 10 Always u se th e sa lt int end ed f or u se wit h dis hwash er. The sa lt con tai ner is loca ted be neath th e low er b aske t an d sho uld be fil led a s exp laine d in th e fo llowin g: Attenti on! Only u se sa lt spe cific ally d esign ed for the u se in dishw ashe rs! Ev ery oth er t ype o f...
- Page 11 When to Refill the Rinse Aid Dispe nser If there is no rinse-aid warning light in the control panel, you can estim ate the amount from the co lour " " of the optica l level indica tor C located next to the cap. When the rinse-aid container is full, the whole indicator will be dark .As the rinse -aid diminishes, the size of the dark dot decreases.
- Page 12 D etergents There are 3 so rts of detergents 1.With phosphate and with chlorine 2.With phospha te and w ithout ch lorine 3.Without phosphate and without chlorine Normally new pulverised detergent is without phosphate. Thus the water softener functio n of phosphate is not given.
- Page 13 Fill in Detergent Fill the detergent dispenser with detergent. The marking indicates the dosing levels , as illustrated on the right: The place of main wash cycle detergent placed. The place of pre-wash cycle detergent place d. Please observe the manufacturers dosing and storage Recommendations as st ated on the detergent packaging.
- Page 14 Consider buying utensils which are identified as dishwasher-proof. Use a mild detergent that is described as 'kind to dish es'. If necessary, seek further information from the detergent manufacturers. For particular items, select a program with as low a temperature as possible. To prevent damage, do not take glass and cutlery out of the dishwasher immediately after the programme has ended.
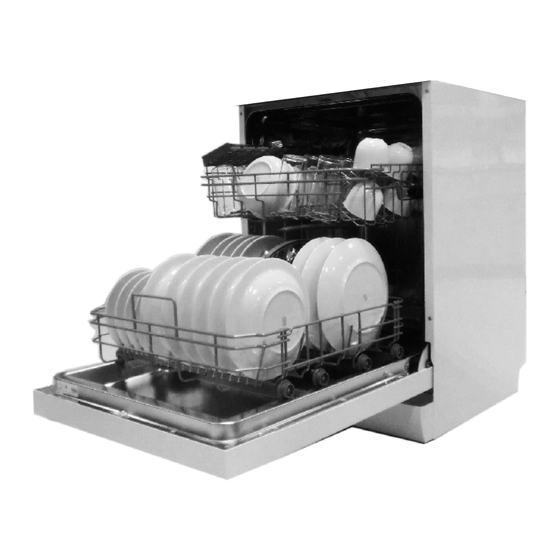
- Page 15 The upper basket is designed to hold more delicate We suggest that you place large items and the most and lighter dishware such as glasse s, co ffee and difficult to clean items are to be placed into the lower tea cups and saucers, as well as plates, sm all bowls basket: such as pots, pans, lids, serving dishes and and shallow pans (as long as they are not too dirty).
- Page 16 Means: need to fill rinse into the R inse-Aid Dispense r. ( ℃) Prewash For h eav iest so iled crocker y, ( ℃ ) Wash 6 0 、 and norm ally soiled p ot s Int ensive Rins e 5/ 30g 、...
-
Page 17: Wash Cycle Table
Premise: A cycle that is underway can only be m odifie d if it has only been running for a short time. Otherwise, the detergent may have already been re leased, and the appliance may have already drain ed the wash water. If this is the case, the detergent disp enser must be refilled (see the section entitled "... - Page 18 The filter prevents larger remnants of food or other objects from getting inside the pump. The residues may block the filter, in this case they must be removed. The filter system consists of a coarse filter,a flat (Main filter) And a microfilter(Fine filter). Main filt er Food and soil particle s trapped in this filter are pulve rized by a special jet on the lower spray arm and wash ed down to drain.
- Page 19 R emarks: - Inspect the filters for blocking after every time the dishwasher has been used. - By unscrewing the coarse filter, you can remove the filter system. Remove any food remnants and clean the filters under running water. The entire filter assembly should be cle aned once a week . C leaning t he Filter To clean the coarse filter and the fine filter, use a cleanin g brush.
-
Page 20: Installation Preparation
Af ter Eve ry Wash When no t in U se for a LongTim e It is recommend that you run a wash cycle with the After eve ry wash, turn off the water supply to the dishwasher empty and then remove the plug from the appliance and le ave the door slightly open so that socket, turn off the water supply and leave the door of moisture and odours are not trapped inside. -
Page 21: Aesthetic Panel's Dimensions And Ins Tallation
Pl ease caref ully read th e installati on instruct ion. Illustrations of cabinet dimensions and installation position of the dishwasher Preparat ions should be made before moving the dishwasher to the installation place . Choose a place near the sink to facilitate the installation of inlet and drain hoses (see figu re 1). - Page 22 2 Install the hook on the aesthetic wooden panel and put the hook into the slot of the outer door of dishwasher(see figure 4a). After positioning of the panel , fix the panel onto the outer door by screws and bolts(See figure 4b) . 【...
-
Page 23: Tension Adjustment Of The Door Spring
● Tension adjustment of the door spring The door sp rings are se t at the facto ry to t he pro per te nsion for th e oute r door. If aest hetic woode n pan el are instal led, you will have to adjust the door spring tensi on. Rotate the a djusti ng scr ew to drive t he ad justor to strain or relax t he ste el cab le (see fi gure 5 ). -
Page 24: Dishwasher Installation Steps
Dishwasher installation steps ● Install the furniture door to the outer door of the dishwasher using the brackets provided. Refer to the template for positioning of the brackets. Adjust the tension of the door spri ngs by using an All en key turning in a clockw ise m otion t o tight en the left and right door springs. - Page 25 Dishwash er must be le vel for prope r dish rack o perati on and wash perfor mance . Place a spiri t level on doo r and rack tr ack inside th e tub a s show n to check t hat the d ishwa sher is level.
- Page 26 Connect the cold water supply hose to a threa ded 3/4(inch) connector and make sure that it is fastened tightly in place . If the water pipes are new or have not been used for an extended period of time, let the water run to make sure that the water is clear.
- Page 27 Fuse blown, or the Replace fuse or reset circuit breaker. Remove any other circuit breaker acted appliances sharing the same circuit with the dishwasher Power supply is not Make sure the dishwasher is turned on and the door is turned on closed securely.
- Page 28 The dishes were not See notes in " Loading the Dishwasher Baskets ". loaded correctly. The programme was Select a more intensive programme. not powerful enough. See" Wash Cycle Table . " Not enough detergent Use more detergent, or change your detergent. was dispensed.
- Page 29 Height : 815mm Width : 598 mm Depth : 550mm with the door closed Water pressure: 0.04-1.0MPa Power supply: see rating label Capacity: 14 place settings...
- Page 31 Sheet of household dishwasher according to EU Directive 1059/2010: Manufacturer WHITE KNIGHT Type / Description DW1460IA Standard place settings Energy efficiency class Annual energy consumption 266 kWh /annum Energy consumption of the standard cleaning cycle 0.940 kWh Power consumption of off-mode 0.30 W...
- Page 32 Crosslee plc,Halifax,H 3 8DE...
Need help?
Do you have a question about the DW1460IA and is the answer not in the manual?
Questions and answers
flashing red glass symbol no leak ...ideas please
A flashing red glass symbol on a White Knight DW1460IA dishwasher indicates an overflow, meaning that some element of the dishwasher is leaking. If overflow occurs, the main water supply should be turned off before calling for service. Additionally, if there is water in the base pan due to an overfill or small leak, it should be removed before restarting the dishwasher.
This answer is automatically generated