
Related Manuals for Monster ABRA A5 V21.1


Summary of Contents for Monster ABRA A5 V21.1
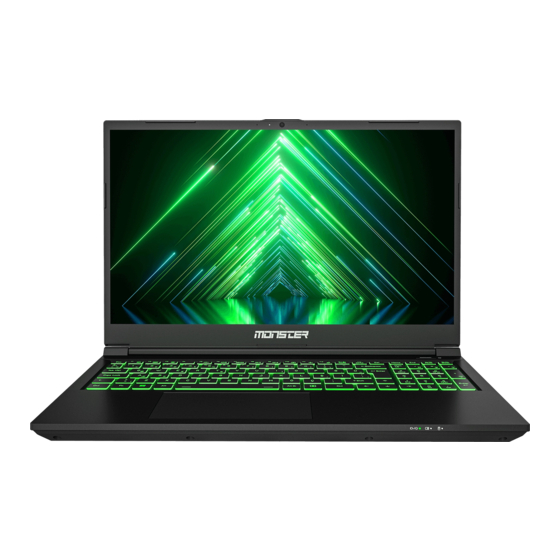
- Page 1 A5 V21.1 USER MANUAL BENUTZERHANDBUCH KULLANIM KILAVUZU MANUAL DE USUARIO MANUEL DE L’UTILISATEUR MANUALE UTENTE دليل المستخدم...
- Page 2 About This User Guide This user manual is a brief introduction to getting your system started. This is a supplement, and not a substitute for the expanded English language User’s Manual in Adobe Acrobat format on the Device Drivers & Utilities + User’s Manual disc supplied with your computer.
- Page 3 Trademarks Intel is a trademark/registered trademark of Intel Corporation. Windows is a registered trademark of Microsoft Corporation. FCC Statement This device complies with Part 15 of the FCC Rules. Operation is subject to the following two conditions: 1. This device may not cause harmful interference. 2.
- Page 4 Servicing Do not attempt to service the computer yourself. Doing so may violate your warranty and expose you and the computer to electric shock. Refer all servicing to authorized service personnel. Unplug the computer from the power supply. Then refer servicing to qualified service personnel under any of the following conditions: •...
- Page 5 • Note that in computer’s featuring a raised electro-plated logo, the logo is covered by a protective adhesive. Due to general wear and tear, this adhesive may deteriorate over time and the exposed logo may develop sharp edges. Be careful when handling the computer in this case, and avoid touching the raised electro-plated logo.
- Page 6 System Startup 1. Remove all packing materials. 2. Place the computer on a stable surface. 3. Securely attach any peripherals you want to use with the computer (e.g. keyboard and mouse) to their ports. 4. When first setting up the computer use the following procedure (as to safeguard the computer during shipping, the battery will be locked to not power the system until first connected to the AC/DC adapter and initially set up as below):...
- Page 7 System Software Your computer may already come with system software pre-installed. Where this is not the case, or where you are re-configuring your computer for a different system, you will find this manual refers to Microsoft Windows 11. RAID Support You need to setup RAID before installing your Windows operating system (see RAID Setup page).
- Page 8 Description RAID Level RAID 0 Identical drives reading and writing data in parallel to increase performance. RAID 0 implements a striped disk (at lease two array and the data is broken into blocks and each block is SSDs needed) written to a separate drive. Identical drives in a mirrored configuration used to protect RAID 1 data.
- Page 9 7. Go to Intel Rapid Storage Technology (in the Advanced menu) and select ® Create RAID Volume. 8. You can now setup your RAID volume using the installed SSDs. 9. Select Name and type a name of your choice for your RAID volume and select <Yes>.
- Page 10 System Map: Front View With Display Open Figure 2 - Front View with Display Open 1. Webcam 2. *Camera LED *When the camera is in use, the LED will be illuminated. 3. Built-In Array Microphone 4. Display 5. Power Button 6.
- Page 11 LED Indicators The LED indicators on the computer display helpful information about the current status of the computer. Icon Color Description Orange The AC/DC Adapter is Plugged In Green The Computer is On Blinking Green The Computer is in Sleep Mode Orange The Battery is Charging The Battery Has Reached...
- Page 12 Keyboard Your notebook comes with a multi-color LED keyboard. You can change the color for the multi-color LED keyboard. The keyboard has a numeric keypad for easy numeric data input. Pressing Num Lk turns on/off the numeric keypad. It also features function keys to allow you to change operational features instantly. Function Keys Scr Lk &...
- Page 13 The LED Keyboard application can be accessed by clicking the LED Keyboard icon in the Control Center (or by pressing the Fn plus key). Function Keys & Visual Indicators The function keys (F1 - F12 etc.) will act as hot keys when pressed while the Fn key is held down.
- Page 14 Keys Function/Visual Indicators Display Brightness Fn + Decrease/Increase Camera Power Toggle Fn + Fn + Airplane Mode Toggle Fn + Sleep Toggle Number Lock Toggle Fn + Scroll Lock Toggle Caps Lock Toggle Fn + Control Center Toggle Fan Speed Control Fn + *Note: It is recommended that you use Maximum fan speed when playing games.
- Page 15 System Map: Front, Left & Right Views Figure 3 - Front, Left & Right Views 1. LED Indicators 7. 2-In-1 Audio Jack (Headphone /Microphone) 2. Security Lock Slot 8. Speakers 3. Vent 9. MicroSD Card Reader 4. USB 3.2 Gen 1 Type-A Port 10.
- Page 16 2. Make sure you select the correct device from the drop-down menu corresponding to the device plugged-in (e.g. choose “Headset” if you have plugged-in a headset and do not choose “Headphone” in this case), and then click OK to save the setting. 3.
- Page 17 Bottom Cover Removal Warning Do not remove any cover(s) and/or screw(s) for the purposes of device upgrade as this may violate the terms of your warranty. If you need to replace/remove the SSD/RAM etc., for any reason, please contact your distributor/supplier for further information. Control Center Run the Control Center from the Start menu in Windows .
- Page 18 The notification area of the taskbar is in the bottom right of the screen. Some of the control panels and applications referred to throughout the course of this manual can be accessed from here. Throughout this manual you will see an instruction to open the Control Panel.
- Page 19 Microsoft Hybrid Graphics Microsoft Hybrid Graphics is a seamless technology designed to get best performance from the graphics system while allowing longer battery life, without having to manually change settings. The computer’s operating system (and some applications) will automatically switch between the integrated GPU and the discrete GPU when required by the applications in use.
- Page 20 To configure the displays using the Project menu: 1. Attach your external display(s) to the appropriate port, and turn it(them) on. 2. Press the + P (or Fn + F7) key combination. 3. Click on any one of the options from the menu to select PC screen only, Duplicate, Extend or Second screen only.
- Page 21 Audio Features You can configure the audio options on your computer from the Sound control panel in Windows. Access the Sound control panel via the Settings (System > Sound) item in the Start menu. The volume may be adjusted by means of the Fn + F5/F6 key combination.
- Page 22 The Power mode can be set to Balanced (default) which balances performance and battery life, Best power efficiency for better battery life with reduced performance, and Best Performance for improved performance but with greater battery consumption. You can also customize the settings for how long your computer will remain inactive before it turns off the screen or goes to sleep.
- Page 23 Latest Updates After installing all the drivers make sure you enable Check for updates (Settings > Windows Update) and go to the Microsoft Store and click Downloads and updates > Get updates to update all Apps etc. Figure 10 - Install Drivers Driver Installation &...
- Page 24 Driver Installation General Guidelines As a general guide follow the default on-screen instructions for each driver (e.g. Next > Next > Finish) unless you are an advanced user. In many cases a restart is required to install the driver. Make sure any modules (e.g. WLAN or Bluetooth) are ON before installing the appropriate driver.
- Page 25 Bluetooth Module Make sure the Bluetooth module is turned on (and not in Airplane Mode) before configuration begins. Bluetooth Configuration in Windows 1. Click the Settings item in the Start Menu. 2. Click Bluetooth & devices. 3. Click Add device > Bluetooth and a list of discovered devices will appear. 4.
- Page 26 TPM Management in Windows You can manage your TPM settings from within Windows: 1. Go to the Control Panel. 2. Click BitLocker Drive Encryption (System and Security). 3. Click TPM Administration. Figure 12 - BitLocker Drive Encryption (TPM Administration) 4. The TPM Management window allows you to configure the TPM within Windows.
- Page 27 TPM Actions 1. Click Prepare the TPM and follow the instructions in the Wizard to prepare the TPM (this will probably require a restart of the computer and confirmation of the setting changes after restart by pressing the appropriate F key). 2.
- Page 28 BIOS • INSYDE BIOS (256Mb SPI Flash ROM) Memory • Dual Channel DDR4 • Two 260 Pin SO-DIMM Sockets • Supporting up to 3200MHz DDR4 Memory • Memory Expandable up to 64GB • Compatible with 8GB,16GB or 32GB Modules (The real memory operating frequency depends on the FSB of the processor.) Display Options •...
- Page 29 Interface • 1x USB 2.0 Port • 1x USB 3.2 Gen 1 Type-A Port • 2x USB 3.2 Gen 2 Type-C Port • 1x Mini DisplayPort 1.4 • 1x HDMI-Out Port • 1x Microphone-In Jack • 1x 2- In-1 Audio Jack (Headphone /Microphone) •...
- Page 30 Environmental Spec • Temperature Operating: 5°C - 35°C Non-Operating: -20°C - 60°C • Relative Humidity Operating: 20% - 80% Non-Operating: 10% - 90% Power • Embedded 4 Cell Polymer Battery Pack, 54Wh • Full Range AC/DC Adapter AC Input: 100 - 240V, 50 - 60Hz DC Output: 20V, 7.5A (150W) Dimensions &...
- Page 31 Über diese Kurzanleitung Dieses Benutzerhandbuch gibt Ihnen einen Über- blick über alle Informationen, die Sie für die Inbetriebnahme Ihres Systems benötigen. Das Benutzerhandbuch ist eine Ergän- zung zum inhaltlich erweitertem Benutzerhandbuch, das im Adobe Acrobat Format in Englisch auf der mit Ihrem Computer gelieferten CD mit den Drivern und Hilfsprogrammen + Benutzerhandbuch vorhanden ist und ersetzt diese nicht.
- Page 32 Warenzeichen Intel ist ein Warenzeichen/eine geschützte Marke der Fa. Intel Corporation. Windows ist eine geschützte Marke der Fa. Microsoft Corporation. FCC-Erklärung Dieses Gerät entspricht Teil 15 der FCC-Vorschriften. Der Betrieb unterliegt folgenden zwei Bedingungen: 1. Dieses Gerät darf keine schädliche Störungen verursachen. 2.
- Page 33 Service und Wartung Versuchen Sie nicht den Computer selbst zu reparieren. Ansonsten erlischt Ihr Garantieanspruch. Ferner kann das dazu führen, dass Sie oder der Computer einem elektrischen Schlag ausgesetzt werden. Wenden Sie sich für Wartungs- und Servicearbeiten jeder Art an das autorisierte Servicepersonal. Ziehen Sie den Stecker des Computers aus der Steckdose.
- Page 34 • Auf der Rückseite des Computerbildschirms befindet sich ein geprägtes Logo, das im Elektroplattierungsverfahren hergestellt wurde, wobei das Logo mit einem schützenden Klebematerial überzogen ist. Aufgrund allgemeiner Abnutzung kann sich dieser Klebstoff im Laufe der Zeit abnutzen und es können scharfe Kanten am Logo auftreten.
- Page 35 Systemstart 1. Entfernen Sie sämtliches Verpackungsmaterial. 2. Stellen Sie den Computer auf eine flache und stabile Ebene. 3. Schließen Sie alle Peripheriegeräte (Tastatur, Maus usw.), die Sie mit dem Computer verwenden möchten, sicher an die entsprechenden Anschlüsse an. 4. Wenn Sie den Computer zum ersten mal einrichten, gehen Sie wie folgt vor (um den Computer während des Versands zu schützen, wird der Akku gesperrt und das System wird erst dann mit Strom versorgt, nachdem der Computer an den AC/DC-Adapter angeschlossen ist und die Ersteinstellung wie unten beschrie-...
- Page 36 Systemsoftware Möglicherweise ist auf Ihrem Computer die Systemsoftware bereits vorinstalliert. Ist das nicht der Fall bzw. wenn Sie Ihren Computer für ein anderes System neu konfigurieren möchten, finden Sie in diesem Handbuch eine Anleitung zu Windows 11. RAID Support Vor der Installation Ihres Windows Betriebssystems müssen Sie die RAID-Ein- richtung durchführen (s.
- Page 37 RAID Level Beschreibung RAID Level RAID 0 Identische Laufwerke, die Daten parallel lesen und schreiben, um die (mindestens zwei Leistung zu erhöhen. Bei RAID 0 wird ein virtuelles Disk-Array gebildet; Daten werden in Blöcke aufgeteilt und jeder Block wird auf ein separates SSDs erforderlich) Laufwerk gespeichert.
- Page 38 7. Gehen Sie zu Intel® Rapid Storage Technology (im Menü Erweitert) und wählen Sie Create RAID Volume. 8. Sie können nun Ihr RAID-Volumen unter Verwendung der installierten SSDs einrichten. 9. Wählen Sie Name und geben Sie einen Namen Ihrer Wahl für Ihr RAID-Volume ein und wählen Sie danach <Ja>.
- Page 39 Systemübersicht: Ansicht von vorne mit gestartetem Bildschirm Abb 2 - Ansicht von vorne mit gestartetem Bildschirm 1. Webcam 2. *Kamera LED *Wenn die Kamera in Betrieb ist leuchtet die LED.. 3. Eingebautes Mikrofon-Array 4. Bildschirm 5. Ein/Aus-Taste 6. Tastatur 7. Touchpad & Tasten Hinweis: Der Betriebsbereich des Touchpads und der Tasten liegt im Bereich der gestrichel- ten Linien in der obigen Abbildung.
- Page 40 LED Anzeigen Die LED-Anzeigen auf dem Computer zeigen wichtige Informationen über den aktuellen Status des Computers an. Symbol Farbe Beschreibung Orange Der AC/DC Netzadapter ist angeschlossen Grün Der Computer ist eingeschaltet Grün blinkend Der Computer befindet sich im Ruhezustand Orange Akku wird geladen Der Akku hat Grün...
- Page 41 Tastatur Ihr Notebook ist mit einer Multicolor-LED-Tastatur ausgestattet. Sie können die Farbe der Multicolor-LED-Tastatur ändern. Die Tastatur verfügt über einen Ziffernblock für die einfache Eingabe numerischer Daten. Mit Num Lk schalten Sie den Ziffernblock ein/aus. Außerdem verfügt es über Funktionstasten, mit denen Sie die Betriebsfunktionen im Handumdrehen ändern können.
- Page 42 Die LED-Tastatur -Anwendung kann durch Klicken auf das LED-Tastatur -Symbol im Kontrollzentrum (oder durch Drücken der Fn - und -Taste) aufgerufen werden. Funktionstasten und optische Anzeigen Die Funktionstasten (F1 - F12 usw.) fungieren als Hotkeys, wenn sie gedrückt werden, während die Fn-Taste gedrückt gehalten wird. Zusätzlich zu den grundlegenden Funktionstastenkombinationen sind einige visuelle Anzeigen verfügbar, wenn der Kontrollzentrum-Treiber installiert ist.
- Page 43 Tasten Tasten Funktion/Visuelle Anzeigen Bildschirmhelligkeit Fn + verringern/erhöhen Kamera ein-/ausschalten Fn + Fn + Flugzeugmodus ein-/ausschalten Fn + Ruhemodus ein-/ausschalten Num Lock ein-/ausschalten Fn + Scroll-Modus ein-/ausschalten Caps Lock ein-/ausschalten Fn + Control-Center ein-/ausschalten Lüftersteuerung Fn + *Hinweis: Beim Gamen empfiehlt es sich, den Computer mit maximaler Lüftergeschwindigkeit Fn + Leistungsmodi umschalten...
- Page 44 Systemübersicht: Ansicht von vorne, links & rechts Abb. 3 - Ansicht von vorne, links & rechts 1. LED Anzeigen 7. 2-in-1 Audiobuchse (Kopfhörer und Mikrofon) 2. Slot für Sicherheitsschloss 8. Lautsprecher 3. Lüfter 9. Micro SD Kartenleser 4. USB 3.2 Gen 1 Typ A Anschluss 10.
- Page 45 2. Vergewissern Sie sich, dass das richtige Gerät aus dem Dropdown-Menü ausgewählt ist, das das angeschlossene Gerät angibt (wenn Sie z. B. ein Headset angeschlossen haben, wählen Sie „Headset mit Mikrofon” und nicht „Kopfhörer”), und klicken Sie dann auf OK, um die Einstellungen zu speichern. 3.
- Page 46 Warnhinweis für das Entfernen der unteren Abdeckung Entfernen Sie keine Abdeckungen und/oder Schrauben zu Aufrüstungszwecken des Geräts, weil dadurch Ihre Garantieansprüche erlöschen. Wenn Sie die SSD/ RAM usw. aus irgendeinem Grund austauschen/entfernen müssen, wenden Sie sich bitte für weitere Control-Center Entfernen Sie keine Abdeckungen und/oder Schrauben zu Aufrüstungszwecken des Geräts, weil dadurch Ihre Garantieansprüche erlöschen.
- Page 47 The notification area of the taskbar is in the bottom right of the screen. Some of the control panels and applications referred to throughout the course of this manual can be accessed from here. Throughout this manual you will see an instruction to open the Control Panel.
- Page 48 Microsoft Hybrid-Grafiken Microsoft Hybrid Graphics ist eine einzigartige Technologie, die entwickelt wurde, um die beste Leistung aus dem Grafiksystem herauszuholen und gleichzeitig die Akkulaufzeit zu verlängern, ohne die Einstellungen manuell ändern zu müssen. Das Betriebssystem des Computers (und einige Anwendungen) schalten autom- atisch zwischen dem integrierten Grafikprozessor und dem diskreten Grafikproz- essor um, wenn dies für die verwendeten Anwendungen erforderlich ist.
- Page 49 So konfigurieren Sie die Anzeigen über das Menü Projekt: 1. Schließen Sie Ihr(e) externes(n)Anzeigegerät(e) an den entsprechendenAnschluss an, und schalten Sie es/ sie ein. 2. Drücken Sie die Tastenkombination+P (oder Fn + F7). 3. Klicken Sie auf eine der Optionen imMenü, um Nur PC-Bildschirm,Duplizieren, Erweitern oder Nurzweiter Bildschirm auszuwählen.
- Page 50 Audiofunktionen Sie können die Audiooptionen auf Ihrem Computer über die Systemsteuerung Sound in Windows konfigurieren. Sie können das Audio-Bedienfeld über Einstellungen (System > Audio) im Startmenü aufrufen Die Lautstärke kann mit der Tastenkombination Fn + F5/F6 eingestellt werden. Die Lautstärke kann ferner mit dem Windows Lautstärkeregler eingestellt werden.
- Page 51 Der Energiesparmodus kann auf Ausgewogen (Standard), d.h. ein Gleichgewicht zwischen Leistung und Akkubetriebsdauer, auf Beste Energieeffizienz, d. h. eine längere Akkubetriebsdauer bei geringerer Leistung, und auf Beste Leistung, d. h. einen höheren Akkuverbrauch bei besserer Leistung, eingestellt werden. Sie können auch einstellen, wie lange der Computerbildschirm im Standby-Modus bleiben soll, bis er sich ausschaltet oder der Computer in den Ruhezustand geht.
- Page 52 Letzte Updates Prüfen Sie nach der Installation aller Treiber auf Ihrem Computer nach Updates Vergewissern Sie sich, dass Sie die (Einstellungen > Windows Update) Option aktivieren und gehen Sie zum Microsoft Store und klicken Sie auf Downloads und Updates > Updates abrufen. Abb.
- Page 53 Allgemeine Hinweise zur Treiberinstallation Wenn Sie kein erfahrener Benutzer sind, folgen Sie in der Regel den Standardanweisungen, die auf dem Bildschirm für jedes Laufwerk angezeigt werden (Weiter > Weiter > Beenden usw.). In vielen Fällen müssen Sie IhrenCom- puter neu starten, um den Treiber zu installieren. Vergewissern Sie sich, dass die entsprechenden Module (WLAN oder Bluetooth usw.) eingeschaltet (aktiviert) sind, bevor Sie den entsprechenden Treiber installieren.
- Page 54 Bluetooth Modul Vergewissern Sie sich, dass das Bluetooth-Modul aktiviert ist (und sich nicht im Flugmodus befindet), bevor Sie die Konfiguration starten. Bluetooth Konfiguration 1. Klicken Sie im Startmenü auf die Option Einstellungen. 2. Klicken Sie auf die Option Bluetooth und Geräte. 3.
- Page 55 TPM-Verwaltung in Windows Sie können Ihre TPM Einstellungen unter Windows verwalten: 1. Rufen Sie die Systemsteuerung auf. 2. Klicken Sie auf BitLocker-Laufwerkverschlüsselung (System und Sicherheit). 3. Klicken Sie auf TPM-Verwaltung. Abb. 12 - Bitlocker Drive Encryption (TPM-Verwaltung) 4. Im Fenster TPM-Verwaltung können Sie das TPM unter Windows konfigurieren.
- Page 56 TPM Aktionen 1. Klicken Sie auf TPM vorbereiten und folgen Sie den Anweisungen des Assistent- en, um das TPM vorzubereiten (dies erfordert wahrscheinlich einen Neustart des Computers und die Bestätigung der Einstellungsänderungen nach dem Neustart durch Drücken der entsprechenden F-(Funktions)Taste. 2.
- Page 57 BIOS • INSYDE BIOS (256Mb SPI Flash ROM) Speicher • Dual Channel DDR4 • Zwei 260 Pin SO-DIMM-Sockel unterstützen • Bis zu 3200MHz DDR4 Speicher Speicher • Erweiterbar bis zu 64GB • Kompatibel mit 8GB, 16GB oder 32GB Modulen (Die tatsächliche Betriebsfrequenz des Speichers hängt vom Prozessor ab) Anzeige-Optionen •...
- Page 58 Interface • 1x USB 2.0-Anschluss • 1x USB 3.2 Gen 1 Typ-A-Anschluss • 2x USB 3.2 Gen 2 Typ-C-Anschlüsse • 1x Mini Display-Anschluss 1.4 • 1x HDMI-Ausgangsanschluss • 1x Mikrofon-Anschlussbuchse • 1x 2-in-1-Audiobuchse (Kopfhörer/Mikrofon) • 1x RJ-45 LAN-Buchse • 1x DC-In-Buchse Kartenleser •...
- Page 59 Umweltspezifikation • Temperatur Betrieb: 5°C - 35°C Nicht-Betrieb: -20 °C - 60 °C • Relative Luftfeuchtigkeit Betrieb: 20% - 80% Nicht-Betrieb: 10% - 90% Strom • Eingebetteter 4-Zellen-Polymer-Akkupack, 54Wh • Vollständiger AC/DC-Adapter AC-Eingang: 100 - 240V, 50 - 60Hz DC-Ausgang: 20V, 7.5A (150W) Maße und Gewicht •...
- Page 60 Kullanım Kılavuzu Hakkında Bu kullanım kılavuzu, sisteminizi başlatmak için ihtiyaç duyabileceğiniz bilgilere genel bakış sunmaktadır. Bu kılavuz, bilgisayarınızla birlikte sunulan Aygıt Sürücüleri ve Yardımcı Uygulamalar + Kullanım Kılavuzu diskinde Adobe Acrobat formatında İngilizce dilinde mevcut, kapsamı genişletilmiş kullanım kılavuzu’nun bir ekidir ve onun yerini almaz. Bu diskte ayrıca bilgisayarınızın düzgün çalışması...
- Page 61 Ticari markalar Intel, Intel Corporation unvanlı şirketin ticari markasıdır/tescilli ticari markasıdır. Windows, Microsoft Corporation unvanlı şirketin tescilli ticari markasıdır. FCC Bildirimi Bu cihaz; FCC Kural, Kısım 15 hükümlerinde öngörülen gerekliliklere uygundur. Bu cihazın işletimi aşağıdaki iki koşula tabidir: 1. Bu cihaz zararlı girişime neden olamaz. 2.
- Page 62 Servis ve Bakım Bilgisayarınızın servis ve bakımını kendiniz yapmaya çalışmayın. Aksi takdirde garantinizi geçersiz hale gelebilir, ayrıca sizi ve bilgisayarı elektrik çarpması- na maruz bırakabilir. Tüm servis ve bakım işleri için yetkili servis personeline başvurun. Bilgisayarınızın fişini prizden çıkarın. Ardından, aşağıdaki koşullardan herhangi biri meydana geldiği takdirde servis ve bakım için yetkili servis personeline başvurun: •...
- Page 63 • Bilgisayar ekranının arka kısmında elektrikli kaplama yöntemiyle imal edilen kabartmalı bir logo mevcut olup logonun üzeri, koruyucu bir yapıştırıcı maddeyle kaplanmıştır. Genel eskime ve yıpranma nedeniyle, bu yapıştırıcı zamanla bozulabilir ve logo üzerinde keskin kenarlar ortaya çıkabilir. Böyle bir durumda, bilgisayarı...
- Page 64 Sistemi Başlatma 1. Tüm ambalaj malzemelerini çıkarın. 2. Bilgisayarı düz ve sağlam bir yüzeye yerleştirin. 3. Bilgisayarla birlikte kullanmak istediğiniz tüm çevre birimlerini (klavye, fare vb.) ilgili portlara güvenli bir şekilde bağlayın. 4. Bilgisayarı ilk defa kurarken aşağıdaki adımları izleyin (sevkiyat sırasında bilgisayarı...
- Page 65 Sistem Yazılımı Bilgisayarınız, sistem yazılımı önceden kurulmuş olarak gelebilir. Sistem yazılımı kurulu olmadığı veya bilgisayarınızı farklı bir sistemle yeniden kurmak istediğiniz durumda, bu kılavuzda Microsoft Windows 11 işletim sisteminden bahsedildiği hususuna dikkat edilmelidir. RAID Desteği Windows İşletim Sisteminizi kurmadan önce, RAID kurulumunu gerçekleştirmeniz gerekmektedir (bkz.
- Page 66 Açıklaması RAID Seviyesi RAID 0 Performansı yükseltmek için birbiriyle aynı özelliklere sahip (asgari iki adet iki diskle paralel bir şekilde veri okuma ve yazma. RAID 0 sanal disk birimi dizisi oluşturur; veriler bloklara ayrılır ve her SSD gereklidir) blok ayrı bir diske yazılır. Disk ikizleme ayarında birbiriyle aynı...
- Page 67 7. Intel Rapid Storage Technology (Gelişmiş menüde) bölümüne gidin ve ® RAID Hacmi oluştur seçeneğini seçin. 8. Artık kurulu SSD’leri kullanarak RAID hacminizi kurabilirsiniz. 9. İsim seçeneğini seçin ve RAID hacminize isim vermek için seçtiğiniz ismi yazın, ardından <Evet> seçeneğini seçin. 10.
- Page 68 Sistem Haritası: Ekran Açık Konumda Önden Görünüm Şekil 2 - Ekran Açık Konumda Önden Görünüm 1. Webcam 2. *Kamera LED lambası *Kamera kullanımdayken LED ışığı yanar. 3. Dahili Mikrofon Dizisi 4. Ekran 5. Güç Düğmesi 6. Klavye 7. Touchpad ve Düğmeler Not: Touchpad ve Düğmelerin geçerli işletim alanı, yukarıda kesik çizgilerle gösterilen sınırlar dahilindedir.
- Page 69 LED Göstergeleri Bilgisayar üzerindeki LED göstergeleri, bilgisayarın mevcut durumu hakkında faydalı bilgileri gösterir. Simge Renk Açıklaması Turuncu AC/DC Adaptörü Takılı Yeşil Bilgisayar Açık Yeşil yanıp söner Bilgisayar Uyku Modunda Turuncu Batarya Şarj Ediliyor Batarya Yeşil Kritik Derecede Yeşil yanıp söner Bilgisayar Uyku Modunda Yeşil Depolama Aygıtı...
- Page 70 Klavye Notebook bilgisayarınızda çok renkli LED klavye mevcuttur. Çok renkli LED klavy- enin rengini değiştirebilirsiniz. Klavyede kolaylıkla sayısal veri girmek için sayısal tuş takımı mevcuttur. Num Lock tuşuna basılarak sayısal tuş takımı açılıp kapa- tılabilir. Klavyede ayrıca işlevsel özellikleri hızla değiştirmenize olanak sağlayan fonksiyon tuşları...
- Page 71 LED Klavye uygulamasına; Denetim Merkezinde bulunan LED Klavye simgesine tıklayarak (veya Fn + tuşuna basarak) erişebilirsiniz. Fonksiyon Tuşları ve Görsel Göstergeler Fonksiyon tuşları (F1 - F12 vb.), Fn tuşu basılı tutularak basıldığında kısayol tuşları olarak kullanılabilir. Temel işlev tuş kombinasyonlarına ek olarak, Denetim Merkezi sürücüsü...
- Page 72 Tuşlar İşlevi / Görseller Ekran Parlaklığı Fn + Azaltma/Artırma Kamera Gücü Açma/Kapatma Fn + Fn + Uçak Modu Açma/Kapatma Fn + Uyku Modu Açma/Kapatma Num Lock Açma/Kapatma Fn + Kaydırma Kilidini Açma/Kapatma Caps Lock Açma/Kapatma Fn + Denetim Merkezi Açma/Kapatma Fan Hızı...
- Page 73 Sistem Haritası: Önden, Soldan ve Sağdan Görünüm Şekil 3 - Önden, Soldan ve Sağdan Görünüm 1. LED Göstergeleri 7. 2’si 1 Arada Ses Jakı (Kulaklık ve 2. Güvenlik Kilidi Yuvası Mikrofon) 3. Havalandırma 8. Hoparlör 4. USB 3.2 Gen 1 Type-A Portu 9.
- Page 74 2. Açılır menüden bağlanan aygıtı gösteren doğru aygıtın seçildiğinden emin olun (örneğin bir mikrofonlu kulaklık bağladıysanız,’’Mikrofonlu kulaklık’’ seçeneğini seçin, “Headphone” seçmeyin) ve ardından ayarları kaydetmek için Tamam tuşuna tıklayın. 3. Bir mikrofon bağladığınız takdirde Mikrofon Giriş Jakını kullanın; kombine ses girişini (audio jack) kullanmayın. Sistem Haritası: Alttan ve Arkadan Görünüm Şekil 4 -...
- Page 75 Alt Kapak Sökme Uyarısı Cihaz donanımlarını yükseltmek amacıyla bilgisayar üzerindeki herhangi bir kapağı ve/veya vidaları sökmeyin; aksi durumda garanti koşulları ihlal edilebilir. Herhangi bir nedenle, SSD/RAM vb. donanımları yenisiyle değiştirmek/kaldır- mak istediğiniz durumda lütfen daha fazla bilgi için dağıtımcınızla/tedarikçinizle iletişime geçiniz. Denetim Merkezi Windows’ta Başlat menüsünden Denetim Merkezini çalıştırın.
- Page 76 Görev çubuğu bildirim alanı, ekranın sağ alt köşesinde bulunmaktadır. Bu kılavuz- da bahsedilen bazı denetim panellerine ve uygulamalara buradan erişilebilir. Bu kılavuzun çeşitli bölümlerinde, Denetim Panelini açma talimatı verildiğini göreceksiniz. Denetim Paneline erişmek için Windows Logo Tuşu + R tuş kombinasyonunu kullanın ve “Control Panel”...
- Page 77 Microsoft Hibrit Grafik (MSHybrid) Microsoft Hibrit Grafik Modu (MSHybrid) - Bu kusursuz teknoloji; ayarları manuel olarak değiştirmeye gerek olmadan daha uzun batarya ömrüyle birlikte grafik sisteminden en iyi performansın elde edilmesini sağlamak amacıyla tasarlanmıştır. Bilgisayarın işletim sistemi (ve bazı uygulamalar) kullanılan uygulamalar gerektirdiğinde dahili GPU (iGPU) ve ayrık GPU (dGPU) arasında otomatik olarak geçiş...
- Page 78 Ekran Yansıtma menüsünü kullanarak ekranları ayarlamak için: 1. Harici ekranı/ekranları uygun port üzerinden bilgisayarınıza bağlayın ve ekranı/ekranları çalıştırın. 2. Windows Logo Tuşu + P (veya Fn + F7) tuş kombinasyonuna basın. 3. Menüden Yalnızca Bilgisayar Ekranı, Çift Ekran, Uzatma veyaYalnızca İkinci Ekran arasından seçmek için seçeneklerden birine tıklayın.
- Page 79 Ses Özellikleri Bilgisayarınızda ses seçeneklerini Windows’ta Ses kontrol paneli üzerinden ayarlayabilirsiniz. Ses kontrol paneline, Başlat menüsünde Ayarlar (Sistem > Ses) öğesi üzerinden erişebilirsiniz. Ses seviyesi ayrıca Fn + F5/F6 tuş kombinasyonu kullanılarak ayarlanabilir. Ses seviyesi ayrıca Windows’ta ses kontrolü işlevi kullanılarak da ayarlanabilir.
- Page 80 Güç modu; performansı ve batarya ömrünü dengeleyen Dengeli (varsayılan), daha düşük performans ile daha iyi batarya ömrü sağlayan En iyi güç etkinliği ve iyileştirilmiş performansla birlikte daha yüksek batarya tüketimi yapan En iyi performans seçeneklerinden birine ayarlanabilir. Ayrıca bilgisayar ekranı kapanıncaya kadar veya bilgisayarınız uyku moduna geçene kadar ne kadar süre boşta kalacağına ilişkin ayarları...
- Page 81 Son Güncellemeler Tüm sürücüleri bilgisayarınıza kurduktan sonra Güncellemeleri denetle (Ayarlar > Windows Güncelleme) seçeneğini etkinleştirdiğinizden emin olun ve tüm Uygulamaları vb. güncellemek için Microsoft Store’a gidin ve İndirmeler ve güncellemeler > Güncellemeleri al seçeneğine tıklayın. Şekil 10 - Sürücü Kurulumu Sürücü...
- Page 82 Sürücü Kurulumuna İlişkin Genel Kurallar Genel bir kural olarak, ileri seviyede bir kullanıcı olmadıkça, her sürücü için ekranda gösterilen varsayılan talimatları izleyin (Sonraki > Sonraki > Bitir vb.). Birçok durumda, sürücüyü kurmak için bilgisayarınızı yeniden başlatmanız gerekir. Uygun sürücüyü kurmadan önce ilgili modüllerin (WLAN veya Bluetooth vb.) Açık (Etkin) olduğundan emin olun.
- Page 83 Bluetooth Modülü Konfigürasyona başlamadan önce Bluetooth modülünün etkinleştirildiğinden (ve Uçak Modunda olmadığından) emin olun. Windows’ta Bluetooth Konfigürasyonu 1. Başlat Menüsünde Ayarlar öğesine tıklayın. 2. Bluetooth ve aygıtlar seçeneğine tıklayın. 3. Aygıt Ekle > Bluetooth seçeneğine tıkladıktan sonra bulunan aygıtların listesi görüntülenecektir.
- Page 84 Windows’ta TPM Yönetimi Windows sistemi üzerinden TPM ayarlarınızı yönetebilirsiniz: 1. Denetim Paneline gidin. 2. Bitlocker Sürücü Şifreleme (Sistem ve Güvenlik) seçeneğine tıklayın. 3. TPM Yönetimi seçeneğine tıklayın. 12 - Bitlocker Sürücü Şifreleme (TPM Yönetimi) 4. TPM Yönetim penceresi üzerinden Windows sisteminde TPM ayarlarını yapabilirsiniz.
- Page 85 TPM Eylemleri 1. TPM Hazırla seçeneğine tıklayın ve TPM hazırlamak için Kurulum sihirbazındaki talimatları izleyin (bu işlem muhtemelen bilgisayarın yeniden başlatılmasını ve bilgisayar yeniden başlatıldıktan sonra uygun F (fonksiyon) tuşuna basarak Ayarların doğrulanmasını gerek-tirecektir). 2. Bilgisayar yeniden başlatıldıktan sonra TPM hazırlanacak ve bunun ardından TPM kapatma, Yönetici Şifresi Değiştirme, Clear TPM Silme veya TPM Kilitlemesini Sıfırlama işlemlerini gerçekleştirmek için Eylemler Menüsünü...
- Page 86 BIOS • INSYDE BIOS (256Mb SPI Flash ROM) Bellek • İki Kanallı DDR4 • 2x 260 Pin SO-DIMM Soket • 3200 MHz DDR4 Bellek desteği • 64GB’a kadar bellek genişletme kapasitesi • 8GB, 16GB veya 32GB Modüllerle uyumlu (Gerçek bellek işletim frekansı, işlemciye dayalıdır.) Görüntü...
- Page 87 Arayüz • 1x USB 2.0 Bağlantı Noktası • 1x USB 3.2 Gen 1 Type-A Bağlantı Noktası • 2x USB 3.2 Gen 2 Type-C Bağlantı Noktaları • 1x Mini DisplayPort 1.4 • 1x HDMI Çıkış Portu • 1x Mikrofon Giriş Jakı •...
- Page 88 Çevre Koşulları • Sıcaklık Çalışmaya elverişli: 5°C - 35°C Çalışmaya elverişli olmayan: -20°C - 60°C • Bağıl Nem Çalışmaya elverişli: %20 -%80 Çalışmaya elverişli olmayan: %10 - %90 Güç • Dahili 4 Hücreli Polimer Batarya Takımı, 54Wh • Tam Kapsamlı AC/DC Adaptör AC Giriş: 100 - 240V, 50 - 60Hz DC Çıkış: 20V, 7.5A (150W) Boyutlar ve Ağırlık...
- Page 89 Manual de Usuario Este manual de usuario proporciona una de- scripción general de la información que puede necesitar para iniciar su sistema. Este manual de usuario es un complemento y no reemplaza el Manual de Usuario Ampliado disponible en inglés en formato Adobe Acrobat, en el disco Controladores y Utilidades del Dispositivo + Manual de Usuario que se proporciona con su computadora.
- Page 90 Marcas comerciales Intel Ies una marca comercial/marca comercial registrada de Intel Corporation. Windows es una marca comercial de Microsoft Corporation. Declaración de la FCC Este dispositivo cumple con los requisitos de la Parte 15, la Norma FCC. El funcionamiento de este dispositivo está sujeta a las dos condiciones siguientes: 1.
- Page 91 Servicio y Mantenimiento No intente trabajo de servicio y mantener su computadora usted mismo. Si lo hace, puede anular la garantía y puede causarle una descarga eléctrica a usted y a la computadora. Consulte al personal de servicio autorizado para todos los trabajos de servicio y mantenimiento.
- Page 92 • En la parte posterior de la pantalla de la computadora, hay un logotipo en relieve producido con el método de galvanoplastia y el logotipo está cubierto con un material adhesivo protector. Debido al uso y desgaste general, este adhesivo puede deterio- rarse con el tiempo y producir bordes afilados en el logotipo.
- Page 93 Inicialización del Sistema 1. Retire todos los materiales de embalaje. 2. Coloque la computadora sobre una superficie plana y estable. 3. Conecte de forma segura todos los periféricos (teclado, mouse, etc.) que desee usar con la computadora a los puertos correspondientes. 4.
- Page 94 Software del Sistema Su computadora puede venir con el software del sistema preinstalado. En caso de que el software del sistema no esté instalado o desee reinstalar su computadora con un sistema diferente, cabe señalar que en este manual se menciona el sistema operativo Microsoft Windows 11.
- Page 95 Descripción Nivel de RAID RAID O Lectura y escritura de datos en paralelo con dos discos idén- (se requiere un mínimo de ticos para mejorar el rendimiento. RAID 0 crea una matriz de disco virtual; los datos se dividen en bloques y cada bloque dos SSD) se escribe en un disco separado.
- Page 96 7. Vaya a Intel® Rapid Storage Technology (en el menú Avanzado) y seleccione Crear Volumen RAID. 8. Ahora puede configurar su volumen RAID utilizando los SSD instalados. 9. Seleccione Nombre y escriba un nombre de su elección para su volumen RAID y seleccione <Sí>.
- Page 97 Mapa de Sistema: Vista Frontal con Pantalla Abierta Figura 2 - Vista Frontal con Pantalla Abierta 1. Cámara Web 2. *Lámpara LED de Cámara *La luz LED se enciende cuando la cámara está en uso. 3. Micrófono de Matriz Incorporado 4.
- Page 98 Indicadores LED Los indicadores LED en la computadora muestran información útil sobre el estado actual de la computadora. Icono Color Descripción Naranja El adaptador de AC/DC está conectado Verde Computadora encendida Verde parpadeo La computadora está en Modo de Sueño Naranja La batería se está...
- Page 99 Teclado Su computadora portátil viene con un teclado LED multicolor. Pueda cambiar el color del teclado LED multicolor. El teclado tiene un teclado numérico para ingresar datos numéricos fácilmente. Presionar Bloq Nim enciende/apaga el teclado numérico. Tam- bién cuenta con teclas de función que le permiten cambiar las funciones operativas al instante.
- Page 100 Se puede acceder a la aplicación Teclado LED haciendo clic en el ícono Teclado LED en el Centro de Control (o presionando el botón Fn más la tecla Teclas de Función e Indicadores Visuales Las teclas de función (F1 - F12 etc.) actuarán como teclas de acceso rápido cuando se presionen mientras se mantiene presionada la tecla Fn.
- Page 101 Teclas Función e Indicadores Visuales Brillo de Pantalla Fn + Disminuir/Aumentar Encender/Apagar Energía de Cámara Fn + Fn + Encender/Apagar Modo Avión Fn + Encender/Apagar Modo de Sueño Encender/Apagar Bloq Num (Num Lock) Fn + Encender/Apagar Bloqueo de Desplazamiento Encender/Apagar Bloq Mayús (Caps Lock) Fn + Encender/Apagar Centro de Control Control de Velocidad de Ventilador...
-
Page 102: Ventilación
Mapa de Sistema: Vistas frontal, izquierda y derecha Figura 3 - Vistas frontal, izquierda y derecha 1. L1. Indicadores LED 7. Conector de Audio 2 en 1 2. Ranura de Bloqueo de Seguridad 8. Altavoces 3. Ventilación 9. Lector de Tarjetas MicroSD 4. -
Page 103: Table Of Contents
2. Asegúrese de seleccionar el dispositivo correcto en el menú desplegable que muestra el dispositivo conectado (por ejemplo, elija “audífonos” si ha conectado unos audífonos y no elija “Auriculares” en este caso) y luego haga clic en Aceptar para guardar la configuración. 3. - Page 104 Advertencia de Retiro de la Cubierta Inferior No retire ninguna cubierta ni tornillos de la computadora para actualizar el hardware del dispositivo; de lo contrario se pueden violar las condiciones de garantía. En caso de que desee reemplazar/quitar hardware como SSD/RAM, comuníquese con su distribuidor/proveedor para obtener más información.
- Page 105 El área de notificaciones de la barra de tareas está en la parte inferior derecha de la pantalla. Desde aquí se puede acceder a algunos de los paneles de control y aplicaciones a los que se hace referencia a lo largo de este manual. A lo largo de este manual, verá...
- Page 106 Gráficos Híbridos de Microsoft Gráficos Híbridos de Microsoft es una tecnología perfecta diseñada para obtener el mejor rendimiento del sistema de gráficos al mismo tiempo que permite una mayor duración de la batería, sin tener que cambiar la configuración manual- mente.
- Page 107 Para configurar las pantallas usando el menú Proyecto: 1. Conecte su(s) pantalla(s) externa(s) alpuerto adecua- do y enciéndala(s). 2. Presione la combinación de teclas+P (o Fn + F7). 3. Haga clic en cualquiera de lasopciones del menú para seleccionarSolo pantalla de PC, Duplicar,Extender o Solo segunda pantalla.
- Page 108 Funciones de Audio Puede configurar las opciones de audio en su computadora desde el panel de control de Sonido en Windows. Acceda al panel de control de Sonido a través del elemento Configuración (Sistema > Sonido) en el menú Inicio. El volumen se puede ajustar mediante la combinación de teclas Fn + F5/F6El nivel de volumen del sonido también se puede configurar usando el control de volumen dentro de Windows.
- Page 109 El Modo de Energía se puede configurar en modo Equilibrado (predeterminado) que equilibra el rendimiento y la duración de la batería, modo Mejor Eficiencia de energía para una mejor duración de la batería con un rendimiento reducido ymodo Mejor rendimiento para un rendimiento mejorado pero con un mayor con- sumo de batería.
- Page 110 Últimas Actualizaciones Después de instalar todos los controladores, asegúrese de habilitar la verificación de Actualizaciones (Configuración> Actualización de Windows) y vaya a Microsoft Store y haga clic en Descargas y Actualizaciones> Obtener actualizaciones para actualizar todas las aplicaciones, etc. Figura 10 - Instalar Controladores Instalación del Controlador y Energía Al instalar los controladores, asegúrese de que su computadora esté...
- Page 111 Directrices Generales de Instalación del Controlador Como guía general, siga las instrucciones predeterminadas en pantalla para cada controlador (p. ej., Siguiente > Siguiente > Finalizar), a menos que sea un usuario avanzado. En muchos casos, es necesario reiniciar para instalar el controlador. Asegúrese de que todos los módulos (por ejemplo, WLAN o Bluetooth) estén encendidos antes de instalar el controlador adecuado.
- Page 112 Módulo Bluetooth Asegúrese de que el módulo Bluetooth esté encendido (y no en modo avión) antes de la configuración. Gestión de TPM en Windows 1. Haga clic en el elemento Configuración en el Menú Inicio. 2. Haga clic en Bluetooth y dispositivos. 3.
- Page 113 Gestión de TPM en Windows Puede administrar la configuración de TPM desde Windows: 1. Vaya al Panel de Control. 2. Haga clic en Cifrado de Unidad BitLocker (Sistema y seguridad). 3. Haga clic en Administración de TPM. Figura 12 - Unidad BitLocker Cifrado (Administración TPM)
- Page 114 Acciones de TPM 1. Haga clic en Preparar el TPM y siga las instrucciones del asistente para preparar el TPM. (esto probablemente requerirá un reinicio de la computadora y la confirmación de los cambios de configuración después del reinicio presionando la tecla F correspondiente).
- Page 115 BIOS • INSYDE BIOS (256Mb SPI Flash ROM) Memoria • DDR4 de Canal Doble • Dos zócalos SO-DIMM de 260 pines que • Admiten hasta 3200 MHz DDR4 Memoria • Memoria ampliable hasta 64 GB • Compatible con Módulos de 8 GB, 16 GB o 32GB (La frecuencia de funcionamiento de la memoria real depende del procesador) Opciones de Visualización •...
-
Page 116: Puerto De Salida Hdmi
Interfaz • 1x Puerto USB 2.0 • 1x Puerto USB 3.2 Gen 1 Tipo-A • 2x Puertos USB 3.2 Gen 2 Tipo-C • 1x puerto de Pantalla Mini 1.4 • 1x puerto deSalida HDMI • 1x Conector de Entrada de Micrófono •... - Page 117 Especificaciones Ambientales • Temperatura En Funcionamiento: 5°C - 35°C No Funcionamiento: -20 °C - 60 °C • Humedad relativa En Funcionamiento: 20% - 80% No Funcionamiento: 10% - 90% Encendida • Paquete de Batería de Polímero de 4 Celdas Integrada, 54 Wh •...
- Page 118 MANUEL DE L’UTILISATEUR Le présent manuel de l’utilisateur offre des informations générales sur la mise en route du système. Ce manuel constitue un supplément et ne remplace pas le manuel de l’utilisa- teur etendu qui est disponible en anglais au format Adobe Acrobat sur le disque “Pilotes et utilitaires + Manuel de l’utilisateur”...
- Page 119 Marques commerciales Intel, est une marque commerciale/marque déposée d’Intel Corporation. Windows est une marque déposée de Microsoft Corporation. Renseignements FCC Cet appareilest conforme à la partie 15 de la réglementation FCC. L’utilisation de cet appareil est soumise aux deux conditions suivantes : 1.
- Page 120 Entretien et maintenance N’essayez pas de faire la maintenance de l’ordinateur vous-même. Cela pourrait constituer une violation de la garantie et vous exposer, ainsi que l’ordinateur, à des chocs électriques. Adressez-vous à un technicien autorisé pour toute réparation. Débranchez l’ordinateur de l’alimentation électrique. Contactez un technicien autorisé...
- Page 121 • Un logo en relief se trouve à l’arrière de l’écran d’ordinateur, qui est produit par la méthode de revêtement électrique, et ce logo est recouvert d’un matériau adhésif protecteur. Ce matériau peut se détériorer au fil du temps par l’usure générale et les bords du logo peuvent devenir tranchants.
- Page 122 Démarrage du système 1. Retirez tous les matériaux d’emballage. 2. Placez l’ordinateur sur une surface plane et stable. 3. Connectez bien aux ports correspondants tous les périphériques (clavier, souris, etc.) que vous envisagez d’utiliser avec votre ordinateur. 4. Lors du installation de l’ordinateur, suivez la procédure ci-dessous (afin de protéger l’ordinateur pendant le transport, la batterie sera verrouillée pour n’ali- mentera le système qu’après avoir été...
- Page 123 Système d’exploitation Votre ordinateur peut être fourni avec un système d’exploitation préinstallé. Sinon, ou si vous voulez réinstaller avec un autre système d’exploitation différent, veuillez noter que ce manuel se réfère à Microsoft Windows 11. Assistance RAID Il est nécessaire de configurer le système RAID avant d’installer le système 4d’exploitation Windows (voir la page Configuration du RAID).
- Page 124 Description RAID RAID 0 Il s’agit de disques identiques qui lisent et écrivent des données (deux disques SSD au en parallèle afin d’augmenter les performances. Le RAID 0 crée un réseau virtuel de volumes de disques. Les données sont divisées minimum requis) en blocs et chaque bloc est inscrit sur un disque spécifique.
- Page 125 7. Cliquez sur Intel® Rapid Storage Technology (dans le menu Avancé) et sélectionnez Créer un volume RAID. 8. Il est désormais possible de configurer votre volume RAID à l’aide des disques SSD installés. 9. Sélectionnez nom et tapez un nom quelconque pour votre volume RAID, puis sélectionnez «Oui».
- Page 126 Schéma du système: frontale avec écran allumé Schéma 2 - Vue frontale avec écran allumé 1. Webcam 2. LED de la caméra* *La LED s’allume lorsque la caméra est utilisée. 3. Microphone intégré 4. Écran 5. Bouton d’alimentation 6. Clavier 7.
- Page 127 Indicateurs LED Les indicateurs LED de l’ordinateur fournissent des informations utiles sur l’état actuel de l’ordinateur. l’icône Couleur Description Orange Adaptateur CA/CC est branché Vert Ordinateur est allumé Clignotement vert Ordinateur est en mode veille Orange Batterie est en cours de chargement La batterie est Vert extrêmement déchargée...
- Page 128 Clavier Votre ordinateur portable est livré avec un clavier LED multicolore. Vous pouvez modi- fier la couleur du clavier LED multicolore. Le clavier dispose d’un pavé numérique pour une saisie facile des données numériques. Appuyer sur Num Lk vous permet d’activer ou de désactiver le pavé...
- Page 129 L’application du Clavier LED est accessible en cliquant sur l’icône du Clavier LED dans le Centre de Contrôle (ou en appuyant sur Fn plus la touche). Touches de fonction & Indicateurs visuels Les touches de fonction (F1 - F12 etc.) agissent comme des touches de raccourci lorsqu’elles sont pressées tout en maintenant la touche Fn enfoncée.
- Page 130 Touche Fonctions des touches et illustrations Réduire/augmenter Fn + l’éclairage de l’écran Marche/Arrêt de la caméra Fn + Fn + Activer/désactiver le mode avion Fn + Activer/désactiver le mode veille Activer/désactiver le mode Num Lock Fn + Activer/désactiver le blocage du défilement Activer/désactiver le mode Caps Lock Fn + Marche/Arrêt du centre de contrôle...
- Page 131 Schéma du système : Vue de face, de gauche et de droite Schéma 3 - Vue de face, de gauche et de droite 1. Indicateurs LED 7. Prise audio 2-en-1 2. Encoche de verrouillage de sécurité 8. Haut-parleur 3. Ventilation 9.
- Page 132 2. Assurez-vous de choisissez le périphérique correct dans le menu correspon- dant à votre périphérique branché (par exemple, choisissez “Casque” si vous avez branché un casque et ne choisissez pas “Écouteurs” dans ce cas), puis appuyez sur OK pour sauvegarder la configuration. 3.
- Page 133 Enlèvement du couvercle du dessous Ne retirez pas les couvercles et/ou les vis pour mettre à niveau le matériel de l’appareil, car cela pourrait enfreindre les conditions de votre garantie. Si vous devez remplacer/retirer le SSD/la RAM etc., pour quelque raison que ce soit, veuillez contacter votre distributeur/fournisseur pour des plus d’informa- tions.
- Page 134 La zone de notification de la barre des tâches se trouve en bas à droite de l’écran. Certains des panneaux de contrôle et des applications mentionnés tout au long de ce manuel sont accessibles à partir d’ici. Tout au long de ce manuel, vous verrez une instruction pour ouvrir le Panneau de configuration.
- Page 135 Graphiques hybrides Microsoft Graphiques hybrides Microsoftest une technologie transparente conçue pour obtenir les meilleures performances du système graphique et prolonger la durée de vie de la batterie sans avoir à modifier manuellement les paramètres. Le système d’exploitation de l’ordinateur (et certaines applications) basculera automatiquement entre le GPU intégré...
- Page 136 Pour configurer les écrans à l’aide du menu Projet : 1. Connectez vos écrans externes au port approprié et allumez-les. 2. Appuyez sur la combinaison de touches Windows Logo + P (ou Fn + F7). 3. Cliquez sur l’une des options du menu pour sélec- tionner Écran du PC uniquement, Dupliquer, Étendre ou Second écran uniquement.
- Page 137 Fonctionnalités audios Vous pouvez configurer les options audios sur votre ordinateur à partir du pan- neau de configuration du Son dans Windows. Accédez au panneau de configura- tion du Son via l’élément Paramètres (Système > Son) dans le menu Démarrer. Le volume peut être ajusté...
- Page 138 Le mode d’alimentation peut être réglé sur Équilibré (par défaut), qui permet d’équilibrer les performances et l’autonomie de la batterie, sur Meilleure efficac- ité énergétique, pour une meilleure autonomie de la batterie avec des perfor- mances réduites, et sur Meilleures performances, pour des performances accrues mais une consommation de batterie plus importante.
- Page 139 Mises à jour actuelles Après avoir installé tous les pilotes sur votre ordinateur, assurez-vous d’avoir activé la fonction Vérifier les mises à jour (Paramètres et Windows Update) et pour mettre à jour toutes les applications etc., rendez-vous sur Microsoft Store et cliquez sur Téléchargements et mises à...
- Page 140 Règles générales d’installation des pilotes En général, à moins que vous ne soyez un utilisateur avancé, suivez les instruc- tions qui s’affichent par défaut à l’écran pour chaque pilote (Suivant > Suivant > Terminer, etc.). Dans de nombreux cas, vous devrez redémarrer votre ordinateur pour installer le pilote.
- Page 141 Module Bluetooth Assurez-vous que le module Bluetooth est activé (et pas en mode avion) avant de commencer à le configurer. Configuration du Bluetooth sous Windows 1. Dans le menu Démarrer, cliquez sur Paramètres. 2. Cliquez sur Bluetooth et périphériques. 3. Cliquez sur Ajouter un appareil et puis Bluetooth pour afficher la liste des appareils trouvés.
- Page 142 Gestion du TPM sous Windows Vous pouvez gérer les paramètres de votre TPM dans le Windows : 1. Accédez au panneau de configuration. 2. Cliquez sur Chiffrement de lecteur Bitlocker (Système et sécurité). 3. Cliquez sur Gestion TPM. Schéma 12 - Chiffrement de lecteur Bitlocker (Gestion TPM)
- Page 143 Opérations TPM 1. Cliquez sur Configurer le TPM et suivez les instructions de l’assistant d’installation pour configurer le TPM (ce processus nécessitera probablement le redémarrage de l’ordinateur et la vérification des paramètres en appuyant sur la touche F (fonction) appropriée après le redémarrage de l’ordinateur). 2.
- Page 144 BIOS • INSYDE BIOS (256Mb SPI Flash ROM) Mémoire • DDR4 double canal • Deux prises SO-DIMM 260 broches • Prise en charge de la mémoire DDR4 jusqu’à 3200 MHzy • Mémoire extensible jusqu’à 64 Go • Compatible avec les modules 8 Go, 16 Go ou 32 Go (La fréquence de fonctionnement réelle de la mémoire dépend du processeur.) Options d’affichage •...
- Page 145 Interface • 1x port USB 2.0 • 1x port USB 3.2 Gen 1 Type-A • 2x ports USB 3.2 Gen 2 Type-C • 1x Mini DisplayPort 1.4 • 1x port de sortie HDMI • 1x prise d’entrée microphone • 1x prise audio 2 en 1 (Casque/Microphone) •...
- Page 146 Spécifications environnementales • • Température Exploitation : 5°C - 35°C Hors exploitation : -20°C - 60°C • Humidité relative Exploitation : 20% - 80% Hors exploitation : 10% - 90% Energie • Batterie polymère 4 cellules intégrée, 54 Wh • Gamme complète d’adaptateurs CA/CC Entrée AC : 100 - 240V, 50 - 60Hz Sortie CC : 20V, 7.5A (150W) Dimension et Poids...
- Page 147 Su Questo Breve Manuale Utente Questo manuale utente è una breve introduzi- one per avviare il tuo sistema. Questo è un supplemento, non è un sostituto della versione estesa del Manuale Utente in lingua inglese nel formato Adobe Acrobat sul disco Driver &...
- Page 148 Marchi registrati Intel è un marchio/marchio registrato di Intel Corporation. Windows è un marchio registrato di Microsoft Corporation. Dichiarazione FCC Questo dispositivo è conforme alla Parte 15 delle Norme FCC. Il funzionamento è soggetto alle due condizioni seguenti: 1. Questo dispositivo non deve causare interferenze dannose. 2.
- Page 149 Manutenzione Non tentare di riparare il computer da soli. Ciò potrebbe violare la tua garanzia ed esporre te e il computer a scosse elettriche. Affidare tutta la manutenzione al personale di assistenza autorizzato. Scollegare il computer dall’alimentatore. Affidare la manutenzione al personale di assistenza qualificato in una delle seguenti condizioni: •...
- Page 150 • Si noti che nei computer con logo galvanizzato in rilievo, il logo è coperto da un adesivo protettivo. A causa dei danni da usura, questo adesivo potrebbe deterio- rarsi nel tempo e il logo esposto può sviluppare spigoli bordi. Prestare attenzione quando si maneggia il computer in questo caso ed evitare di toccare il logo gal- vanizzato in rilievo.
- Page 151 Avvio del Sistema 1. Rimuovere tutti i materiali di imballaggio. 2. Posizionare il computer su una superficie stabile. 3. Collegare in modo sicuro tutte le periferiche che si desidera utilizzare con il computer (ad esempio la tastiera e il mouse) alle loro porte. 4.
- Page 152 Software di Sistema Il tuo computer potrebbe essere già dotato di un software di sistema preinstalla- to. Se questo non è il caso, o se stai riconfigurando il tuo computer per un sistema diverso, vedrai che questo manuale fa riferimento a Microsoft Windows 11. Supporto RAID Prima di installare il sistema operativo Windows, è...
- Page 153 Descrizione Livello RAID RAID 0 Unità identiche leggono e scrivono dati in parallelo per (sono necessari aumentare la prestazione. RAID 0 implementa un insieme di dischi con striping e i dati vengono suddivisi in blocchi e almeno due SSD) ciascun blocco viene scritto su un’unità separata. Unità...
- Page 154 7. Andare a Intel® Rapid Storage Technology (nel menu Advanced) e selezionare Create RAID Volume. 8. Ora puoi configurare il tuo volume RAID utilizzando gli ssd installati. 9. Selezionare Name e digitare un nome scelto per il volume RAID e Selezionare <Yes>.
- Page 155 Mappa del Sistema: Vista Frontale con Schermo Aperto Figura 2 - Vista Frontale con Schermo Aperto 1. Webcam 2. *Fotocamera LED *Quando la fotocamera è in uso, il LED si illuminerà. 3. Microfono Integrato 4. Schermo 5. Pulsante di Accensione 6.
- Page 156 Indicatori LED Gli indicatori LED sul computer mostrano informazioni utili sullo stato corrente del computer. Icona Colore Descrizione Arancione L’adattatore CA/CC è Inserito Verde Il Computer è Acceso Lampeggia in Verde Il Computer è in Modalità Sospensione Arancione La Batteria è in Carica La Batteria ha Raggiunto un Livello Verde di Carica Estremamente Basso...
- Page 157 La Tastiera Il tuo notebook viene fornito con una tastiera LED multicolore. È possibile cambi- are il colore della tastiera LED multicolore. La tastiera ha un tastierino numerico per un facile inserimento di dati numerici. Premendo Num Lk si attiva/disattiva il tastierino numerico.
- Page 158 È possibile accedere all’applicazione di Tastiera LED cliccando sull’icona di Tasti- era LED nel Centro di Controllo (oppure premendo il tasto Fn e il tasto Tasti Funzione & Indicatori Visivi I tasti funzione (F1 - F12 ecc.) agiranno come tasti di scelta rapida se premuti mentre si tiene premuto il tasto Fn.
- Page 159 Tasti Tasti Funzione/Indicatori Visivi Luminosità dello Schermo Fn + Riduzione/Aumento Attiva/Disattiva Fotocamera Fn + Fn + Attiva/Disattiva Modalità Aereo Fn + Attiva/Disattiva Modalità Risparmio Attiva/Disattiva Number Lock Fn + Attiva/Disattiva Scroll Lock Attiva/Disattiva Caps Lock Fn + Attiva/Disattiva il Centro di Controllo Controllo Velocità...
- Page 160 Mappa del Sistema: Viste Anteriore, Sinistra e Destra Figura 3 - Viste Anteriore, Sinistra e Destra 1. Indicatori LED 7. 2-In-1 Audio Jack (Cuffie/Microfono) 2. Slot per Blocco di Sicurezza 8. Altoparlanti 3. Prese di Aria 9. Lettore di Schede microSD 4.
- Page 161 2. Assicurarsi di selezionare il dispositivo corretto dal menu a discesa corrispon- dente al dispositivo collegato (ad esempio Scegliere “Auricolare” se hai collegato un auricolare e non scegliere “Cuffia” in questo caso), e quindi cliccare su OK per salvare l’impostazione. 3.
- Page 162 Avviso di Rimozione del Coperchio Inferiore Non rimuovere le coperture e/o le viti ai fini per aggiornare il dispositivo poiché ciò potrebbe violare i termini della garanzia. Se è necessario sostituire/rimuovere SSD/RAM ecc. per qualsiasi motivo, contat- tare il proprio distributore/fornitore per ulteriori informazioni. Centro di Controllo Windows.
- Page 163 L’area di notifica della barra delle applicazioni si trova in basso a destra dello schermo. Da qui è possibile accedere ad alcuni dei pannelli di controllo e delle applicazioni a cui si fa riferimento nel corso di questo manuale. In questo manuale vedrai un’istruzione per aprire il Pannello di Controllo. Per accedere al Pannello di Controllo, utilizzare la combinazione del Tasto Windows Logo + tasto R e digitare “Pannello di Controllo”.
- Page 164 Microsoft Hybrid Graphics Microsoft Hybrid Graphics è una tecnologia impeccabile progettata per ottenere le migliori prestazioni dal sistema grafico consentendo una maggiore durata della batteria senza dover modificare le impostazioni manualmente. Il sistema operativo del computer (ed alcune applicazioni) passerà automaticamente tra la GPU integrata e la GPU discreta quando richiesto dalle applicazioni in uso.
- Page 165 Per configurare i display utilizzando il Progetto menu: 1. Collegare i tuoi display esterni allaporta appropriata e accenderli. 2. Premere la combinazione di tasti Windows Logo + P (o Fn + F7). 3. Cliccare su una delle opzioni dalmenu per selezionare Solo PC Schermo, Duplicare, Estendere o Solo secondo schermo.
- Page 166 Funzionalità Audio È possibile configurare le opzioni di audio sul tuo computer dal pannello di con- trollo Suono in Windows. Accedere al pannello di controllo Suono tramite la voce Impostazioni (Sistema > Suono) nel Start menu. Il volume può essere regolato tramite la combinazione di tasti Fn + F5/F6.
- Page 167 La modalità di Alimentazione può essere impostata su Bilanciato (impostazione predefinita) che bilancia la prestazione e la durata della batteria, Migliore efficien- za energetica per una migliore durata della batteria con prestazione ridotta, e Migliori Prestazioni per prestazioni migliorate ma con un maggiore consumo della batteria.
- Page 168 Ultimi Aggiornamenti Dopo aver installato tutti i driver, assicurarsi di abilitare Controlla per aggiornamenti (Impostazioni > Windows Update) e andare su Microsoft Store e cliccare su Download e aggiornamenti > Ottieni aggiornamenti per aggiornare tutte le app ecc. Figura 10 - Installare i Driver Installazione del Driver &...
- Page 169 Linee Guida Generali per l’installazione del Driver Come guida generale, seguire le istruzioni predefinite sullo schermo per ciascun driver (ad esempio Avanti > Avanti > Fine), a meno che non sia un utente avanzato. In molti casi è necessario un riavvio per installare il driver. Assicurarsi che i moduli (ad es.
- Page 170 Modulo Bluetooth Assicurarsi che il modulo Bluetooth sia acceso (e non in modalità aereo) prima che inizi la configurazione. Configurazione Bluetooth in Windows 1. Cliccare sulla voce Impostazioni nel menu Start. 2. Cliccare su Bluetooth & Dispositivi. 3. Cliccare su Aggiungere dispositivo > Bluetooth e apparirà un elenco di dispos- itivi rilevati.
- Page 171 TPM Gestione in Windows Puoi gestire le impostazioni del TPM da Windows: 1. Andare al Pannello di Controllo. 2. Cliccare su Crittografia Unità bitlocker (Sistema e Sicurezza). 3. Cliccare su Amministrazione TPM. Figura 12 - Unità Bitlocker Crittografia (Amministrazione TPM) 4.
- Page 172 Azioni TPM 1. Cliccare su Preparare il TPM e seguire le istruzioni della procedura guidata per preparare il TPM (questo richiederà probabilmente un riavvio del computer e la conferma delle modifiche delle impostazioni dopo il riavvio premendo il tasto F appropriato).
- Page 173 BIOS • INSYDE BIOS (256Mb SPI Flash ROM) Memoria • DDR4 a Doppio Canale • Due 260 Pin SO-DIMM Prese Supporta • Memoria fino a DDR4 3200MHz Memoria • Espandibile fino a 64 GB • Compatibile con Moduli da 8GB, 16GB o 32GB (La vera frequenza operativa della memoria dipende dal processore.) Opzioni di Display •...
- Page 174 Interfaccia • 1x Porta USB 2.0 • 1x Porta USB 3.2 Gen 1 Tipo-A • 2x Porte USB 3.2 Gen 2 Tipo-C • 1x Porta Mini Display1.4 • 1x Porta HDMI-Out • 1x Jack per Microfono • 1x Jack Audio 2-In-1 (Cuffie/Microfono) •...
- Page 175 Specifiche Ambientali • Temperatura In funzione: 5°C - 35°C Non in funzione: -20°C - 60°C • Umidità Relativa In funzione: 20% - 80% Non in funzione: 10% - 90% Alimentazione • Pacco Batteria ai polimeri a 4 celle Integrato, 54Wh •...
- Page 176 دليل املستخدم يقدم دليل املستخدم هذا نظرة عامة عن املعلومات .التي قد تحتاجها لتشغيل نظامك هذا الدليل هو ملحق لدليل املستخدم املوسع Adobe Acrobat املتوفر باللغة اإلنجليزية بتنسيق عىل قرص ب ر امج تشغيل الجهاز واألدوات املساعدة + دليل املستخدم ،املرفق...
- Page 177 بيان لجنة االتصاالت الفيد ر الية .FCC 51 من قواعد لجنة االتصاالت الفيد ر الية يتوافق هذا الجهاز مع أحكام الجزء :يخضع تشغيل هذا الجهاز للرشطني التاليني .ال يجوز أن يتسبب هذا الجهاز يف حدوث تشويش ضار ،يجب أن يتقبل هذا الجهاز أي تشويش يتلقاه .مبا...
- Page 178 معلومات السالمة .استخدم فقط محول تيار مرتدد / تيار مستمر معتمد لالستخدام مع هذا الحاسوب .استخدم فقط كابل الطاقة والبطاريات املشار إليها يف هذا الدليل ال تلقي البطاريات يف النار فقد تنفجر. اضطلع عىل الترشيعات املحلية املتعلقة بالتخلص من النفايات .ملعرفة...
- Page 179 التخلص من نفايات البطاريات واألمور التي يجب م ر اعاتها .املنتج الذي اشرتيته يحتوي عىل بطارية قابلة إلعادة الشحن البطارية قابلة إلعادة التدوير. قد يكون من غري القانوين، عند انتهاء العمر االف رت ايض للبطارية، التخلص منها مع .نفايات املدينة مبوجب قوانني الدولة / الوالية والقوانني املحلية املختلفة اتصل...
- Page 180 130° الصورة 1 - فتح الغطاء/الحاسوب مع توصيل محول التيار املرتدد / التيار املستمر برنامج النظام قد يكون حاسوبك مزو د ً ا بربنامج نظام مثبت مسب ق ًا. إذا مل يكن مثة نظام تشغيل مثبت عىل حاسوبك أو إذا أردت .تثبيت...
- Page 181 تثبيتRAID .( )لتحسني األداء أو الحاميةRAID أق ر اص( يف وضعSSD) ميكن تثبيت محركات األق ر اص ذات الحالة الصلبة الحالة الصلبة يف وضع RAID يرجى املالحظة أنه يجب تبيث محركات األق ر اص ذات ،ال تغري الوضع إال إذا كنت تنوي إعادة تثبيت نظام التشغيل .قبل...
- Page 182 RAID عملية تثبيت انتقل إىل حاسوب قابل للتشغيل وانسخ امللف املسمىf6mdflpy-x64 املوجود يف املوقع املذكور أدناه عىل “قرص”ب ر امج تشغيل الجهاز واألدوات املساعدة + دليل املستخدم ، إىل ذاكرة فالشUSB أو محرك أق ر اص صلبةUSB خارجي Raid\F6\VMD\f6vmdflpy-x64\ ...
- Page 183 :خريطة النظام املنظر األمامي والشاشة مفتوحة - 2 الصورة الشاشة مفتوحة كام ري ا الحاسوب * ضوء كام ري ا ليد *تيضء إضاءة ليد عندما تكون الكام ري ا مستخدمة منظومة ميكروفون مدمجة الشاشة زر الطاقة لوحة املفاتيح لوحة اللمس واألز ر ار مالحظة: تقع...
- Page 184 مؤ رش ات ليد .تعرض مؤ رش ات ليد املوجودة عىل الحاسوب معلومات مفيدة حول الوضع الحايل للحاسوب التوضيح اللون الرمز محول التيار املرتدد / التيار املستمر موصل برتقايل الحاسوب مفتوح أخرض الحاسوب يف وضع السكون وميض باللون األخرض برتقايل البطارية...
- Page 185 لوحة املفاتيح يأيت حاسوبك املحمول الخاص بك مزود ا ً بلوحة مفاتيح متعددة األلوان مع إضاءة ليد. ميكنك تغيري لون لوحة املفاتيح ذات اإلضاءة الليد متعددة األلوان. تحتوي لوحة املفاتيح عىل لوحة رقمية إلدخال البيانات الرقمية بسهولة. يؤدي الضغط عىلNum Lock إىل تشغيل/إيقاف تشغيل لوحة املفاتيح الرقمية. تتميز أيض ً ا بوجود أز ر ار وظيفية تتيح لك تغيري...
- Page 186 املفاتيح الوظيفية & املؤ رش ات املرئية ستعمل كمفاتيح تشغيل رسيع عند الضغط عليها أثناء الضغط باستم ر ار عىل مفتاح (F1 - F12 ... )إلخ املفاتيح الوظيفية ،باإلضافة إىل مجموعات مفاتيح الوظائف األساسية .تتوفر بعض املؤ رش ات املرئية عند تثبيت برنامج تشغيل مركز التحكم مفاتيح...
- Page 187 مفاتيح وظيفية / برصية سطوع الشاشة Fn + خفض/زيادة تشغيل/إيقاف تشغيل طاقة الكام ري ا Fn + تشغيل/إيقاف وضع الط ري ان Fn + تشغيل/إيقاف وضع السكون Fn + تشغيل/إيقاف تشغيل مفتاح قفل الرتقيم تشغيل/إيقاف تشغيل قفل التمرير Fn + تشغيل/إيقاف...
- Page 188 :خريطة النظام املظهر األمامي، واملظهر من اليسار ومن اليمني الصورة 3 - املظهر األمامي، واملظهر من اليسار ومن اليمني 1 مقبس صوت 2 يف مؤ رش ات ليد مك رب ات الصوت فتحة قفل األمان قارئ بطاقةMicroSD فتحة التهوية ...
- Page 189 تأكد من تحديد الجهاز الصحيح من القامئة املنسدلة التي تعرض الجهاز املتصل عىل سبيل املثال: اخرت “سامعة الرأس ذات امليكروفون” إذا قمت بتوصيل سامعة الرأس ذات امليكروفون .ثم انقر فوق “موافق” لحفظ اإلعدادات ()ال تخرت “سامعة رأس ،إذا قمت بتوصيل ميكروفون فاستخدم مقبس إدخال امليكروفون .()مقبس...
- Page 190 تحذير فك الغطاء السفيل ال تزل أي غطاء و/أو مسامري موجودة عىل الحاسوب لتحديث مكوناته ...SSD إذا كنت بحاجة إىل استبدال إو إ ز الة ذاكرة الوصول العشوايئ أو قرص الحالة الصلب . يرجى االتصال باملوزع/املورد للحصول عىل مزيد من املعلومات مركز...
- Page 191 توجد منطقة اإلشعا ر ات يف رشيط املهام يف الركن السفيل األمين من الشاشة. ميكن الوصول من هنا إىل بعض لوحات التحكم والتطبيقات املشار إليها يف هذا الدليل. ستجد يف أقسام ،مختلفة من هذا الدليل أنه قد تم توجيهك لفتح لوحة التحكم. للوصول إىل لوحة التحكم ...
- Page 192 :Graphics Command Center ® للوصول إىل مركز التحكم .يف الویندوز من قامئة ابدأ Intel® Graphics Command Center انتقل إىل مركز التحكم :NVIDIA للوصول إىل لوحة تحكم . من قامئة ابدأ يف الویندوزNVIDIA انتقل إىل لوحة تحكم أجھزة العرض و/أو منفذ العرض HDMI الحظ...
- Page 193 :لضبط شاشات العرض باستخدام لوحة التحكم يف العرض .الشاشة/الشاشات قم بتوصیل الشاشة/الشاشات الخارجیة بالحاسوب عرب املنفذ املناسب وشغل .انقر بزر املاوس األیمن فوق سطح املكتب واخرت إعدادات العرض من القامئة .(Detect) انقر فوق الزر كشف .سیكتشف الحاسوب بعد ذلك أي شاشات متصلة (Multiple displays) یمكنك...
- Page 194 Sound Blaster Studio تطبيق .من قامئة البدء يف ويندوز Sound Blaster Studio ش غ ّ ل لوحة التحكم يف - 8 الصورة Sound Blaster Studio الطاقة والبطارية تتيح لك لوحة التحكم يف الطاقة والبطارية ضبط خيا ر ات الطاقة برسعة للشاشة ووضع السكون والطاقة، وتوفري البطارية...
- Page 195 تثبيت ب ر امج التشغيل يتضمن قرص “ب ر امج تشغيل الجهاز واألدوات املساعدة + دليل املستخدم”، األدوات املساعدة وب ر امح التشغيل الالزمة ليك يعمل حاسوبك بسالسة. من املمكن أن تكون مثبتة كمسب ق ًا. إذا مل تكن مثبتة، أدخل القرص وانقر...
- Page 196 القواعد العامة املتعلقة بتثبيت ب ر امج التشغيل >اتبع اإلرشادات االف رت اضية التي تظهر عىل الشاشة لكل برنامج تشغيل، باعتبارها دليال ً عا م ً ا )عىل سبيل املثال التايل .التايل> إنهاء( ما مل تكن مستخد م ً ا متقد م ً ا. يف كثري من الحاالت، يلزم إعادة تشغيل الحاسوب لتثبيت برنامج التشغيل ...
- Page 197 إعداد البلوتوث يف الويندوز .انقر فوق اإلعدادات من قامئة البدء .انقر فوق خيار البلوتوث واألجهزة .بعد النقر فوق خيار إضافة جهاز> البلوتوث، ستعرض قامئة األجهزة التي تم العثور عليها .انقر نق ر ً ا مزدو ج ً ا فوق الجهاز الذي تريد إق ر انه بالحاسوب، ثم انقر فوق اتصال .إذا...
- Page 198 - 12 الصورة تشفري محركBitLocker (إدارة الوحدة النمطية للنظام ( األسايس املوثوق بهTPM)) ( ميكنك ضبط إعدادات الوحدة النمطية للنظام األسايس املوثوق بهTPM) يف نظام ويندوز من خالل نافذة إدارة ( الوحدة النمطية للنظام األسايس املوثوق بهTPM) - 13 الصورة الوحدة...
- Page 199 استكشاف األخطاء وإصالحها الحل السبب املحتمل للمشكلة .الوحدات مقفلة ألن الحاسوب يف وضع الط ري ان ال ميكن العثور عىل الشبكةWireless لتشغيل/إيقاف تشغيل وضع الط ري ان اضغط عىل مفتاحFn + F11 .يف نفس الوقت LAN / البلوتوث (3 .)انظر...
- Page 200 BIOS ( میجابایتROM) 256 SPI Flash ذاكرة ق ر اءة فقط INSYDE BIOS • التخزين ثنائیة القناة DDR 4 ذاكرة • 260 دبوس مقبسSODIMM عدد اثنني • دعم ذاكرةDDR4 يصل إىل 0023 ميجا هرتز • ذاكرة قابلة للتوسيع حتى 46 جيجابايت •...
- Page 201 واجهة املستخدم 1× منفذUSB 2.0 • 1× منفذUSB 3.2 من الجيل األول من النوعA • 2× منفذUSB 3.2 من الجيل الثاين من النوعC • 1× 1.4 منفذ عرض مصغر • 1× منفذ إخ ر اجHDMI •...
- Page 202 الطاقة حزمة بطاریة بولیمر رباعیة الخالیا مدمجة، 45 واط/ساعة • محول تیار مرتدد/تیار مستمر كامل املدى • 50 - 60 فولت 240 - 100 :مدخل تیار مرتدد ( 150 )واط أمبیر 7.5A ،فولت :مخرج التیار املستمر األبعاد والوزن (TBC) ()ارتفاع ملم...
- Page 203 TÜRKİYE • UAE • CYPRUS • GERMANY • UK...
Need help?
Do you have a question about the ABRA A5 V21.1 and is the answer not in the manual?
Questions and answers