Table of Contents
Advertisement
Quick Links
Advertisement
Table of Contents

Related Manuals for LLG uniSPEC 1 UV/VIS


Summary of Contents for LLG uniSPEC 1 UV/VIS
- Page 1 OPERATION MANUAL ® L A B W A R E OPERATION MANUAL LLG-uniSPEC 1 UV/VIS Spektrophotometer Thank you very much for purchasing this LLG-uniSPEC 1 UV/VIS. Please read the following instructions carefully and always keep this manual within easy reach.
-
Page 2: Table Of Contents
® L A B W A R E Contents Preface 1.1 Safety 1.2 General 1.3 Electrical 1.4 Warning 1.5 Performance 1.6 Radio Interference Introduction of the Instrument 2.1 Brief Introduction of the instrument 2.2 Working Principle 2.3 Structure 2.4 Unpacking Instructions 2.5 Specifications Install Instrument 3.1 Environment Required... -
Page 3: Preface
OPERATION MANUAL Contents System Functions 5.1 Energy 5.2 Get Dark Current 5.3 Wavelength Calibration 5.4 Load Default 5.5 Version Instrument Maintenance 6.1. Daily Maintenance 6.2. Trouble Shooting 6.3. Fuse replacement 7. Spare part and accessories 8. Warranty 1. Preface 1.1 Safety Read the following manual before installing and using the instrument and its accessories. -
Page 4: Electrical
® L A B W A R E 1.3 Electrical Before switching on the apparatus, make sure it is set to the voltage of the local power supply (see Installation). The power cord shall be inserted in a socket provided with a protective earth contact. The protective action must not be negated by the use of an extension cord without a protective conductor. -
Page 5: Introduction Of The Instrument
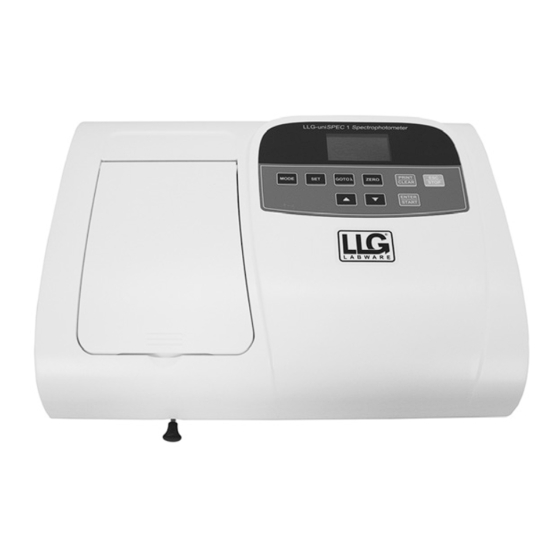
2. INTRODUCTION OF THE INSTRUMENT 2.1 Brief Introduction of the instrument The LLG-uniSPEC 1 is a single beam, general purpose instrument designed to meet the needs of the Conventional Laboratory, This instrument is ideal for various applications, such as: Chemistry, Biochemistry, Petro-chemistry, Environmental Protection, Food and Beverage Labs, Water and Waste Water Labs and other fields of quality control and research. -
Page 6: Working Principle
® L A B W A R E 2.2 Working Principle Different matter has different but special absorbance wavelength point. Also, when at the fixed wavelength point, the absorbance has some relation to the substance’s (Always transparent Solution) concentration and its thickness. The relation can be concluded as the following Formula, which is called Lambert-Beer Law. -
Page 7: Unpacking Instructions
OPERATION MANUAL 2.4 Unpacking Instructions Carefully unpack the contents and check the materials against the following packing list to ensure that you have received everything in good condition. Packing List Description Quantity Spectrophotometer Power Cord 1 cm Glass Cuvettes 1 Set of 4 1 cm Quartz Cuvettes 1 Set of 2 User’s Manual... -
Page 8: Install Instrument
® L A B W A R E 3. Install Instrument 3.1 Environment Required To ensure the best performance, the following conditions are required: • The best working temperature range is 16-30 °C and the humidity is 45-80 % r.H. •... -
Page 9: Operation Introduction
OPERATION MANUAL 4 Operation Introduction 4.1 Software Structure 4.1.1 Main Interface Fig 4-1 Main Interface After 20 minutes’ warm-up, the system goes into main interface. (Fig.4-1) Press the key of to change the functions. MODE 4.1.2 Firmware Functions The firmware consists of 5 functions: T, A, C, F and system functions 1) T To measure the Transmittance of a sample in a fixed wavelength point. -
Page 10: Basic Operation
® L A B W A R E 4.2 Basic Operation 4.2.1 Set Wavelength In the measurement Interface, press to go into wavelength setting Interface. Use GOTO λ Arrow Key to increase or decrease the value of wavelength, then press to confirm. -
Page 11: Measurement
OPERATION MANUAL 4.4 Measurement 4.4.1 T-Mode Step 1, Go into T Mode Interface In the Main Interface, press Key to move the cursor on “T”, you will see the current MODE sample’s T% value. Press , to go into Continuous Measurement Interface. Fig. 4-2; ENTER Fig. -
Page 12: A-Mode
® L A B W A R E 1) When the optional Printer is linked to the instrument, if you want to print out the test result, use Arrow Key to choose “Print”, then press to confirm. After printing, the ENTER data will be deleted from the Photometer. - Page 13 OPERATION MANUAL 2) Create Curve If you want to create a new standard curve by several standard samples, Use Arrow Key to move the cursor on “Create Curve”, then press to confirm. The system will ask you to ENTER input the quantity of your standard samples. (Fig.4-7). Note: The default quantity is “3”.
- Page 14 ® L A B W A R E Step 4, Input Standard Samples’ Concentration Pull the 1# Standard Sample in the light path and input the value of its concentration by the Arrow key, then press to confirm. The system will go into the next interface. ENTER (Fig.4-10) Fig.
- Page 15 OPERATION MANUAL 3) Load Curve All the curve equations will be saved in the Photometer automatically. If you want to reload the saved curve, just follow the following steps: Move the cursor on “Load Curve” and press to confirm. Then the system will go into ENTER the curve equation record interface.(Fig.
-
Page 16: F-Mode (Coefficient Method)
® L A B W A R E Move the cursor on the curve equation that you want to delete and press , then system ENTER will ask you to confirm again. (Fig. 4-16) Fig. 4-16 Move the cursor on “Yes” and press to confirm, then the curve equation will be ENTER deleted. - Page 17 OPERATION MANUAL Input the value of B in the same way(Fig. 4-19) Fig. 4-19 3) Test Samples Step 1, Go into pre-test Interface Move the cursor on “Test”, then press to go into pre-test Interface. (Fig.4-20) ENTER Fig.4-20 Step 2, Set Wavelength Press to go into wavelength setting interface, input the wavelength value by GOTO λ...
-
Page 18: System Functions
® L A B W A R E Step 3, Calibrate 100%T/0Abs Press to go into continuous measurement interface (Fig. 4-22). Put the Reference ENTER Solution in the light path, then press to calibrate 100%T/0Abs; ZERO Fig. 4-22 Step 4, Measurement Put the samples to be measured in the light path, press to measure, then the result ENTER... -
Page 19: Get Dark Current
OPERATION MANUAL 5.2 Get Dark Current When the working condition changes, a dark current calibration is required before any measurement. Use Arrow key to choose “Dark Current” and press to confirm (Fig. 4-25) ENTER Note: Remove the cuvettes from the light path first. Do not open the lid of the compartment during the course of calibration. -
Page 20: Wavelength Calibration
® L A B W A R E 5.3 Wavelength Calibration After some time, the energy of lights drops off which can have a slight influence on the test result. In this case, users can reset the wavelength to compensate. We suggest the users to calibrate the wavelength every one or two months. -
Page 21: Version
OPERATION MANUAL 5.5 Version Press Arrow Key to choose “Version” and press ENTER to confirm. You will see the version of the software and hardware. (Fig.4-30). Press to return. Fig. 4-30 Due to different software versions and updates, what you see on the instrument screen maybe different from the one showed in the above fig. -
Page 22: Troubleshooting
® L A B W A R E 6.2 Troubleshooting 1) Dark Current Error when self-test Possible Cause Solution • Open lid of the compartment Close the lid of the compartment during the self-test. and switch on the power again. 2) No response after power on Possible Cause Solution... -
Page 23: Spare Part And Accessories
Plug the socket and switch on the power 7. Spare part and accessories Part code Description 6.263 636 LLG-uniSPEC 1 UV/VIS-Spectrophotometer with EU and UK plug 6.263 633 Deuterium lamp (D2) for LLG-uniSPEC 1 6.263 615 Tungsten lamp for LLG-uniSPEC 1, 2 and 4 6.266 530... -
Page 24: Warranty
® L A B W A R E 10. Warranty This product is warranted to be free from defects in material and workmanship for a period of three (3) years from date of purchase. This warranty is valid only if the product is used for its intended purpose and within the guidelines specified in this instruction manual. - Page 25 OPERATION MANUAL Notes...
- Page 26 L A B W A R E L A B W A R E ® L A B W A R E Lab Logistics Group GmbH Am Hambuch 1 D-53340 Meckenheim/Germany Fon: +49 (0)2225 9211- 0 Fax: +49 (0)2225 9211-11 www.llg-labware.com info@llg-labware.com...
Need help?
Do you have a question about the uniSPEC 1 UV/VIS and is the answer not in the manual?
Questions and answers