Subscribe to Our Youtube Channel
Summary of Contents for Kolin KCB-BLC-8859T
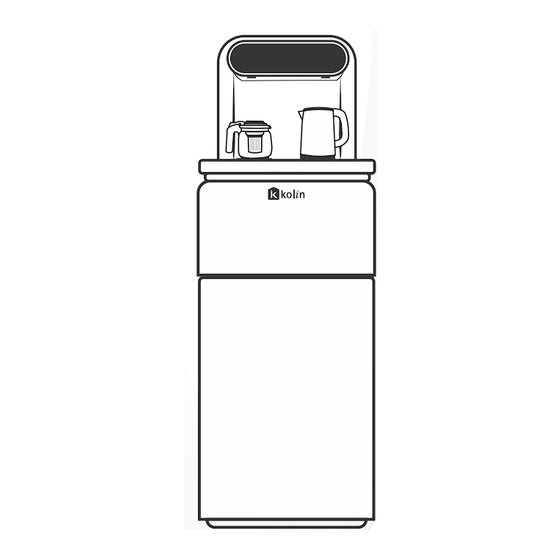
- Page 1 OWNER’S MANUAL MODEL: KCB-BLC-8859T COFFEE/TEA BAR WATER DISPENSER • KEEP THIS MANUAL IN GOOD CONDITION • PLEASE READ THIS MANUAL CAREFULLY BEFORE USING THE PRODUCT • THE IMAGE IS FOR REFERENCE ONLY, ACTUAL UNIT MAY DIFFER FROM THE IMAGE ABOVE...
- Page 2 To Users Thank you for choosing Kolin as your trusted brand for water dispensers. We appreciate your confidence in our products. Before installing and using the water dispenser (Coffee Tea Bar), we kindly request you to carefully read and understand this instruction manual.
-
Page 3: Table Of Contents
Product Introduction Safety Precaution Product Features and Parts Product Specification Installation and Usage Methods Proper Cleaning and Maintenance Troubleshooting... -
Page 4: Product Introduction
Product Introduction Introducing our innovative Kolin Coffee Tea Bar, the ultimate solution for all your beverage cravings. This sleek and compact unit seamlessly combines the convenience of a water dispenser with extraordinary features such as an anti-scalding heating kettle capable of withstanding temperatures up to 100°C boiling water, and a high boron glass kettle... - Page 5 • In case of water leakage, immediately switch off the power and drain all water from the product. Contact our Kolin hotline number or your local dealer for assistance by professional service personnel. Do not attempt repairs yourself. •...
-
Page 6: Product Features And Parts
Do not attempt to repair it yourself. Do not immerse the appliance in water for cleaning. Use a damp cloth instead. Do not use the product outdoors or in areas with water splashing. If a fault occurs during the process of boiling water, immediately disconnect the •... -
Page 7: Product Specification
Electrical Schematic Diagram Heating and cooling-type water dispenser Specifications Heating and cooling type water Function dispenser Rated 230V~, 60Hz voltage/ frequency 1350W Heating power (Electric Kettle) Water heating capacity 8.0L/ h 50 - 100℃ Thermal insulation Plate Cooling power Water cooling capacity 2.0L/ h 5 - 10℃... -
Page 8: Installation And Usage Methods
Installation and Usage Methods WARNING Do NOT use other liquids such as coffee, tea, juices, or beers in the water source container. This unit is specifically designed for dispensing water only. Do NOT use alternative containers. The water containers designed for this dispenser are specifically intended for use with 3 and 5 gallons only. - Page 9 • Securely fasten the faucet assembly in place using the provided screws. Make sure to tighten all four screws to establish a firm and reliable connection. 3. Location: • Position the coffee tea bar in an upright position. • Place the coffee tea bar near a grounded wall outlet on a stable, horizontal surface.
- Page 10 CAUTION : To ensure safe and proper operation, only use the provided base for the electric kettle. The base is designed to support the kettle and provide the necessary power supply for efficient water heating. Using any other base may compromise performance and safety.
- Page 11 Remote Controller Remote Controller (Picture 1) • Power Connect the power and turn on the switch at the back. Press the Power Button to turn on the machine. Press the Power Button again to turn it off. • Water Press the Water Button to dispense water into the black electric kettle. Press the Water Button again to stop dispensing.
- Page 12 Display Panel Indication This light indicates the power icon. This light indicates water being dispensed into the black kettle. This light indicates the heat icon. This light indicates the cool icon and water being dispensed as cold water. This light indicates the activation of the thermal insulation plate. The OFF light indicates that the machine is in standby mode.
- Page 13 Standby/ "OFF" State • To activate the standby mode, turn on the power switch (red) located on the back of the product. You will hear a beep sound confirming that the product is in standby mode. The display panel will show "OFF," and the power light indicator will blink. Adjusting Settings in Standby/ "OFF"...
- Page 14 • Turning on the Power Once the setup is complete, you can now turn on the coffee tea bar by simply double-touching the power icon. • Boiling Hot Water • Double-press the pour water icon on the right side panel to activate the water pouring function.
-
Page 15: Proper Cleaning And Maintenance
WARNING Please exercise caution as the thermal insulation plate can reach a tempera- ture of up to 85°C. Avoid direct contact with the hot plate to prevent burns. NOTE: You can adjust the timer for the Keep Warm function in the standby mode. - Page 16 Cleaning Cold Water Tank • Regular cleaning of cold water tank is recommended every 3 months or whenever an off-taste is detected to ensure optimal performance and water quality. Follow these steps to clean the water tank: Removing Existing Water: •...
- Page 17 Plug the unit into a nearby power source. • Switch on the switch located at the back of the dispenser to power on. • Fill the empty storage tanks with the tap water by double pressing the cold • icon button, then wait for it to dispense water, once water came out of the cold faucet that is an indication that the tank is filled.
-
Page 18: Troubleshooting
• Fill the kettle with water again and boil it to remove any lingering vinegar. Repeat this step as necessary. Troubleshooting During use, you may encounter the following situations, which are considered normal. Please continue to use the product with confidence: Minor noise from the heating pipe during the heating process. - Page 19 Troubleshooting Troubleshooting KPII072023...


Need help?
Do you have a question about the KCB-BLC-8859T and is the answer not in the manual?
Questions and answers