Table of Contents
Advertisement
Quick Links
Advertisement
Table of Contents

Related Manuals for Kässbohrer LOW-LOADER Series

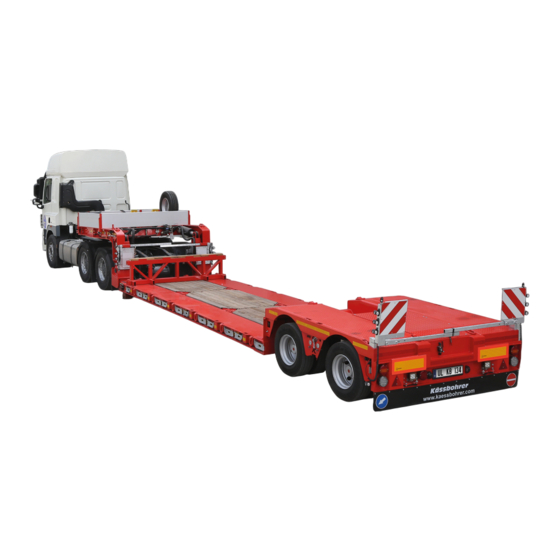
Summary of Contents for Kässbohrer LOW-LOADER Series
-
Page 2: Table Of Contents
I I n n d d e e x x 1. GENERAL INFORMATION AND SAFETY INSTRUCTIONS 1.1. About the User Manual ..............7 1.2. Meanings of Symbols Used in User Manual......7 1.3. Personal Protective Equipments..........8 1.4. Terms of Use and Safety Information ........9 2. - Page 3 3.6.6. Control Panel..............38 3.7. Tires..................39 3.8. Spare Wheel Holder ..............39 3.9. Spare Tire Lowering Crane ............40 3.10. Wheel Chock ................40 3.10.1. Pin Type Wheel Chock Holder ........40 3.11. Boxes and Storage Units ............42 3.11.1. Gooseneck Corner Chamfered Tool Cabinet....42 3.11.2. Fire Extinguisher Cabinet..........43 3.12.
- Page 4 5.6. Important Technical Considerations ........65 5.6.1. Fire Extinguisher...............65 5.6.2. Wheel Chocks ..............65 5.6.3. Modifications on the Trailer..........65 5.6.4. Air Leakage...............65 5.6.5. Considerations For the Environment ........65 5.7. Cleaning the Vehicle ..............66 5.8. Work Lamp................67 6. TRANSPORTATION SOLUTION 6.1. Container Transportation............68 6.1.1.
- Page 5 8.12.1. Filter Element Maintenance of Yellow and Red Couplings ................79 8.13. Maintenance of Extendable Lowbed Platform.......80 8.14. Tire Changement ..............80 8.14.1. Tightening Torques of Wheel Nuts .........81 8.14.2. Nut Tightening Sequence ..........81 8.14.3. Tire Inflation Pressure .............82 8.14.4. Alloy Rim Wheels............82 8.15.
- Page 6 FOREWORD First of all, thank you for choosing us for your new vehicle investment. Your vehicle is manufactured with the latest production technologies to the highest quality standards and equipped with the best safety and efficiency features. You can find detailed information about the accessories, equipment and hardware that might be in your vehicle in this manual.
-
Page 7: General Information And Safety Instructions
1. GENERAL INFORMATION AND • Exceeding of the maximum vehicle SAFETY INSTRUCTIONS speed 1.1. About the User Manual • Exceeding the permissible length, width and height The usage and operation information given in this manual is prepared to make • Unapproved parts like tires, acces- sure the vehicle is used in compliance sories, spare parts and etc. -
Page 8: Personal Protective Equipments
The information specified by It is obligatory to use approp- this warning symbol is very riate personal protective important for health and hu- equipment during man safety. When the given in- operations. formation is ignored, serious damage, injuries and even Long hair is particularly dan- death may occur. -
Page 9: Terms Of Use And Safety Information
To prevent possible accidents and envi- When working around the ve- ronmental pollution, follow the operating hicle, a lightweight helmet instructions and binding regulations. approved by an accredited institution should be worn. • Pay attention to the safety and warning signs placed on your Protective Ear Plugs vehicle. -
Page 10: Main Informations
2. MAIN INFORMATIONS 2.2. Brake Data Plate There is a brake data plate on the ve- There are vehicle identification stickers hicle which is equipped with an EBS on the vehicle. system. You may see this information on this plate. 2.1. - Page 11 compliance with regulations and our It is necessary to keep the warranty, al- quality standards. It is necessary to per- ways operating and maintenance man- form the maintenance to ensure our ual available on the vehicle to allow products always operate in the most effi- authorized service performing the servic- cient manner in compliance with our lat- ing to see the warranty conditions and...
-
Page 12: Trailer Running Gear And Usage Instructions
3. TRAILER RUNNING GEAR AND USAGE INSTRUCTIONS Service Line: It is the pneumatic line • 1.Toolbox where the pneumatic brake signal from • the truck is transmitted. 2.Kingpin Supply Line: It is the pneumatic line • 3.Control panel where the compressed air needed by the trailer is transmitted from the truck. - Page 13 If your vehicle is equipped with 2 different types of coup- lings, you must use only one type at the same time. When couplings mounting/demounting, parking brake of the truck and trailer must be engaged. If the brake parameters are Palm coupling with a test point modified, your vehicle's brake calculation might be non-sui-...
- Page 14 • • First demount the supply line red Mount supply line red (2). (2). • Be sure that couplings are matched • Demount the service line yellow (1). correctly. • 3.1.1.4. Demounting of C (UK) Slightly slide plastic covers to the Couplings lower side and close the plastic covers.
-
Page 15: Compressed Air Tanks
3.1.1.7. The Connections In Vehicles If the gooseneck and platform That Gooseneck and Platform Area area is matched, the vehicle are Separate will not brake properly if the vehicle is driven without the EBS power cable attached. In the vehicle whose goose- neck and platform area are matched, the vehicle cannot be moved without the Duoma-... -
Page 16: Ebs Socket
• 2.Drain valve Driving with a non-connected EBS connection is illegal. The water in the compressed air tank can cause corrosion • Drive only with an approved and problems and affect the func- well-operating EBS plug connection tionality of the brake system. in accordance with regulations. -
Page 17: Prev ( Park Release Emer-Gency Valve )
The black button is located under the Even if the truck 7 pin socket marked area in the image below. (ISO 7638) has a CAN data li- ne, if the spiral cable used bet- ween the truck and the trailer is 5-core, it will cause the trai- ler EBS Modulator to not work properly. -
Page 18: Brake Chambers
The black button is located under the The service brake is not sui- marked area in the image below. table for braking of the semi- trailer permanently. During longer waiting periods, the se- mi-trailer must be secured with a spring-loaded park bra- ke and with wheel chocks. - Page 19 according to axles type and loading ca- On some brake chambers pacity. The maintenance, modification or used in vehicles, the emer- repair operations must be performed by gency release screw is lo-ca- authorized services. ted in its socket (1) behind the brake chamber, not in its soc- 3.1.5.1.
-
Page 20: Suspension System
• Close the plastic cover on the brake chamber. Brake chamber will be activated after this operation. Before this operation, the ve- hicle must fixed securely with wheel chocks. Serious inju- ries may occur. Don't drive without being sure that all the brake system is Manually operated air suspension driving position working properly after this operation... -
Page 21: Elektronic Controlled Air Suspension (Ecas)
If the trailer will be driven at a non-driving height, the vehicle may be damaged, or a height problem may occur. 3.2.2. Elektronic Controlled Suspension (ECAS) Electronic controller suspension (ECAS) is an optional solution. This sys- tem sets the driving height or defined dif- ferent heights electronically. -
Page 22: Smartboard (Info Center)
If your Smartboard includes the battery, you may use some control even if the truck is not connected. You may check Smartboard user Manuel for the detail information. 3.3. Electrical System 15-pin socket (ISO 12098) + 2x7-pin socket (ISO 1185 (24N) / ISO 3731 Manometer (24S)) are used to supply the lighting system in our vehicles. -
Page 23: 2X7 Pin Socket
Empty Empty Empty Empty 3.3.2. 2x7 Pin Socket This system provides electricity for the electrical system on the vehicle like stop lamps, signal lamps etc. 2x7 pin socket pin connec-tions are made suitable for 24S ISO 3731 and 24N ISO 1185 norm. Open the protection cover and mount the sockets regularly. -
Page 24: Light System
Supply line Left taillight Empty Left indicator Brake light Empty Right indicator Fog lamp Right taillight Axle lifting Please be careful with the co- lor of the sockets. The black socket is suitable for ISO 1185 and the white socket is suitab- le for ISO 3731. - Page 25 Electrical Sockets Stop Lamps End Outline Markers License Plate Lamps Side Position Lamp Modulator When needed, you can obtain the electrical diagram of your vehicle from manufacturer. The lamps must be checked regularly. If there is any problem with the electrical system, it must be repaired immediately.
-
Page 26: King Pin
If you add or remove any If the wearing on the king pin lamps on the vehicle, your ve- is bigger than 2 mm, the king hicle may be non-suitable for pin must be replaced. regulations. 3.5. Semi-trailer Axle System Vehicles with LED electrical Axle with disc or drum type brake mech- systems consume very low... -
Page 27: Hubodometer
For more detailed information about your axles, please refer to manufacturer’s manual gi- ven to you at the time of delivery. If the axles are used other than the conditions specified in the manufacturer’s man-ual or if their maintenance is inter- rupted, your vehicle may be out of warranty. -
Page 28: Mechanical Alignment And Calibration
In an emergency, the power can be cut off by turning off the battery switch. • Parking lights must be turned on from the truck cabin. In order for the steering system to work, the right parking electric line of the truck must be working. - Page 29 3.6.2.1. Mechanical Alignment Mechanical alignment is done to ensure that the fifth wheel and hydraulic steering wheels are at the correct angle to each other. Once done, there is no need to do it again except for oil change and malfunction.
- Page 30 1. First, the gooseneck area should be 4.The position of the valve levers on the aligned with the help of a truck, and it hydraulic valve block must be taken to should be seen that the reference arrow the driving position. and the zero line on the table are aligned as in the picture below.
- Page 31 Gooseneck sensor calibration Sensor number 2 can be positioned in- out as shown in the picture below. The sensitivity of the system depends on the distance x between the sensor and the 3 reference bar. As the X distance in- Lambs creases, the system works more sensi- For sensor calibration of axle area:...
- Page 32 This process should be done again after sensor replace- ment and steering system faults are eliminated. In order for the angle sensor calibration to be correct, the Mechanical Alignment pro- cess must first be performed. Then following steps should be done in order. 1.
- Page 33 permanently, the Auto (2) and Set (5) buttons of the remote control are pressed simultaneously for 3 seconds. All temporarily saved values are saved permanently. In this case, the yellow and red lamps will flash 3 times fast (2 Hz) si- multaneously and the Angle Sensor Cali- bration function will be automatically exited.
-
Page 34: Semi-Automatic Alignment System
3.6.3. Semi-Automatic Alignment System The most distinctive feature of the Semi-Automatic Alignment system is that it automatically performs the alignment for only one angle value. For this reason, the Automatic Alignment function only works when the angle between the truck and the trailer is 0°. It is controlled by the yellow position lamp that the angle between the truck and the trailer is 0°. -
Page 35: Fully Automatic Alignment System
(*) Lamp can be in any state (Continuous on / on intermittently / not on). (><) The lamps flash in sequence relative to each other. While the yellow lamp is on, the red lamp is not lit. While the red lamp is on, the yellow lamp is not lit. 3.6.4. - Page 36 interfering with the steering system. The blocking is removed when the ve- hicle speed drops below the 15 km/h limit. 2 Hz 2 Hz Appears when entering the Angle Sen- sor Calibration process. Continues un- til the vehicle's straight angle values are saved.
-
Page 37: Remote Controller
2 Hz Indicates that the angle sensor on the fifth wheel is faulty. Continues until the fault is fixed. 2 Hz Indicates that the angle sensor in the steering hub is faulty. Continues until the fault is fixed. (*)(*)Lamp can be in any state (Continuous on / on intermittently / not on). (><)The lamps flash in sequence relative to each other. -
Page 38: Control Panel
3.6.6. Control Panel It flashes at the same time with the red lamp on the left front of the gooseneck. The steering system control panel is lo- The operating principle of the vehicle ac- cated on the left front of the vehicle ac- cording to the steering type is explained cording to the driving direction. -
Page 39: Tires
newly coated tires and partially worn As a result of a possible brea- tires shall not be used side-by-side in re- kage of the chock, the stee- lation to the structure and type of the ve- ring trailer hicle. Otherwise, driving safety will be uncontrollable and can cause disrupted. -
Page 40: Spare Tire Lowering Crane
• Open the rope by turning the mech- anism handle on the crane. The tire will go down. • Remove the carabiner at the end of the rope from the rim. • Collect the rope by wrapping it on the crane again. Attach the carabi- ner to the fixing pin on the rear of the spare wheel. - Page 41 take the wheel chock from its slot by pull- 3.10.1.2. Pocket Type Wheel Chock ing it sideways from the wheel chock Holder holder. Placing the wheel chock from Its hold- er: Place the wheel chocks on the hold- Removing the wheel chock from hold- ers and mount the cotter pin (1) to pin.
-
Page 42: Boxes And Storage Units
3.11. Boxes and Storage Units Be sure that the boxes and storage units are properly clo- sed and that the materials in- side of these storage units are fixed properly before driving. Otherwise, the accident may occur. Installing The keys of The top cover Be sure that the necessary sa- •... -
Page 43: Fire Extinguisher Cabinet
Side cover lock and latch(1) Inside of The cabinet • 3.11.2. Fire Extinguisher Cabinet Pull the latch (1) on the side cover lock and remove it. Fire extinguisher cabinets are used to protect fire extinguishers from the exter- • Turn the removed latch clockwise nal environment. -
Page 44: Bumper
3.14. Extendable Chassis • First, close the lid and close the latch on the lid. The maneuvers mentioned be- low must be done on absolu- • Lock the latch to tighten the cover. tely flat ground with a tow truck suitable for Low-Loader. 3.12. - Page 45 The location of screw lever Pump start button Hydraulic control levers 4)Engage the vehicle’s parking brake Opening the lock 6)Extend the vehicle past the slot in front of the desired extension. 7)Close the lock. Red park button 5)Remove the safety pin, unlock with the screw lever on the gooseneck.
-
Page 46: Shortening The Chassis
time lower the lever 3. Lowering the chassis too far may cause the chassis to contract, causing the vehicle to not shorten. Take the twitch of the chassis by making small up and down move- ments with the number 3 lever. Closing the lock Disengage the parking brake of the vehicle. -
Page 47: Lengthening And Shortening The Vehicle With Intermediate Platform Attachment And Removal [Option]
Opening the lock Closing the lock 9) Disengage the parking brake of the vehicle. 3.14.3. Lengthening and Shortening the Vehicle with Intermediate Platform Attachment and Removal [Option] • Depending on the option on the ve- hicle, raise the axle area to the high- est level with the lowering/lifting button or the lowering/lifting valve. - Page 48 • Carefully remove the pins from their sockets. • Carefully separate the axle area from the platform with the help of a crane and place the aluminum sup- ports under the axle area in their new position. • Place the aluminum supports under the front platform by changing the Marked areas connection points of the intermedi-...
-
Page 49: Extension Brackets And Woods
To open the brackets, hold the slot in the • Trailer is brought back with the help middle, lift them up slightly and turn of truck and crane and the pin area them. on the platform is matched with the pin area on the axle area. -
Page 50: Lubrication System
you reduce the vibration by taking the space in the expansion label. Side extension woods Warning signs 3.16. Lubrication System 3.18. Rotating Warning Lamp Your vehicle may have an automatic lu- brication system that allows the axles, A warning lamp is used to warn other steering system and/or tail lift to be drivers while the vehicle is loaded in traf- steered. - Page 51 Led rotating warning lamp 51 / 84...
-
Page 52: Components Of Upperstructure And Usage
4. COMPONENTS OF Make sure the step is off while UPPERSTRUCTURE AND USAGE driving. Otherwise, it may cau- se serious damage, injury or 4.1. Gooseneck Area even death. There is a control panel on the left side of the gooseneck to control the hydraulic components of the vehicle. - Page 53 There is a screw lever on the left side of the gooseneck. The main uses of this lever are as follows; • As a handle when climbing a goose- neck (1)) • As a pump handle (2) when using the emergency hand pump •...
-
Page 54: Gooseneck Separating And Connecting
Spare wheel holders Hydraulic Cylinders Possible squeezing, pinching 4.1.1.2. Gooseneck Separating and or cutting etc. when dealing connecting with the spare tire. There is a risk of accident due to the 4.1.1.2.1. Gooseneck Separating operation! spare tire The maneuvers mentioned be- could fall and injure the driver. - Page 55 Pump start button The pressure relief button 5) Separate the hydraulic, electrical and pneumatic connections between the gooseneck and the pool shown in the pictures. Hydraulic control levers 3) Engage the vehicle's parking brake. (The red button should be pulled.) Hydraulic multi quick coupling Red button 4) Release the pressure of the steering...
- Page 56 6) While holding down the pump start button, lower the gooseneck separation console from the 1 and 2 levers. Pulling the safety pin 8) In order to bring the pool and goose- Lowering the gooseneck separation console neck of the vehicle to the separation po- sition, bring the gooseneck hydraulic gooseneck separation...
- Page 57 Hydraulic control levers 10) When the turning process is com- The rotation of the console holding the hook pleted and the tip of the hook in front of the pool is freed from the console, move forward with the truck and separate the pool from the gooseneck.
- Page 58 4.1.1.2.2. Gooseneck Connecting 1)Approach to the trailer with the truck. Centering the holes Approaching to the trailer with the truck. 4) Attach the safety pin and the goose- 2)If necessary, keep the pump start but- neck pin shown in the picture. ton pressed and adjust the height of the gooseneck with the number 3 lever.
-
Page 59: Front Panel
Pump start button Red button 7)Connect the hydraulic, pneumatic and 4.1.2. Front Panel electrical connections Front area of gooseneck Couplings, electrical sockets, spare wheel holder, corner bevel tool cabinet Hydraulic multi quick coupling located front area gooseneck. Spare wheel and spare wheel crane can be supplied according to customer's request. -
Page 60: Gooseneck Closing Sheet
• Remove the pillars by pulling them upwards from their sockets. Side aluminium covers 4.1.4. Gooseneck Closing Sheet Gooseneck closing sheet Gooseneck Closing Sheet is given ac- cording to customer request. -
Page 61: Transportation Process
5. TRANSPORTATION PROCESS tear, deformation or roughness on the metal surfaces. 5.1. Pre-Driving Checks • Check the correctness of the 5th • Make sure that all necessary docu- wheel height. The 5th wheel should mentation is available at the vehicle be 0-2 cm lower than the upper link plate of the Low-loader. - Page 62 of the impact/joint. Make sure that the helming wedge is neatly settled. 5th Wheel • Check that the King pin and connec- Proper placement of the kingpin tions are healthy. On the 5th wheel, top connecting plate and king pin; make sure that there is a sufficient amount of grease to ensure undam- aged bonding, free of dust and dirt.
-
Page 63: Separating The Low-Loader From The Truck
5.2.2. Separating Low-Loader from the Truck Follow these steps to separate the low- loader from the truck: • Dock the truck and Low-loader in the parking area straight and aligned. • Pull the parking brake and secure the vehicle with wheel chocks against slipping. -
Page 64: Parking Of The Low-Loader
suspension bellows of the truck and • Make sure that the weight or dimen- separate it from the Low-loader. sions of the load do not exceed the technical and legal limits. 5.2.3. Parking of the Low-Loader • Note that vehicle stability may be af- In case you will park your Low-Loader, fected by the load distribution, the which is not connected to the truck, for a... -
Page 65: Important Technical Considerations
parking. Do not forget to remove the • If a roof lift or sliding roof system is wheel chocks before setting off. used, make sure that the system is made suitable for driving. • Make the tensioning by making the Canvas / Curtain connections safely. -
Page 66: Cleaning The Vehicle
This rule also applies to empty contain- ers in contact with oil, chemical materi- als, and waste of cleaning cloths. Take these wastes to the relevant authorities or the most appropriate service point for disposal. If your vehicle tire has expired; Health and Safety The end-of-life tire must be disposed of in accordance with the regulations. -
Page 67: Work Lamp
In the gooseneck area of the vehicle, 1 • After cleaning the vehicle, carefully or 2 LED lamps are given as an option. lubricate the greasing points with a grease gun. This is important to pre- By activating the fog line of the truck, the vent dirt and moisture from entering working lamps are controlled with the various parts of the vehicle. -
Page 68: Transportation Solution
6. TRANSPORTATION SOLUTION 6.1. Container Transportation 6.1.1. Container Lock The vehicle may have a container lock as an option. These locks are positioned on the platform for container transport on the semi-trailer. Locks are unlocked by turning the star under the container lock. Container slots are placed on the locks. -
Page 69: Loading And Load Security
7. LOADING AND LOAD SECURITY • It is dangerous and prohibited to fix the load to the vehicle surface via a 7.1. Safety Instructions tool apart from the permissible equipment. Accident hazards arising from loading and unloading and load securing process perfor- med not professionally. -
Page 70: Load Distribution And Load Limits Of Truck-Semi-Trailer Combination
of tractors, trucks, trailers, semi-trailers along with how and how much of the ton- nage and dimensions of these loads are to be secured. For instance, here, the distribution of the load amount that can be carried by a 6x2 truck per its axle, to the vehicle’s weight center according to its horizontal and vertical distance. - Page 71 Lashing angle ~90° Measuring the angle with a miter Lashing angle ~35° 7.2.1.2. Using the Lashing System At 35°, the effective downward force is When attaching the lashing systems, try only 50% of the applied stress. to apply the highest possible tension force.
-
Page 72: Lashing Rings
In case of doubt, have your axle loads In the transportation opera- checked at a suitable weighing station. tions to be carried out with the loading table; Check the suita- *Axle load: It is the load transmitted to bility of the loading with the the road by an axle or an axle group. - Page 73 Loading crane Rema socket connection 73 / 84...
-
Page 74: Inspection And Maintenance
8. INSPECTION AND MAINTENANCE • You must properly support the ve- hicle when performing maintenance 8.1. General Information on the hydraulic lift system. All instructions apply to standard vehicle • You should always use KÄSS- maintenance, lubrication, inspection and BOHRER spare parts. standard settings. - Page 75 maintenance schedule is valid under One Time in Three Months Mainte- reasonable vehicle use and normal oper- nance Work ating conditions. • Clean the filter element of the Yellow Weekly Maintenance Work and Red coupling heads. • Check the steering chock. •...
-
Page 76: Hydraulic And Pneumatic Hoses And Connections
• Lubricate the drum grease points on the axles with grease nipples at every brake pad change or every 12 months. • Change the hydraulic system filter. Take your lowbed to the service center for a grease change of the wheel hub bearing after 300,000 km or 36 months of use. -
Page 77: King Pin Assembly Bolt
King Pin If the wearing on the king pin 2 inch king pin is bigger than 2 mm, the king pin must be replaced. 8.8.1. King Pin Assembly Bolt 8.8.2. Changement of King Pin The King Pin's slot on the gooseneck is suitable for mounting the following pins (alternatively): Comparison of 2 inch and 3.5 inch king pins... -
Page 78: King Pin Maintenance
After installing the new king pin, apply Loctite 270 to the bolts and tighten to the tighte- ning torque listed in the table above. King Pin sizes 8.9. King Pin Steering Center Bearing Control Maximum allowable clearance on King Pin steering center bearing: Loctite 270 •... -
Page 79: Maintenance Of Filters In Connection Couplings
once a year or whenever you have prob- lems with the vehicle's alignment. As a result of a possible brea- kage of the chock, the stee- ring trailer uncontrollable and can cause serious damage, injury or even death. Filter of connection coupling 8.12. -
Page 80: Maintenance Of Extendable Lowbed Platform
Air tubes should be dried daily with water discharge valves. Water accumulating in the system may cause malfunc- tions in the brake system. The pin (2) that under the air tank (1) is pressed to release water that collected in the air tank. Filter Element Maintenance of Yellow and Red Couplings Carefully avoid contaminating... -
Page 81: Tightening Torques Of Wheel Nuts
2) To close air connection of air bags, Driving the vehicle with a iso- close the valves. lating cock closed can se- riously damage suspension assembly. Using tires with different wear levels will cause abnormal wear. 8.14.1. Tightening Torques of Wheel Nuts Check the tightening torque of Air bags air isolating valves... -
Page 82: Tire Inflation Pressure
required torque values (630 ÷ 650 Only in this way can the correct com- Nm) are reached. pression of the O-ring seal be achieved. Over-tightening the valve can deform the 8.14.3. Tire Inflation Pressure O-ring and damage the valve seat, caus- ing air leakage. -
Page 83: Mixing Hydraulic Oils
or of various types are mixed, sludge For trouble-free operation of and sludge formation can be encoun- the hydraulic system, an oil tered. These can cause malfunction and with a viscosity suitable for damage to the hydraulic system. There- the climate / seasonal condi- fore, there is no guarantee for the use of tions in where the vehicle is mixed oils.
Need help?
Do you have a question about the LOW-LOADER Series and is the answer not in the manual?
Questions and answers