
Related Manuals for Nursery Works ACRYLIC CHANGING TRAY


Summary of Contents for Nursery Works ACRYLIC CHANGING TRAY
- Page 1 Read all instructions BEFORE assembly and USE of product. KEEP INSTRUCTIONS FOR FUTURE USE. ACRYLIC CHANGING TRAY Instruction Manual NW25419 REVISED 10 MAY 2023...
- Page 2 Nursery Works is a purveyor of cutting-edge juvenile products. Created for the ultra-chic, Nursery Works aims to bring high design into the nursery. Our designers work, whenever possible, in close collaboration with highly skilled American craftspeople to build each piece. Our...
-
Page 3: Important Note
323 688 3678, or via email at info@nurseryworks.net. For additional information on our Purchase Terms and Conditions, please visit www.nurseryworks.net. Your authorized Nursery Works retailer will also be happy to assist you. MAINTENANCE AND CLEANING: To preserve the quality of your Nursery Works furniture we recommend periodically wiping with a damp, lint-free cotton cloth and a non-toxic cleaner. - Page 4 Use only a very soft damp cloth when cleaning acrylic surfaces. It is possible to scratch acrylic, so NEVER use any scouring compounds or chemical cleaners such as Windex or other glass cleaners (even if they are environmentally friendly, organic or non-scented).
-
Page 5: Before Use
WARNING: BEFORE USE ● Read all instructions before use of the changing table. ● Keep instructions for future use. ● Do not use changing table if it is damaged or broken. ● If a means of attachment to the contoured changing pad or add-on changing unit is provided, the instructional literature shall provide instructions on how to secure the contoured changing pad or add-on changing unit to the support... -
Page 6: Fall Hazard
WARNING: FALL HAZARD ● Children have suffered serious injuries after falling from changing areas. Falls can happen quickly. ● STAY in arm’s reach of your child. ● ALWAYS secure this pad to the support surface by using the provided hardware. See instructions. ●... -
Page 7: One-Year Limited Warranty
ONE YEAR LIMITED WARRANTY We will replace any missing parts at the time of purchase or any defective item within a one year period from the date of original purchase. Please keep your receipt so that we may process your warranty request. - Page 8 ACRYLIC CHANGING TRAY Hardware and Tools List • Be sure you follow the instructions in the order that they appear. • To avoid possible scratching, assemble furniture on a soft surface (like a carpet or blanket). • Be careful not to over tighten screws. Hardware &...
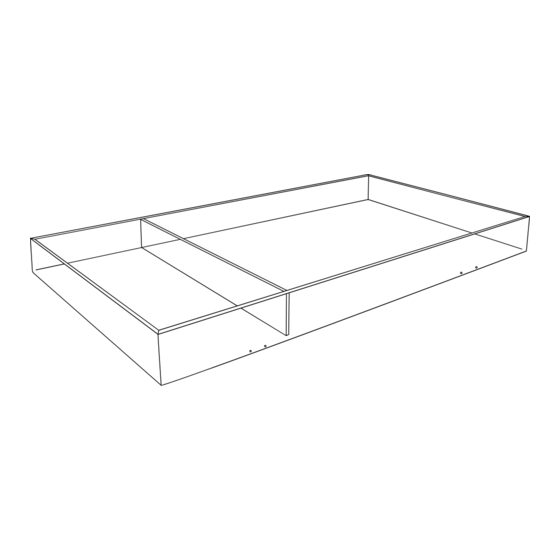
- Page 9 ACRYLIC CHANGING TRAY Parts List Parts Ref. No Description Changer Tray (Pad NOT Included) - 09 -...
- Page 10 ACRYLIC CHANGING TRAY Assembly Instructions Step 1 (back) Place the Changer Tray onto the Dresser. - 10 -...
- Page 11 Step 2 (back) with two Acrylic Plates A, Fix the Changer Tray four Wood Screws B and four Bolts C. Do not overtighten screws. - 11 -...
- Page 12 Step 3 Assembly is complete. - 12 -...
- Page 13 - 13 -...
- Page 14 WWW.NURSERYWORKS.NET...
- Page 15 Lire toutes les instructions AVANT l’assemblage et l’UTILISATION du produit. CONSERVEZ CES INSTRUCTIONS POUR UN USAGE ULTÉRIEUR. PLATEAU À LANGER ACRYLIQUE Manuel d'instruction NW25419 RÉVISÉ LE 10 MAY 2023...
- Page 16 Nursery Works est un fournisseur de produits pour enfants à la fine pointe de l'art. Consacrée au chic du chic, Nursery Works vise à apporter tous les raffinements du design dans le mobilier pour enfants. Nos concepteurs travaillent le plus possible en étroite collaboration avec les artisans américains les plus habiles pour fabriquer chaque élément.
-
Page 17: Avis Important
Veuillez lire toutes les instructions avant l'assemblage et les conserver pour un usage ultérieur. Merci d'avoir acheté un produit Nursery Works. Pour toute question ou obtenir de l'aide, veuillez communiquer avec nous au 323 688 3678, ou par courriel à... - Page 18 Utiliser uniquement un chiffon humide très doux lors du nettoy- age de surfaces en acrylique. Il est possible d’égratigner l’acrylique. C’est pourquoi il ne faut JAMAIS utiliser des produits à récurer ou des nettoyants chimiques comme du Windex ou d’autres nettoyants à vitre (même s’ils sont écologiques, biologiques ou non parfumés).
-
Page 19: Avant L'utilisation
AVERTISSEMENT: AVANT L’UTILISATION ● Veuillez lire toutes les instructions avant d’utiliser la table à langer. ● Conservez ces instructions pour une consultation ultérieure. ● N’utilisez pas la table à langer si elle est endommagée ou brisée. ● Si la table à langer dispose d’un dispositif de fixation du matelas à... - Page 20 AVERTISSEMENT: RISQUE DE CHUTE ● Des enfants ont subi de graves blessures lors de chutes d’une surface à langer. Une chute peut se produire sans crier gare. ● RESTEZ toujours à portée de main de l’enfant. ● Fixez TOUJOURS ce matelas sur le support la surface en utilisant les accessoires de montage.
-
Page 21: Garantie Limitée D'un An
GARANTIE LIMITÉE D'UN AN Nous remplacerons toute pièce manquante au moment de l'achat ou tout article défectueux au cours de la période de garantie d'un an à compter de la date initiale de l'achat. Veuillez conserver votre reçu de caisse pour le traitement de votre demande de garantie. Cette garantie ne couvre que les produits neufs avec leur emballage original. - Page 22 PLATEAU À LANGER ACRYLIQUE Liste des accessoires et des outils • Suivre les instructions dans l'ordre où elles apparaissent. • Pour éviter d'éventuelles égratignures, assembler le meuble sur une surface douce. Par exemple un tapis ou une couverture. • Prendre garde de ne pas trop serrer les vis. Accessoires et outils N°...
- Page 23 PLATEAU À LANGER ACRYLIQUE Liste des pièces Pièces N° de réf. Description Plateau à langer (Coussin NON compris) - 23 -...
- Page 24 PLATEAU À LANGER ACRYLIQUE Instructions de montage Étape 1 (arrière) Placer le Plateau à langer sur la commode. - 24 -...
- Page 25 Étape 2 (arrière) avec deux Plaques Acryliques A, Fixer le Plateau à langer quatre vis à bois B et quatre boulons C. Ne pas trop serrer les vis. - 25 -...
- Page 26 Étape 3 L'assemblage est terminé. - 26 -...
- Page 27 - 27 -...
- Page 28 WWW.NURSERYWORKS.NET...
Need help?
Do you have a question about the ACRYLIC CHANGING TRAY and is the answer not in the manual?
Questions and answers