Advertisement
Available languages
Available languages
Quick Links
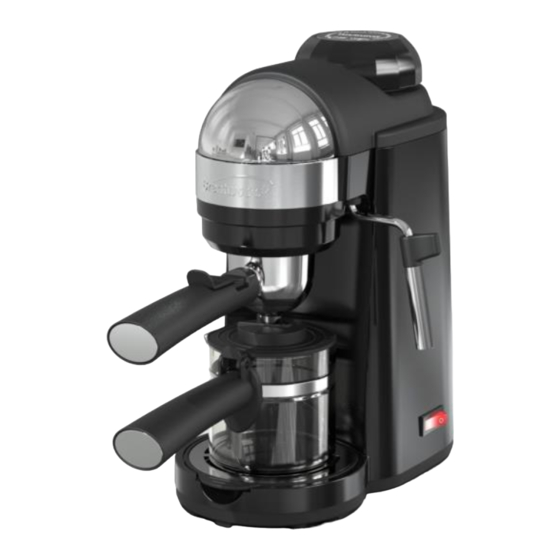
ESPRESSO & CAPPUCCINO MAKER
MÁQUINA DE CAFÉ ESPRESSO Y CAPPUCCINO
CAFETIÈRE EXPRESSO ET CAPPUCCINO
MODEL NO.: GA-135BK
Operating and Safety Instructions
FOR INDOOR HOUSEHOLD USE ONLY
Instrucciones de Operación y Seguridad
SOLO PARA USO DOMESTICO
Consignes de Sécurité et de Fonctionnement
POUR USAGE DOMESTIQUE INTÉRIEUR SEULEMENT
Advertisement

Related Manuals for Brentwood Appliances GA-135BK


Summary of Contents for Brentwood Appliances GA-135BK
- Page 1 ESPRESSO & CAPPUCCINO MAKER MÁQUINA DE CAFÉ ESPRESSO Y CAPPUCCINO CAFETIÈRE EXPRESSO ET CAPPUCCINO MODEL NO.: GA-135BK Operating and Safety Instructions FOR INDOOR HOUSEHOLD USE ONLY Instrucciones de Operación y Seguridad SOLO PARA USO DOMESTICO Consignes de Sécurité et de Fonctionnement...
-
Page 2: Important Safeguards
IMPORTANT SAFEGUARDS When using this or any other electrical appliance, always follow these basic safety precautions, especially when children are present. READ ALL INSTRUCTIONS BEFORE USE WARNING-To reduce the risk of fire, electric shock, serious personal injury and property damage please note the following: •... -
Page 3: For Future Reference
− The marked electrical rating must be at least as great as that of the product. − Arrange the extension cord so that it will not drape over the countertop or tabletop where it can be tripped over or pulled. WARNING: This product is equipped with a polarized plug (one blade is wider than the other blade) to reduce the risk of electrical shock. - Page 4 WARNING: Machine and parts are HOT during and after use. Allow to cool before touching. How to Brew Espresso Always turn control dial to “RELEASE OFF” position and remove plug from wall outlet before filling water. Never overflow water tank or use more than the recommended amount of water.
- Page 5 How to Steam Milk (Non-Fat or 2% Recommended) Fill the carafe with water to the ‘STEAM’ icon level marker and add water to the water tank. Follow the ‘How to Brew Espresso’ through step 7. Move the control dial from the ‘ESPRESSO CUP’ icon to the ‘PAUSE’ position. Remove the carafe from the drip tray, away from the machine.
- Page 6 Parts: Directions Latte Follow the “Steam Milk” instructions. Prepare Ingredients espresso. Pour espresso into an 8-10oz latte cup. • 1 Part Espresso Pour freshly steamed milk aiming at the center. Top • 3 Parts Steamed Milk with a thin layer of foam with the left over froth. •Thin Layer of Froth Directions Cappuccino...
- Page 7 ONE YEAR LIMITED WARRANTY Write down the following information about your appliance to better help you obtain assistance or service if you ever need it. CUSTOMER RECORD Date of Purchase______________ Store/Dealer___________________________ Model/Item No: _______________________________ THIS WARRANTY APPLIES TO PRODUCTS PURCHASED AND USED IN THE U.S. ONLY. This is the only express warranty for this product and is in lieu of any other warranty or condition.
-
Page 8: Precauciones Importantes
PRECAUCIONES IMPORTANTES Al usar este o cualquier otro electrodoméstico, siga las precauciones básicas de seguridad, especialmente cuando niños están presentes. LEA TODAS LAS INSTRUCTIONES ANTES DE USAR ADVERTENCIA- Para reducir el riesgo de incendio, descarga eléctrica, lesiones personales graves y daños a la propiedad, por favor tenga en cuenta lo siguiente: •... - Page 9 − Organice el cable de extensión de manera que no cuelgue del mostrador o de la mesa donde alguien se pueda tropeza. ADVERTENCIA: Este producto está equipado con un enchufe polarizado (una pata es más ancha que la otra) para reducir el riesgo de descarga eléctrica. Esta es una característica de seguridad .
- Page 10 ADVERTENCIA: La máquina y las piezas están CALIENTES durante y después del uso. Deje que se enfríe antes de tocarlo. Cómo preparar el espresso Gire siempre el sintonizador de control a la posición "RELEASE OFF" y desenchufe el enchufe de la toma de corriente antes de llenar el agua. Nunca desborde el tanque de agua ni utilice más de la cantidad de agua recomendada.
- Page 11 Lave el Portafiltro y la Canasta del Filtro en agua tibia jabonosa, séquelos y vuelva a armarlos para su almacenamiento. 12. Siempre libere la presión y deje que la unidad se enfríe durante al menos 5 minutos antes de guardar o comenzar el siguiente ciclo de colado. La máquina y las piezas están muy calientes durante y después de su uso.
- Page 12 derramará antes de que se forme la espuma. La espuma sobrante se utiliza como capa superior en las bebidas. Parts: Direcciones Latte Siga las instrucciones de la "Leche al vapor". Prepara Ingredientes un espresso. Vierta el espresso en una taza de café •...
-
Page 13: Importantes Mesures De Sécurité
IMPORTANTES MESURES DE SÉCURITÉ Lorsque vous utilisez cet appareil ou tout autre appareil électrique, suivez toujours ces précautions de base, surtout en présence d’enfants. LISEZ TOUTES LES INSTRUCTIONS AVANT USAGE ATTENTION —Afin de réduire le risque d’incendie, de décharge électrique ou de blessure physique grave, veuillez lire les consignes qui suivent : •... - Page 14 • Ne laissez pas le cordon pendre sur le bord de la table ou du comptoir où il pourrait trébucher ou être tiré. Ne pas laisser le cordon toucher les surfaces chaudes. • Ne pas faire fonctionner l'appareil s'il a un cordon d'alimentation ou une fiche endommagée ou coupée, si les fils sont exposés, s'il fonctionne mal, s'il est tombé...
- Page 15 AVERTISSEMENT : La machine à café ne peut pas fonctionner en continu. Si vous devez l'utiliser à nouveau, veuillez attendre 3 minutes après avoir relâché la vapeur. ENTRETIEN ET NETTOYAGE (NE PAS METTRE DE PIÈCES AU LAVE-VAISSELLE) Débranchez l'appareil de la prise de courant et laissez-le refroidir avant de le nettoyer. Nettoyez la machine avec un chiffon doux et humide.
- Page 16 et versez l'eau de la carafe dans le réservoir d'eau. Replacez le capuchon et tournez à droite jusqu'à ce que le joint soit bien serré. Placez la carafe vide sur le bac d'égouttement, en plaçant le couvercle de la carafe directement sous le bec du filtre Portafilter.
- Page 17 Lait vapeur - Crée du lait chaud pour les lattes Remplissez jusqu'à 2/3 de lait froid dans un pichet en acier inoxydable ou dans une tasse de taille similaire. Placez le pichet moussant sous la baguette à vapeur, en immergeant l'embout plus profondément dans le lait, créant ainsi moins de bulles.
- Page 18 Parts: Itinéraire d'accès Latte Suivez les instructions "Lait vapeur". Préparez Ingrédients l'espresso. Verser l'espresso dans une tasse à café au • 1 part d'espresso lait de 8-10 oz. Verser le lait fraîchement cuit à la • Lait cuit à la vapeur vapeur en le dirigeant vers le centre.
Need help?
Do you have a question about the GA-135BK and is the answer not in the manual?
Questions and answers