
Related Manuals for MicaSense RedEdge-M / DJI Matrice 100


Summary of Contents for MicaSense RedEdge-M / DJI Matrice 100
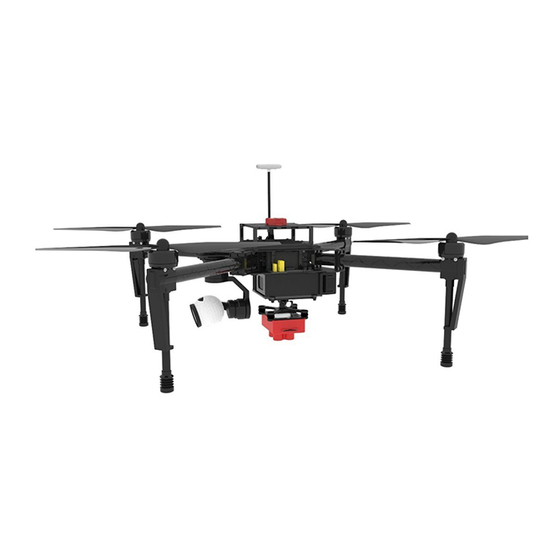
- Page 1 RedEdge-M / DJI Matrice 100 I N T E G R A T I O N G U I D E P/N: 900-00009 Rev 01 - Nov 2017...
-
Page 2: Table Of Contents
Table of Contents Thank you for your purchase! What’s inside? What’s Required? Let’s get started! Attaching the RedEdge and the RedEdge Mount Attaching DLS/GPS mast assembly Powering the RedEdge-M Support... -
Page 3: Thank You For Your Purchase
Thank you for your purchase! These instructions show how to integrate the MicaSense RedEdge-M with a DJI Matrice 100. This will cover attaching mounting brackets included in the kit, powering the camera from the host system, and placement of the Downwelling Light Sensor (DLS) and GPS puck. -
Page 4: What's Required
What’s Required? #1 Phillips Screwdriver Cutting tool - such as scissors or diagonal cutter 1.5mm hex wrench 2mm hex wrench Let’s get started! Warning: Installation of this kit into a Matrice 100 drone should be done by an experienced person, in adherence with all recommendations and guidelines of the Matrice 100 manufacturer. Before assembling this kit, ensure the Matrice is not powered, has the battery removed, and the rotor blades removed. -
Page 5: Attaching Dls/Gps Mast Assembly
Attaching DLS/GPS mast assembly 1. Locate and remove the DJI mast kit from its packaging. 2. Insert the longest carbon rod into the base mount. 3. Secure the base mount with the included M2 screw 4. Place the top cap on the other side of the carbon rod 5. - Page 6 7. Using the included alcohol wipe, clean all surfaces where VHB tape will be applied. This is a critical step in promoting adhesion between surfaces. 8. Apply the round double sided tape to the round mast top plate 9. Center the GPS - DLS mounting plate over the round mast plate and firmly press together. Make sure the plate is pointing front-back relative to the aircraft.
-
Page 7: Powering The Rededge-M
Powering the RedEdge-M 1. Locate the BEC and attach the XT30 connector to the Matrice 100 distribution board as shown below. XT30 connector, note gender keying XT30 connector plugged into distribution board 2. Connect the RedEdge-M (3 pin DF13) connector into the power port of the camera. 3. - Page 8 LOST PROFITS, OR REPLACEMENT PRODUCT COSTS ARISING OUT OF THE PURCHASE, USE, OR PERFORMANCE OF THE MICASENSE ACCESSORIES, UNDER ANY THEORY OF LIABILITY, EVEN IF MICASENSE HAS BEEN ADVISED OF THE POSSIBILITY OF SUCH DAMAGES. MICASENSE DISCLAIMS ANY IMPLIED WARRANTY...
- Page 9 RedEdge-M has five bands—blue, green, red, red edge, and near-infrared—that our research showed were optimal for sensing crop health. It simply shows you more. And with MicaSense Atlas, you can see many different analytical layers in one easy to use interface, and compare these outputs across time.
- Page 10 Located in Seattle, Washington, MicaSense delivers integrated solutions for data gathering, processing, and analytics across the global agriculture market. With decades of expertise in widely varied UAV applications, the MicaSense team is redefining remote sensing technology and pioneering new ways to collect and analyze information.
Need help?
Do you have a question about the RedEdge-M / DJI Matrice 100 and is the answer not in the manual?
Questions and answers