Table of Contents
Advertisement
Quick Links
Advertisement
Table of Contents

Related Manuals for Bromic Heating HF-UH5

Summary of Contents for Bromic Heating HF-UH5
- Page 1 SMALL STORAGE ELECTRIC HOT WATER 5L Storage HF-UH5 HF-OH5 V4 - 03/2023...
-
Page 2: Table Of Contents
CONTENTS 1. PREFIX 2. IMPORTANT NOTES & WARNINGS 3. PRODUCT OVERVIEW 4. INSTALLATION 5. OPERATION 6. USER CARE 7. MAINTENANCE 8. TROUBLESHOOTING 9. WIRING DIAGRAM 10. WARRANTY bromichotwater.com 1300 276 642... -
Page 3: Prefix
1. PREFIX This manual contains important information about the installation, operating and maintenance of Bromic Open (Non-pressure) Small Storage Water Heaters. Please pay close attention to the important safety information shown throughout this instruction manual. Any safety information will be accompanied by the following safety alert symbols: DANGER, WARNING, IMPORTANT... -
Page 4: Important Notes & Warnings
2. IMPORTANT NOTES AND WARNINGS IMPORTANT • Read all instructions before installing or using this appliance. • Installation must be performed by a qualified technician in compliance with AS/NZS 3500.4, Clause G12 of the NZ Building Code, and all other current national and local regulations. •... -
Page 5: Product Overview
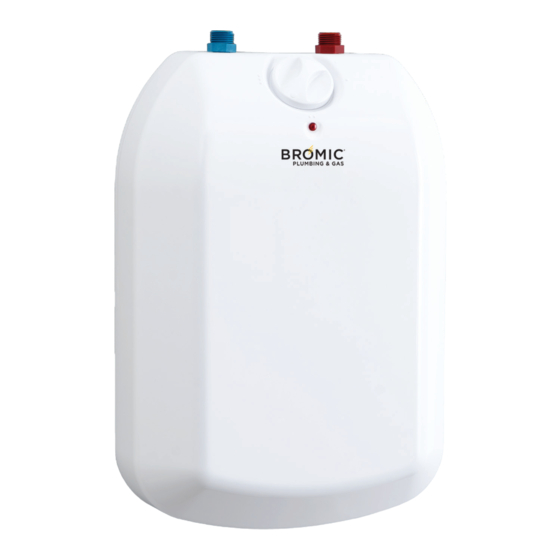
The appliance utilises a stainless-steel tank and is suitable for kitchen sinks as well as work place kitchens/kitchenettes. Data HF-UH5 HF-OH5 Part No. 2850001... - Page 6 3.1 VENTED TAP INSTALLATION WARNING • The heater must only be installed with the supplied vented tap and fittings. The tap as supplied provides constant ventilation to atmosphere and prevents pressurisation of the heating chamber. • Note: The unit is supplied with 2 x 1/2” to 3/8” reducers, these are required to connect the tap hoses to the main appliance and are not represented in the below image.
-
Page 7: Installation
4. INSTALLATION WARNING • Installation must be performed by a qualified technician in compliance with AS/NZS 3500.4, Clause G12 of NZ Building Code, and all other current national and local regulations. • The heater should always be vented before initial start-up. Vent the heater each time after the water has been emptied from the heater or pipes. - Page 8 4.1 HF-UH5 MOUNTING AND WATER CONNECTION IMPORTANT • HF-UH5 is only suitable for undersink installation. • The water connections of the appliance must point upwards. • Do not block/restrict the hot water outlet. This serves as a ventilation. Mount the heater on the wall in a vertical position (as per the above orientation) with one of the 2 options below.
- Page 9 4.2 HF-OH5 MOUNTING AND WATER CONNECTION 4.2 HF-OH5 MOUNTING AND WATER CONNECTION IMPORTANT IMPORTANT • HF-OH5 is only suitable for oversink installation. • HF-OH5 is only suitable for oversink installation. • The water connections of the appliance must point downwards. •...
-
Page 10: Operation
4.3 ELECTRICAL CONNECTION IMPORTANT! • Do not connect the heater to the electric mains until the tank is filled with water and all water connections are tight and the appliance is full of water. • Do not use extension cords to connect the heater with a socket. •... -
Page 11: User Care
5.2 ADJUSTING THE TEMPERATURE Adjust the thermostat to the desired position from ‘•’ (~10°C) to ‘•••’ (~70°C) NOTES: - The current position on the dial is the ‘OFF’ position. - The heating LED indicator (located above the dial) will switch on when water is being heated. -
Page 12: Troubleshooting
7.2 SERVICING This is a non-serviceable item, it can only be opened by a qualified and au- thorised professional. Allow the appliance to cool down. Insert a flat screw driver to one of the three (3) locations shown above. III. Lever the screw driver to remove the front cover from the latch. IV. -
Page 13: Wiring Diagram
9. WIRING DIAGRAM E1 = Heating element F1 = Thermal cut-out K1 = Thermostat XP = Supply cord with a plug X1 = Terminal H1 = Heating LED indicator 10. WARRANTY Please visit our webpage for warranty details – bromic.com/warranty-information Read all instructions before installing or using this appliance. - Page 14 SYDNEY HEAD OFFICE 10 Phiney Place, Ingleburn NSW 2565 Australia T: AU 1300 276 642 F: (+61) 1300 735 115 E: plumbing@bromic.com BROMICHOTWATER.COM...
Need help?
Do you have a question about the HF-UH5 and is the answer not in the manual?
Questions and answers