
Related Manuals for Wellsys i12


Summary of Contents for Wellsys i12
- Page 1 MANUAL Quench USA Inc. 630 Allendale Road, Ste 200 King of Prussia, PA 19406 (855) 558-9796 www.wellsyswater.com...
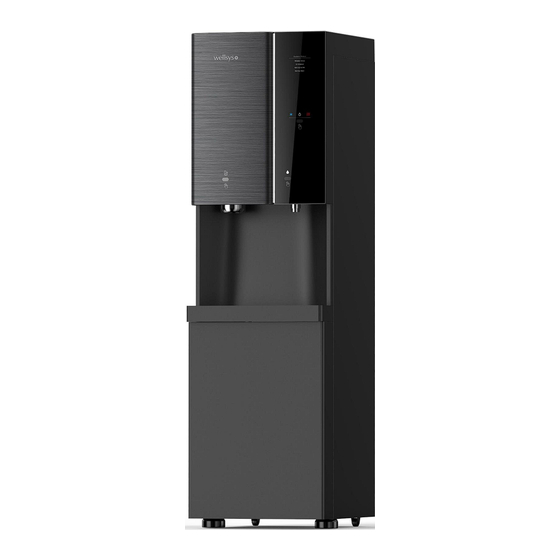
- Page 2 Congratulations on your choice of the Wellsys i12 Ice and Water Dispenser. The i12 model dispenses hot, cold, and ambient water as well as ice. The Wellsys i12 Ice and Water Dispenser provides exceptional quality and great tasting water with every use.
-
Page 3: Table Of Contents
• Preventative Maintenance ............ 40 • System Inspection ..............41 • Warranty Procedure .............. 41 TROUBLESHOOTING • i12 Diagnostic Error Codes ............. 42 • i12 Self-Diagnostic Mode ............43 • Troubleshooting Guide ............44 i12 Manual Page 3 - Revision: 6-13-2023... -
Page 4: Safety Alert Symbols
Unit should be protected by ground-fault circuit interrupter (GFCI) or residual current device (RCD) having a rated residual operating current not exceeding 30mA. Use only Wellsys supplied power cord. Never use extension cords or power strips to connect unit. Do not use if the power supply cord is damaged. - Page 5 CAUTION! USE A WATER PRESSURE REGULATOR. Wellsys will not be responsible for injury or damage caused by excessive water pressure. Input or feed pressure must be 40 psi to 80 psi. Be aware of any potential pressure surges caused by building/municipal pumping stations.
-
Page 6: Features And Benefits
10-inch dispense height with recessed faucet to protect from cross-contamination. Leak Prevention i12 Ice and Water Dispensers are supplied with a leak stop device to cut off the water supply in the case of a water leak or overfill. Hands-free Touchless Dispensing Touchless Capacitive Sensors use Infrared Technology to activate select and dispensing functions. -
Page 7: Certifications
CERTIFICATIONS i12 Ice and Water Dispensers have been tested and certified to rigorous NSF and UL Standards. We believe that performance testing and certifications validate Wellsys as a world-leader in Ice and Water Dispensers. Wellsys i12 Component Certifications Include: UL399 – Certified Drinking Water Cooler Intertek Labs (ETL) Certified the i12 Ice and Water Dispenser to ANSI/UL 399 Standard for Drinking Water Coolers. -
Page 8: Model Designations, Consumables, & General Specs
MODEL/PART DESIGNATIONS MODEL - BRAND NAME DESCRIPTION PART NUMBER i12 – Hot, Cold, Ambient, Ice Z10561-(YYMMDD)-00(XXX) CONSUMABLES FILTER REPLACEMENT FREQUENCY PART NUMBER SEDIMENT FILTER 6-12 MONTHS ICESED PRE-CARBON FILTER 12 MONTHS ICEPREC RO MEMBRANE (x2) TEST TDS REDUCTION AT 12 MONTHS... -
Page 9: Shipping Specifications
SHIPPING SPECIFICATIONS ITEM 430mm W x 492mm D x 1490mm H Width/Depth/Height 16.9”W x 19.4”D x 58.7”H Weight (dry) 118lbs (53.7 kg) 58.7” 19.4” 16.9” i12 Manual Page 9 - Revision: 6-13-2023... -
Page 10: Receiving Your Equipment
(877) 386-0823 to report the damage. Photograph all damages to be submitted with the claim. THIS MUST BE DONE WITHIN FIVE BUSINESS DAYS OF DELIVERY. If not reported within 3 business days, Wellsys and/or carrier will not be responsible for replacement or repair. i12 Manual... -
Page 11: Display And Control Panel
DISPLAY & CONTROL PANEL i12 Manual Page 11 - Revision: 6-13-2023... - Page 12 Manual Page 12 - Revision: 6-13-2023...
-
Page 13: Operating Instructions
OPERATING INSTRUCTIONS The below pictures show the front user interface (UI) and control panel for the i12 Ice and Water Dispenser, as well as the Beep Operation Signal table. To Select Water: Place your hand close to the WATER SELECT IR SENSOR. Move your hand away and back to the sensor to select the next option. -
Page 14: Warranty
WELLSYS MANUFACTURED ICE AND WATER DISPENSER LIMITED WARRANTY The Wellsys i12 is covered by the Wellsys Warranty for a period of 1 year from the date of purchase against manufacturer defects given the filtration is changed with branded filters on the recommended schedule. -
Page 15: Service Requirements
4. Clean and sanitize external surfaces of the i12 Ice and Water Dispenser. Use soap and water or chemicals that are compatible with ABS plastic and will not damage or degrade the product surfaces. -
Page 16: I12 Parts List
PARTS LIST Rec’ Part No. Description Photo Stock 11-1274-2 FLOAT VALVE ¼” CONNECTIONS CH900BPC BOOSTER PUMP 21-0401-6 SIDE PANEL (L) CH900BIS ICE STORAGE BASKET CH900SW2-ICE ICE DISCHARGE BLADE FIN ICE DISCHARGE BLADE FIN CH900SWB BRACKET ICE FULL SENSOR -... - Page 17 COLD WATER LEVEL SENSOR COLD WATER TEMPERATURE CH900CS SENSOR (COOLING SENSOR) CH900WS-SOL-ASY WATER SUPPLY SOL VALVE ASSY CH900DWSV-VOD WATER DISPENSE SOLENOID V/V ICE TRAY MOTOR (SPECIAL CH900MTWM ORDER) ICE DISCHARGE DOOR CH900IDD-ASY ASSEMBLY (SPECIAL ORDER) i12 Manual Page 17 - Revision: 6-13-2023...
- Page 18 COLD MANIFOLD CH900HT-ASSY HOT TANK ASSY 51-0347-1 6-IN AIR FILTER (SEDIMENT) 24mo 41-2335-1 MAIN PCB (V.1.0) CAPACITIVE WATER LEVEL CH900CWLS SENSOR 21-1045 SURROUNDING TEMP SENSOR CH900AVF AUTO FLUSHING VALVE CH900SOLV-RAW RAW WATER SOLENOID V/V i12 Manual Page 18 - Revision: 6-13-2023...
- Page 19 PRE CARBON FILTER ICEPOSTCA POST CARBON PLUS FILTER ICERO RO MEMBRANE FILTER 22-1855 DRAIN SOLENOID VALVE 11-3469-1 FRONT MID COVER ASSY 11-3465-1 FRONT UPPER COVER 91-4480-0 FRONT DECO ASSY (WELLSYS) 11-3475-0 WINDOW DISPLAY i12 Manual Page 19 - Revision: 6-13-2023...
- Page 20 41-2145-0 IR SENSOR 11-3462-1 REAR COVER 11-0755-0 TOP COVER 91-4481-0 FRONT LOWER COVER ASSY 91-4482-0 DRIP TRAY ASSY i12 Manual Page 20 - Revision: 6-13-2023...
-
Page 21: Flow Diagram
WATER FLOW DIAGRAM i12 Manual Page 21 - Revision: 6-13-2023... -
Page 22: Electrical Diagram
ELECTRICAL DIAGRAM DANGER! HIGH VOLTAGE ELECTRICAL HAZARD. PCB (Printed Circuit Board) contains High Voltage. Only trained and qualified technicians should attempt live testing. i12 Manual Page 22 - Revision: 6-13-2023... - Page 23 Manual Page 23 - Revision: 6-13-2023...
-
Page 24: Pre-Installation Procedures
Only qualified personnel who have read and understand this entire manual should attempt to install, or service this i12 Ice and Water Dispenser, failure to do so could result in death or serious injury. DO NOT plug into an electrical supply until specifically instructed. -
Page 25: Notes On Installation
*If either are blocked, the water will not flow smoothly to and from the unit, and may cause performance degradation. 8. Do not place any heating system near the rear of the unit. 9. The power supply, source water, and drain must be directly connected to the unit. i12 Manual Page 25 - Revision: 6-13-2023... -
Page 26: Filter Flushing Procedure
FILTER FLUSHING PROCEDURE It is important to flush all filters inside the i12 unit prior to installation. This will flush any carbon fines and preservative from the filters and extend the life of the filters as well reduce the potential of blockages and improve the quality of the water. - Page 27 Filter Head #1 (see below). With the flush tube still running to drain, open the ¼-turn valve and allow water to flush the filter for 3 min. Once complete, shut the ¼-turn valve off. i12 Manual Page 27 - Revision: 6-13-2023...
- Page 28 Return all filters to their original position. Ensure all filters retained both black o-rings and firmly tighten. Return the white tube to the front port of the manifold. i12 Manual Page 28 - Revision: 6-13-2023...
- Page 29 10. Once flushed, shut off the ¼-turn valve. Disconnect the drain to bucket line, and reinstall the original plumbing line to the right side outlet port of the manifold. Once this is done, the flushing procedure is complete. i12 Manual Page 29 - Revision: 6-13-2023...
-
Page 30: Installation
Refer to the previous section which outlines how to flush the filters while installed. With the filters flushed, turn on the water supply and ensure the ¼-turn valve just before the filters is open. DRAIN (3/8”) BRINE (1/4”) SUPPLY (1/4”) i12 Manual Page 30 - Revision: 6-13-2023... - Page 31 AMBIENT TANK COLD TANK ICE BIN HOT TANK 8. The i12 WILL NOT dispense cold water until the water has become chilled to a set temperature. This may take up to 45min (from the water being turned on) to reach temperature, at which time cold will become selectable as a dispense option.
-
Page 32: Sanitizing And Service
Allow the mixture of cleaning agent and water to sit in tank for several minutes. i12 Manual Page 32 - Revision: 6-13-2023... - Page 33 Ensure that the Red Seal stays with the Drip Tray. Remove the screw behind where the drip tray sat. Press down on the top of the lower front panel and tilt the top edge outward, then lift the panel up and away from unit. i12 Manual Page 33 - Revision: 6-13-2023...
- Page 34 6, and allow fresh water to drain from the Ambient Tank through the Hot Tank and into the bucket. Repeat this process 1 more time with fresh water. Once finished, close the Drain Valve. i12 Manual Page 34 - Revision: 6-13-2023...
- Page 35 2. Clean the drip tray and grill with a soft cloth or sponge with hot running water and approved cleaning agent. Dry off. 3. Push the drip tray back into the unit. i12 Manual Page 35 - Revision: 6-13-2023...
- Page 36 3. Remove the three screws holding the Dispense Spout to the Panel. Remove the Spout. Clean the Dispensing Spout with a soft cloth or sponge, hot running water, and an approved cleaning agent. Dry off. Reinstall the Dispense Spout and reassemble the unit. i12 Manual Page 36 - Revision: 6-13-2023...
-
Page 37: Condensate Pump Setup
CONDENSATE PUMP SETUP The Wellsys i12 Ice and Water Dispenser should have its drain and brine line plumbed to a drain, but a condensate pump can also be installed externally to aid in pumping the water from these two lines to drain access. It is recommended to use a “Little Giant VCMA-20” but any condensation pump should work. -
Page 38: Final Inspection
Leaving water in the hot tank will allow you to turn the hot tank on immediately after installation of the system but if left overnight may result in a taste complaint. 3. Never lay the system on its side. i12 Manual Page 38 - Revision: 6-13-2023... -
Page 39: Resetting Hot Tank Overload Thermostat
If water flows from the hot tank, the tank is primed and full of water. Continue with resetting the thermostat. Water will begin heating, and hot water should be available within 5-10 minutes. OVERLOAD RESET i12 Manual Page 39 - Revision: 6-13-2023... -
Page 40: Preventative Maintenance
4. Check solenoids for proper function. Dripping solenoids should be replaced immediately. Every 5 years, in addition to the above, perform the following: • Replace all internal fittings and tubing. • Replace solenoids. i12 Manual Page 40 - Revision: 6-13-2023... -
Page 41: System Inspection
Tap TDS TDS out of the cold and hot tanks Pictures Depending on the situation, technical support may request more information. Upon approval, WELLSYS will process warranty credit or replacement part to be fulfilled i12 Manual Page 41 - Revision: 6-13-2023... -
Page 42: I12 Diagnostic Error Codes
DIAGNOSTIC ERROR CODES The Wellsys i12 Ice and Water Dispenser can display error codes on the front panel through LED signals for specific system statuses as well as using the several icons to distinguish certain failures or errors. Below is a breakdown of these status and error codes. -
Page 43: I12 Self-Diagnostic Mode
SELF-DIAGNOSTIC MODE The Wellsys i12 Ice and Water Dispenser has a diagnostic mode that can be activated through a specific sequence of sensor activation. This diagnostic mode allows the machine to perform manual checks of several processes and components and give an error signal if it finds anything wrong. -
Page 44: Troubleshooting Guide
Damage or disconnection of one of several connections in the hot Hot Tank Wiring Failure tank circuit. Check all wiring, ensure no connections have arced. i12 Manual Page 44 - Revision: 6-13-2023... - Page 45 Investigate why the Ambient Level Sensor Failure unit overfilled. If RO system is not bypassed, and flow from the filtration system is normal, replace the ambient level sensor. i12 Manual Page 45 - Revision: 6-13-2023...
- Page 46 Compressor body should be warm to the touch and Compressor and Gas System condenser should also be slight warm. If compressor is extremely hot and condenser is cold, call technical support. If compressor is not running, call technical support. i12 Manual Page 46 - Revision: 6-13-2023...
- Page 47 If dispense sensor is operating correctly, and dispense door is Ice Turntable Failure opening, check that the Ice Turntable inside the unit is turning and pushing ice out of the unit. If unresponsive, call technical support. i12 Manual Page 47 - Revision: 6-13-2023...
Need help?
Do you have a question about the i12 and is the answer not in the manual?
Questions and answers