Axis P7214 User Manual
Video encoder
Hide thumbs
Also See for P7214:
- Installation manual (61 pages) ,
- Installation manual (91 pages) ,
- User manual (61 pages)
Table of Contents
Advertisement
Quick Links
Advertisement
Table of Contents

Related Manuals for Axis P7214


Summary of Contents for Axis P7214
- Page 1 USER'S MANUAL AXIS P7214 Video Encoder...
- Page 2 About this document This manual is intended for administrators and users of the AXIS P7214 Video Encoder, and is applicable to firmware 5.40 and later. It includes instructions for using and managing the product on your network. Previous experience of networking will be of use when using this product.
-
Page 3: Table Of Contents
AXIS Media Control (AMC) ........ -
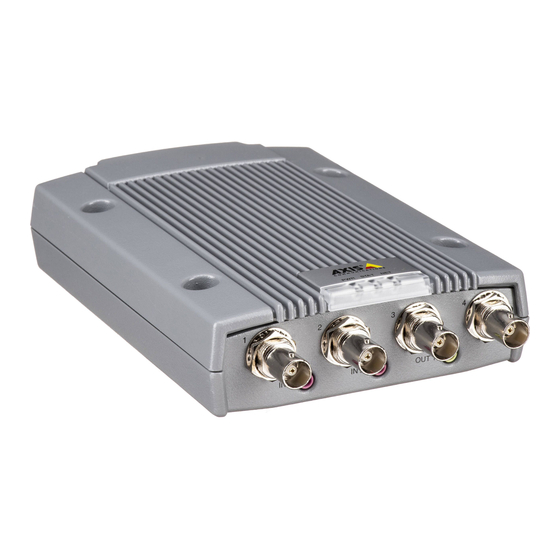
Page 4: Hardware Overview
AXIS P7214 Video Encoder Hardware Overview Hardware Overview IN 1 IN 2 OUT 1 9 10 11 12 Audio input 1 Audio input 2 Audio output 1 Video input connectors LED indicators for power, status, network Mounting holes SD card slot (microSD) -
Page 5: Led Indicators
Control button - The control button is used for: page 37 • Connecting to an AXIS Video Hosting System service. See . To connect, press and hold the button for about 1 second until the Status LED flashes green. page 37 •... -
Page 6: Accessing The Product
Macintosh computer (Mac OS X), click on the Bonjour tab and select the product from the drop-down list. If you do not know the IP address, use AXIS IP Utility to locate the product on the network. For more information on how to discover and assign an IP address, refer to the Installation Guide. -
Page 7: Access From The Internet
Set the Root Password To gain access to the Axis product, you must set the password for the default administrator user root. This is done in the Configure Root Password dialog, which appears when the product is accessed for the first time. -
Page 8: The Live View Page
AXIS P7214 Video Encoder Accessing the Product Note • The default administrator user name root is permanent and cannot be deleted. Reset to Factory Default • If the password for root is lost, the product must be reset to the factory default settings. See... - Page 9 Simplex - speaker only mode , the Microphone and Talk buttons must both be active to send audio to the Axis product. Click either button to stop audio transmission. Use the slider to control the volume of the speakers and the microphone.
- Page 10 AXIS P7214 Video Encoder Accessing the Product Click the Emulate joystick mode button and click in the image to move the camera view in the direction of the mouse pointer. Click the Center mode button and click in the image to center the camera view on that position. The center mode button could also be used to zoom in on a specific area.
-
Page 11: Media Streams
Note also that all multicast viewers count as one unicast viewer in the maximum total of 20 simultaneous connections. AXIS Media Control negotiates with the Axis product to determine the transport protocol to use. The order of priority, listed in the AMC Control Panel, can be changed and the options disabled, to suit specific requirements. -
Page 12: Alternative Methods Of Accessing The Video Stream
AXIS P7214 Video Encoder Media Streams The AMC Control Panel can be used to configure various video and audio settings. Please see the AXIS Media Control User’s Manual for more information. The AMC Control Panel is automatically installed on first use, after which it can be configured. Open the AMC Control Panel from: •... -
Page 13: Accessing Audio Streams
• The Axis product supports QuickTime 6.5.1 and later. • QuickTime adds latency to the video stream. • It may be possible to use other players to view the H.264 stream using the paths above, although Axis does not guarantee this. -
Page 14: Setting Up The Product
Setting Up the Product Setting Up the Product The Axis product can be configured by users with administrator or operator rights. To open the product’s Setup pages, click Setup in the top right-hand corner of the Live View page. Administrators have unrestricted access to all settings. -
Page 15: Video And Audio
AXIS P7214 Video Encoder Video and Audio Video and Audio The video and audio settings can be used to optimize video and audio quality. You can configure the following: page 15 • Video stream settings. See page 16 • Stream profiles. See page 17 •... -
Page 16: Quad Stream
AXIS P7214 Video Encoder Video and Audio Compression. The compression level affects the image quality, bandwidth and file size of saved images; the lower the • compression, the higher the image quality with higher bandwidth requirements and larger file sizes. -
Page 17: Camera Settings
A privacy mask is an area of solid color that prohibits users from viewing parts of the monitored area. Privacy masks cannot be bypassed via the VAPIX® Application Programming Interface (API). The Privacy Mask List (Video & Audio > Privacy Mask) shows all the masks that are currently configured in the Axis product and indicates if they are enabled. -
Page 18: Audio Settings
An overlay image is a static image superimposed over the video stream. The image, for example company logo, is used to provide extra information or to mask a part of the image. To use an overlay image, the image must first be uploaded to the Axis product: 1. Go to Video & Audio > Overlay Image. - Page 19 Half-duplex - Audio can be transmitted to and from the Axis product but only in one direction at a time. To transmit audio using the Live View page, use the Talk and Listen buttons, see AMC Audio Controls, on page 9 Simplex —...
-
Page 20: Audio Clips
To add, download, modify or remove audio clips, go to Video & Audio > Audio Clips. For more information see the online help To configure the Axis product to play audio clips when an event occurs, an action rule must be set up. For more information, see... -
Page 21: Live View Config
AXIS P7214 Video Encoder Live View Config Live View Config You can customize the Live View page and alter it to suit your requirements. It is possible to define the following features of the Live View page. page 16 •... - Page 22 Viewer Settings To configure options for the viewer, go to Live View Config > Viewer Settings. Select Show viewer toolbar to display the AXIS Media Control (AMC) or the QuickTime viewer toolbar under the video • image in your browser.
- Page 23 AXIS P7214 Video Encoder Live View Config 1. Go to Setup > Live View Config. 2. Under Output Buttons, select the type of control to use: Pulse activates the output for a defined period of time. The pulse time can be set from 1/100 second to 60 seconds.
-
Page 24: Ptz (Pan Tilt Zoom)
field. For more information about modifiers, see in the online help Advanced Limits Define the pan, tilt, zoom and focus limits for the Axis product. Movements to the left and right, up and down, can be restricted to narrow the area under surveillance. -
Page 25: Control Queue
1. Administrator — An administrator takes over PTZ control regardless of who is first in queue. The administrator will be removed from the queue 60 seconds after the last PTZ control command. 2. Event — The Axis product can be configured to go to a preset position when triggered by an alarm (see Events, on page 29 The event will immediately be placed first in the queue except when an administrator is in control. -
Page 26: Detectors
To control the number of motion detection alarms, the parameters Object Size, History and Sensitivity can be adjusted. See Detection Parameters, on page 27 Once motion detection windows are configured, the Axis product can be configured to perform actions when motion is detected. Setting Up an Action Rule, on page 30... - Page 27 AXIS P7214 Video Encoder Detectors Note Using the motion detection feature may decrease the product’s overall performance. Set Up Motion Detection Windows To set up a motion detection Include Window, follow these instructions: 1. Go to Detectors > Motion Detection.
-
Page 28: Audio Detection
Audio Detection The Axis product can be configured to generate an alarm when audio rises above or falls below the threshold value. The threshold value can be set in the range 0–100 where 0 is the most sensitive and 100 the least sensitive. -
Page 29: Events
Events The Axis product can be configured to perform actions when different events occur, for example, start a recording when motion is detected. The set of conditions that defines how and when the action is triggered is called an Action Rule. -
Page 30: Setting Up An Action Rule
AXIS P7214 Video Encoder Events Available actions include: • Output Port — activate an I/O port to control an external device. Play Audio Clip — see Audio Clips, on page 20 • PTZ Control • Preset Position — go to a preset position. -
Page 31: Schedules
AXIS P7214 Video Encoder Events Recipient Use with action Email Send Images Send Notification Send Images HTTP Send Images Send Notification Network Share Send Images Send Notification To add a recipient: 1. Go to Events > Recipients and click Add. -
Page 32: Recording List
(that is, not the date the recordings were made). Note To play recordings in Windows Media Player, AXIS Matroska File Splitter must be installed. AXIS Matroska File Splitter can be downloaded from www.axis.com/techsup/software For detailed recording and video information, select a recording and click Properties. - Page 33 AXIS P7214 Video Encoder Recordings Note If a new stream profile is selected while a recording is ongoing, the recording will be stopped and saved in the recording list and a new recording with the new stream profile will start. All previous continuous recordings will remain in the recording...
-
Page 34: System Options
IP address filtering is enabled on the System Options > Security > IP Address Filter page. Once enabled, the listed IP address are allowed or denied access to the Axis product. Select Allow or Deny from the list and click Apply to enable IP address filtering. -
Page 35: Date & Time
Check the box to enable the IEEE 802.1X protocol. Audio Support Select Enable audio support to allow clients to retrieve audio streams from the Axis product. For information on how to configure Audio Settings, on page 18 audio settings, see Note Deselecting this option will disable audio globally in the Axis product, for configured events and profiles with audio as well. -
Page 36: Network
IPv4 Address Configuration By default, the Axis product is set to use IPv4 (IP version 4) and to obtain the IP address automatically via DHCP. The IPv4 settings are configured under System Options > Network > TCP/IP > Basic. - Page 37 Host Name Configuration The Axis product can be accessed using a host name instead of an IP address. The host name is usually the same as the assigned DNS name. The host name is configured under System Options > Network > TCP/IP > Advanced.
- Page 38 This function can be disabled under System Options > Network > TCP/IP > Advanced. HTTP The HTTP port used by the Axis product can be changed under System Options > Network > TCP/IP > Advanced. In addition to the default setting, which is 80, any port in the range 1024–65535 can be used.
- Page 39 SOCKS is a networking proxy protocol. The Axis product can be configured to use a SOCKS server to reach networks on the other side of a firewall or proxy server. This functionality is useful if the Axis product is located on a local network behind a firewall, and notifications, uploads, alarms, etc need to be send to a destination outside the local network (for example the Internet).
-
Page 40: Storage
. To enable SNMP v3, check the box and provide the initial user password. Note The initial password can only be set once. If the password is lost, the Axis product must be reset to factory default, see Reset to Factory Default Settings, on page 44 UPnP The Axis product includes support for UPnP . -
Page 41: Ports & Devices
6. Click Connect. To clear all recordings and data from the Axis product’s folder on the designated share, click Clear under Storage Tools. To avoid filling the share, it is recommended to remove recordings continuously. Under Recording Settings, select Remove recordings older than and select the number of days or weeks. -
Page 42: Maintenance
The Axis product provides several maintenance functions. These are available under System Options > Maintenance. Click Restart to perform a correct restart if the Axis product is not behaving as expected. This will not affect any of the current settings. -
Page 43: Support
System Overview To get an overview of the Axis product’s status and settings, go to System Options > Support > System Overview. Information that can be found here includes firmware version, IP address, network and security settings, event settings, image settings and recent log items. -
Page 44: Advanced
For more information, see www.axis.com/developer File Upload Files, for example web pages and images, can be uploaded to the Axis product and used as custom settings. To upload a file, go to System Options > Advanced > File Upload. Uploaded files are accessed through http://<ip address>/local/<user>/<file name> where <user> is the selected user group (viewer, operator or administrator) for the uploaded file. -
Page 45: Troubleshooting
Always read the upgrade instructions and release notes available with each new release, before upgrading the firmware. To upgrade, follow these instructions: 1. Save the firmware file to your computer. The latest version of the firmware is available free of charge from Axis website at www.axis.com/techsup 2. -
Page 46: Symptoms, Possible Causes And Remedial Actions
Identify the product using its model or serial number. Move the Axis product to an isolated network, or to one with no DHCP or BOOTP server. Set the IP address again, using AXIS IP Utility or ARP/Ping (see the Installation Guide). Open the Setup pages and disabled DHCP in the TCP/IP settings. - Page 47 Also, make sure that AXIS Media Control is installed on your computer. only Installation of additional Configure the Axis product to use a Java applet for updating video images in Internet Explorer. Go ActiveX component to Setup > Live View Config and select Java applet under Default viewer.
- Page 48 Slow image update Configuring pre-buffers, motion detection, high-resolution images or high frame rates will affect the performance of the Axis product. Poor performance Poor performance may be caused by heavy network traffic, multiple users accessing the product, low performance clients, use of features such as motion detection, event handling or uploaded applications.
- Page 49 AXIS P7214 Video Encoder Troubleshooting Storage and disk management problems Video cannot be recorded Check that the SD card is not write protected (that is, read only). SD card cannot be mounted Reformat the SD card and then click Mount.
-
Page 50: Technical Specifications
AXIS P7214 Video Encoder Technical Specifications Technical Specifications Item Specifications Function/group Video Encoder Model AXIS P7214 (4 channels) Pan/Tilt/Zoom Wide range of analog PTZ cameras supported (drivers available for download at www.axis.com) 100 presets/camera, guard tour, PTZ control queue Supports Windows compatible joysticks... -
Page 51: Performance Considerations
ARTPEC-4, 512 MB RAM, 128 MB Flash memory Power 8-20 V DC, max 8W; Power over Ethernet IEEE 802.3af Class 3, AXIS PS-K power supply Connectors 4x analog composite video inputs (BNC) 2x mono microphone or line inputs, 6Vpp max (3.5 mm jacks) 1x mono audio output, 2Vpp max at 1kohm (3.5 mm jack) - Page 52 AXIS P7214 Video Encoder Technical Specifications • Heavy network utilization due to poor infrastructure. Bandwidth affected. • Viewing on poorly performing client computers lowers perceived performance. Frame rate affected.
- Page 53 User's Manual Ver. M2.3 AXIS P7214 Video Encoder Date: April 2012 Part No. 47398 © Axis Communications AB, 2011 - 2012...
Need help?
Do you have a question about the P7214 and is the answer not in the manual?
Questions and answers