
Subscribe to Our Youtube Channel
Related Manuals for Secura GLA-717


Summary of Contents for Secura GLA-717
- Page 1 AIR COOKER (OIL FREE FRYER) Instruction Manual Model: GLA-717 Easy & good life Please carefully read the instruction manual, before using the product. Keep the manual for reference in future.
-
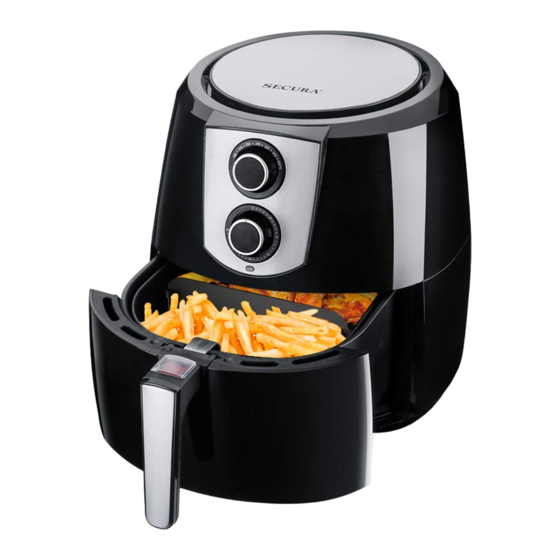
Page 3: Product Structure Diagram
Product Structure Diagram: 1. Fry basket 2. Protective cover 3. Push-release button 4. Handle bar 5. Fry pot Air inlet 7. Upper cover 8. Control panel 9. Temperature controller 10. Timer 11. Indicator light 12. Air outlet 13. Power cable Cautions:... -
Page 4: Security Warning
Security Warning: - Do not use the AC power except 120V to avoid electric shock, fire and other accident; - Please exclusive use outlet above 15A. To ensure continued protection against risk of electric shock, connect to properly grounded power socket only. - Please keep the plug clean to avoid disaster;... -
Page 5: Before The First Use
Before the first use Remove all packaging material. Remove an stickers or labels from the appliance Thoroughly clean the basket and the pan with hot water, some washing-up liquid and a non-abrasive sponge. Wipe the inside and outside of the appliance with a moist cloth. ... -
Page 6: Care And Maintenance
8. If the ingredient ready, carefully pull out the pan, and press the basket release button and lift the basket out of pan to remove the ingredients. Don not turn the basket upside down with the pan still attached to it, as any excess oil that has collected on the bottom of the pan will leak onto the ingredients. -
Page 7: Troubleshooting
Troubleshooting: Problem Possible Cause Solution Power cord has not been Closely insert the power cord into inserted into the power the grounded power socket. socket Does not work Did not set the timer Set the timer to desired cooking ...
Need help?
Do you have a question about the GLA-717 and is the answer not in the manual?
Questions and answers