Table of Contents
Advertisement
Quick Links
Advertisement
Table of Contents
Troubleshooting

Related Manuals for Race Navigator RN ONE

Summary of Contents for Race Navigator RN ONE
- Page 2 Thank you for choosing RN ONE! Please read this manual before using the device for the first time. Visit the website for more information: www.race-navigator.com Manual updated: 08-11-2023 Release date: 11/05/2016...
-
Page 3: Table Of Contents
TABLE OF CONTENTS DELIVERY SCOPE ..................................... 10 RN ONE INSTALLATION .................................. 11 RN ONE PORTS DESCRIPTION ..............................12 DEVICE CONFIGURATION WITH MULTIPLE CAMERAS ......................16 RN ANALYZER APP ..................................17 TECHNICAL PARAMETERS ................................19 HOME ......................................21 STATUS BAR .................................... 22 DASHBOARD ................................... - Page 4 DASHBOARD · P 5 ................................. 27 ANEL MANUAL RECORDING................................28 RECORDING WITH OBD-II DIAGNOSTIC DATA ......................... 29 RN OBD LINK P ............................. 30 ONNECTING TO RN P BT LE............................. 33 ONNECTING TO LAPS HISTORY (LAPS) ................................36 LAP DETAILS ................................... 37 REVIEW DRIVE ..................................
- Page 5 10.2 CAR · C CAN B ..............................45 ONFIGURE 10.3 CAN B ........................54 IAGNOSTICS AND ROUBLESHOOTING TRACK ....................................56 11.1 TRACK VARIANTS .................................. 59 11.2 TRACK VARIANTS · E ............................... 59 11.3 TRACK VARIANTS · A ............................... 60 EVENT....................................61 12.1 EVENT ·...
- Page 6 CAMERA ....................................96 DEVICE ....................................98 15.1 DEVICE · S ..................................99 TATUS 15.2 DEVICE · C ..................................100 LOCK 15.3 DEVICE · U ................................... 101 PDATE 15.4 DEVICE · D ................................104 IAGNOSTICS 15.5 DEVICE · RN R ................................105 ESET 15.6 RN R...
- Page 7 AUTOSTART ..................................116 LAYOUT ..................................... 118 17.1 LAYOUT S ................................. 119 ETTINGS EXPORT IMPORT................................120 18.1 EXPORT VIDEO ..................................121 18.2 IMPORT VIDEO..................................122 PIT LANE MONITOR ................................ 123 19.1 ............................. 124 ETTING UP ONITOR 19.2 ..............................125 ONITOR ETTINGS 19.3 ............................
- Page 8 20.2 ......................... 142 ONDITIONS FOR PRESSURE DATA TRANSMISSION 20.3 TPMS ..........................143 ONNECTING AVIGATOR 20.4 TPMS ..............................145 ETTING UP SYSTEM 20.5 TPMS S ..................................146 ETTINGS 20.6 ............................148 PTIMAL RESSURE ETTINGS 20.7 ................................. 148 RESSURE ISPLAY 20.8 ............................. 149 RESSURE ARNING ETTINGS...
-
Page 10: Delivery Scope
• Race Navigator ONE With its big touchscreen and compact, lightweight casing, the RN ONE is a system • External GPS antenna designed for intuitive usage. Two integrated cameras for track and cockpit recording Windscreen holder with suction cup •... -
Page 11: Rn One Installation
Make sure that the mounted RN ONE can record videos properly. In general, the best − Turning off position is about 5 10 cm above the dashboard. -
Page 12: Rn One Ports Description
Back view RN ONE ports description LAN port (service port) USB ports Microphone port Speaker port External GPS Antenna HDMI port (service port) Power connector Track camera Speakers ... - Page 13 Right-hand view 10. USB port 11. Power button 12. Track camera 13. Inside camera Left-hand view ...
- Page 14 14. Home button Plan view Clicking the Home button in any location opens the main page of the RN ONE (the Home view, see 01. Home, page 17). The Home button lights up green when the device is turned on.
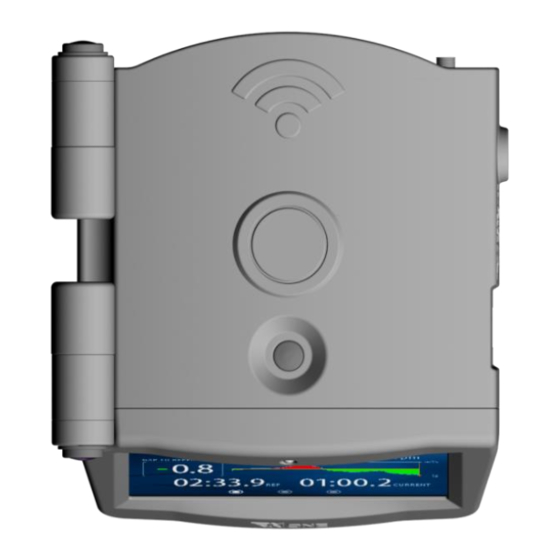
- Page 15 Front view 15. Control LED 16. Display ...
-
Page 16: Device Configuration With Multiple Cameras
In this table it is defined what camera types can be connected to which ports depending on used cameras. Please do not use different setups than defined below. Double USB port Double USB port Single USB port RN ONE Cameras back side, bottom blue back side, top black right side Configuration ... -
Page 17: Rn Analyzer App
Open to download laps from device List of available laps RN Analyzer APP RN Analyzer is an extended analysis tool of the data from all Race Navigator devices. The application is very easy to use and offers a wide range of analysis options: •... - Page 18 • A possibility to compare two laps (or more!) and see exactly where you are gaining or losing time. • The section times analysis. It allows you to count your best theoretical time and best continuous time. • Laps overview. You can compare maximum and minimum values of the data types gathered by the system.
-
Page 19: Technical Parameters
TECHNICAL PARAMETERS DISPLAY Display size 5’’ (built-in) VIDEO CAPABILITIES Recording resolution HD, 720p at 30fps ✓ ✓ Stereo audio recording Manual/automatic start ✓ ✓ Wide viewing angle Real time overlay ✓ Built-in recording layouts (up to 4 cameras) Recording format .mp4 or .mkv (depends on mode) HARDWARE ✓... -
Page 21: Home
HOME Driver Selection Driver Track Name Event Type This page is the main page of the RN ONE and is displayed when the system starts. This view can be opened from any location by clicking the Home button. Dashboard Press this button to open the Dashboard. -
Page 22: Status Bar
STATUS BAR The bar at the top of the screen contains Warning Battery important information about the RN ONE device and its current status. Device Clock Current View Progress Warning When the icon shows up, an issue occured, e.g. not enough disk space. You should check the Device Name device status by clicking on the item. -
Page 23: Dashboard
Lap counter Current Speed Current RPM DASHBOARD Gap to Reference Gap to Reference Chart The Dashboard consists of five panels. Gap to Reference Chart DASHBOARD · Panel 1 Panel 1 presents the data for the current lap and Next Panel the reference lap. -
Page 24: Manual Correction Of Current Lap Number
Manual Correction of Current Lap Number If the actual lap number on the device does not match the race lap number before or during the race, it can be manually adjusted. Lap number adjustment: To adjust the Lap Number press on the Lap Counter. -
Page 25: Dashboard · Panel 1 Additional Settings
DASHBOARD · Panel 1 Additional Settings Enable the flag ‘Extended Gap to Reference Gain or Lose Coloring’ to display an indicator in red or green color when you are gaining or losing in time. Enable the flag ‘Use Extended Gap to Reference Precision’... -
Page 26: Dashboard · Panel 2
DASHBOARD · Panel 2 Panel 2 presents the laps from the current event. The best lap of each driver is colored yellow. Previous Panel Full laps are colored white, while the others are in grey. You can find the selected reference lap in the Reference Lap Time bottom left corner. -
Page 27: Dashboard · Panel 4
DASHBOARD · Panel 4 Panel 4 presents your current speed, the time of the current lap (on the right; colored white) and the time of the reference lap (on the left, colored yellow). DASHBOARD · Panel 5 Panel 5 presents a trip distance and the overall distance made by the currently selected car. -
Page 28: Manual Recording
MANUAL RECORDING In addition to the automatic recording possibility, you can also start and stop recording videos manually. Start/Stop Button To start recording, press the Start/Stop button on the right side of the Home Screen. Press the button again to stop recording. Start/Stop Button Recording can also be started with the "Home Button"... -
Page 29: Recording With Obd-Ii Diagnostic Data
RECORDING WITH OBD-II DIAGNOSTIC DATA To extend the range of the recorded and displayed data you need to have the RN PLUG. The RN PLUG can be purchased via our online store (www.store.race-navigator.de). • Plug the RN PLUG into the OBD-II diagnostic port in your vehicle (it is usually located in the driver footwell, under the steering wheel, on the left side). -
Page 30: Connecting To Rn Obd Link Plug
Connecting to RN OBD LINK Plug Select OBD Connection Go to Settings → Device → Additional Settings → OBD-II Settings. Select the RN OBD LINK Plug, if no device is paired, a yellow text is shown. Press the RN OBD LINK Plug image or “PAIR” button to begin pairing procedure. - Page 31 Pairing steps Get Familiar with pairing steps and press “NEXT” button to proceed. Scan for OBD Plug Press “Connect” button on the left side of front panel of the RN OBD LINK Plug to activate the Bluetooth discoverability. Press “Scan” button to discover “RN OBD LINK Plug”...
- Page 32 Pairing Select “RN OBD LINK Plug” from the list, then press “PAIR” button. Pairing Confirmation If device is paired successfully a popup message shows up with information of paired device. If you get a message that you should repeat pairing, please follow the steps once again. Reading data The data is read from the plug every time when the recording is ongoing.
-
Page 33: Connecting To Rn Plug Bt Le
Connecting to RN Plug BT LE Select OBD Connection Go to Settings → Device → Additional Settings → OBD-II Settings. Select the RN Plug BT LE, if no device is paired, a yellow text is shown. Press the RN Plug BT LE image or “PAIR” button to begin pairing procedure. - Page 34 Pairing steps Get Familiar with pairing steps and press “NEXT” button to proceed. This version of RN PLUG BT doesn't have any button for setting it into pairing mode. To pair the RN PLUG just plug it into the OBD Socket of the car and turn on the ignition.
- Page 35 Pairing Select “RN Plug BT LE” from the list, then press “PAIR” button. Pairing Confirmation If device is paired successfully a popup message shows up with information of paired device. If you get a message that you should repeat pairing, please follow the steps once again. Reading data The data is read from the plug every time the recording is ongoing.
-
Page 36: Laps History (Laps)
LAPS HISTORY (LAPS) The laps page displays all laps in the selected event. Full laps are colored white while the others are colored grey, except for the best laps of each driver which are colored yellow. The list can be sorted by column headers. You can change the sorting method by clicking on one of them. -
Page 37: Lap Details
LAP DETAILS Here you can get all lap details and view the recorded video. Back Button You can go one step back by clicking this button. Review Drive Here you can watch the animation with the lap data. View Video By clicking the button, you can display the video. -
Page 38: Video Player
VIDEO PLAYER In the player you can watch the video of the selected lap. The recorded videos consist of both camera views: the outer and inner. Along with the camera views, other lap data is presented such as: track name, current time, lap time and current speed. -
Page 39: Analysis
ANALYSIS On this page you can select two laps and compare them with each other. Full laps are colored white, while the others are in grey. The best laps of each driver are colored yellow. Change Event In order to select laps from different sessions for comparison, you can change the event by clicking this button. -
Page 40: Settings
SETTINGS Here you can specify all device parameters. Driver: You can select a driver. Car: Press this button to select a specific car. Track You can select a track variant. Event Here you can select a type of event. Network You can connect to the network. -
Page 41: Driver
DRIVER Each recorded video is associated with a driver, car, track and an event. To select a driver, go to the Settings view and click Driver. You will find a list of existing users. Scroll down the list and select one. Press Set to confirm your selection. - Page 42 Now you can use the cockpit camera of the RN ONE to take a photo of yourself. Press Take to take a picture. Use the Back button to complete the process. Consequently, you can find the new driver on the list and select it.
-
Page 43: Car
To select a car, go to the Settings view and click Car. There will be a list of previously added cars. Scroll down the list and select one. Press Set to confirm your selection. Edit Here you can edit the existing car options. To add a new car, press this button. - Page 44 Now, you can find the new car on the list and select it. Confirm your selection by pressing the Set button.
-
Page 45: Car · Configure Can Bus
10.2 CAR · Configure CAN Bus The device integrates a logging function of additional data channels from the CAN Bus of a connected vehicle. For a communication it is necessary to use an appropriate CAN cable (see picture) – please contact your supplier to get more details. - Page 46 Click on the car brand to list available car models. Select your car model and click SET button.
- Page 47 After going back to the car edit screen the name of your car is displayed as selected CAN PROTOCOL and the CAN ENABLED checkbox set. transmission can be disabled by unchecking the CAN ENABLED option. If CAN ENABLED option selected Bluetooth communication with RN OBD Plug is disabled.
- Page 48 On the next screen click the SELECT CAN button. Select your car brand or, if not available, click the Add button.
- Page 49 Type in the car brand and then the car model. If the brand is already available, but there is no model of your car, add it on a list of available car models. After adding new car model it is visible on the list with current details that are unavailable right now, because there is no data loaded yet.
- Page 50 It is usually 500 kbps or 1000 kbps. CAN Listen Mode In the CAN "listen mode" the CAN transmitter is disabled and the Race Navigator device is not interfering with any CAN bus communication - passive reception of CAN frames.
- Page 51 LOAD DBC – provide the file in .DBC format that includes a definition of all CAN protocol signals of your car. The system prompts to insert the memory stick with .DBC file copied directly on the stick. Prepare it and connect to one of device’s USB ports.
- Page 52 CAN signals will be overwritten by the new ones. If you want that your channel names are compatible with typically used channels in Race Navigator please use listed names: steering_angle – for steering wheel angle brake – for main brake (brake pedal position or brake pressure) gas_pedal –...
- Page 53 After going back you will see your car model with available signals. Don’t forget to ‘SET’ this CAN protocol. On the car settings you will see the CAN PROTOCOL name changed to the one that you recently set.
-
Page 54: Can Bus Diagnostics And Troubleshooting
10.3 Diagnostics Troubleshooting In case of problems with the CAN Bus communication, there diagnostic tools available to check for issues. After selecting CAN Bus interpreter for the connected car by the CAN Bus cable, open CAN Bus monitor dashboard (DASHBOARD-> Panel 3). The communication on CAN Bus is monitored continuously here. - Page 55 If the communication is detected but incoming data don’t match with the selected CAN interpreter, then the shown message is displayed. The reason for this issue can be a wrongly selected CAN interpreter with different CAN IDs defined or a wrong CAN Bus speed setup. Please select a correct CAN interpreter from existing ones, create a new one from the correct DBC file, change the CAN Bus speed from your...
-
Page 56: Track
TRACK All filtered tracks are displayed here. To filter the tracks by countries, just click the Countries button. Click on the specific track to open the Track Variants view. You can select one of the available track variants or create a new one (see 12.1 & 12.2). If you want to disable automatic track detection you need to access “Settings”. - Page 57 Here you can set the countries by which to filter the tracks. Select the country and click the Set button or just select the check box next to the country. The caption on the top of the view informs about the currently selected countries.
- Page 58 The tracks created by the user (see 12.1 & 12.2) are listed under the 'User Tracks' filter.
-
Page 59: Track Variants
11.1 TRACK VARIANTS All available variants of the selected track are listed here. Scroll down the list and select one of them. Press Set to confirm your selection. Edit You can edit a track variant. Here you can add a new track variant. Remove Press the Remove button, to remove a track Edit... -
Page 60: Track Variants · Add
Record button. Place the car exactly on the start line, press Start Track Recording and drive. The RN ONE automatically records the new track variant route when you drive. The track variant recording stops automatically without user interaction when you cross the same line as the start line. -
Page 61: Event
EVENT All available event types are listed here. You can browse through the list and select one of them. The available types are colored white, while the ones not available are colored grey. Press Set to confirm your selection. Additional event types can be purchased online (store.race-navigator.de). -
Page 62: Event · Trackday/Race
12.1 EVENT · Trackday/Race • It is a default event type. • All data is recorded directly on the device. • Separate videos are prepared for each lap. • In the auto-start mode, the recording is activated automatically and deactivated twenty seconds after the vehicle stops. -
Page 63: Event · Endurance
EVENT · Endurance • Endurance is a special mode designed for "Endurance" events, when it is important to transfer the video recorded by the Race Navigator to the memory stick immediately during the pit stop. • For recording purposes, it is required to have the memory stick plugged in. -
Page 64: Event · Taxi
12.3 EVENT · Taxi • Taxi is a special mode designed for "Taxi" events. • For recording purposes, it is required to have the memory stick plugged in. Otherwise, the video will not be recorded and you will be notified about the missing memory stick. -
Page 65: Event · Street Mode
12.4 EVENT · Street Mode • The Street Mode is an event type designed for testing your car’s straight line performance. • This mode allows you to measure the acceleration and deceleration of the vehicle during the drive. • The event type provides a specially customized dashboard dialog where it is possible to watch the visualization most... - Page 66 STREET MODE TEST ACTIVATION Before a test start, standby mode must be activated by pressing NOT ACTIVE. button from the dashboard. The button color will change to green and Recording of each street mode test is starting ACTIVATED. STARTED icon means that a test is carried out. automatically when start conditions are met.
- Page 67 ACCELERATION TEST (ACCEL) This option allows measure acceleration of a car. • To switch to the Acceleration test, click the ACCEL button. • Choose one of three preconfigured speed Time chart ranges: 0-100 km/h, 0-200 km/h, 100-200 km/h or define your own range from value A to value B.
- Page 68 Acceleration test with braking To enable this test, go to STREET MODE general settings and select Acceleration test with braking SETTINGS checkbox. In this case, after reaching your maximum defined speed, the test is continued until the very end of braking, that is 0 km/h. NOTE: The time spent while driving at a higher speed than the defined maximum is not included...
- Page 69 BRAKING TEST In this mode, you are provided with the same features as in the Acceleration test but the speed range is defined as descending. • To switch to the Braking test, click the BRAKING button. • Choose one of the three preinstalled speed ranges: 50-0 km/h, 100-0 km/h, 200-0 km/h or define your own range from the customized start speed to 0 km/h.
- Page 70 DISTANCE TEST (DRAG RACE) In this type of the Street Mode you can measure your driving time for a predefined • distance. To switch to the Distance test, click the DISTANCE button. • Choose one of three predefined distance values: 1/4 MILE, 1000 M, 2000 M or select your own distance value.
- Page 71 GENERAL TESTS SETTINGS General Settings Button Acceleration test with braking For more details, please refer to section about: Acceleration test with braking. Disable Audio Signals: In settings you can also Disable Audio Signals. Select this option to disable sound effects when starting and stopping street mode measurements.
- Page 72 TEST RESULTS After each test a detailed table appears on a dashboard screen. • Last: Lap time of the latest test. • Avg: Average time of all tests in a current Event and test type (for example one speed range). •...
- Page 73 MEASURMENT LAPS LIST Go to → HOME → LAPS To View your Street Mode measurement laps. SECTIONS In laps list all measurements of the same type are grouped together. Laps marked with yellow are the ones with the best (shortest) time.
-
Page 74: Event · Rcn Mode
12.5 EVENT · RCN Mode The RCN event type is a feature prepared for the regularity driving events at the Nürburgring. There are total of 6 different racing groups predefined: the Blue, Red and Yellow defined for the track variants Nürburgring Nordschleife and Nürburgring 24H. - Page 75 The particular setups can be previewed on the Settings. In the RCN mode a new lap is created only when the start line is crossed, to avoid breaking the lap sequence. Make sure that the new event is created before the race begins.
- Page 76 3. Confirm Time Lap - when starting this type of lap, the Set Time Lap is selected automatically as the reference lap. The system calculates and displays the time difference between current lap time and set lap time each second. 4.
- Page 77 RESET RCN button Here you can stop current RCN Event and start a new one to begin a new RCN laps sequence. Keep recording during RCN when car stops Unchecked recommended setting, unchecked recording stops starts automatically when the automatic recording start/stop is on, check it only if you need a complete video also while fueling, but then you need to wait longer after the race to download...
- Page 78 SETTIME REF - Here you can select a reference lap for all the Set Time and Confirm Time Laps in current RCN event type. Reference lap can be chosen from the list of recorded laps on your device. SPRINT REF - Here you can select a reference lap for all the Sprint Laps in current RCN event type.
-
Page 79: Event · Rally
12.6 EVENT · Rally It is a specially-designed racing mode for the rally event, when conditions are often unpredictable and tend to change rapidly. Well-developed algorithms provide such system capabilities as: • Automatic start and stop of data and video recording of stages –... - Page 80 Record button. • Place the car exactly on the start line, press the Record button and drive. The RN ONE automatically records the new special stage route when you drive. • Press the Record button once again to stop recording, when you reach the finish line.
- Page 81 Distance Measurement for Reconnaissance In Rally mode a specially designed Dashboard is available. It simplifies the measurement of distances between segments of the rally route including stages and checkpoints. The Dashboard is divided into three parts: • at the top you can see the distance travelled from the last checkpoint, •...
- Page 82 Before the official start: • connect your Race Navigator to constant power supply, • check if you have enough storage, • go to SETTINGS > EVENTS and set the RALLY mode, • go to SETTINGS > AUTOSTART and set auto-recording option from 20 km/h, •...
-
Page 83: Event · Auto Managed
12.7 EVENT · Auto Managed The auto managed event type is a special designed mode that cooperates with the Race Navigator Event Management System (EMS). The EMS improves motorsport events handling with additional hardware components dedicated software modules. It makes the event organization easier thanks to an automatization of many functions, like automatic downloading of selected or all laps from all Race Navigators in the... -
Page 84: Event · Auto Managed Rec Limit
12.8 EVENT · Auto Managed Rec Limit You can enable recording time limit by checking the “Enable recording time limit per driver” option. You can set the time limit in the “Recording time limit per driver” box. In effect each driver cannot have more footage recorded than previously set. -
Page 85: Event · Touristenfahrten/Live-Lap Timing Deactivated
Navigator. This may be necessary if the use of lap timers on a specific racetrack or during specific events is not allowed. The Touristenfahrten-Mode allows you to use your Race Navigator in compliance with such regulations. Selecting and changing of this event type is protected code. - Page 86 After pressing OK the event is set and active. Safety options can be changed by selecting Touristenfahrten and pressing SETTING button. The SETTING dialog allows users to enable or disable PIN protection by selecting ENABLE PIN PROTECITON option. Changing this option also requires typing the current PIN code.
- Page 87 User can also change the PIN code by pressing on the text field. Changing PIN code requires completing 3 steps: Step 1: Type current PIN code (when changing PIN code for the first time, a default PIN “1234” has to be used).
- Page 88 Step 3: Confirm new PIN code by typing it again and press OK button. When the new PIN code is correctly set, users will see the information about it under PIN code text field. To Confirm setting new PIN code click OK button, to cancel this change click CANCEL button.
- Page 89 After the drive, you can analyse your laps as usual with all data and times, on both the Race Navigator and using the RN Analyzer App. Enabling and disabling of the mode is only possible when the car is at a standstill. Only a user...
-
Page 90: Event · Simulation
12.10 EVENT · Simulation The RN Simulation Mode is a mode that activates a connection between your Race Navigator device with the racing game simulator. You can use your Race Navigator at home practicing with your simulator in the same way as you do on the track. - Page 91 LIST OF TRACKS AVAILABLEI IN SIMULATION EVENT: • Barcelona, • Brands Hatch 2 Variants: GP, INDY, • Hungaroring, • Imola, • Laguna Seca, • Magione, • Misano, • Monza, • Mugello, • Nürburgring 6 Variants: Bridge to Gantry, Nordschleife, GP + Nordschleife, Grand Prix, Grand Prix Kurzanbindung, VLN, •...
- Page 92 MAJOR FEATURES: • real time gap to reference timing, • ideal coordinates matching between the simulator and real world, • precise comparison between Simulation laps, • precise comparison between Simulation to real live laps, • analysis with RN Analyzer tools the same way as real life laps, •...
- Page 93 SIMULATION EVENT REQUIRMENTS In order to use Simulation mode on your device: • Purchase and install the Simulation Event on your Device. • Download and install our RN Sim Connector Windows Application from: race-navigator.com • Purchase and install Assetto Corsa PC game directly from Steam client or any other store •...
-
Page 94: Network
NETWORK You can select one of the two available connection modes: internet connection and RN Access Point. RN Access Point Mode Click this button to create an access point for your iPad with the RN Analyzer App. To use the encryption of the RN access point network, press the AP Settings button and select the check box at the top. - Page 95 Lan Settings In order to connect Race Navigator device to local network using a LAN cable enter “LAN SETTINGS” and check the “Enable DHCP for Ethernet” box. Do not enable this option when you use the Race Navigator with the Wi-Fi Dashboard connected by...
-
Page 96: Camera
CAMERA Here you can preview both camera views and check the resolutions. You can flip the camera view by 180 degrees by checking the “Flip” box. Use this setting when the RN camera is mounted upside down Check the “Main Camera” box to record main video (bigger picture in the final recording) with currently displayed camera. - Page 97 For instance when the additional Full HD camera is connected to the RN ONE system, and the 2- cameras video layout is selected as the current video overlay, the secondary camera can be selected from available built-in cameras that is used for video recording.
-
Page 98: Device
DEVICE Here you can specify all parameters of the device. Status You can check the status of the device. Clock Here you can set date and time. Update Click here to install the latest version of the Diagnostics You can download the diagnostic data. Reset Here you can reset various device settings. -
Page 99: Device · Status
The basic data of the device and its components is presented here. Edition Name Commercial edition name of the software. Device Name Unique name of the RN ONE device. Version The version of the installed software. Left SD/HD Video Time Estimated remaining recording time for SD/HD quality. -
Page 100: Device · Clock
15.2 DEVICE · Clock Here you can set the current date and time. Zones Zones You can choose the proper time zone or set the time manually. Use the Back button to complete the process. -
Page 101: Device · Update
15.3 DEVICE · Update You can install the latest version of the RN software your device. Internet connection is required. Follow the instructions below to install the latest version. On the Settings page, click the RN Device button and then the Update button. Make sure that your device is connected to the Wi-Fi network (to connect, go to: Settings >... - Page 102 When the download is finished, click the Install button on the Updates view. Wait for the next screen. On the next screen, click the Start Update button.
- Page 103 Installing the newest version is in progress. It may take a few minutes. The finished installation is marked with a caption. Press the Back button to restart your device.
-
Page 104: Device · Diagnostics
15.4 DEVICE · Diagnostics Here you can copy the diagnostic data directly to the memory stick. Press Export Data button to start the process. A memory stick is required to be plugged in. Otherwise, the Export data button will be disabled and you will be notified about the missing memory stick. -
Page 105: Device · Rn Reset
15.5 DEVICE · RN Reset Here you can reset various RN ONE settings and restore the device to the basic installation. 15.6 RN Reset · Reset Event Data Press the RN Reset button to display the list of events. Select a particular event and press the Remove button to reset the event data. -
Page 106: Rn Reset Actory Ettings
15.7 RN Reset · Factory Settings Press the RN Factory button to restore the device’s software to its original settings. In the next dialog, click YES to confirm or NO to abort the operation. The operation cannot be undone. 15.8 RN Reset ·... -
Page 107: Device · Help
15.9 DEVICE · Help The Race Navigator Help Content is presented here. You can read the basic descriptions of your device functions. 15.10 DEVICE · Logo All available video logos are listed here. You can browse through the list and select one of them. -
Page 108: Device · Video, Sound
15.11 DEVICE · Video, sound Video Click the Video button to set the video recording quality. Different video quality options are available. The video can be recorded in: • High Quality (1920x1080, ~3MB/s; 1280x768, ~1 MB/s) • Low Quality (1920x1080, ~1MB/s; 1280x768, ~0,5 MB/s) Select the option by clicking on the element. - Page 109 Recorder If you want to have all your laps videos to be in a single video file, click the “Recorder” button and check the “Do not split recorded video into separated laps” checkbox. If it is required to record video files that are limited in size (for instance by an external IT system) it is possible to enable the flag ‘limitation of maximum single video file size’...
-
Page 110: Device · Additional Settings Nits Ime
15.12 DEVICE · Additional settings · Units / Time Units: Race Navigator system provides 2-unit types for displaying a current speed: • KM/H (metric) • (imperial) Select this option by pressing a unit type. The selected speed unit type is displayed on all screens (dashboards, lap list) and on video recordings. -
Page 111: Pit Lane Monitor
15.13 DEVICE · Additional settings · PIT LANE MONITOR Pit Lane Monitor functionality is accessible from: Home View→Settings→Device→Additional Settings→Pit Lane Monitor More details about Pit Lane Monitor can be found here: PIT LANE MONITOR 15.14 DEVICE · Additional settings · OBD-II Settings OBD-II Menu is accessible from: Home View→Settings→Device→Additional... -
Page 112: Tpms Settings
15.15 DEVICE · Additional settings · TPMS SETTINGS TPMS functionality is accessible from: Home View→Settings→Device→Additional Settings→TPMS SETTINGS More details about TPMS SETTINGS can be found here: TIRE PRESSURE MONITORING SYSTEM ... -
Page 113: Device · Additional Settings Uto Emove
15.16 DEVICE · Additional settings · Auto Remove If you check the “Use auto lap removal” option, all laps older than the value set in the “Number of days for auto lap removal” box will be automatically removed upon turning on the device. -
Page 114: Pit Lane Rec. Zone
15.17 DEVICE · Additional settings · PIT Lane REC. Zone Pit Lane Recording Zone is defined as a special area on the track, usually the pit lane area. The system knows when entering and leaving happens. There are two options to choose how the system behaves in the area. - Page 115 To check if this option is available on currently selected track go to Settings > Device > Additional > Settings > Pit Lane Recording Zone. This screen informs about availability of the Zone. Red Warning at the bottom informs about a lack of the zone definition.
-
Page 116: Autostart
AUTOSTART Different video recording modes are available. You can start recording manually which activates automatically after exceeding the required speed of 20 km/h or 40 km/h, or RPM, or you can select the Standing Start mode. Standing Start automatically starts recording the video without any time and data when the vehicle near tracks... - Page 117 When the vehicle stops, recording is turned off automatically. If you want to set the amount of time to pass before the recordings stops you need to check the option “Enable custom time for auto recording stop” and enter the desired amount of time in the “Custom time for auto recording stop”...
-
Page 118: Layout
LAYOUT The Race Navigator system provides different video layouts available to be used in recorded videos. Swipe the layout carousel and choose a desired video layout. Below you can change the video recording format resolution: • HD (always available, HD cameras are built into the device) •... -
Page 119: Layout Settings
17.1 LAYOUT Settings The steering wheel angle in the video overlay is multiplied by the value in the “Steering wheel data multiplication factor” box. If you want to inverse the steering wheel angle set this value to “-1”. The default value is “1”. If you want to hide the steering wheel image in the video overlay check the “Hide steering wheel image in video overlays”... -
Page 120: Export Import
EXPORT IMPORT In order to import or export data to an external drive, enter “EXPORT IMPORT” in “Settings”. A memory stick must be plugged in. Otherwise, both buttons will be disabled and you will be notified about the missing memory stick. -
Page 121: Export Video
18.1 EXPORT VIDEO Here you can export the video and data directly to the memory stick. The memory stick is required to be plugged in. Otherwise, the Copy button will be disabled and you will be notified about the missing memory stick. -
Page 122: Import Video
18.2 IMPORT VIDEO Here you can import videos and data from memory stick to Race Navigator device. Select desired event and go back. All laps from the selected event are listed. Full laps are colored white, while the others are colored grey, except for the best laps of each driver which are colored yellow. -
Page 123: Pit Lane Monitor
indicates a delayed exit. This allows the driver to correct his pace in the pit lane to PIT LANE MONITOR achieve an optimum pit stop time. The Pit Lane Monitor functionality can be • Speed monitoring - the display automatically shows the current speed of the car in HOME VIEW →... -
Page 124: Setting Up Pit Lane Monitor
19.1 Setting up Pit Lane Monitor The Pit Lane Monitor Functionality is an additional feature that is activated for a selected device after purchasing. When Pit Lane Monitor is activated a user can set it up. After entering Settings, at first it has to be checked if currently selected Track Variant has pit lane start and end lines defined. -
Page 125: Pit Lane Monitor Settings
19.2 Pit Lane Monitor Settings Pit Lane Monitor Settings are split between 3 independent sections. Each of these features will be displayed on the sixth dashboard screen. Only selected features will displayed dashboard screen. This approach gives the user opportunity to personalize The Pit Lane Monitor to its own needs. -
Page 126: Pit Lane Monitor Countdown
19.3 Pit Lane Monitor Countdown The Pit Lane Monitor Countdown can be activated from: HOME VIEW → SETTINGS → DEVICE ADDITIONAL → SETTINGS → PIT LANE MONITOR → Pit Lane Monitor Countdown. Pit Lane minimum time: Defines the time, that driver must spend in pit lane, before leaving it. - Page 127 • Variable Pit Lane Times Race Time: set race duration in minutes. That value is important to use correct pit lane time duration that depends on remaining race time. Variable Pit Lane Times feature enables a user to • use different pit lane time for each pit stop. It can Define PIT STOP TIMES, be set in accordance to the rules of racing series •...
- Page 128 Set race start time and duration • Race Start Time: Tap on the text box to fill the values. • Race Time: Tap on the text box to fill the values.
- Page 129 Fill the Pit Lane durations for: • PIT TIME FROM FIRST PIT STOP • PIT TIME FOR LAST PIT STOP • To add new time press ADD button...
- Page 130 Values for PIT TIME FROM FIRST PIT STOP Please note that in order to use this functionality both “PIT TIME FROM FIRST PIT STOP” and “PIT TIME FOR LAST PIT STOP” need to be set. Adding new time entry: Press ADD to create new variable pit stop times depending on the number of finished laps.
- Page 131 Values for PIT TIME FOR LAST PIT STOP Adding new time entry: Switch to entering Pit Times for Last Pit stop by pressing PIT TIME FOR LAST PIT STOP button. Press ADD to create new entry. Enter the remaining race time in whole minutes and the corresponding pit lane time for the last stop.
- Page 132 Pit Lane Monitor Countdown Operation: After arriving in Pit Box, countdown continues to display the time. When the time gets closer to 0, it warns by coloring the value in yellow (below 20 secs), orange (below 5 secs) and then red (after passing When the time reaches 0, it is the signal to leave the Pit Box.
- Page 133 After start from Pit Box, countdown, instead of pit Box to End Line time, displays the Gap Time - real time difference between time left and estimated time, calculated using current speed and distance to Pit Lane End Line. If the current speed is too high, driver will leave the Pit Lane earlier than expected.
-
Page 134: Pit Lane Maximum Speed Warning
19.4 Pit Lane Maximum Speed Warning The Pit Lane maximum speed Warning can be activated from: HOME VIEW → SETTINGS → DEVICE ADDITIONAL → SETTINGS → PIT LANE MONITOR → Pit Lane Maximum Speed Warning. For explanation press the icon. Pit Lane maximum speed: Pit Lane maximum speed is used to display warnings on a speedometer when the driver is... -
Page 135: Pit Lane Overall Time Counter
19.5 Pit Lane Overall time Counter The Pit Lane Overall time Counter can be activated from: HOME VIEW → SETTINGS → DEVICE → → ADDITIONAL SETTINGS PIT LANE MONITOR Pit Lane Overall time Counter. Time to stay in Pit Lane: Defines the time, that a driver have to spend in pit lane during the whole competition. -
Page 136: Modifying Pit Lane Monitor Start And End Lines
Pit Lane Overall Time Counter Reset Overall Time in Pit Lane Left counter can be reset any time. It is necessary to remember to reset the counter before the race. It can be done by starting a new event: SETTINGS→EVENT→START NEW EVENT Or by using a reset button: (blue loopoing arrow) on the pitlane dashboard (last panel). -
Page 137: Modify Pit Lane Start/End
19.7 Modify Pit Lane Start/End Pit Lane Monitor has additional setting accessible through the MODIFY PIT LANE START/END button on the bottom right corner. This dialog informs user about Pit Lane Start and End Line positions with its coordinates. Displayed values can be copied to any map browser in order to check its position. - Page 138 Tap on one of the text boxes to edit either line’s latitude, longitude, or direction. Coordinates must be between -180° 180° and direction between 0° 360° where: • North = 0 • East = 90 • South = 180 • West = 270 •...
-
Page 139: Pit Lane Visits
19.8 Pit Lane Visits When Pit Lane Monitor is activated in Pit Lane Monitor settings the Race Navigator system is detecting crossing of the Pit Lane Start Line and End Line. Based on that every pit stop visit is saved. -
Page 140: Tire Pressure Monitoring System
• TIRE PRESSURE MONITORING intuitive indications on RN screen about optimal pressure for each wheel, SYSTEM • customizable ranges of optimal pressures and warnings, RN Vision offers a high quality Tire Pressure • Monitoring System (TPMS) that is fully compatible tire puncture alarms, with RN systems. -
Page 141: System Mounting
• 20.1 System mounting Receiver mounting RN TPMS Receiver has to be mounted inside of the car, close to the middle. RN TPMS sensors have to be mounted in Please validate sensors’ signal availability after mounting wheels on the car and a standard way same as other TPMS sensors. -
Page 142: Conditions For Pressure Data Transmission
Sensors positioning and identification Each sensor from the kit has an unique identifier. Each corner has the unique ID that pre-programmed in the receiver before delivery. Sensors must be mounted in proper corners of a car to read values from corresponding wheels. Each sensor has appropriate label (FL, FR, RR, RL) on the sensor and on the valve. -
Page 143: Connecting Tpms To Race Navigator
20.3 Connecting TPMS to Race Navigator The TPMS communicates by CAN Bus. It can be R A C E N A V IG A TO R T P M S R E C E I V E R connected to the RN system as the only external device or as an additional external device together with car’s ECU. - Page 144 Using Racing version R A C E N A V IG A TO R T P M S R E C E IV E R • In the TPMS racing version the RN device together with RN TPMS is connected to the car’s CAN Bus.
-
Page 145: Setting Up Tpms System
20.4 Setting up TPMS system Enabling functionality The Tire Pressure Monitoring System can be activated in the RN menu under: HOME VIEW → SETTINGS → DEVICE → ADDITIONAL SETTINGS → TPMS SETTINGS Turning TPMS ON/OFF Select this checkbox in order to turn ON the TPMS Functionality. -
Page 146: Tpms Settings
20.5 TPMS Settings TPMS Listen Mode and CAN Bus speed If the TPMS is the only CAN Bus device connected to the RN system, please adjust the CAN Bus settings here. Set CAN Listen Mode to OFF and set your receiver CAN Bus Speed (default is 1 Mbps). For TPMS CAN Bus Listen Mode and Speed settings press on this button Settings... - Page 147 TPMS connection as additional device in the car’s CAN Bus Select the proper CAN Data Interpreter from: HOME VIEW → SETTINGS → CAR → EDIT → SELECT CAN Settings for the listen mode and CAN bus speed are used from the selected car’s protocol (under CAR’s settings) if you use a connection to car’s CAN bus.
-
Page 148: Optimal Tire Pressure Settings
20.6 Optimal Tire Pressure Settings Optimal Tire Pressure Settings allow to set up pressures that are marked as ‘optimal’ in the system. To set the Optimal Pressure Range press on this Button in TPMS Settings section Use text boxes to set the values of your need. These settings are global for each tire. -
Page 149: Tire Pressure Warning Settings
20.8 Tire Pressure Warning Settings TPMS Pressure warnings are set separately for each tire. You can enable or disable warning message for each tire separately. Disabling Pressure warnings: To completely disable Pressure warnings uncheck all 4 boxes. Warning: Disable/Enable Each tire have its own pressure range for displaying warnings. -
Page 150: Tire Pressure Warning Messages
20.9 Tire Pressure Warning Messages As soon as a single wheel pressure drops below or increases above a warning level, the alarm screen will appear to warn the driver. The screen shows a separate tire image in every corner. The black tire image informs about too low pressure when the red one shows too high pressure alert. -
Page 151: Troubleshooting/Recovery
Troubleshooting/Recovery The recovery mode was developed for system emergency situations that happen when a faulty state is detected. This faulty state can occur when the device lost power unexpectedly during an update process or while saving critical data or when unexpected data is stored by the system. Recovery Procedure In case your device is not starting properly, the Recovery screen will appear. -
Page 152: More Information And Safety Precautions
Do not expose the device to • objects that will reduce cooling, direct sunlight for an extended The Race Navigator is an electronic • Connect the charger to a proper period of time. When a too high power source,... - Page 153 • • Caution: this device contains a non- Do not drop your device or subject device. Disassembly, modification or any attempt of repair could replaceable internal Lithium it to severe shock, • battery, the battery can burst or Do not subject your device to cause damage to your device and explode, releasing...
-
Page 154: Regulatory Information
If this equipment does cause Changes or modifications not expressly The Race Navigator ONE device complies harmful interference to radio or television approved by the party responsible for with the Electromagnetic Compatibility reception, which can be determined by compliance could void the user’s authority... - Page 155 The antenna (a built-in and external) must interference, including interference that This transmitter must not be co-located or be installed and operated with minimum may cause undesired operation of the operating in conjunction with any other distance of 20 cm between the radiator and device.
- Page 156 RN VISION company guarantees, that during one and accessories, secured in original “Race consumer law can be obtained in the Office of year since the purchase of Race Navigator, the Navigator” packaging, including material and Competition and Consumer Protection. product (hardware) and its accessories are free quality flaws appearing during normal usage in from material and production flaws.
- Page 157 Services for VISION’s published guidelines include but are not USER SHOULD PERIODICALLY CREATE BACKUP the Race Navigator ONE can be limited to the limited to information contained in technical COPIES OF SUCH INFORMATION STORED ON THE country where the device was purchased.
- Page 158 does not include recovery of data or information, the date of replacement or repair, whichever delivery, unless it’s inconsistent with the issue’s or reinstalling software. provides longer coverage for you. character. The user can submit the product for repair in a If the product is submitted in a country different country different than the country of purchase, that the country of the RN VISION product’s...
- Page 159 © 2019 RN VISION GMBH: All rights reserved. costs. RN VISION will ship a replacement product Policy, available at: www.race-navigator.com. Race Navigator ONE is a trademark of RN VISION or part to you with installation instructions, if company. applicable, and any requirements for the return of GENERAL the replaced product or part.
- Page 160 RACE-NAVIGATOR.COM...
Need help?
Do you have a question about the RN ONE and is the answer not in the manual?
Questions and answers