Table of Contents
Advertisement
Advertisement
Table of Contents

Related Manuals for GoPro Hero12


Summary of Contents for GoPro Hero12
- Page 2 Check Out the OOBE @GoPro pinterest.com/GoPro That’s short for “Out-of-Box Experience.” It’s our mobile-friendly site that will help you get started with your GoPro right out of the box—from set up and recording to automatic highlight videos and saving your media. gopro.com/OOBE...
-
Page 3: Table Of Contents
Exposure Control Customer Support Using Voice Control Trademarks Video Encoding Regulatory Information Pairing Your GoPro to Other Devices Playing Back Your Media Connecting to the GoPro Quik App Automatic Highlight Videos Saving Your Media Deleting Your Media Setting Your Preferences... -
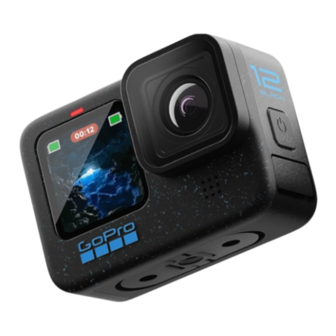
Page 4: Meet Hero12 Black
This is not a door/latch. 9. Microphone 16. 1/4-20 Mounting Threads 4. Status Light Do not try to open.) 10. Removable Lens 5. Front Screen Learn how to use the accessories that came with your GoPro. Mounting Your GoPro (page 99). -
Page 5: Getting Started
Be sure your hands are clean and dry before handling your SD card. WARNING: Although non-GoPro batteries may fit in your HERO12 Black, they could greatly limit your camera's Check the manufacturer’s guidelines to see your card’s acceptable performance. Use of non-GoPro batteries will also void your temperature range and other important information. - Page 6 Getting Started Getting Started SD CARD + BATTERY SETUP Insert the battery. Unlock the door latch and flip the door open. 2. With your camera off and battery removed, insert the SD card into Connect your camera to a USB charger or computer using the the card slot with the label facing the battery compartment.
- Page 7 3. Select Update your camera manually and follow the instructions. PRO TIP: The app will check for the latest camera software every time it connects to your GoPro. This helps ensure that you'll always have the latest features and best performance from your GoPro. If new software is available, the app will tell you how to install it.
-
Page 8: Get To Know Your Gopro
2. Battery Status 3. Current Mode (Video, Photo, or Time Lapse) 4. Capture Settings WARNING: Use caution when using your GoPro and its mounts and accessories. Always be aware of your surroundings to avoid injuring yourself and others. Be sure to follow all local laws including all privacy laws,... - Page 9 Get to Know Your GoPro Get to Know Your GoPro DISPLAY OPTIONS USING THE REAR TOUCH SCREEN The front screen features 4 display options. 1. Swipe down on the rear screen to access the Dashboard. 2. Tap to access the front screen settings.
- Page 10 Heads Up: The capture settings are not available when you turn your Time Lapse turns long events into short, shareable videos by taking a GoPro to take portrait shots. Be sure to choose the settings you want before rotating your camera.
- Page 11 Time Lapse, and Live Streaming only). RECORDING WITH QUIKCAPTURE QuikCapture is the fastest and easiest way to power on your GoPro and get the shot. All it takes is the push of the Shutter button. 1. With your camera off, press the Shutter button...
- Page 12 Swipe down on the rear screen to access the Dashboard. You can also add HiLight Tags by saying, “GoPro, HiLight” when Voice 1. Turn your camera to the orientation you want. Control is on and by tapping when watching your footage with 2.
-
Page 13: Using Easy Controls
NAVIGATING WITH THE BUTTONS Easy Controls make it as easy as possible to point, shoot, and get Although your GoPro is waterproof, the touch screen won’t work under amazing results with your GoPro. Each mode is preloaded with ultra water. Use the buttons and front screen to swap modes and presets. - Page 14 Using Easy Controls Using Easy Controls 1080p Video 3. Use the slider to choose from the available options. Captures full HD 1080p video while also maximizing battery life and compatibility with older devices. VIDEO QUALITY PHOTO MODE OPTIONS Captures video in 4K for highest You have 2 capture options in Photo mode.
- Page 15 Each mode features onscreen shortcuts that make it easy to adjust your Mount your camera to a stationary object or tripod, point it toward the GoPro's capture settings. You can change slo-mo speed, digital lenses, night sky, and let physics take over. Star Trails uses the Earth’s rotation framing, and more.
- Page 16 Speed (Video) media, or Full Frame (8:7 frame/aspect ratio) with the flexibility to crop Set your GoPro to capture video at normal speed (1x), 2x slo-mo, 4x your footage into widescreen or mobile shots using the GoPro Quik app. slo-mo, or 8x slo-mo. All videos recorded in 2x slo-mo and above can be...
-
Page 17: Using Pro Controls
2. Swipe left and tap Preferences > General > Default Preset. SWITCHING CONTROLS Your GoPro uses the Easy Controls by default, but you can switch to the Pro Controls with just a couple of swipes and a tap. 1. Swipe down on the rear screen to access the Dashboard. - Page 18 Pro Control Presets Pro Control Presets CUSTOMIZING THE PRESETS HIDING + REORDERING PRESETS You can change the settings in your presets with just a few taps. You can manage presets by hiding those you aren't currently using and rearranging your list. 1.
- Page 19 Pro Control Presets Pro Control Presets CREATING YOUR OWN PRESETS Saving Changes to an Existing Preset The perfect capture settings for a day on the slopes may not be so great Go to the capture settings of the preset that you want to modify. when you’re recording indoors.
-
Page 20: Recording Video
Pro Control Shortcuts Recording Video PERSONALIZING YOUR ON-SCREEN SHORTCUTS Pro Control Video mode gives you the flexibility to record in a wide range of resolutions from standard HD 1080p video all the way up to On-screen shortcuts give you quick one-tap access to your camera’s pro-quality 5.3K. - Page 21 • HyperSmooth Video Stabilization (page 123) Interval (Looping Video) Choose how long your GoPro records before looping back to record over the start of the video. The default interval is 5 minutes. CAPTURE SETTINGS The capture settings are specialized settings and tools to help you get...
- Page 22 + Horizon Lock/Leveling, SuperView, or HyperView lens. Some Horizon Lock digital lens will also enhance stabilization. lenses only work with select frame rates. If needed, your GoPro will automatically adjust the frame rate when you switch lenses. To learn more, see HyperSmooth Video Stabilization (page 123).
-
Page 23: Taking Photos
Night Photo Set Up Looping Video Automatically adjusts your GoPro's shutter speed for dark and low-light To capture Looping video, you'll need to set up a new preset and choose shots. - Page 24 To learn more, see Burst Rate (page 127). Set up Interval Photo and choose how often your GoPro takes a photo— Shutter (Night Photo) from a 0.5-second to 120-second interval. Set how long your camera’s shutter stays open for night shots.
-
Page 25: Capturing Time Lapse
Interval (Interval Photo) (page 126). Star Trails Mount your GoPro to a stationary object and point it at the night sky to Digital Lenses capture trails of light across the sky. Tap the Digital Lenses shortcut to swap between the Wide and Linear lens. - Page 26 Duration Capture (page 59). Lens: Wide Scheduled Capture Heads Up: Available settings will vary based on the time lapse mode Set your GoPro to automatically turn itself on and start recording. selected. To learn more, see Scheduled Capture (page 60).
- Page 27 Capturing Time Lapse Capturing Time Lapse Trail Length (Star Trails, Light Painting, Vehicle Light Trails) PROTUNE Set the length of the light trails when using the night effects presets. You can find Protune settings under the Capture settings. Protune Choose Max for continuous trails with no breaks, long trails, or short gives you manual control of advanced settings, including white trails.
-
Page 28: Live Streaming + Webcam Mode
GoPro Quik app. USING YOUR GOPRO AS A WEBCAM Both your GoPro and computer must be set up for webcam mode before you go live. Your camera is in webcam mode by default. Connect your camera to your computer using the included USB-C cable, and then... -
Page 29: Hero12 Black Power Tools
This is a moment you don’t want to miss. With HindSight on, you can your camera to a GoPro backpack strap to get a complete series of frame your shot, but you don’t have to start recording. You can press photos when you're hiking or exploring new locales. - Page 30 Using HindSight DURATION CAPTURE on the rear touch screen will let you know that HindSight is on. Use duration capture to set how long your GoPro records before it stops. Press the Shutter button at any time to start recording.
-
Page 31: Exposure Control
1. Tap and hold anywhere on the rear touch screen until a set of brackets appears. The exposure will be based on area in the Heads Up: Your GoPro will stay on after taking the shot. It will turn brackets. - Page 32 Exposure Control Exposure Control 2. You can change the exposure by dragging the brackets to any 4. Check the screen to see if the exposure looks good. Tap other area of the screen. inside the brackets to lock in the exposure. You can also tap to cancel any changes.
-
Page 33: Using Voice Control
Stops capture in Video and Time Lapse modes. Photo and Burst modes stop on their own. PRO TIP: Saying “GoPro, capture” and “GoPro, stop capture” is the hands-free way of pressing the Shutter button . They will start and stop capture using the mode and settings you currently have on... - Page 34 Mode Command Description These commands let you switch modes on the fly. If you just recorded a video, you can say, “GoPro, take a photo” to snap a photo without GoPro, Video mode Switches your camera to Video mode manually switching modes.
-
Page 35: Video Encoding
Using Voice Control Video Encoding SEE A COMPLETE LIST OF COMMANDS ON YOUR CAMERA Your GoPro features a variety of encoding options based on how you use your media. 1. Swipe down on the rear screen to access the Dashboard. -
Page 36: Pairing Your Gopro To Other Devices
Tap the tile to see a list of paired devices or add a new one. GP-Log color profile. 3. Your GoPro will find all available devices. Tap the one you want to Heads Up: Be sure that your devices are capable of playing back 10-bit pair. -
Page 37: Playing Back Your Media
Playing Back Your Media Playing Back Your Media Swipe up to see the last video, photo, or burst you took. Swipe left and Add/remove HiLight Tag right to flip through the other files on your SD card. Adjust the playback volume 00:04 / 01:12 Go to the previous or next photo in a burst or group of continuous photos... - Page 38 3. Tap a video or photo to see it in full-screen view. 4. Tap to select files. PRO TIP: Use the GoPro Quik app to grab still photos from videos, 5. Tap to go back to the playback screen. create short shareable videos from full-length footage, save media to your phone, and more.
-
Page 39: Connecting To The Gopro Quik App
Connecting to the GoPro Quik App Connecting to the GoPro Quik App Use the GoPro Quik app to control your GoPro, edit and share videos SETTING THE CONNECTION SPEED and photos on the go, grab stills from your videos, and automatically... -
Page 40: Automatic Highlight Videos
FINDING THE BEST SHOTS (Your GoPro must be connected to a power outlet, and Auto Upload Be sure to mark your best shots with HiLight Tags. The GoPro Quik app must be off.) looks for tags when it creates videos. This helps ensure that favorite 1. - Page 41 Swipe down on the rear screen to access the Dashboard. your GoPro to your phone. 2. Swipe left and tap Connections > GoPro Subscription > 2. Start the GoPro Quik app on your phone and follow the Auto Upload. on-screen instructions.
-
Page 42: Deleting Your Media
Hidden Items. • Delete only the media that has been uploaded and saved to the GoPro cloud, while keeping anything that has not been uploaded. • Delete all media from your SD card, whether it has been uploaded and save to the GoPro cloud or not. -
Page 43: Setting Your Preferences
Deleting Your Media Setting Your Preferences Your GoPro will always verify whether or not you want to delete the USING THE DASHBOARD media before it permanently deletes it from your SD card. With your camera in landscape orientation, swipe down on the rear screen to access the Dashboard. - Page 44 SD card status. From this screen you can manage SD card storage and Start Upload set up cloud upload with a GoPro subscription. Tap here to back up your media to the cloud with a GoPro subscription. There are 3 options available based on your camera's upload and GoPro App 06:00 AM connection status.
- Page 45 DEVICES, CONTROLS + PREFERENCES AUTO UPLOAD With your camera in landscape orientation swipe down on the rear Set up and turn on auto upload to the cloud with your GoPro screen to access the Dashboard, and then swipe left to add devices, subscription.
- Page 46 8-bit encoding on videos under 4K. Choose 8-Bit to use 8-bit HEVC Default Preset encoding on all videos. Set the preset your GoPro captures in when you turn it on using the Mode button . This setting does not affect QuikCapture.
- Page 47 Max Lens Mod Rear Screen Grid Set whether you're using your GoPro with Max Lens Mod 2.0 (name in Use a grid on the rear touch screen to frame your shot. blue on the side of the lens) or the original Max Lens Mod (name in white on the side of the lens).
-
Page 48: Important Messages
Setting Your Preferences Important Messages ABOUT Problems are rare, but your GoPro will let you know if anything comes GoPro Updates up. Here are some of the messages you might see. Update your camera’s software to ensure you have the latest features and performance upgrades. -
Page 49: Resetting Your Camera
REPAIRING YOUR FILE for 10 seconds. This will restart your camera. There will be no changes Your GoPro will automatically try to fix damaged files. Files can be to your settings. damaged if your camera loses power while recording or if there’s RESTORE PRESETS TO THE DEFAULTS a problem saving the file. -
Page 50: Mounting Your Gopro
RESTORING FACTORY SETTINGS This will restore all of your camera’s original settings, clear all device connections, and deregister your camera from your GoPro subscription. This is useful if you’re giving your camera to a friend and want to completely reset it to its original state. - Page 51 3. Secure your camera to the mounting buckle with a thumb screw. USING 1/4-20 MOUNTS In addition to the mounting fingers, your GoPro has 1/4-20 mounting threads. This makes it compatible with most standard camera mounts and accessories.
- Page 52 USING YOUR GOPRO IN + AROUND WATER weaken the bond, and you could lose your camera. Your GoPro is waterproof to 33ft (10m) with the door locked. You won’t • Attach mounts in dry, room-temperature conditions. They won’t stick need an additional housing before diving in.
-
Page 53: Removing The Door
With the door in a horizontal position, gently pull outward until it snaps off. WARNING: Your camera’s door is removable. Be sure that the door is securely locked and sealed after closing. WARNING: Avoid using your GoPro with the door off. The battery could slide out during use. -
Page 54: Maintenance
• Turn off the front screen. • Make sure your GoPro is dry and clean before opening the door. • Turn off Wireless Connections. Rinse your camera with fresh water and dry it with a cloth if needed. - Page 55 Disassembling or puncturing Your GoPro is full of sensitive components, including the battery. the integrated battery can cause an explosion or fire. Avoid exposing your camera to very hot or cold temperatures. Extreme temperatures may temporarily shorten battery life or cause your camera to temporarily stop working properly.
-
Page 56: Troubleshooting
The computer doesn’t work with HEVC files. Try downloading the Corporation’s (RBRC) Battery Recycling Program. We encourage latest version of the GoPro Player for Mac ® or Windows ® for free at you to visit Call2Recycle at call2recycle.org or call 1-800-BATTERY gopro.com/apps. -
Page 57: Tech Specs: Video
GoPro Quik app or 1. Swipe down on the rear screen to access the Dashboard. - Page 58 Tech Specs: Video Tech Specs: Video VIDEO RESOLUTION (RES) Video Resolution Description Video resolution refers to the level of detail in each frame of video. The higher the resolution, the better the image quality. A 5.3K video features Ultra HD video with an extra-tall 9:16 aspect 91% more resolution than 4K video and 665% more than 1080p.
- Page 59 Tech Specs: Video Tech Specs: Video DIGITAL LENSES (VIDEO) FRAMES PER SECOND (FPS) Digital lenses let you choose how much of the scene is captured by your Frames per second refers to the number of frames captured in each camera. The different lenses also affect the zoom level and the fisheye second of video.
- Page 60 Tech Specs: Video Tech Specs: Video VIDEO SETTINGS Digital Lens Description Here’s a full rundown of your camera’s video resolutions, frame rates (fps), digital lenses, and aspect ratios in Highest Quality video mode. Wide field of view without the fisheye effect of HyperView, SuperView, or Wide.
- Page 61 If heat’s a problem, try recording shorter videos. Also limit use of 4K 9:16 Wide 2160x3840 9:16 30/25 features that take a lot of power, such as the GoPro Quik app. The Wide, Linear, Remote (sold separately) can control your GoPro while using less energy. 2.7K 240/200 Linear + Horizon...
- Page 62 Using Horizon Lock will also enhance stabilization. PRO TIP: Use Max Lens Mod 2.0 (sold separately) to max out your GoPro with the ultimate in unbreakable video stabilization up to 4K at 60 frames per second.
-
Page 63: Tech Specs: Photo
27MP photos in the 8:7 aspect ratio. This ultra immersive format digital distortion (noise). is the tallest and widest field of view ever on a GoPro HERO camera. The Standard Photo added height makes it perfect for creating extra-tall 9:16 vertical shots or Includes Local Tone Mapping, which enhances photos by boosting the any other size you need for any social media platform. - Page 64 Tech Specs: Photo Tech Specs: Photo INTERVAL (INTERVAL PHOTO) BURST RATE Interval sets how often your camera takes a photo while using Interval Capture fast-action scenes with one of these high-speed settings: Photo. You can choose an interval of 0.5, 1, 2, 3, 5, 10, 30, 60, or 120 •...
-
Page 65: Tech Specs: Time Lapse
When this setting is turned on, all photos are saved as a .jpg image You can increase TimeWarp video speed up to 30x to turn longer (for viewing on your camera or sharing with the GoPro Quik app) activities into shareable moments. The default setting is Auto, and a .gpr file. - Page 66 Tech Specs: Time Lapse Tech Specs: Time Lapse SPEED RAMP (TIMEWARP) TIME LAPSE SETTINGS Speed Ramp works by cranking down your TimeWarp from the speed Here's a full rundown of your camera's time lapse available resolutions, you selected for your video to 30 frames per second (real speed). Simply digital lenses, and aspect ratios.
- Page 67 Tech Specs: Time Lapse Tech Specs: Time Lapse TIME LAPSE INTERVAL TIME LAPSE VIDEO RECORDING TIME The Interval sets how often your camera takes a shot in Time Lapse Use this chart to determine the length of your videos. video and Time Lapse photo modes. Interval Recording Time Video Length...
-
Page 68: Tech Specs: Protune
Protune unlocks your camera’s full creative potential by giving you manual control of advanced settings, including Color, White Balance, Choose how often your GoPro snaps a shot in Night Lapse mode. Night and Shutter Speed. It’s compatible with professional color correction Lapse intervals are Auto;... - Page 69 Natural (default) color profile. values will give you warmer tones. You can also choose Auto to let your GoPro set the White Balance or Captures photos and videos with a color- Vibrant the Native setting to create a minimally color-corrected file that allows saturated profile.
- Page 70 Tech Specs: Protune Tech Specs: Protune ISO MINIMUM/MAXIMUM SHUTTER ISO Minimum and ISO Maximum let you set a range for the camera’s The Protune Shutter setting only applies to the Video and Photo modes. sensitivity to light and image noise. Image noise refers to the degree This setting determines how long the shutter stays open.
- Page 71 Tech Specs: Protune Tech Specs: Protune EXPOSURE VALUE COMPENSATION (EV COMP) SHARPNESS Exposure Value Compensation affects the brightness of your photos and Sharpness controls the quality of details captured in your video footage videos. Adjusting this setting can improve image quality when shooting or photos.
- Page 72 Insert your SD card into a card reader to access the .wav files with your sync the date and time on multiple HERO12 Black cameras for easier and computer. They’re saved with the same name and in the same location more precise editing.
-
Page 73: Customer Support
Trademarks GoPro, HERO and their respective logos are trademarks or registered trademarks of GoPro, Inc. in the United States and other countries. The Bluetooth word mark and logos are registered trademarks owned by Bluetooth SIG, Inc., and any use of such marks is under license. All other trademarks are the property of their respective owners.
Need help?
Do you have a question about the Hero12 and is the answer not in the manual?
Questions and answers