Table of Contents
Advertisement
Available languages
Available languages
Quick Links
USA office: Fontana
AUS office: Truganina
GBR office: Ipswich
If you're having difficulty, our friendly
customer team is always here to help.
FRA office: Saint Vigor d'Ymonville
USA:cs.us@costway.com
AUS:cs.au@costway.com
GBR:cs.uk@costway.com
FRA:cs.f r @costway.com
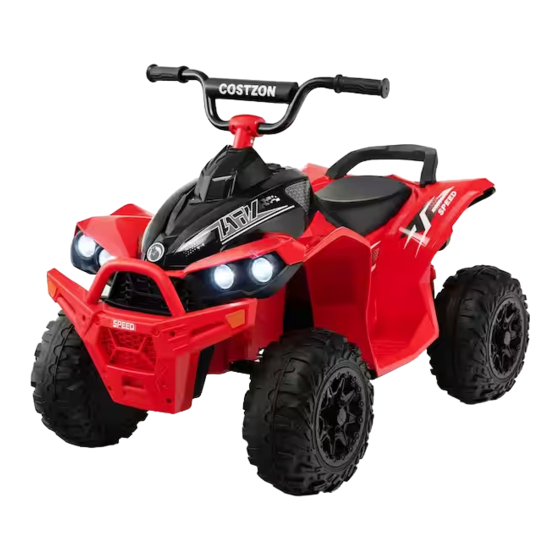
Kids Ride On ATV
Quad Électrique pour Enfants
TQ10122
THIS INSTRUCTION BOOKLET CONTAINS IMPORTANT SAFETY INFORMATION. PLEASE READ AND KEEP FOR FUTURE REFERENCE.
Advertisement
Table of Contents

Subscribe to Our Youtube Channel
Related Manuals for Costway honey joy TQ10122


Summary of Contents for Costway honey joy TQ10122
- Page 1 GBR office: Ipswich FRA office: Saint Vigor d'Ymonville USA:cs.us@costway.com If you're having difficulty, our friendly AUS:cs.au@costway.com customer team is always here to help. GBR:cs.uk@costway.com THIS INSTRUCTION BOOKLET CONTAINS IMPORTANT SAFETY INFORMATION. PLEASE READ AND KEEP FOR FUTURE REFERENCE. FRA:cs.f r @costway.com...
-
Page 2: Before You Start
honey joy TQ10122 Before You Start Please read all instructions carefully and keep it for future reference. Warnings Attention! Use it with protective equipment. Attention! Not use it in the traffic. Attention! Children should use this product under the parental supervision. General Warnings The product must be installed and used under the supervision of an adult. -
Page 3: Specifications
honey joy honey joy The picture in this manual is to show the product operation and WARNING: Not to be used in traffic. structure, please follow the real product only if any difference between picture and product happens. WARNING: CHOKING HAZARD-Small parts. Please understand that we may not inform you in time to improve Not for children under 3yrs. - Page 4 honey joy honey joy Hardware Parts DRIVING WHEEL GEAR BOX (L/R) FRONT WHEEL Flat head WASHER NUT M10 screw M4*14 WHEEL CAP STEERING REAR AXLE BRACKET Pre-installed on: Parts CHARGER SADDLE FRONT HANDLEBAR FENDER TAIL FUEL TANK STEERING DECORATION LEVER...
-
Page 5: Product Assembly
honey joy honey joy 1.Insert the steering lever into the body in the direction Product Assembly shown in the figure. 2.Clip the steering bracket into the body according to the direction shown in the figure. Fix it with screws. Clip the front fender into the body. Secure with screws. The steering lever needs to go through the limit hole of the... - Page 6 honey joy honey joy Put the gasket, front wheel, gasket and nut into the front Clip the fuel tank decoration into the body according to the axle in turn. direction shown in the figure. Fix it with screws. Fix the nut with the spanner, and then fix the wheel cap on the wheel.
- Page 7 honey joy honey joy Clip the handlebar assembly into the body in the direction Remove the saddle and connect the power cord as shown shown in the figure. Fix it with M5 screw. in the figure, and then install the saddle and lock it. When installing the handlebar screw, push the steering lever up with your hands.
-
Page 8: Charging Instructions
honey joy honey joy DASHBOARD DIAGRAM CHARGING INSTRUCTIONS Forward/ Stop/ Back Fast and Power slow switch switch Charging hole Music /Loud speakers Pedal ●The charging hole is located under the rear license plate Join the connector from the part M charger to the Charging hole and plug the other end into a wall outlet. -
Page 9: Troubleshooting
honey joy honey joy Troubleshooting Troubleshooting Problem Reason Solution Problem Reason Solution The car doesn't 1.The battery 1.Charge the batteries Slow running 1. The battery is out 1. Replace the battery; move voltage is too low; fully; speed of service life; 2. - Page 10 honey joy honey joy Precautions for charging WARNING: ● Before the initial using, the electric car batteries must be ● For safe driving, please kindly pay attentions to the following charged for 18 hours, thus to avoid permanent damage to the warning matters: battery, otherwise, they will not be repaired.
-
Page 11: Maintenance
honey joy honey joy Precautions for operations Maintenance ● Before using, please check if various components are mounted ● To prevent your baby from accidental injury, please inspect and properly and connected solidly. maintain the car regularly. ● Do not operate in any streets, roads, slopes, ditches and other ●... -
Page 12: Avant De Commencer
honey joy TQ10122 Avant de Commencer Veuillez lire attentivement toutes les instructions et les conserver pour la référence ultérieure. Avertissements Attention ! Utilisez ce produit avec un équipement de protection. Attention ! Ne l’utilisez pas dans la circulation routière. Attention ! Les enfants doivent utiliser ce produit sous la surveillance de leurs parents. Avertissements Généraux Le produit doit être installé... -
Page 13: Spécifications
honey joy honey joy L'image dans ce manuel est de montrer le fonctionnement et la Attention : Ne pas utiliser dans la circulation. structure du produit, veuillez suivre le produit réel uniquement si une différence entre l'image et le produit se produit. Veuillez comprendre Attention : RISQUE D'ÉTOUFFEMENT - Petites pièces. - Page 14 honey joy honey joy Quincaillerie Pièces ROUE MOTRICE BOÎTE DE ROUE AVANT Vis à tête plate RONDELLE ÉCROU VITESSES (G/D) ENJOLIVEUR SUPPORT DE ESSIEU DIRECTION ARRIÈRE Pré-installé sur: Pièces CHARGEUR SELLE GARDE-BOUE GUIDON AVANT LEVIER DE QUEUE DÉCORATION DU RÉSERVOIR DIRECTION DE CARBURANT...
-
Page 15: Assemblage Du Produit
honey joy honey joy 1.Insérez le levier de direction dans le corps dans la Assemblage du Produit direction indiquée sur la figure. 2.Clipsez le support de direction dans le corps selon la direction indiquée sur la figure. Fixez-le avec des vis. Clipsez le garde-boue avant dans la carrosserie. - Page 16 honey joy honey joy Placez tour à tour le joint, la roue avant, le joint et l'écrou Clipsez la décoration du réservoir de carburant dans la dans l'essieu avant. caisse selon le sens indiqué sur la figure. Fixez-le avec Fixez l'écrou avec la clé, puis fixez l'enjoliveur sur la roue. des vis.
- Page 17 honey joy honey joy Clipsez l'ensemble du guidon dans le corps dans le sens Retirez la selle et branchez le cordon d'alimentation comme indiqué sur la figure. Fixez-le avec une vis M5. indiqué sur la figure, puis installez la selle et verrouillez-la. Lors de l'installation de la vis du guidon, poussez le levier de direction vers le haut avec vos mains.
-
Page 18: Instructions De Charge
honey joy honey joy SCHÉMA DU TABLEAU DE BORD INSTRUCTIONS DE CHARGE Avancer/ Arrêter/ Retour Commutation Interrupteur rapide et lente Trou de charge Musique/ Haut-parleurs Pédale ● Le trou de chargement est situé sous la plaque d'immatriculation arrière Connectez le connecteur du chargeur de la pièce M au trou de charge et branchez l'autre extrémité... -
Page 19: Dépannage
honey joy honey joy Dépannage Troubleshooting Problème Causes Solutions Problem Reason Solution La voiture ne 1.La tension de la 1.Chargez Vitesse de 1.La batterie n'a 1. Remplacez la batterie ; bouge pas batterie est trop complètement les course lente plus de durée de 2. - Page 20 honey joy honey joy Précautions pour le chargement ATTENTION ● Avant la première utilisation, les batteries de la voiture ● Pour une conduite en toute sécurité, veuillez prêter attention électrique doivent être chargées pendant 18 heures, afin d'éviter aux avertissements suivants : des dommages permanents à...
-
Page 21: Entretien
honey joy honey joy Précautions pour les opérations Entretien ● Avant l'utilisation, veuillez vérifier si les différents composants ● Pour éviter que votre bébé ne se blesse accidentellement, sont montés correctement et solidement connectés. veuillez inspecter et entretenir régulièrement la voiture. ●... - Page 22 Return / Damage Claim Instructions DO NOT discard the box / original packaging. In case a return is required, the item must be returned in original box. Without this your return will not be accepted. Take a photo of the box markings. A photo of the markings (text) on the side of the box is required in case a part is needed for replacement.
Need help?
Do you have a question about the honey joy TQ10122 and is the answer not in the manual?
Questions and answers