Table of Contents
Advertisement
Quick Links
Advertisement
Table of Contents

Related Manuals for Telos XP50

Summary of Contents for Telos XP50
- Page 1 Telos Manual...
-
Page 2: Table Of Contents
Content Specifications About the device Description Package Contents Components and Controls Features Power supply Precautions Recommendations for Battery Use Battery Charging Battery Installation External Power Supply Getting Started Powering on and Image Settings Button Operation Interface Status Bar Quick Menu Main Menu Enter the Main Menu Amplification Level... - Page 3 Defective Pixel Repair Restore Default Pixel Map Device Information Functions Video Recording and Photography Digital Zoom PiP Function Display-Off Function Wi-Fi Function Stadiametric Rangefinder Installing the Device on a Tripod USB Connection Software Stream Vision 2 Firmware Update Maintenance Technical Inspection Technical Maintenance and Storage Troubleshooting Legal Compliances and Disclaimers...
-
Page 4: Specifications
Specifications You can learn more about the main parameters here. XP50 Model XP50 77493 Microbolometer Type uncooled Resolution, Pixels 640x480 Pixel Pitch, µm NETD, mK < 18 Frame Rate, Hz Optical Characteristics Magnification, x Smooth Digital 2.5-10 Zoom, x... - Page 5 Exit Pupil Diameter, 4 / 0.16 mm/inch Angular Field of View (Horizontal x 12.4х9.3 Vertical), degree Linear Field of 21.8 View, m at 100 m Eyepiece Focus +4 / -5 Range, Dioptre Detection Distance for Deer- 1800 / 1969 Sized Objects, m/y Display ...
- Page 6 Dimensions, 238x72x62 / 9.37x2.83x2.44 mm/inch Weight (with 0.67 / 23.6 battery), kg/oz Video Recorder Photo/Video 1024x768 Resolution, Pixels Video/Photo .mp4 / .jpg Format Built-in Memory 64 GB Wi-Fi Channel** Frequency 2.4/5 GHz Standard IEEE 802.11 b/g/n/ac * Actual battery life may vary depending on the use of Wi-Fi and the built-in video recorder.
-
Page 8: Description
Description Telosthermal imaging monoculars are designed for use both at night-time and during the day and provide exceptional image quality even in adverse weather conditions (fog, smog, rain) and beyond obstacles like branches, tall grass, dense foliage, etc. known to hinder target detection. Unlike night-vision devices based on electron-optical converters, thermal imaging devices do not need an external light source and are resistant to bright light. -
Page 9: Package Contents
Package Contents Telos thermal imager LPS7i battery pack with protective cover Spare battery compartment cover Power adapter USB Type-C cable with USB Type-A adapter Case Hand strap Quick start guide Lens cloth Warranty card... -
Page 10: Components And Controls
Components and Controls... - Page 11 ...
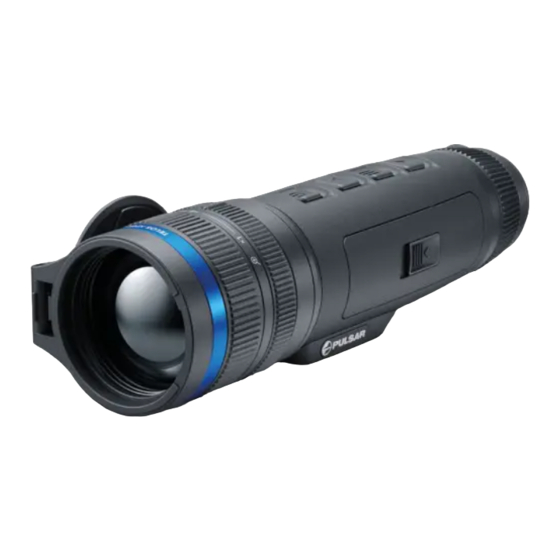
- Page 12 1. Lens cover 2. Lens focus ring 3. Digital zoom adjustment ring 4. Tripod socket 5. Battery compartment 6. LPS7i battery 7. Battery compartment cover 8. Battery protective cover 9. ON/OFF/Calibration button 10. UP/REC button 11. MENU button 12. DOWN/MODE button 13.
-
Page 13: Features
Features Compact and lightweight Functional and ergonomic design 8-colour display palette 3 calibration modes: Manual, Semi-Automatic, Automatic Detection range up to 1800 m/1969 yds Smooth digital zoom 2.5-10x Three levels of sensitivity enhancement: Normal, High, Ultra Stadiametric Rangefinder Display-Off function Defective pixel repair Updatable firmware Wide operating temperature range (-25°С... -
Page 14: Precautions
Precautions It is not recommended to charge the battery with the USB cable and wireless charger at the same time. This will not increase the charge rate and may damage the battery. Use the USB Type-C cable and power adapter supplied with the device (or purchased separately) to charge the LPS 7i batteries. -
Page 15: Recommendations For Battery Use
Recommendations for Battery Use The battery should be partially charged (50 to 80 %) for long-term storage. Charge at an ambient temperature of 0°C to +35°C (32°F to 95°F) or the lifespan of the battery will decrease significantly. Using the battery at sub 0°C (<32°F) ambient temperature decreases battery capacity. -
Page 16: Battery Charging
Battery Charging The Telosthermal imager comes with an LPS7i rechargeable Lithium-ion battery. LPS7i batteries support USB Power Delivery fast charging technology when using a standard charging set (USB Type-C cable, power adapter). Before first use, make sure the battery is fully charged. LPS 7i batteries also support wireless charging. - Page 17 Image not found or type unknown...
- Page 18 Install the LPS7i battery in the battery compartment of the device. 2. Connect the USB cable (20) to the USB Type-C connector (16) of the device. 3. Connect the other end of the USB cable (20) to the Power Adapter (21) by removing the USB Type-A adapter.
- Page 19 Battery charge level is from 51% to 75% Battery charge level is from 76% to 99% Battery is full Option 2.Charging the battery via USB Image not found or type unknown...
- Page 20 1. Remove the protective cover(8). 2. Connect the plug of the USB Type-C cable (20) to the USB Type-C connector (18) of the battery. 3. For fast charging, connect the second end of the USB Type-C cable (20) to the Type-C connector of the power adapter (21) by removing the Type-A adapter from the plug.
- Page 21 Place the battery (6) with the sign side on the wireless charger* (22). For more efficient wireless charging, align the lightning bolt icon on the battery with the centre of the charger platform (22). 2. Turn on the wireless charger according to its instruction manual. 3.
-
Page 22: Battery Installation
Battery Installation 1. Install the cover (7) on the LPS7i battery (6). 2. Insert the battery (6) into the battery compartment (5) until you hear a click. The battery contacts must face the top of the device (see diagram). - Page 23 3. To remove the battery (6), slide the switch (A) on the cover (7) to the left...
-
Page 24: External Power Supply
External Power Supply Show device diagram... - Page 25 Power can be supplied from an external source such as a 5 V or 9 V power bank. 1. Connect the external power source to the USB Type-C connector (16) on the device. 2. The device will switch to draw power from the external source while the LPS7i battery is gradually recharged.
-
Page 26: Powering On And Image Settings
Powering on and Image Settings Show device diagram... - Page 27 1. Open the lens cover (1). 2. Press the ON/OFF (9) button briefly to turn on the device. 3. Adjust the eyepiece diopter ring (13) until the symbols in the display are sharp. 4. Rotate the lens focus ring (2) to focus on the object being observed. 5.
- Page 28 11. Activate the Quick Menu by briefly pressing the MENU (11) button to adjust the brightness and contrast of the display (for more details see Quick Menu section). 12. Upon completion of use turn the device off by a long press of the ON/OFF (9) button. ...
-
Page 29: Button Operation
Button Operation Operation Button Power device on short press Power device off long press for 3 secs long press for less than 3 Turn display off secs Turn display on short press Calibrate the microbolometer short press Switching amplification levels short press Turn on/off the White Hot long press... - Page 30 Exit menu (switch to viewing long press mode) Quick Menu Button Enter quick menu short press Switch between quick menu short press options Increase value short press Decrease value short press Exit quick menu long press...
-
Page 31: Status Bar
Status Bar The status bar at the bottom of the display shows current operating statuses via icons, including: Colour Mode: - White hot - Black hot Amplification level Smoothing Filter (displayed when the function is on) Calibration Mode (in Automatic calibration mode a countdown timer will appear instead of the calibration mode icon 3 seconds before automatic calibration begins). - Page 32 Quick Menu Show device diagram...
- Page 33 The quick menu is used to quickly access the settings for brightness, contrast, and use the stadiametric rangefinder. Enter the menu by briefly pressing the MENU (11). A short press of the MENU (11) button enables you to toggle between functions, as described below.
- Page 34 Brightness – press the UP (10)/DOWN (12) buttons to change display brightness from 0 to 20. Contrast – press the UP (10)/DOWN (12) buttons to change image contrast from 0 to 20. Notes: Display brightness and contrast settings are saved in the memory when the device is turned off.
- Page 35 Video Recording and Photography Show device diagram...
- Page 36 Telosthermal imagers are capable of video recording and photography. Videos and images are saved on the built-in memory card. Before using this feature please set the date and time (see General Settings section). For information on how to watch recorded photos and videos, see the Stream Vision 2 user manual: Android, iOS.
- Page 37 1. Switch to Video mode by pressing and holding the UP/REC (10) button. 2. The icon and the remaining recording time in HH:MM (Hours:Minutes) format are displayed in the upper left corner, for example 4:20. 3. Press the UP/REC (10) button briefly to start video recording. 4.
- Page 38 1. Switch to the Photomode by pressing and holding the UP/REC (10) button. 2. Press the UP/REC (10) button briefly to take a photo. The icon flashes – the photo file is being saved to the built-in SD card. Notes: You can enter and operate the menu during video recording.
- Page 39 Digital Zoom Show device diagram...
- Page 40 The functionality of the device makes it possible to smoothly increase the base magnification (please refer to the Magnification line in the Specifications table) of the device using the adjustment ring (3) , as well as return to the base magnification To increase the digital zoom, turn the adjustment ring (3) clockwise.
- Page 41 PiP Function Show device diagram...
- Page 42 The PiP (Picture-in-Picture) function allows you to see both the main image and a magnified image in a dedicated window. To turn on and off the PiP function see the PiP Mode section. Rotate the adjustment ring (3) to change the magnification ratio in the PiP ...
- Page 43 The zoomed image is displayed in a dedicated window, while the image in the rest of the screen is displayed at base magnification (2.5x). When the PiP is turned on you can control both the discrete and smooth digital zoom. In this case the zoom value changes only take place in the dedicated window.
- Page 44 Display-Off Function Show device diagram...
- Page 45 This function darkens the screen, which aids the user’s concealment. However, the device stays on. When this function is in use, the device switches to the standby mode, which allows it to be switched on instantly. 1. When the device is on, press and hold the ON/OFF (9) button. The display will turn off, the current time and the "Display off"icon will appear.
- Page 46 Wi-Fi Function The device has a function enabling wireless communication with external devices (smartphone or tablet) via Wi-Fi. Turn on the wireless module in the WI-Fi Activation menu option. Wi-Fi is displayed in the status bar as follows: Indication on the status bar Connection Status Wi-Fi is switched off Wi-Fi connection is in progress...
- Page 47 Stadiametric Rangefinder Show device diagram...
- Page 48 Telosthermal imagers are equipped with a stadiametric rangefinder which allows the user to determine the approximate distance to an object of a known size with reasonable accuracy.
- Page 49 1. To select the Stadiametric Rangefinder function, enter the Quick Menu by briefly pressing the MENU (11)button. Image not found or type unknown 2. Press the MENU (11)button briefly to select the icon 3. You will see on the display: measurement bars, icons of three reference objects and respective distances for the three objects.
- Page 50 Installing the Device on a Tripod 1. Screw the tripod mounting plate into the socket(4) as far as it will go. 2. Mount the Telos device with mounting plate on the tripod.
- Page 51 USB Connection Show device diagram...
- Page 52 1. Connect one end of the USB cable to the USB Type-C port (16) of your device and the other end to the USB port of your PC / laptop using a USB Type-A adapter. 2. Turn the device on with a short press of the ON/OFF(9) button (a device that has been turned off cannot be detected by your computer).
- Page 53 3. Your device will be detected by the computer automatically; no drivers need to be installed. 4. Two connection modes will appear on the display: Power and Memory Card(external storage device). 5. Select the connection mode with the UP (10)/DOWN (12) buttons. 6.
- Page 54 Stream Vision 2 Install the Stream Vision 2 application to download files, update firmware, control the device by remote control and broadcast images from your device to a smartphone or a tablet via WiFi. We recommend using the latest version – Stream Vision 2. You can find further guidelines on Stream Vision 2 here.
- Page 55 Android...
- Page 56 Firmware Update 1. Download the free Stream Vision 2 App in Google Play or App Store. 2. Connect your Pulsar device to your mobile device (smartphone or tablet). 3. Launch Stream Vision 2 and go to section “Settings”. 4. Select your Pulsar device and press “Check firmware update”. 5.
- Page 57 Technical Inspection It is recommended to inspect your riflescope before each use. Check the following: The device should be free of any cracks or deformations. The lenses should be free of cracks, grease, dirt or debris. The battery level of the device should be full. Electrical sockets should be free of salts, oxidation, or other debris.
- Page 58 Technical Maintenance and Storage Maintenance should be carried out at least twice a year and should include the following steps: Wipe the exterior surfaces of metal and plastic parts with a cotton cloth. Do not use chemically active substances, solvents, etc. as these will damage the paint.
- Page 59 Troubleshooting For technical support please contact support@pulsar-vision.com. Answers to frequently asked questions about the devices can also be found in the section. The device does not turn on Possible cause Battery Pack is discharged. Solution Charge the Battery Pack. The device does not operate from an external power source Possible cause The USB cable is damaged.
- Page 60 Possible cause Calibration is required. Solution Perform the calibration according to Calibration Modesection. Black screen after calibration Solution If the image does not clear after calibration, you need to recalibrate. Poor quality image. There is noise or ghost images of previous scenes or objects Possible cause Manual calibration has been performed with the lens cover open.
- Page 61 Possible cause The device was exposed to static electricity during operation. Solution After exposure to static electricity, the device may either reboot automatically or require turning off and on again. The image of the object being observed is missing Possible cause The object is behind glass, which obstructs thermal vision.
- Page 62 Possible cause The device is in an area with too many Wi-Fi networks that may be causing signal interference. Solution To ensure a stable Wi-Fi connection, relocate the device to an area with fewer or no Wi-Fi networks. Possible cause The device has a 5 GHz network enabled, but the smartphone only supports 2.4 GHz.
- Page 63 2 by following the link. The image quality during the device operation at below zero temperatures is worse than at positive temperatures Possible cause In warm climates, objects in the background of a thermal image heat up differently because of thermal conductivity, generating a high temperature contrast and a sharper thermal image.
- Page 64 Legal Compliances and Disclaimers Attention! A license is required for Telos Thermal Imager when exporting outside your country. Electromagnetic compatibility.This product complies with the requirements of European standard EN 55032: 2015, Class A. Caution!Operation of this equipment in a residential environment could cause radio interference.
Need help?
Do you have a question about the XP50 and is the answer not in the manual?
Questions and answers