Table of Contents
Advertisement
Advertisement
Table of Contents

Related Manuals for Kaffit K96L


Summary of Contents for Kaffit K96L
- Page 1 USER MANUAL Coffee machine KAFFIT.COM K96L...
-
Page 2: Table Of Contents
Contents The appliance and its parts Controls and display Introduction Safety instructions Precautions Prohibitions Intended use Symbol description Instruction for first-time use Electrical connection Filling the water tank Filling the coffee bean hopper Grinder adjustment lever for setting the level of grinding Power on Power off Making beverages... -
Page 3: The Appliance And Its Parts
RESET (to factory settngs) The appliance and its parts Selection of water supply mode Volume adjustment setting Model K96L Factory reset settings Factory reset. ALL BEVERAGES item Machine settings. Return to the factory settings Statistics Advertising settings Welcome Ads ADs while making a beverage ADs after the beverage preparation Security&Privacy... -
Page 4: Controls And Display
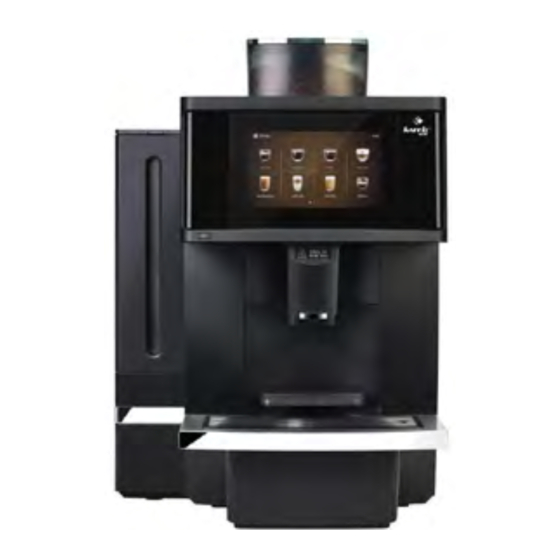
Introduction Model K96L Thank you for choosing the K96L fully automatic coffee machine. The coffee machine must only be used to prepare coffee and coffee drinks with milk. We are not responsible for the consequences of any misuse of the coffee machine. Please read the contents of the instruction manual carefully. -
Page 5: Precautions
Symbol desctiption You can find the hotline number of KAFFIT.com, as well as the contacts of service centers on the website www.kaffit.com, or in the warranty certificate. Caution! Non-compliance with the operation, may cause electric shock, and threat to life. -
Page 6: Filling The Coffee Bean Hopper
Filling the coffee bean hopper Press the ON/OFF button to activate the appliance. • Never put green (unroasted) coffee beans, coffee flavored with oils or roasted with added sugar into the hopper. • Only roasted coffee beans may be placed in the hopper. - Page 7 Display message: "PRESS AND HOLD SETTINGS TO ENTER MENU". Select OPEN to quickly enter the menu, or activate the Display message: “COMPLETE. CONGRATULATIONS, CLOSE mode to enter the menu by pressing and holding THE COFFEE MACHINE IS SET UP.” the SETTINGS button. Display message: "CUP CONFIRM".
-
Page 8: Power Off
Power off Making beverages by pressing the touch button-indicator Please warm up the cup before preparing your drink. Press and hold the ON/OFF button to turn off the coffee machine. When you turn off the The recommended volume for preparing Espresso is 30-50 ml. coffee machine, a rinsing cycle starts automatically. -
Page 9: Preparing A Serving Of Hot Milk
Settings in the programming mode When the touch icons appear on the screen, your drink is With the KAFFIT.com coffee machine, you can easily make settings for preparing ready - enjoy! coffee beve ages according to your individual taste preferences. Using the navigation buttons, you can view and execute the program steps and store the desired settings in memory. -
Page 10: Shortcut Function
Program item Description Programm item Description In this menu item you can: MACHINE SETTINGS INDIVIDUALIZATION - activate instant access to the shortcut function. pg. Adjust hot water and coffee dispensing volumes - activate the prompt for confirming the installation of pg. -
Page 11: Shortcut Function. "Rinse Milk Unit" Touch Icon
Display message: RINSING. At the end of the process, the touch icons for preparing The rinsing process must not be interrupted. A small amount beveraged will appear on the display. of hot water is dispensed through the coffee spout. Be careful! Shortcut function. -
Page 12: Machine Settings
See the table below for details on the setting options. Display message: The screen will be unlocked in 15 seconds. Beverage Strength Settings The countdown starts. ESPRESSO BEVERAGE RECIPE: As soon as the countdown shows a value of 0 seconds, the -Coffee screen will be unlocked. - Page 13 To enter programming mode, do the following: Press the COFFEE TEMPERATURE tab. Check the box next The coffee machine is ready. Beverage preparation touch to the value you need (LOW/MID/HIGH). icons are lit. Press and hold the "SETTINGS" button for 2 seconds to enter the programming menu.
- Page 14 Press the COFFEE VOLUME tab to activate it. Fill in the Select the MACHINE SETTINGS tab and activate it. value you need and confirm your choice by touching the The MACHINE SETTINGS tab is highlighted. symbol - Press on the field to activate the COFFEE TEMPERATURE tab.
-
Page 15: Water Settings
Water settings The coffee machine is ready. Beverage preparation touch icons are lit. The coffee machine is ready. Beverage preparation touch Press and hold the "SETTINGS" button for 2 seconds to icons are lit. enter the programming menu. Press and hold the "SETTINGS" button for 2 seconds to enter the programming menu. -
Page 16: Using A Water Filter
Manual or Automatic rinsing Using a water filter In this menu item, you can set an automatic or manual rinsing cycle when the In this menu item, you can set the use of the coffee machine with or without a 50L/150L water coffee machine is switched on. -
Page 17: Language Settings
When the setting is complete, the coffee machine enters The SHORTCUT FUNCTION tab is highlighted. beverage preparation mode. On the right, the shortcut function touch icons are lit. LANGUAGE SETTING Select the MACHINE SETTINGS tab and activate it. The MACHINE SETTINGS tab is highlighted. The coffee machine is ready. -
Page 18: Programming On/Off Time Settings
To set the automatic switch-on time, press SWITCH OFF TIME Press the AUTOMATIC SWITCH ON/OFF tab. tab. A sub-menu with tabs will open: The time programming window will open. Select the desired - Auto switch on/off setting time in hours and minutes and confirm your choice by - Switch off time pressing the "OK"... -
Page 19: Reset (To Factory Settngs)
Press the AUTOMATIC SWITCH ON/OFF tab. Press the AUTOMATIC SWITCH ON/OFF tab. The AUTO SWITCH ON/OFF TIME SETTINGS window Scroll to the RESET tab. opens. By default, the auto on and off times are not set. To return to the factory settings of the time, press on the To set the automatic switch-on time, press SWITCH ON RESTORE DEFAULT SETTINGS. -
Page 20: Volume Adjustment Setting
Press the "WATER SUPPLY MODE" tab. Select the operating Select the MACHINE SETTINGS tab and activate it. mode you need. The MACHINE SETTINGS tab is highlighted. Select the operating mode you need. Choose the VOLUME ADJUSTMENT tab. Display message: DIRECTIVES ARE BEING SENT, Set the desired value and press "OK"... -
Page 21: Factory Reset. All Beverages Item
Press the FACTORY RESET tab. To exit the sub-menu press BACK A window with tabs will open: - ALL BEVERAGES To exit the menu, press the EXIT touch icon and confirm your - MACHINE SETTING choice by pressing the OK button. Factory reset. -
Page 22: Statistics
The top right corner shows the total number of beverages prepared. For a detailed view of each beverage, swipe up To exit the sub-menu press BACK. from the bottom of the display. To exit the sub-menu, press BACK. To view information about the number of beverages prepared To exit the menu, press the EXIT touch icon and confirm your during the day, choose the DAILY COUNTER tab. -
Page 23: Advertising Settings
Advertising settings A window will open: CONFIRM TO RESET STORAGE This menu item will allow you to set up advertising playback: LOCATION TO FACTORY SETTING?. - when you turn on the coffee machine To confirm the reset, press "OK" or "CANCEL" to cancel the action. -
Page 24: Welcome Ads
Advertising settings. ADs while making a beverage Advertising settings. Welcome ADs The coffee machine is ready. Beverage preparation touch The coffee machine is ready. Beverage preparation touch icons are lit. icons are lit. Press and hold the "SETTINGS" button for 2 seconds to Press and hold the "SETTINGS"... -
Page 25: Ads After The Beverage Preparation
To upload a new video, insert a USB flash drive into the USB slot For the convenience of changing the beverage recipe during preparation, select the “BACK” (located to the right of the display), activate the LOAD FROM U value. The video will play on the left side of the display and the drink recipe will be shown on DISK tab. -
Page 26: Security&Privacy Individualization
Security&Privacy Individualization In this menu item you can set and activate a password to enter the programming menu. To In this menu item you can: activate the operating mode of the coffee machine with a password request, you must - activate instant access to the shortcut option. perform the following steps: - activate the prompt for confirming the installation of the cup. -
Page 27: Confirming The Cup In Position
To exit the sub-menu press BACK. To exit the sub-menu press BACK. To exit the menu, press the EXIT touch icon and confirm To exit the menu, press the EXIT touch icon and confirm your choice by pressing the OK button. your choice by pressing the OK button. -
Page 28: About Equipment
When "OPEN" is selected the coffee machine will turn on and off only after holding the To exit the sub-menu press BACK. button for 3 seconds. To exit the menu, press the EXIT touch icon and confirm To exit the sub-menu press BACK. your choice by pressing the OK button. -
Page 29: Water Connection
Water connection 3. Connect the other end of the hose (connection Water connection group 2/2) to the softener/water filtration system. Step 2. Service settings for connecting to the water supply Water connection group. The coffee machine is ready. Beverage preparation touch Initially, the coffee machine is set to use water from the water tank. -
Page 30: Disposal Of Coffee Waste
Disposal of coffee waste Your K96L coffee machine is available for direct disposal of coffee grounds under The SHORTCUT FUNCTION tab is highlighted. On the right, the shortcut function touch icons are the countertop. For this you need: lit. 1. Cut out a circle with a diameter of 8 cm in the countertop. -
Page 31: Cleaning The Milk Unit
To exit the menu, press the EXIT touch icon and confirm your choice by pressing the OK button. Display message: DRIP TRAY IS FULL. Pull out the tray, remove the coffee grounds and empty the waste water. Cleaning the milk unit. Display message: INSTALL THE DRIP TRAY. -
Page 32: Descaling The Coffee Machine
Once you have started the descaling process, please do not interrupt it! Display message: CLEAN THE WATER TANK AND FILL IT Dissolve 1 portion of KAFFIT.com cleaning agent in 1 liter of water (coffee WITH WATER. PRESS CONFIRM BUTTON TO CONTINUE machine with a 1.8 l tank). -
Page 33: Cleaning Coffee Grounds Container And Drip Tray
To exit the menu, press the EXIT touch icon and confirm your choice by pressing the OK button. Display message: DESCALING. Cleaning coffee grounds container and drip tray. • Do not use chemical solvents, abrasive or aggressive cleaners to clean the coffee grounds The display prompts: DRIP TRAY FULL / INSTALL DRIP container and waste water tray. -
Page 34: Cleaning Water Tank
2. Press the release elements and carefully remove the Auto Cappuccino system by pulling it down (photo 2). The following payment systems can be used in the KAFFIT.com K96L coffee machine: 3. Disassemble it into separate parts in the sequence indicated on (photo 3). -
Page 35: Trouble-Shooting
Trouble-shooting 1. The water tank is empty. Fill the water tank. The message is permanently lit on the 2. The water tank is full. A Rinse the water tank display This section is devoted to possible malfunctions that may occur during float has stuck in the water "ADD WATER"... -
Page 36: Transportation And Recycling
Transportation and recycling • Please sAve the packaging of the coffee machine for future transportation. • Make sure to empty the water from water tank, water waste and coffee grounds from the drip tray. Otherwise it will damage the machine. •...
Need help?
Do you have a question about the K96L and is the answer not in the manual?
Questions and answers